It seems like every major app out there has a chat feature — and yours should be no different!
However, creating a chat tool can seem like a daunting task. There’s no native UIKit controls designed specifically for chat, and you’ll need a server to coordinate the messages and conversations between users.
Fortunately, there’s some great frameworks out there to help you: Firebase lets you synchronize real time data without writing a line of server code, while JSQMessagesViewController gives you a messaging UI that’s on par with the native Messages app.
In this Firebase tutorial, you’ll build RIC (Really Instant Chat) — an anonymous chat application. If you’ve used IRC or Slack, this sort of application should already be familiar to you.

Along the way, you’ll learn how to do the following:
- Set up the Firebase SDK and
JSQMessagesViewControllerwith CocoaPods. - Synchronize data in real time with the Firebase database.
- Authenticate anonymously with Firebase.
- Leverage
JSQMessagesViewControllerfor a complete chat UI. - Indicate when a user is typing.
- Use Firebase Storage.
Getting Started
To get started with this Firebase tutorial, download the starter project here; at present, it contains a simple dummy login screen.
You’ll use CocoaPods to install both the Firebase SDK and JSQMessagesViewController. If you’re new to CocoaPods, check out our Cocoapods with Swift tutorial to get up and running.
Open Terminal at the project’s folder location. Open the Podfile at the project’s root folder and add the Firebase SDKs and JSQMessagesViewController as dependencies into the ChatChat target:
pod 'Firebase/Storage' pod 'Firebase/Auth' pod 'Firebase/Database' pod 'JSQMessagesViewController' |
Save the Podfile and run the following command to install your dependencies:
pod install |
Once the packages have installed, open ChatChat.xcworkspace in Xcode. Before you can run the app, you’ll need to configure Firebase.
If you’re new to Firebase you’ll need to create an account. Don’t worry — this is easy and totally free.
Create a Firebase Account
Head to the Firebase signup site, create an account, and then create a new Firebase project.
Follow the instructions to add Firebase to an iOS app, copying the GoogleService-Info.plist config file to your project. This contains the configuration information needed for Firebase integration with your app.
Now build and run the app. You should see the following:

Enabling Anonymous Authentication
Firebase lets users log in through email or social accounts, but it can also authenticate users anonymously, giving you a unique identifier for a user without knowing any information about them.
To set up anonymous authentication, open the Firebase App Dashboard, select the Auth option on the left, click Sign-In Method, then select the Anonymous option, switch Enable so that it’s on, then click Save.

Just like that, you’ve enabled super secret stealth mode! Okay, so it’s really just anonymous authentication, but hey — it’s still cool. :]

Logging In
Open LoginViewController.swift and add the following underneath import UIKit:
import Firebase |
To log in to chat, the app will need to authenticate using the Firebase authentication service. Add the following code to loginDidTouch(_:):
if nameField?.text != "" { // 1 FIRAuth.auth()?.signInAnonymously(completion: { (user, error) in // 2 if let err = error { // 3 print(err.localizedDescription) return } self.performSegue(withIdentifier: "LoginToChat", sender: nil) // 4 }) } |
Here’s what’s going on in the code above:
- First, you check to confirm the name field isn’t empty.
- Then you use the Firebase Auth API to sign in anonymously. This method takes a completion handler which is passed a user and, if necessary, an error.
- In the completion handler, check to see if you have an authentication error. If so, abort.
- Finally, if there wasn’t an error, trigger the segue to move to the
ChannelListViewController.
Build and run your app, enter your name and hit Login anonymously.

Creating the Channels List
Once the user logs in, they navigate to the ChannelListViewController, whose job it is to show the user a list of current channels and give them the option to create new channels. You’ll model this as a table view with two sections. The first section provides a form where the user can create a new channel, and the second section contains a list of all the known channels.

In this section you will learn how to:
- Save data to the Firebase database.
- Listen for new data being saved to the database.
To start, add the following to the top of ChannelListViewController.swift :
import Firebase enum Section: Int { case createNewChannelSection = 0 case currentChannelsSection } |
This is the same import statement as before followed by an enum to hold your different table view sections.
Next, inside the class, add the following:
// MARK: Properties var senderDisplayName: String? // 1 var newChannelTextField: UITextField? // 2 private var channels: [Channel] = [] // 3 |
Here, you:
- Add a simple property to store the sender’s name.
- Add a text field, which you’ll use later for adding new Channels.
- Create an empty array of
Channelobjects to store your channels. This is a simple model class provided in the starter project that simply contains a name and an ID.
Next, you need to set up your UITableView to render the new channel from and a list of available channels. Add the following functions to ChannelListViewController.swift
// MARK: UITableViewDataSource override func numberOfSections(in tableView: UITableView) -> Int { return 2 // 1 } override func tableView(_ tableView: UITableView, numberOfRowsInSection section: Int) -> Int { // 2 if let currentSection: Section = Section(rawValue: section) { switch currentSection { case .createNewChannelSection: return 1 case .currentChannelsSection: return channels.count } } else { return 0 } } // 3 override func tableView(_ tableView: UITableView, cellForRowAt indexPath: IndexPath) -> UITableViewCell { let reuseIdentifier = (indexPath as NSIndexPath).section == Section.createNewChannelSection.rawValue ? "NewChannel" : "ExistingChannel" let cell = tableView.dequeueReusableCell(withIdentifier: reuseIdentifier, for: indexPath) if (indexPath as NSIndexPath).section == Section.createNewChannelSection.rawValue { if let createNewChannelCell = cell as? CreateChannelCell { newChannelTextField = createNewChannelCell.newChannelNameField } } else if (indexPath as NSIndexPath).section == Section.currentChannelsSection.rawValue { cell.textLabel?.text = channels[(indexPath as NSIndexPath).row].name } return cell } |
This should be very familiar to anyone who’s used a UITableView before, but briefly you do the following:
- Set the number of sections. Remember, the first section will include a form for adding new channels, and the second section will show a list of channels.
- Set the number of rows for each section. This is always 1 for the first section, and the number of channels for the second section.
- Define what goes in each cell. For the first section, you store the text field from the cell in your
newChannelTextFieldproperty. For the second section, you just set the cell’s text label as your channel name
To make sure this is all working, add the following code below the properties:
override func viewDidAppear(_ animated: Bool) { super.viewDidAppear(animated) channels.append(Channel(id: "1", name: "Channel1")) channels.append(Channel(id: "2", name: "Channel2")) channels.append(Channel(id: "3", name: "Channel3")) self.tableView.reloadData() } |
This just adds some dummy channels to the channels array.
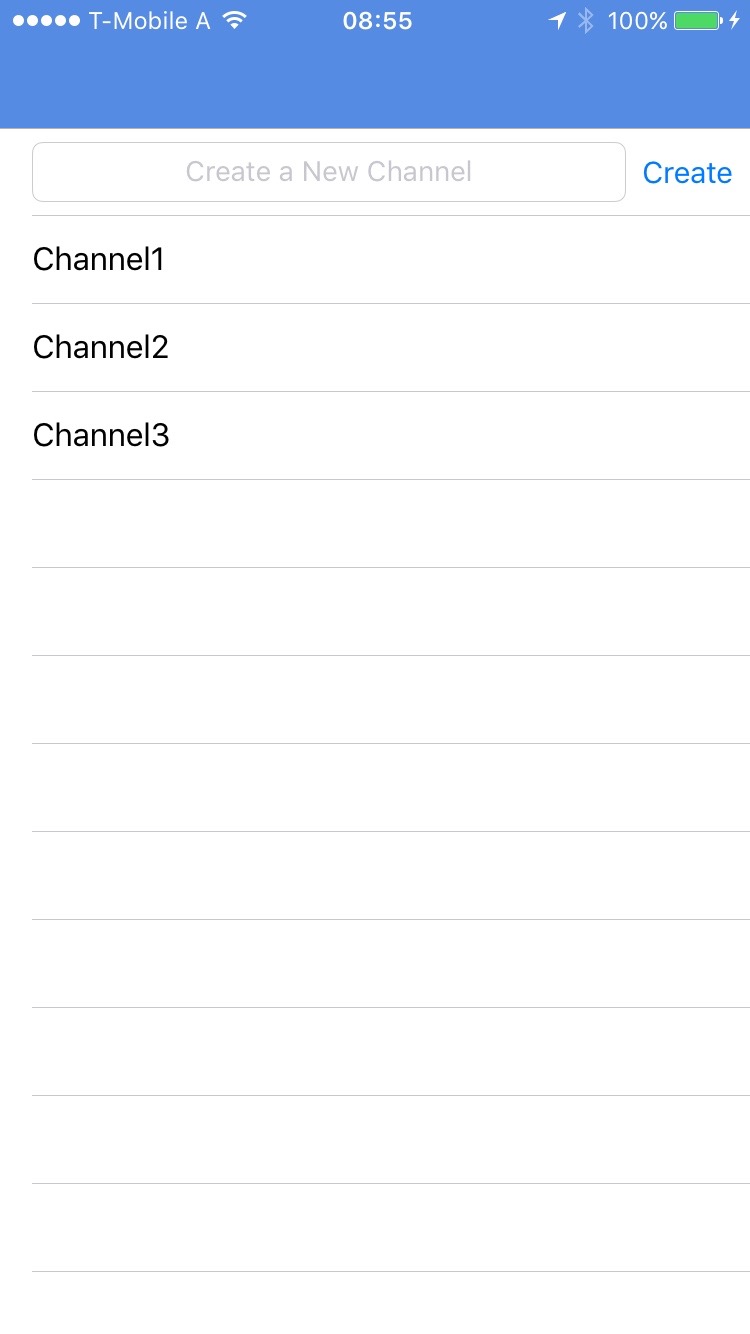
Build and run your app; log in again and you should now see the form to create a new channel and the three dummy channels from above:
Great! Now you need to make it work for real with Firebase. :]
Firebase Data Structure
Before you get going on the realtime data synchronization, take a moment and think about the data structure first.
The Firebase database is a NoSQL JSON data store. Essentially, everything in the Firebase database is a JSON object, and each key of this JSON object has its own URL.
Here’s a sample of how your data could look as a JSON object:
{
  "channels": {
    "name": "Channel 1"
    "messages": {
      "1": {
        "text": "Hey person!",
        "senderName": "Alice"
        "senderId": "foo"
      },
      "2": {
        "text": "Yo!",
        "senderName": "Bob"
        "senderId": "bar"
      }
    }
  }
} |
The Firebase database favors a denormalized data structure, so it’s okay to include senderId for each message item. A denormalized data structure means you’ll duplicate a lot of data, but the upside is faster data retrieval. Tradeoffs — we haz them! :]
Realtime Channel Synchronization
To start off, remove the viewDidAppear(_:) code you added above, then add the following properties below the others:
private lazy var channelRef: FIRDatabaseReference = FIRDatabase.database().reference().child("channels") private var channelRefHandle: FIRDatabaseHandle? |
channelRef will be used to store a reference to the list of channels in the database; channelRefHandle will hold a handle to the reference so you can remove it later on.
Next you need to query the Firebase database and get a list of channels to show in your table view. Add the following:
// MARK: Firebase related methods private func observeChannels() { // Use the observe method to listen for new // channels being written to the Firebase DB channelRefHandle = channelRef.observe(.childAdded, with: { (snapshot) -> Void in // 1 let channelData = snapshot.value as! Dictionary<String, AnyObject> // 2 let id = snapshot.key if let name = channelData["name"] as! String!, name.characters.count > 0 { // 3 self.channels.append(Channel(id: id, name: name)) self.tableView.reloadData() } else { print("Error! Could not decode channel data") } }) } |
Here’s what’s going on:
- You call
observe:with:on your channel reference, storing a handle to the reference. This calls the completion block every time a new channel is added to your database. - The completion receives a
FIRDataSnapshot(stored insnapshot), which contains the data and other helpful methods. - You pull the data out of the snapshot and, if successful, create a Channel model and add it to your channels array.
Now add the following:
// MARK: View Lifecycle override func viewDidLoad() { super.viewDidLoad() title = "RW RIC" observeChannels() } deinit { if let refHandle = channelRefHandle { channelRef.removeObserver(withHandle: refHandle) } } |
This calls your new observeChannels() method when the view controller loads. You also stop observing database changes when the view controller dies by checking if channelRefHandle is set and then calling removeObserver(withHandle:).
There’s just one more thing you need to do before you can see a list of channels pulled from Firebase: provide a way to create channels! The IBAction has already been set up for you in the storyboard, so just add the following code to your class:
// MARK :Actions @IBAction func createChannel(_ sender: AnyObject) { if let name = newChannelTextField?.text { // 1 let newChannelRef = channelRef.childByAutoId() // 2 let channelItem = [ // 3 "name": name ] newChannelRef.setValue(channelItem) // 4 } } |
Here’s the play-by-play:
- First check if you have a channel name in the text field.
- Create a new channel reference with a unique key using
childByAutoId(). - Create a dictionary to hold the data for this channel. A
[String: AnyObject]works as a JSON-like object. - Finally, set the name on this new channel, which is saved to Firebase automatically!
Build and run your app and create some channels.

Everything should be working as expected, but you’ve not yet added the code to visit one of your channels when tapped. Fix that with the following code:
// MARK: UITableViewDelegate override func tableView(_ tableView: UITableView, didSelectRowAt indexPath: IndexPath) { if indexPath.section == Section.currentChannelsSection.rawValue { let channel = channels[(indexPath as NSIndexPath).row] self.performSegue(withIdentifier: "ShowChannel", sender: channel) } } |
The should be familiar to you. It just triggers the ShowChannel segue when the user taps a channel cell.
Creating the Chat Interface
JSQMessagesViewController is a souped-up UICollectionViewController that’s customized for chat, so you don’t have to create your own! :]
In this section of the tutorial you will focus on four things:
- Creating message data.
- Creating colored message bubbles.
- Removing avatar support.
- Changing the text color of a UICollectionViewCell.
Almost everything you’ll need to do requires that you override methods. JSQMessagesViewController adopts the JSQMessagesCollectionViewDataSource protocol, so you only need to override the default implementations.
JSQMessagesCollectionViewDataSource, check out the Cocoa documentation here.Open up ChatViewController.swift and add the following imports:
import Firebase import JSQMessagesViewController |
Change the subclass from UIViewController to JSQMessagesViewController:
final class ChatViewController: JSQMessagesViewController { |
At the top of ChatViewController, define the following properties:
var channelRef: FIRDatabaseReference? var channel: Channel? { didSet { title = channel?.name } } |
Now that ChatViewController extends JSQMessagesViewController, you’ll need to set initial values for senderId and senderDisplayName so the app can uniquely identify the sender of the messages — even if it doesn’t know specifically who that person is.
These need to be set when the view controller is first instantiated. The best place to do that is when the segue is about to happen. Back in ChannelListViewController.swift, add the following:
// MARK: Navigation override func prepare(for segue: UIStoryboardSegue, sender: Any?) { super.prepare(for: segue, sender: sender) if let channel = sender as? Channel { let chatVc = segue.destination as! ChatViewController chatVc.senderDisplayName = senderDisplayName chatVc.channel = channel chatVc.channelRef = channelRef.child(channel.id) } } |
This sets up the properties on the ChatViewController that you just created before performing the segue.
The best place to get the senderDisplayName is when the user first enters their name when they log in.
In LoginViewController.swift, add the following method:
// MARK: Navigation override func prepare(for segue: UIStoryboardSegue, sender: Any?) { super.prepare(for: segue, sender: sender) let navVc = segue.destination as! UINavigationController // 1 let channelVc = navVc.viewControllers.first as! ChannelListViewController // 2 channelVc.senderDisplayName = nameField?.text // 3 } |
Here’s what you’re doing:
- Retrieve the destination view controller from
segueand cast it to aUINavigationController. - Cast the first view controller of the
UINavigationControllerto aChannelListViewController. - Set the
senderDisplayNamein theChannelListViewControllerto the name provided in thenameFieldby the user.
Back in ChatViewController.swift, add the following to the bottom of viewDidLoad():
self.senderId = FIRAuth.auth()?.currentUser?.uid |
This sets the senderId based on the logged in Firebase user.
Build and run your app and navigate to a channel.
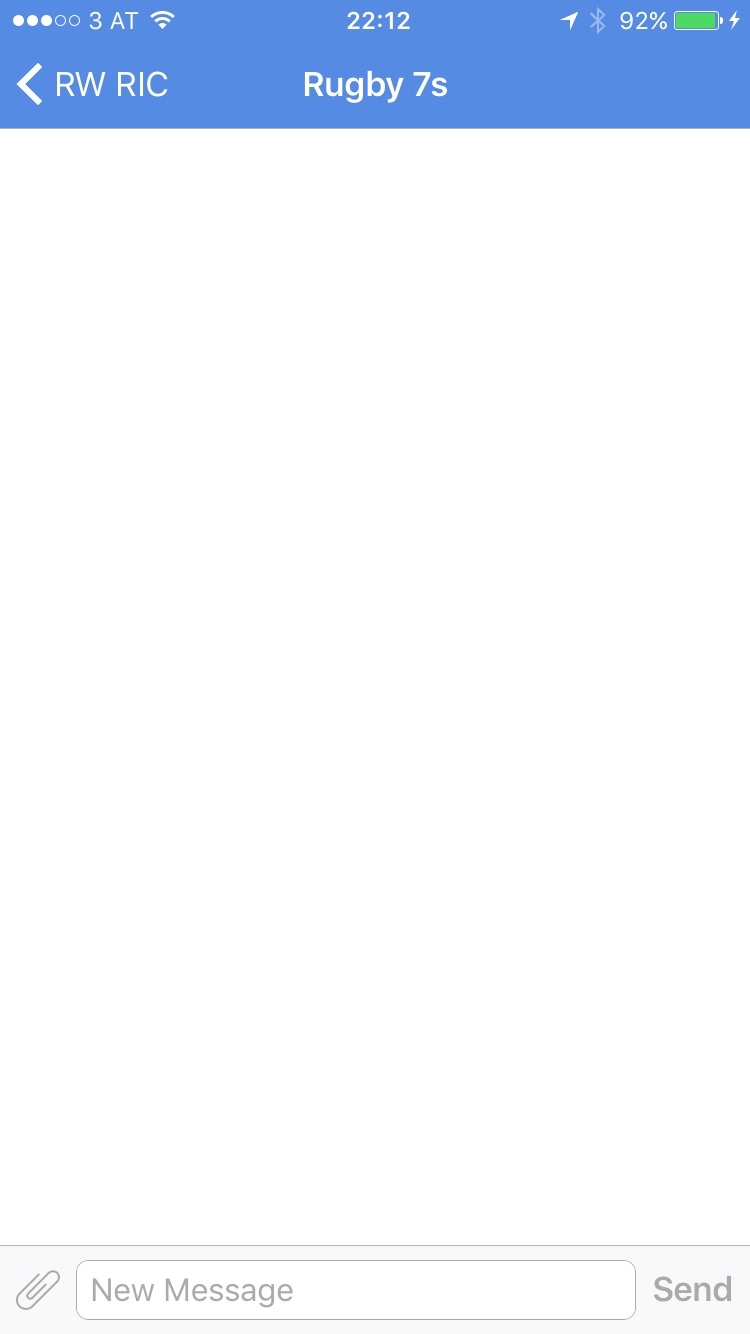
By simply inheriting from JSQMessagesViewController you get a complete chat UI. Fancy chat UI win! :]

Setting Up the Data Source and Delegate
Now that you’ve seen your new awesome chat UI, you probably want to start displaying messages. But before you do that, you have to take care of a few things.
To display messages, you need a data source to provide objects that conform to the JSQMessageData protocol, and you need to implement a number of delegate methods. You could create your own class that conforms to the JSQMessageData protocol, but you’ll use the built-in JSQMessage class that is already provided.
At the top of ChatViewController, add the following property:
var messages = [JSQMessage]() |
messages is an array to store the various instances of JSQMessage in your app.
Now add the following:
override func collectionView(_ collectionView: JSQMessagesCollectionView!, messageDataForItemAt indexPath: IndexPath!) -> JSQMessageData! { return messages[indexPath.item] } override func collectionView(_ collectionView: UICollectionView, numberOfItemsInSection section: Int) -> Int { return messages.count } |
You’re probably no stranger to the two types of delegate methods above. The first is much like collectionView(_:cellForItemAtIndexPath:), but for message data. The second is the standard way to return the number of items in each section; in this case, the number of messages.
Message Bubble Colors
The messages displayed in the collection view are simply images with text overlaid. There are two types of messages: outgoing and incoming. Outgoing messages are displayed to the right and incoming messages on the left.
In ChatViewController, add the following methods to the UI and User Interaction section:
private func setupOutgoingBubble() -> JSQMessagesBubbleImage { let bubbleImageFactory = JSQMessagesBubbleImageFactory() return bubbleImageFactory!.outgoingMessagesBubbleImage(with: UIColor.jsq_messageBubbleBlue()) } private func setupIncomingBubble() -> JSQMessagesBubbleImage { let bubbleImageFactory = JSQMessagesBubbleImageFactory() return bubbleImageFactory!.incomingMessagesBubbleImage(with: UIColor.jsq_messageBubbleLightGray()) } |
Then add the following properties at the top:
lazy var outgoingBubbleImageView: JSQMessagesBubbleImage = self.setupOutgoingBubble() lazy var incomingBubbleImageView: JSQMessagesBubbleImage = self.setupIncomingBubble() |
JSQMessagesBubbleImageFactory has methods that create the images for the chat bubbles. There’s even a category provided by JSQMessagesViewController that creates the message bubble colors used in the native Messages app.
Using the methods outgoingMessagesBubbleImage(:with) and incomingMessagesBubbleImage(:with), you can create the images for outgoing and incoming messages respectively. And with that, you have the image views needed to create outgoing and incoming message bubbles!
Before you get too excited, you’ll need to implement the delegate methods for the message bubbles.
Setting the Bubble Images
To set the colored bubble image for each message, you’ll need to override a method of JSQMessagesCollectionViewDataSource, called collectionView(_:messageBubbleImageDataForItemAt:).
This asks the data source for the message bubble image data that corresponds to the message item at indexPath in the collectionView. This is exactly where you set the bubble’s image.
Add the following to ChatViewController:
override func collectionView(_ collectionView: JSQMessagesCollectionView!, messageBubbleImageDataForItemAt indexPath: IndexPath!) -> JSQMessageBubbleImageDataSource! { let message = messages[indexPath.item] // 1 if message.senderId == senderId { // 2 return outgoingBubbleImageView } else { // 3 return incomingBubbleImageView } } |
Taking the above code step-by-step:
- Here you retrieve the message.
- If the message was sent by the local user, return the outgoing image view.
- Otherwise, return the incoming image view.
Removing the Avatars
JSQMessagesViewController provides support for avatars, but you don’t need (or want) avatars in your anonymous RIC app.
Add the following to ChatViewController:
override func collectionView(_ collectionView: JSQMessagesCollectionView!, avatarImageDataForItemAt indexPath: IndexPath!) -> JSQMessageAvatarImageDataSource! { return nil } |
To remove the avatar image, you simply return nil for each message’s avatar display.
Finally, in viewDidLoad(), add the following:
// No avatars collectionView!.collectionViewLayout.incomingAvatarViewSize = CGSize.zero collectionView!.collectionViewLayout.outgoingAvatarViewSize = CGSize.zero |
This tells the layout to size each avatar at CGSize.zero, which is “no size”.
Check that your app builds and you can navigate to one of your channels;
Time to start the conversation and add a few messages!
Creating Messages
Create the following method in ChatViewController:
private func addMessage(withId id: String, name: String, text: String) { if let message = JSQMessage(senderId: id, displayName: name, text: text) { messages.append(message) } } |
This helper method creates a new JSQMessage and adds it to the data source.
Add a few hardcoded messages in viewDidAppear(_:) to see things in action:
// messages from someone else addMessage(withId: "foo", name: "Mr.Bolt", text: "I am so fast!") // messages sent from local sender addMessage(withId: senderId, name: "Me", text: "I bet I can run faster than you!") addMessage(withId: senderId, name: "Me", text: "I like to run!") // animates the receiving of a new message on the view finishReceivingMessage() |
Build and run you app; you’ll see the messages appear in the conversation view:
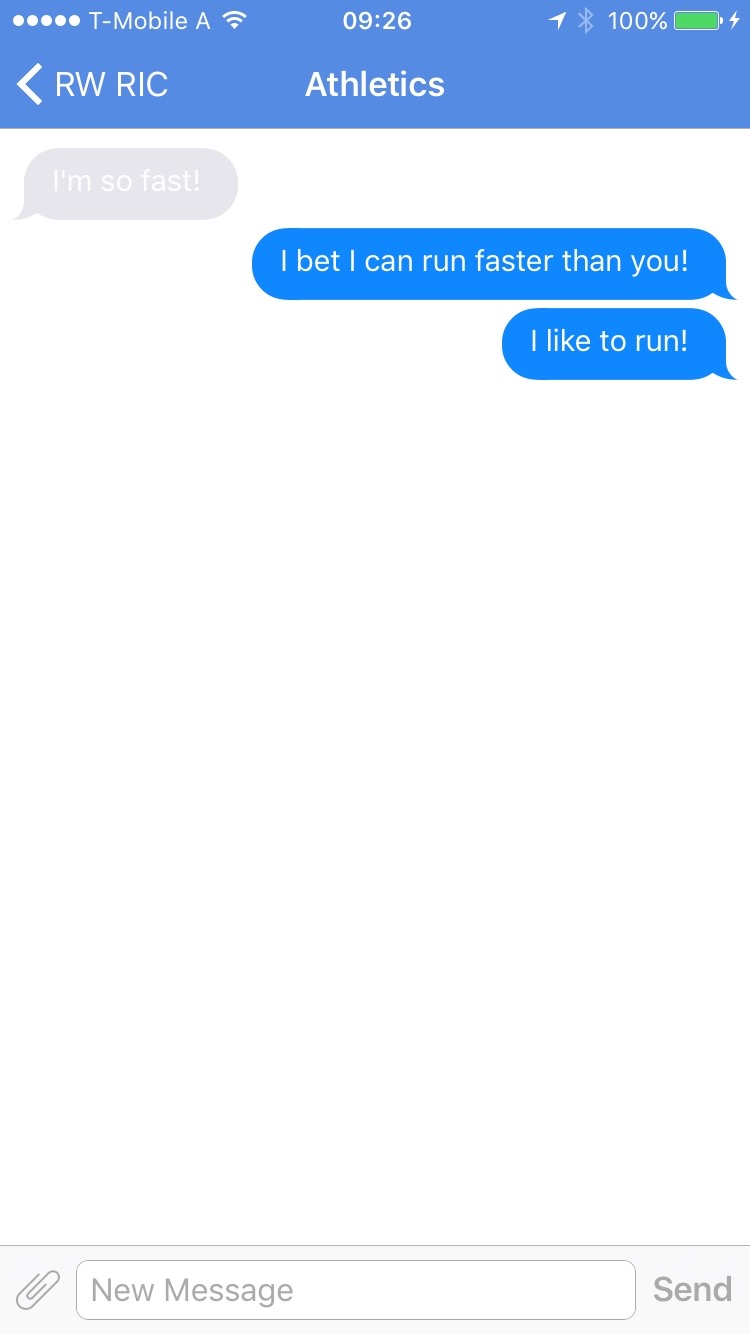
Hm, the text is a bit hard to read on the incoming messages. It should probably be black.
Message Bubble Text
As you’ve realized by now, to do almost anything in JSQMessagesViewController, you just need to override a method. To set the text color, use the good old fashioned collectionView(_:cellForItemAt:).
Add the following method in ChatViewController:
override func collectionView(_ collectionView: UICollectionView, cellForItemAt indexPath: IndexPath) -> UICollectionViewCell { let cell = super.collectionView(collectionView, cellForItemAt: indexPath) as! JSQMessagesCollectionViewCell let message = messages[indexPath.item] if message.senderId == senderId { cell.textView?.textColor = UIColor.white } else { cell.textView?.textColor = UIColor.black } return cell } |
If the message is sent by the local user, the text color is white. If it’s not sent by the local user, the text is black.
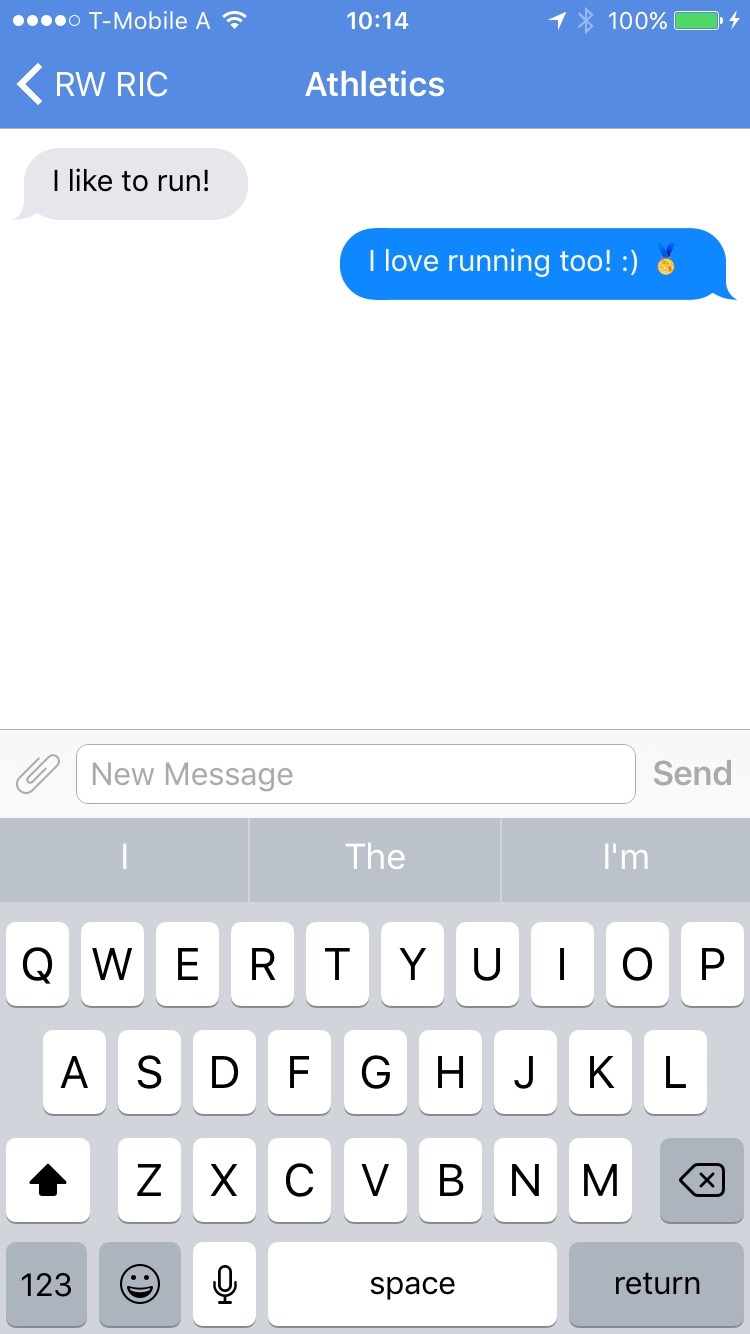
Build and run; you should see incoming messages in black text:

Boom — that’s one nice looking chat app! Time to make it work (for real) with Firebase.
Sending Messages
Add the following properties to ChatViewController.swift:
private lazy var messageRef: FIRDatabaseReference = self.channelRef!.child("messages") private var newMessageRefHandle: FIRDatabaseHandle? |
These should be familiar to you as they’re very similar to the channelRef and channelRefHandle properties you used in the ChannelListViewController.
Next, delete ChatViewController’s viewDidAppear(_:) to remove the stub test messages.
Then, override the following method to make the “Send” button save a message to the Firebase database.
override func didPressSend(_ button: UIButton!, withMessageText text: String!, senderId: String!, senderDisplayName: String!, date: Date!) { let itemRef = messageRef.childByAutoId() // 1 let messageItem = [ // 2 "senderId": senderId!, "senderName": senderDisplayName!, "text": text!, ] itemRef.setValue(messageItem) // 3 JSQSystemSoundPlayer.jsq_playMessageSentSound() // 4 finishSendingMessage() // 5 } |
Here’s what’s going on:
- Using
childByAutoId(), you create a child reference with a unique key. - Then you create a dictionary to represent the message.
- Next, you Save the value at the new child location.
- You then play the canonical “message sent” sound.
- Finally, complete the “send” action and reset the input toolbar to empty.
Build and run; open up your Firebase App Dashboard and click on the Data tab. Send a message in the app and you should see the messages appear in the dashboard in real time:
High five! You’re saving messages to the Firebase database like a pro. The messages don’t appear on the screen, but you’ll take care of that next.
Synchronizing the Data Source
Add the following to ChatViewController:
private func observeMessages() { messageRef = channelRef!.child("messages") // 1. let messageQuery = messageRef.queryLimited(toLast:25) // 2. We can use the observe method to listen for new // messages being written to the Firebase DB newMessageRefHandle = messageQuery.observe(.childAdded, with: { (snapshot) -> Void in // 3 let messageData = snapshot.value as! Dictionary<String, String> if let id = messageData["senderId"] as String!, let name = messageData["senderName"] as String!, let text = messageData["text"] as String!, text.characters.count > 0 { // 4 self.addMessage(withId: id, name: name, text: text) // 5 self.finishReceivingMessage() } else { print("Error! Could not decode message data") } }) } |
Taking each numbered comment in turn:
- Start by creating a query that limits the synchronization to the last 25 messages.
- Use the
.ChildAddedevent to observe for every child item that has been added, and will be added, at themessageslocation. - Extract the
messageDatafrom thesnapshot. - Call
addMessage(withId:name:text)to add the new message to the data source. - Inform
JSQMessagesViewControllerthat a message has been received.
Next, call your new method in viewDidLoad():
observeMessages() |
Build and run your app; you should see any messages sent earlier along with any new ones you enter:
Congrats! You have a real time chat app! Now it’s time to do some even fancier things, such as detecting when a user is typing.
Knowing When a User is Typing
One of the coolest features of the Messages app is seeing the “user is typing” indicator. When the little bubble pops up, you know another user is typing into the keyboard. This indicator is super-important, because it keeps us from sending those awkward “Are you still there?” messages.
There are many ways of detecting typing, but textViewDidChange(_:) is a great place to check. Add the following to the bottom of ChatViewController:
override func textViewDidChange(_ textView: UITextView) { super.textViewDidChange(textView) // If the text is not empty, the user is typing print(textView.text != "") } |
To determine whether the user is typing, you check the value of textView.text. If the value is anything other than the empty string, you know that the user has typed something.
Using Firebase, you can update the Firebase database when a user is typing. Then, in response to the database getting updated with this indication, you can display the “user is typing” indicator.
To do this, first add the following properties to ChatViewController:
private lazy var userIsTypingRef: FIRDatabaseReference = self.channelRef!.child("typingIndicator").child(self.senderId) // 1 private var localTyping = false // 2 var isTyping: Bool { get { return localTyping } set { // 3 localTyping = newValue userIsTypingRef.setValue(newValue) } } |
Here’s what you need to know about these properties:
- Create a Firebase reference that tracks whether the local user is typing.
- Store whether the local user is typing in a private property.
- Use a computed property to update
localTypinganduserIsTypingRefeach time it’s changed.
Now add the following:
private func observeTyping() { let typingIndicatorRef = channelRef!.child("typingIndicator") userIsTypingRef = typingIndicatorRef.child(senderId) userIsTypingRef.onDisconnectRemoveValue() } |
This method creates a child reference to your channel called typingIndicator, which is where you’ll update the typing status of the user. You don’t want this data to linger around after users have logged out, so you can delete it once the user has left using onDisconnectRemoveValue().
Add the following to call your new method:
override func viewDidAppear(_ animated: Bool) { super.viewDidAppear(animated) observeTyping() } |
Now replace the line print(textView.text != "") in textViewDidChange(_:) with this:
isTyping = textView.text != "" |
This just sets isTyping whenever the user has typed something.
Finally, add the following at the end of didPressSend(_:withMessageText:senderId:senderDisplayName:date:):
isTyping = false |
This resets the typing indicator when the Send button is pressed.
Build and run your app; pull up the Firebase App Dashboard to view the data. When you type a message, you should see the typingIndicator record update for the user:
Wahoo! You now know when a user is typing! Now it’s time to work on displaying the indicator.
Querying for Typing Users
The “user is typing” indicator should display every time any user is typing, with the exception of the local user. You can safely assume that the local user knows when they’re typing. :]
Using a Firebase query, you can retrieve all of the users that are currently typing. Add the following property to ChatViewController:
private lazy var usersTypingQuery: FIRDatabaseQuery = self.channelRef!.child("typingIndicator").queryOrderedByValue().queryEqual(toValue: true) |
This property holds an FIRDatabaseQuery, which is just like a Firebase reference, except that it’s ordered. You initialize the query by retrieving all users who are typing. This is basically saying, “Hey Firebase, go to the key /typingIndicator and get me all users for whom the value is true.”
Next, add the following to the bottom of observeTyping():
// 1 usersTypingQuery.observe(.value) { (data: FIRDataSnapshot) in // 2 You're the only one typing, don't show the indicator if data.childrenCount == 1 && self.isTyping { return } // 3 Are there others typing? self.showTypingIndicator = data.childrenCount > 0 self.scrollToBottom(animated: true) } |
Here’s what’s going on:
- You observe for changes using
.value; this will call the completion block anytime it changes. - You need to see how many users are in the query. If the there’s just one user and that’s the local user, don’t display the indicator.
- At this point, if there are users, it’s safe to set the indicator. Call
scrollToBottomAnimated(animated:)to ensure the indicator is displayed.
Before you build and run, grab a physical iOS device, as testing this situation takes two devices. Use the simulator for one user, and your device for the other.
Now, build and run your app on both the simulator and the device. When one user types you should see the indicator appear:
So now you’ve got a typing indicator, but you’re still missing one big feature of modern messaging apps — sending images!
Sending Images
To send images, you’re going to follow mostly the same principle as sending text, with one key difference. Rather than storing the image data directly with the message, you’ll use Firebase Storage, which is better suited to storing large files like audio, video or images.
To start, you need to add the Photos import to ChatViewController.swift:
import Photos |
Next, add the following property:
lazy var storageRef: FIRStorageReference = FIRStorage.storage().reference(forURL: "YOUR_URL_HERE") |
This is a Firebase storage reference and is conceptually similar to the Firebase database references you’ve seen already, but for a storage object. Replace YOUR_URL_HERE with your Firebase app URL, which you can find by clicking Storage in your App Console.

Sending a photo message will require a little bit of smoke and mirrors. Saving a Photo to Firebase storage returns a URL, but this may take a couple of seconds — perhaps longer, if the network connection is poor. Rather than blocking the user interface during this time, which will make your app feel slow, you send the photo message with a fake URL and update the message once the photo has been saved.
Add the following property:
private let imageURLNotSetKey = "NOTSET" |
and add this method:
func sendPhotoMessage() -> String? { let itemRef = messageRef.childByAutoId() let messageItem = [ "photoURL": imageURLNotSetKey, "senderId": senderId!, ] itemRef.setValue(messageItem) JSQSystemSoundPlayer.jsq_playMessageSentSound() finishSendingMessage() return itemRef.key } |
This should look familiar to you: it’s very similar to the didPressSend(_:withMessageText:senderId:senderDisplayName:date:) method you implemented earlier.
Now, you need to be able to update the message once you get a Firebase Storage URL for the image. Add the following:
func setImageURL(_ url: String, forPhotoMessageWithKey key: String) { let itemRef = messageRef.child(key) itemRef.updateChildValues(["photoURL": url]) } |
Next, you need to allow the user to select an image to send. Luckily JSQMessagesViewController already contains the UI for adding an image to your message, so you just need to implement the method that handles the click:
override func didPressAccessoryButton(_ sender: UIButton) { let picker = UIImagePickerController() picker.delegate = self if (UIImagePickerController.isSourceTypeAvailable(UIImagePickerControllerSourceType.camera)) { picker.sourceType = UIImagePickerControllerSourceType.camera } else { picker.sourceType = UIImagePickerControllerSourceType.photoLibrary } present(picker, animated: true, completion:nil) } |
Here you just present a camera if the device supports it, or the photo library if not.
Next, you need to implement the UIImagePickerControllerDelegate methods to handle when the user picks the image. Add the following to the bottom of the file (after the last closing brace):
// MARK: Image Picker Delegate extension ChatViewController: UIImagePickerControllerDelegate, UINavigationControllerDelegate { func imagePickerController(_ picker: UIImagePickerController, didFinishPickingMediaWithInfo info: [String : Any]) { picker.dismiss(animated: true, completion:nil) // 1 if let photoReferenceUrl = info[UIImagePickerControllerReferenceURL] as? URL { // Handle picking a Photo from the Photo Library // 2 let assets = PHAsset.fetchAssets(withALAssetURLs: [photoReferenceUrl], options: nil) let asset = assets.firstObject // 3 if let key = sendPhotoMessage() { // 4 asset?.requestContentEditingInput(with: nil, completionHandler: { (contentEditingInput, info) in let imageFileURL = contentEditingInput?.fullSizeImageURL // 5 let path = "\(FIRAuth.auth()?.currentUser?.uid)/\(Int(Date.timeIntervalSinceReferenceDate * 1000))/\(photoReferenceUrl.lastPathComponent)" // 6 self.storageRef.child(path).putFile(imageFileURL!, metadata: nil) { (metadata, error) in if let error = error { print("Error uploading photo: \(error.localizedDescription)") return } // 7 self.setImageURL(self.storageRef.child((metadata?.path)!).description, forPhotoMessageWithKey: key) } }) } } else { // Handle picking a Photo from the Camera - TODO } } func imagePickerControllerDidCancel(_ picker: UIImagePickerController) { picker.dismiss(animated: true, completion:nil) } } |
These two methods handle the cases when the user either selects an image or cancels the selection process. When selecting an image, the user can either get one from the photo library or take an image directly with their camera. Starting with choosing a photo from the library:
- First, check to see if a photo URL is present in the info dictionary. If so, you know you have a photo from the library.
- Next, pull the
PHAssetfrom the photo URL - You call
sendPhotoMessageand receive the Firebase key. - Get the file URL for the image.
- Create a unique path based on the user’s unique ID and the current time.
- And (finally!) save the image file to Firebase Storage
- Once the image has been saved, you call
setImageURL()to update your photo message with the correct URL
Now add the code to handle a taken picture. Add the following immediately below the TODO you just added:
// 1 let image = info[UIImagePickerControllerOriginalImage] as! UIImage // 2 if let key = sendPhotoMessage() { // 3 let imageData = UIImageJPEGRepresentation(image, 1.0) // 4 let imagePath = FIRAuth.auth()!.currentUser!.uid + "/\(Int(Date.timeIntervalSinceReferenceDate * 1000)).jpg" // 5 let metadata = FIRStorageMetadata() metadata.contentType = "image/jpeg" // 6 storageRef.child(imagePath).put(imageData!, metadata: metadata) { (metadata, error) in if let error = error { print("Error uploading photo: \(error)") return } // 7 self.setImageURL(self.storageRef.child((metadata?.path)!).description, forPhotoMessageWithKey: key) } } |
Here’s what this does:
- First you grab the image from the info dictionary.
- Then call your
sendPhotoMessage()method to save the fake image URL to Firebase. - Next you get a JPEG representation of the photo, ready to be sent to Firebase storage.
- As before, create a unique URL based on the user’s unique id and the current time.
- Create a
FIRStorageMetadataobject and set the metadata to image/jpeg. - Then save the photo to Firebase Storage
- Once the image has been saved, you call
setImageURL()again.
Nearly there! You’ve now set up your app to save the image data to Firebase Storage and save the URL to the message data, but you’ve not yet updated the app to display those photos. Time to fix that.
Displaying the Images
First, add a property to ChatViewController:
private var photoMessageMap = [String: JSQPhotoMediaItem]() |
This holds an array of JSQPhotoMediaItems.
Now, you need to create a sibling method to addMessage(withId:name:text:). Add the following:
private func addPhotoMessage(withId id: String, key: String, mediaItem: JSQPhotoMediaItem) { if let message = JSQMessage(senderId: id, displayName: "", media: mediaItem) { messages.append(message) if (mediaItem.image == nil) { photoMessageMap[key] = mediaItem } collectionView.reloadData() } } |
Here, you store the JSQPhotoMediaItem in your new property if the image key hasn’t yet been set. This allows you to retrieve it and update the message when the image is set later on.
You also need to be able to fetch the image data from Firebase Storage to display it in the UI. Add the following method:
private func fetchImageDataAtURL(_ photoURL: String, forMediaItem mediaItem: JSQPhotoMediaItem, clearsPhotoMessageMapOnSuccessForKey key: String?) { // 1 let storageRef = FIRStorage.storage().reference(forURL: photoURL) // 2 storageRef.data(withMaxSize: INT64_MAX){ (data, error) in if let error = error { print("Error downloading image data: \(error)") return } // 3 storageRef.metadata(completion: { (metadata, metadataErr) in if let error = metadataErr { print("Error downloading metadata: \(error)") return } // 4 if (metadata?.contentType == "image/gif") { mediaItem.image = UIImage.gifWithData(data!) } else { mediaItem.image = UIImage.init(data: data!) } self.collectionView.reloadData() // 5 guard key != nil else { return } self.photoMessageMap.removeValue(forKey: key!) }) } } |
Here, you:
- Get a reference to the stored image.
- Get the image data from the storage.
- Get the image metadata from the storage.
- If the metadata suggests that the image is a GIF you use a category on
UIImagethat was pulled in via theSwiftGifOriginCocapod. This is needed becauseUIImagedoesn’t handle GIF images out of the box. Otherwise you just useUIImagein the normal fashion. - Finally, you remove the key from your
photoMessageMapnow that you’ve fetched the image data.
Finally, you need to update observeMessages(). Within the if statement, but before the final else condition, add the following test:
else if let id = messageData["senderId"] as String!, let photoURL = messageData["photoURL"] as String! { // 1 // 2 if let mediaItem = JSQPhotoMediaItem(maskAsOutgoing: id == self.senderId) { // 3 self.addPhotoMessage(withId: id, key: snapshot.key, mediaItem: mediaItem) // 4 if photoURL.hasPrefix("gs://") { self.fetchImageDataAtURL(photoURL, forMediaItem: mediaItem, clearsPhotoMessageMapOnSuccessForKey: nil) } } } |
Going through this, line by line:
- First, check to see if you have a photoURL set.
- If so, create a new
JSQPhotoMediaItem. This object encapsulates rich media in messages — exactly what you need here! - With that media item, call
addPhotoMessage - Finally, check to make sure the
photoURLcontains the prefix for a Firebase Storage object. If so, fetch the image data.
There’s now just one final thing left to do. Can you guess what it is?
While you’re decoding photo messages, you’re only doing this if the image data is in the message when you first observe it. However, you also need to observe any updates to the message that occur later, like when you update the image URL after it’s been saved to storage.
Add the following property:
private var updatedMessageRefHandle: FIRDatabaseHandle? |
Now add the following to the bottom of observeMessages().
// We can also use the observer method to listen for // changes to existing messages. // We use this to be notified when a photo has been stored // to the Firebase Storage, so we can update the message data updatedMessageRefHandle = messageRef.observe(.childChanged, with: { (snapshot) in let key = snapshot.key let messageData = snapshot.value as! Dictionary<String, String> // 1 if let photoURL = messageData["photoURL"] as String! { // 2 // The photo has been updated. if let mediaItem = self.photoMessageMap[key] { // 3 self.fetchImageDataAtURL(photoURL, forMediaItem: mediaItem, clearsPhotoMessageMapOnSuccessForKey: key) // 4 } } }) |
Here’s what this does:
- Grabs the message data dictionary from the Firebase snapshot.
- Checks to see if the dictionary has a photoURL key set.
- If so, pulls the
JSQPhotoMediaItemout of the cache. - Finally, fetches the image data and update the message with the image!
The very last thing you need to do is some housekeeping and clean things up when the ChatViewController disappears. Add the following method:
deinit { if let refHandle = newMessageRefHandle { messageRef.removeObserver(withHandle: refHandle) } if let refHandle = updatedMessageRefHandle { messageRef.removeObserver(withHandle: refHandle) } } |
Build and run the app; you should be able to tap on the little paperclip icon and send photo or image messages in your chat. Notice how the messages show a little waiting spinner — this is when your app is saving the photo data to Firebase Storage.
Kaboom! You just made a big, bad, real time, user-typing-indicating, photo and GIF sending chat app. Go grab yourself your favorite beverage, you earned it!
Where to Go From Here?
You can download the completed project with all of the code you’ve developed in this Firebase tutorial.
You now know the basics of Firebase and JSQMessagesViewController, but there’s plenty more you can do, including one-to-one messaging, social authentication, and avatar display.
To take this app even further, you could take a look at the Firebase iOS documentation.
I hope you’ve enjoyed this Firebase tutorial; if you have any questions feel free to leave them in the non-anonymous yet avatar-enabled discussion below! :]
The post Firebase Tutorial: Real-time Chat appeared first on Ray Wenderlich.