We’ve all heard stories about how some developer changed the label of a button or the flow of their welcome screens, and suddenly found their retention rate or their in-app purchase rate increased by some crazy amount.
Maybe somewhere on your to-do list, you’ve an “experiment with my purchase button” still sitting there, waiting to be checked off because you discovered running these experiments scientifically is actually a lot of work.
In Firebase Remote Config Tutorial for iOS we showed you how to use Remote Config to update certain parts of your app on the fly and deliver customized content to users in particular countries.
This follow-up tutorial will explore how to use Remote Config to conduct iOS A/B testing by experimenting with different values and measuring the results using Firebase Analytics to find out which sets of values work better. We’ll follow this up with a quick lesson how to perform even more advanced customization based on user properties.
Getting Started
Open your completed Planet Tour app from the previous Remote Config tutorial. Remember to open the xcworkspace file instead of the xcodeproj file.
If you didn’t complete the tutorial, download the Planet Tour 2 Starter app. You’ll need to create a Firebase project for the app and download a GoogleServices-info.plist file from the console, which you can do by following these directions:
- Go to firebase.google.com/console
- Click on Create New Project.
- Name your project Planet Tour, make sure your region is selected, then click Create Project.
![iOS A/B Testing]()
- Click on Add Firebase to your iOS app.
![iOS A/B Testing]()
- Add the bundle ID of your project (
com.razeware.Planet-Tour), leave the App Store ID field blank then click Add App.
![iOS A/B Testing]()
- At this point, your browser will download a
GoogleServices-info.plistfile for you. - Open up
Planet Tour.xcworkspacein Xcode, and drag this file into thePlanet Tourproject (select Copy Items if Needed). - You can just click Continue to go through the next few steps of the setup wizard. We’ve already done those for you.
Build and run your app; you should see a lovely tour of our solar system. Click on a few planets to see details about them.
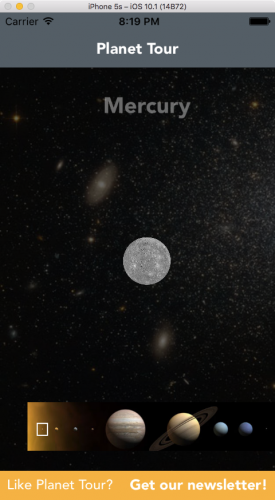
If you’re new to the project, take a little bit of time to review RCValues.swift to understand how we’re using Remote Config within the project. Then go back to the main screen and check out the banner at the bottom where the app is asking you to sign up for the newsletter.
An Introduction to iOS A/B testing
The higher-ups at Planet Tour, Inc. are concerned there aren’t enough people subscribing to the Planet Tour newsletter. After all, how can you build a successful business if you’re not able to email people about exciting new Planet Tour offers?
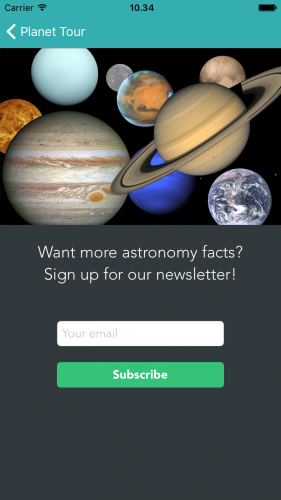
Any way we can make this Subscribe button more enticing?
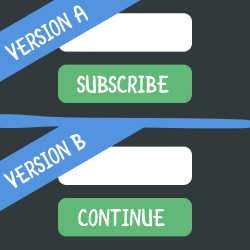
The folks from marketing have a theory. You might be able to get more subscribers if you change the label of the Subscribe button to Continue. It does sound more inviting, doesn’t it? While you’re at it, maybe you should try changing the text of the banner from Get our newsletter to Get more facts.
These are easy changes to make now that your app is wired up to use Remote Config. It would just be a few seconds of work publishing these new values in the Firebase console. Then after a week, you could see if you get more newsletter subscribers. Simple, right?
Well, hang on. How would you know the changes you made are directly responsible for the results you’re seeing? What happens if some influential blogger mentions your app’s newsletter in their latest post? Or you end up running an ad campaign in another app’s newsletter, thereby bringing in an audience more inclined to subscribe to newsletters in the first place?
These are factors you can’t really control, and they might lead you to draw the wrong conclusions.
Ideally, you’d want to release two versions of your app simultaneously. One random group of users gets to see the new newsletter labels, and the other group gets to see the current newsletter. You can compare the results between these two groups and feel reasonably confident the differences are due to the changes you made, and not some external factor.
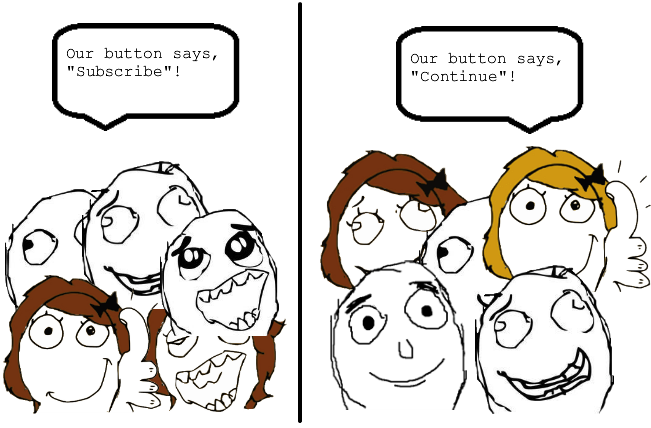
iOS A/B testing, as explained by rage face comics.
Well, that’s exactly what iOS A/B testing is, and it’s a very common way to run these kinds of experiments. Many larger companies have built up their own infrastructure to run and measure these tests, but with Firebase Remote Config, you can do it on top of the infrastructure Firebase has already created.
Creating Your First A/B Test
Head over to the Firebase Console. Select Planet Tour from the list of projects, then select Remote Config from the list of features on the left.
Click the Add Parameter button. For the key, enter subscribeVCButton. Next, click the Add value for condition drop-down and select Define new condition.
In the dialog, give it the name Newsletter Test. Under Applies if…, select User in random percentile. Pick <= for the operator, and 50 for the percentile. When you’re all done, your dialog should look similar to below.
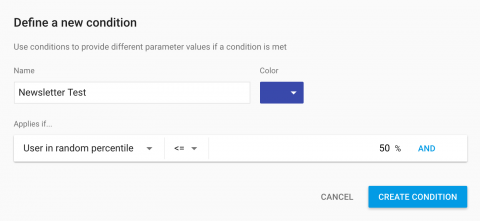
Click Create condition to create this condition. In the Value for Newsletter Test field, enter the string Continue. For the Default value file, click the Other empty values drop-down and select No value.
This is your way of telling the Remote Config library it should just go ahead and use whatever values are supplied locally in the code. If you picked the other option Empty string, your button would have literally had a title of “” for a value and look like it didn’t have a label at all!
Finally, click Add parameter.
Now you can move on to changing the label of the button on the front page.
Create a new parameter and give it a key of subscribeBannerButton. Select Add value for condition > Newsletter Test, and give the condition a value of Get more facts!. Make sure the default value is set to No value. Click Add parameter.
Click Publish changes to publish these changes. You should now see these two entries among your Remote Config values.

If you entered something incorrectly, don’t worry; you just need to click the little pencil icon next to each entry to edit and republish your changes.
Okay, let’s see how these new changes look!
Build and run your app. Depending on what group your assigned to, you’ll either see the old default values, or your exciting new ones.
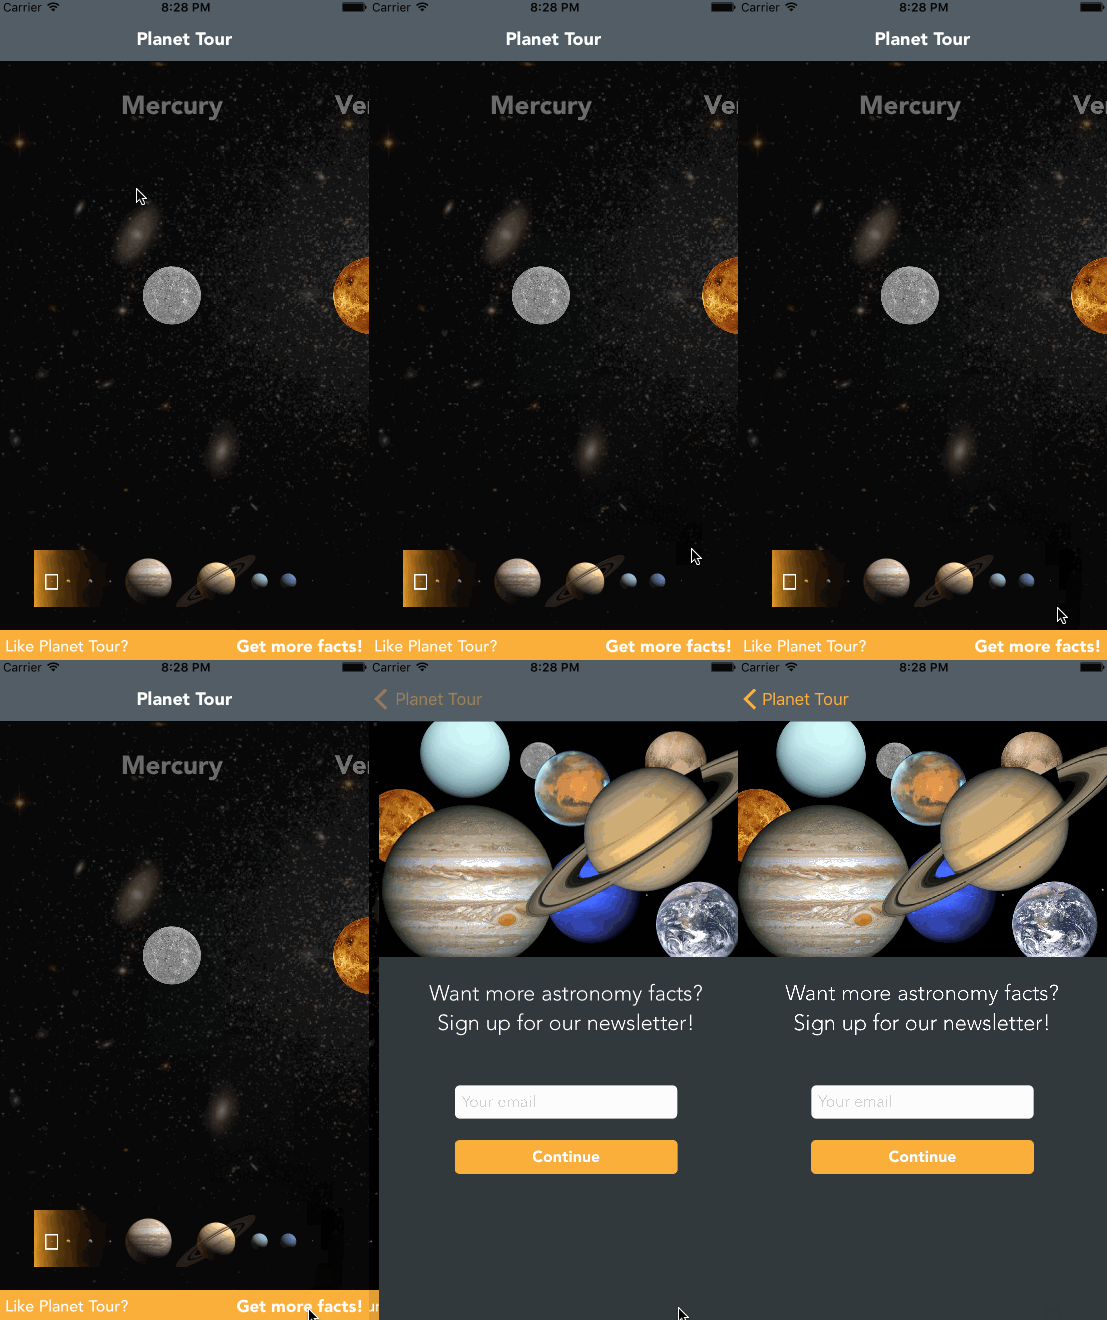
If you don’t see your new experimental values, you can’t just re-run your app on the chance you’ll see the new values. Remote Config remembers what percentile it’s randomly assigned you to, and that won’t change for the lifetime of the app. After all, it would be very weird if your users saw different versions of your app every time they started it up.
Instead, you’ll need to delete and reinstall your app to see if you get placed into a different group.
Try the delete-reinstall cycle a few times and you should eventually see the new values. If you don’t see the new values after 8 or 9 tries, immediately step away from your computer and find the nearest roulette table. :]
Disclaimer: raywenderlich.com does not encourage actual gambling in place of a decent app monetization strategy
You have your new newsletter text going out to half of your population, while the rest of your population still sees the old text. How do you know which version is performing better?
You need to measure your results with some analytics.
Adding Firebase Analytics
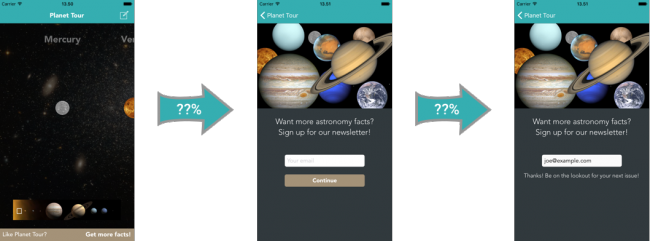
To figure out which version of your newsletter flow is performing better, you’ll need to measure the results. Specifically, you’ll want to see how many people, after seeing the main menu, decided to click on the banner at the bottom to go to the GetNewsletterViewController. You’ll want to see how many of those people clicked on the Subscribe (or Continue) button.
This is something you can measure fairly easily with mobile analytics. If you’re not familiar with the concept of mobile analytics, there’s a great tutorial on the subject here.
Firebase Analytics is just one of many mobile analytics solutions available out there. I like using it in this situation because a) It’s free, and b) By having Remote Config installed and working, you’ve already got Firebase Analytics up and running, too!
Adding Events
Firebase Analytics, like most other mobile analytics solutions, is an event-based model. As users perform actions in your app, Firebase Analytics sends events to its servers. Sometime later, these servers process these events and turn them into meaningful graphs for you to analyze.
Open ContainerViewController.swift. Add the following to the top of the file:
import Firebase |
Next, add the following to the end of viewDidLoad():
FIRAnalytics.logEvent(withName: "mainPageLoaded", parameters: nil) |
This will send off an event named mainPageLoaded when your user first starts up the app and makes it to your main screen. The parameters argument is a dictionary of optional key/value pairs associated with this event. You don’t need any here, so this is left as nil.
Next, open GetNewsletterViewController.swift. Add the following to the top of the file:
import Firebase |
Next, add the following to the end of viewDidLoad():
FIRAnalytics.logEvent(withName: "newsletterPageLoaded", parameters: nil) |
Finally, add the following to the end of submitButtonWasPressed(_:):
FIRAnalytics.logEvent(withName: "newsletterButtonPressed", parameters: nil) |
Your app will trigger events when the user first visits the main page, the newsletter page, and when they click the Submit button to sign up for the newsletter.
Before you build and run, you’ll want to turn on Firebase Analytics debug mode, which lets you see the results of all these analytics calls in the console.
To do this, select Product\Scheme\Edit Scheme. Within the Run scheme, select Arguments. Within Arguments Passed On Launch, click the + symbol and enter the argument -FIRAnalyticsDebugEnabled. Make sure you include the dash at the beginning.
When you’re done, you should have something like the following:
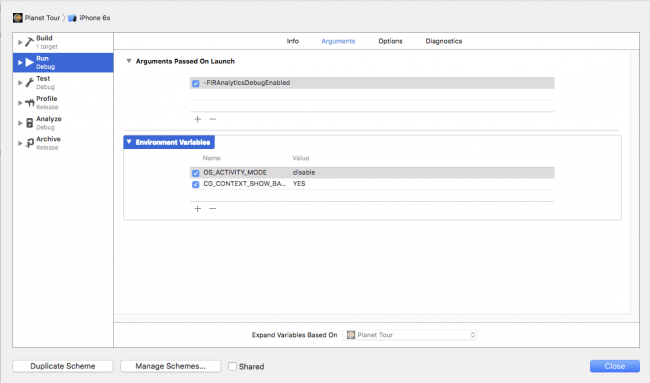
Your project might not have these same environment variables, which is fine. But adding OS_ACTIVITY_MODE with a value of disable will certainly make your console a lot less verbose.
Close the dialog and build and run. You should now see output in the console similar to below:
Planet Tour[34325:] <FIRAnalytics/DEBUG> Logging event: origin, name, params: app, mainPageLoaded, {
    "_o" = app;
} |
When you click the Get more facts! (or Get our newsletter) button, this will also be logged to your console:
Planet Tour[34325:] <FIRAnalytics/DEBUG> Logging event: origin, name, params: app, newsletterPageLoaded, {
    "_o" = app;
} |
A similar event will be logged when you click the Subscribe (or Continue) button.
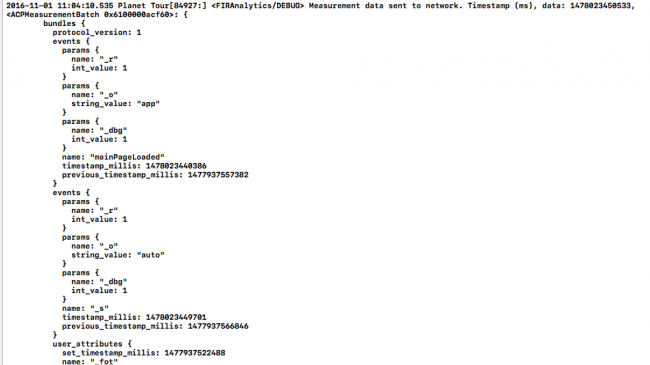
If you then wait approximately 10 seconds, you’ll see some output in your log (as a giant JSON object) indicating Firebase has sent this information to its severs.
Because you’ve turned on debug mode with the -FIRAnalyticsDebugEnabled flag, Firebase Analytics is very aggressive about sending data to its servers. It sends a batch either when it has data that’s more than 10 seconds old, or when your app moves into the background.
If you hit Command-Shift-H to simulate pressing the home button, you’ll see more JSON data in your console as Firebase Analytics sends another batch of data to its servers.
In a production app, this behavior would probably kill your phone’s battery life. Therefore, when you don’t have debug mode turned on, Firebase Analytics sends data either when it has data that’s more than an hour old, or when your app goes into the background.
Incidentally, this debug setting does persist. So if you want to turn off Analytics debug mode (because, say, you want to stress test your app’s battery performance), you either disable the flag and then delete and reinstall the app, or explicitly turn off debug mode by changing the flag to -noFIRAnalyticsDebugEnabled
You’re sending events to the servers, but how do you view this collected data?
Viewing Analytics
Head on over to the Firebase console, select your Planet Tour project, then click on the Analytics section. You’ll see a summary of your app’s usage over time, but right now you’re more interested in viewing data for the individual events you just recorded.
Head over to the Events tab. You’ll probably see something like this:
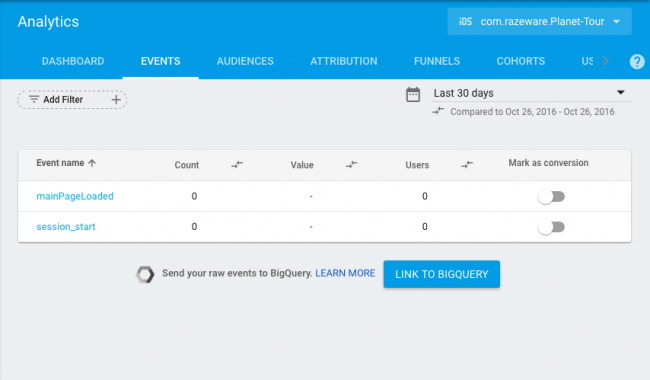
Looks pretty empty, doesn’t it? Well, that’s partly because the default “Last 30 days” timeframe doesn’t include data you’ve collected from the current day. This is generally because the current day’s data is incomplete and it would be misleading, not to mention a giant bummer, to see all your graphs end in a big downturn in usage.
To select today’s data, select the Last 30 days drop-down and pick Today instead. This time when you see your events for today… it will probably look just as empty.
This is because Firebase Analytics only generates graphs and reports based on your analytics data every few hours. Your best bet is to come back in a few hours and see what your data looks like then. But that’s okay, because you’re not done yet!
While you might be recording how often people are triggering these events within the app, you’re still not keeping track of whether these users are in the new experimental flow or seeing the old values. You can’t really distinguish between the two. Luckily, this is something you can accomplish with user properties.
Adding a User Property
A user property in Firebase Analytics is simply a property associated with a particular user.
Some examples of user properties are premium users within your app, user fitness goals in your exercise app, or any other user-associated data you might want to filter your event data by.
In your case, you’ll add an experimentGroup property to record what experiment group the user belongs to. You’ll set the value of this property through Remote Config.
Go back to the Remote Config section of the Firebase console. Click Add Parameter. Give the parameter a key of experimentGroup.
Select the Add value for condition drop down, select Newsletter Test and give that group a value of newsletterFlowA. Add a default value of newsletterDefault.

Click Add parameter to add the parameter, then click Publish changes to publish your changes.
In RCValues.swift, add the following method to keep track of this experimentGroup value in a user property of the same name below activateDebugMode().
func recordExperimentGroups() { let myExperimentGroup = FIRRemoteConfig.remoteConfig()["experimentGroup"].stringValue ?? "none" FIRAnalytics.setUserPropertyString(myExperimentGroup, forName: "experimentGroup") } |
Next, call this method in fetchCloudValues(), right before you set fetchComplete to true.
self?.recordExperimentGroups() |
Finally, you need to tell Firebase Analytics this is a user property you care about seeing in your reports. You can do this in the Firebase console. Select Analytics, then select User Properties on the top bar.
Now be careful in this next step — the Firebase console doesn’t let you edit or delete user properties once you create them!
Click on New user property and give it the name experimentGroup. If you want to be extra-sure you get the name right, you can cut-and-paste the name directly from the code. Give it any description you’d like. Then click Create.

experimentGroup instead of something very specific like newsletterTestOneGroup. This gives you the freedom to re-use this user property next month for a completely different type of experiment while still keeping the same somewhat accurate.Build and run the app!
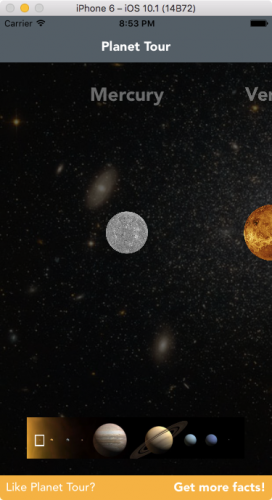
Your app should look nearly the same as before, but you might notice this extra bit of output in the console:
Planet Tour[7397:] <FIRAnalytics/DEBUG> Setting user property. Name, value: experimentGroup, newsletterFlowA |
When your analytics data is sent, you’ll see something like this in the output:
user_attributes {
  set_timestamp_millis: 1477662722018
  name: "experimentGroup"
  string_value: "newsletterFlowA"
} |
This means your user property of newsletterFlowA is now associated with all events for this session and for all future sessions. Note, this isn’t retroactive; those old events sent to Firebase Analytics will remain propertyless.
But this does mean you can now simulate iOS A/B testing in the real world. Give it a try!
- Build and run your app.
- View the home page, and occasionally, view the newsletter page and sign up for the newsletter too.
- Hit Command-Shift-H to move your app into the background and “flush” the analytics data.
- Stop and delete your app from your device or simulator.
- Go back to step 1 and repeat 10 to 15 times. Or until you get bored.
Once you’ve done that, wait a few hours for the results to process; you can always work on the “Advanced User Targeting” part of this tutorial while you’re waiting. Then come back to view your results.
Head over to the Firebase console, select Analytics, click on the Events tab, and select Today from the dropdown. Unless, that is, you decided to wait overnight to view your data, in which case select Yesterday. You should now see these new events in your console.
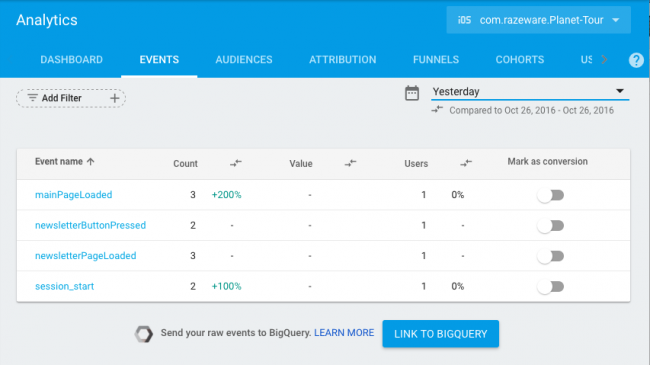
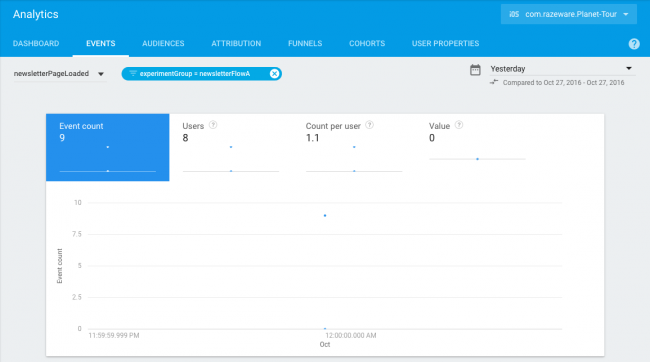
Click the newsletterPageLoaded event to view more details about it. You’ll probably see something like this.
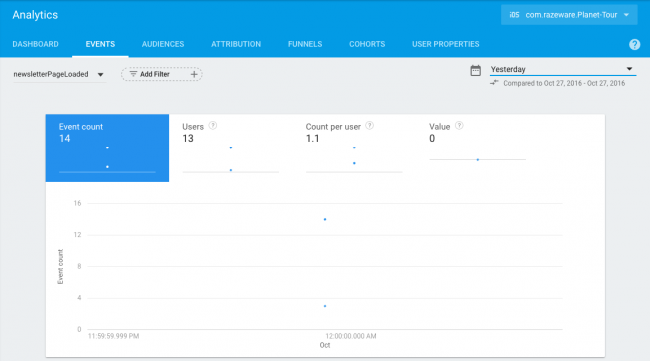
In a real app where lots of people use your app over the course of several days, you’ll have much more interesting graphs. But for now, you get these fantastic dots. :]
Interpreting the Data
You can see how many people have visited your newsletter page, but this still doesn’t give you the insight you need to determine which flow works better. To do that, you’re first going to need to separate this data by the experimentGroup user property.
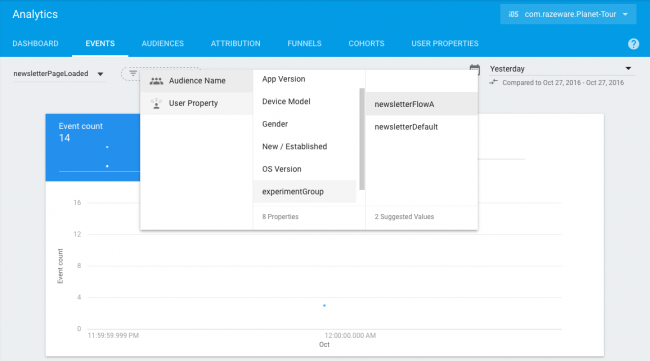
While still looking at the newsletterPageLoaded event, click on Add Filter at the top, then click on User Property, experimentGroup, then newsletterFlowA.
You should be able to then see how many users from the newsletterFlowA group visited the newsletter page.
By changing the filter in a similar way, you can compare this value to the users in the newsletterDefault group who visited the page.
Does this mean the group with the most newsletterPageLoaded or newsletterButtonPressed events has the more effective flow? Well, not necessarily. There’s always a chance the other group had more people using your app that day.
Think about it this way; imagine 100 people visited app version A, and 20 of them signed up for the newsletter. Meanwhile 80 people visited app version B, and 18 of them signed up for the newsletter. While the first version has more total people signing up for the newsletter, version B actually has a better conversion rate — 20% vs. 22.5%.
There’s an easy way for you to make these same calculations: funnels!
Funnels are basically a group of events you’re interested in measuring as a series. By defining a funnel, you can see how many times each event was triggered in a nice bar graph, and more importantly, see the fall-off from one event to the next.
Click on the Funnels header, then click Add your first funnel. Name it Newsletter flow. Add whatever description you want. You should see two drop-downs below to select events. Make the first one mainPageLoaded, and the second newsletterPageLoaded. Click Add another event to create a third event, and select newsletterButtonPressed.
Click Create & View, and you should see a page like this.
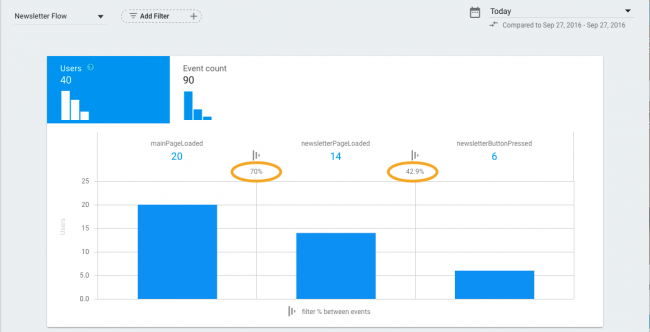
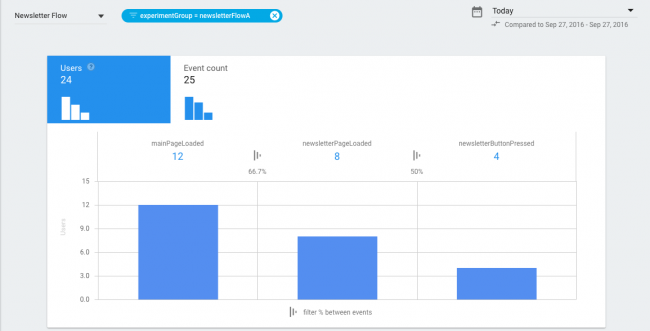
Our newsletter flow funnel — those percentages (circled in orange) are the numbers we’re most interested in.
This shows you the number of people who made it to each part of the funnel. The most important numbers, however, are the little percentage numbers at the top. Those show you what percentage of users made it from the current step to the next one.
Now, you can filter this by people who have the newsletterFlowA user property…
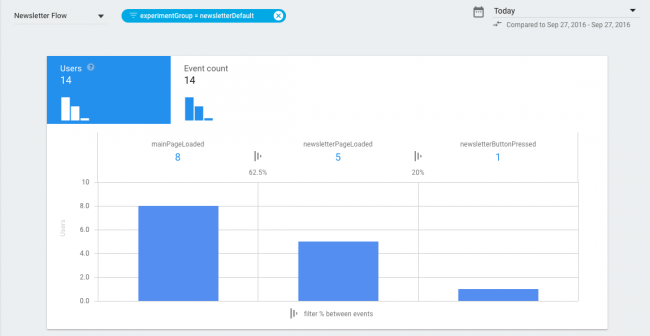
Or newsletterDefault.
In these screenshots, it looks like newsletterFlowA performed better, both in terms of people who made it to the newsletter page as well as people who clicked the subscribe button. Your data may look different, depending on what you did inside your app.
Once you have this data, you can then take action! If it turns out the new newsletter flow is doing better, you could change the condition so it applies to 75% of your viewers. Or just remove the condition entirely and make these new values the default. It’s up to you.
Advanced User Targeting with User Properties
Or, “Pluto Returns!”
In our previous tutorial, you avoided an international crisis by setting shouldWeIncludePluto to true for your users in Scandinavia. It turns out, however, setting this by country wasn’t enough. The choice of whether or not Pluto is a planet is a deeply personal one, and many individuals from around the world feel strongly, Pluto should be a planet. How can we customize Planet Tour for all of them?
Well, rather than just altering this value by country, you’re going to add in much more fine-grained control by changing this setting based on a user property.
Set a User Property
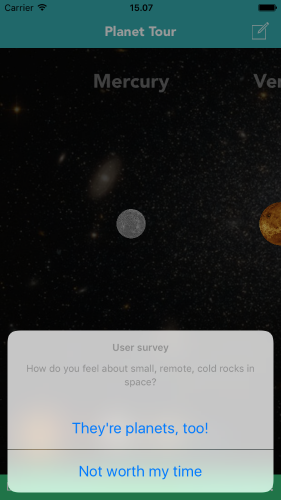
While there are different ways to determine if a user is a fan of small, remote, rocks in space, the easiest way is to just ask them.
At the top of PlanetsCollectionViewController.swift, add this line:
import Firebase |
Next, add the following above the reuseIdentifier definition:
fileprivate let takenSurveyKey = "takenSurvey" |
Finally, add the following inside the extension with the MARK: -Internal line.
func runUserSurvey() { let alertController = UIAlertController(title: "User survey", message: "How do you feel about small, remote, cold rocks in space?", preferredStyle: .actionSheet) let fanOfPluto = UIAlertAction(title: "They're planets, too!", style: .default) { _ in FIRAnalytics.setUserPropertyString("true", forName: "likesSmallRocks") } let notAFan = UIAlertAction(title: "Not worth my time", style: .default) { _ in FIRAnalytics.setUserPropertyString("false", forName: "likesSmallRocks") } alertController.addAction(fanOfPluto) alertController.addAction(notAFan) navigationController?.present(alertController, animated: true) UserDefaults.standard.set(true, forKey: takenSurveyKey) } |
Two things you should note with the survey you added: First, after you get a response back from the user, you’re recording this in a new user property called likesSmallRocks. Second, you’re making a note in UserDefaults this user has taken the survey, so they don’t get asked every visit.
It’s best to get into the habit of adding a user property in the Firebase console the same time you add it in code. Open the Firebase console and select Analytics, then User Properties. Select New user property and create a new one called likesSmallRocks. As before, I recommend cutting-and-pasting the exact name from the code.

Go back to PlanetsCollectionViewController, and at the end of viewDidAppear(_:), add these lines to make sure you only ask this once per app install:
if !UserDefaults.standard.bool(forKey: takenSurveyKey) { runUserSurvey() } |
If you want to make testing a little easier, add this line to viewWillAppear(_:) above customizeNavigationBar(), which will let you re-take the survey at a future point.
let retakeSurveyButton = UIBarButtonItem(barButtonSystemItem: .compose, target: self, action: #selector(runUserSurvey)) parent?.navigationItem.rightBarButtonItem = retakeSurveyButton |
Build and run your app. You’ll now get asked how you feel about small rocks in space. Feel free to answer honestly. :]
Customizing Your App
Now you’ve created this user property, you can start adjusting Remote Config values based on its value. Open the Firebase console and select Remote Config. If you completed the previous tutorial, you should still see your entry for shouldWeIncludePluto.
Click the pencil icon next to this entry to edit, then select Add value for condition\Define new condition. Name the new condition Small rock fans, and state this condition applies if User property\likesSmallRocks | exactly matches | true.
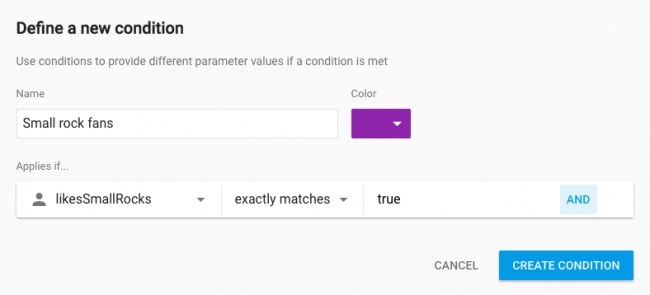
Click Create condition, then set this value to true.
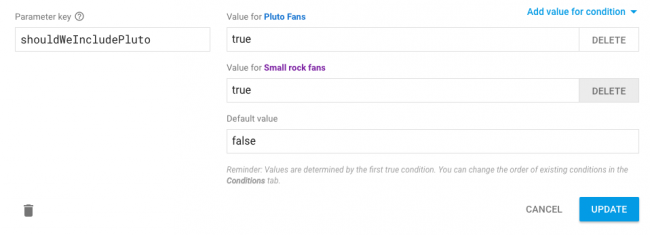
Click Update, then Publish changes.
Now build and run your app again.
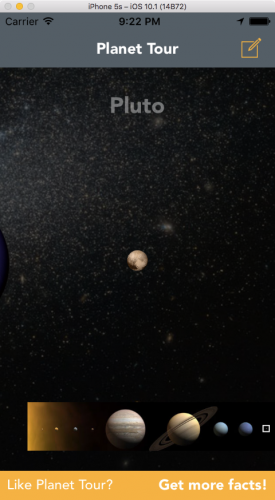
If you said you’re a fan of small remote rocks, you should now see Pluto listed among your planets. If you didn’t, you won’t see Pluto…unless your device thinks it’s in a Scandinavian country, in which case Pluto is still there.
If you want to see what your app looks like for people who answered the user survey differently, click the bar button item on top to retake the survey, then quit and re-run your app.
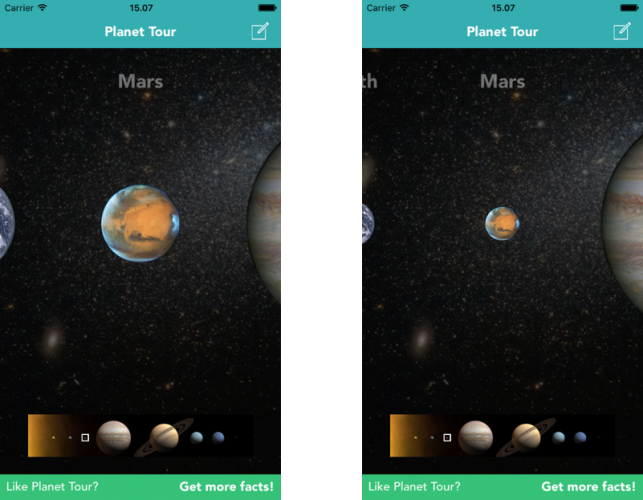
How about making some more subtle changes to appeal to your Pluto fans? There’s a variable in your app — planetImageScaleFactor — that determines how closely the size of the planet images match the actual size of their corresponding planet.
At a value of 1.0, they’re perfectly to scale, so planets like Pluto are barely a pixel large. At a value of 0.0, all planets are the same size. Right now, this variable has a default value of 0.33, which gives you a sense of the planets’ relative size, while still making the smaller ones easy to see.
You’re going to make this value slightly lower for fans of small rocks, so the smaller planets like Pluto and Mercury show up bigger than they would otherwise.
Go back to Remote Config in the Firebase console, and create a new entry for planetImageScaleFactor. Give it a value of 0.2 for users in the Small rock fans condition and a default value of 0.45.

Build and run Planet Tour again. Depending on how you feel about small remote rocks, planets like Mars or Pluto should look proportionately larger or smaller.
While this might seem like a fun but inconsequential change, these types of customizations can be quite powerful. As you learn more about your users and the parts of your app they prefer, you can start to deliver a truly customized experience to your users, making sure the elements that appeal to them are always front and center.
Where To Go From Here?
You can download the fully completed Planet Tour 2 project for this Firebase Remote Config tutorial. Please note, however, you still need to create a project in the Firebase Console and drag in your GoogleServices-info.plist file for the project to work.
There’s plenty more you can do with Firebase Analytics and Remote Config, and you can always read the documentation for more information.
In the meantime, think about elements of your app you’ve always wanted to experiment with. Try running one of them through iOS A/B testing, and let us know what you discovered in the comments below!
The post Firebase Tutorial: iOS A/B Testing appeared first on Ray Wenderlich.
