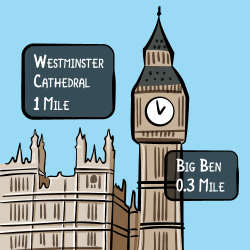
Learn how to make a location based augmented reality app that displays points of interest over video!
Update note: This tutorial was updated for Swift 3 and iOS 10 by Jean-Pierre Distler.
Augmented reality is a cool and popular technique where you view the world through a device (like your iPhone camera, or Microsoft HoloLens), and the device overlays extra information on top of the real-world view.
I’m sure you’ve seen marker tracking iOS apps where you point the camera at a marker and a 3D model pops out.
In this augmented reality iOS tutorial, you will write an app that takes the user’s current position and identifies nearby points of interest (we’ll call these POIs). You’ll add these points to a MapView and display them also as overlays on a camera view.
To find the POIs, you’ll use Google’s Places API, and you’ll use the HDAugmentedReality library to show the POIs on the camera view and calculate the distance from the user’s current position.
This tutorial assumes you have some basic familiarity with MapKit. If you are completely new to MapKit, check out our Introduction to MapKit tutorial.
Getting Started
First download the starter project and make yourself familiar with the content. Select the Places project in the project navigator, the Places target in the editing pane, and in the General tab, within the Signing section, set Team to your developer account. Now you should be able to compile the project. The Main.storyboard contains a Scene with a MapView and a UIButton already hooked up for you. The HDAugmentedReality library is included and there are files PlacesLoader.swift and Place.swift. You use them later to query a list of POIs from Googles Places API and map the result into a handy class.

Before you can do anything else, you need to obtain the user’s current location. For this, you’ll use a CLLocationManager. Open ViewController.swift and add a property to ViewController below the mapView outlet and call it locationManager.
fileprivate let locationManager = CLLocationManager() |
This just initializes the property with a CLLocationManager object.
Next add the following class extension to ViewController.swift.
extension ViewController: CLLocationManagerDelegate { } |
Before you can get the current location you have to add a key to the Info.plist. Open the file and add the key NSLocationWhenInUseUsageDescription with a value of Needed for AR. The first time you try to access location services iOS shows an alert with this message asking the user for the permission.
Now that everything is prepared, you can get the location. To do this, open ViewController.swift and replace viewDidLoad() with the following:
override func viewDidLoad() { super.viewDidLoad() locationManager.delegate = self locationManager.desiredAccuracy = kCLLocationAccuracyNearestTenMeters locationManager.startUpdatingLocation() locationManager.requestWhenInUseAuthorization() } |
This is a basic configuration for the locationManager. The manager needs a delegate to notify when it has updated the position of the iDevice. You set it to your view controller using self. Then the manager needs to know how accurate the position should be. You set it to kCLLocationAccuracyNearestTenMeters, which will be accurate enough for this example project. The last line starts the manager and asks the user to grant permission to access location services if it was not already granted or denied.
Note: For desiredAccuracy, you should use the lowest accuracy that is good enough for your purposes. Why?
Say you only need an accuracy of some hundred meters – then the LocationManager can use phone cells and WLANs to get the position. This saves battery life, which you know is a big limiting factor on iDevices. But if you need a better determination of the position, the LocationManager will use GPS, which drains the battery very fast. This is also why you should stop updating the position as soon as you have an acceptable value.
Now you need to implement a delegate method to get the current location. Add the following code to the CLLocationManagerDelegate extension in ViewController.swift:
func locationManager(_ manager: CLLocationManager, didUpdateLocations locations: [CLLocation]) { //1 if locations.count > 0 { let location = locations.last! print("Accuracy: \(location.horizontalAccuracy)") //2 if location.horizontalAccuracy < 100 { //3 manager.stopUpdatingLocation() let span = MKCoordinateSpan(latitudeDelta: 0.014, longitudeDelta: 0.014) let region = MKCoordinateRegion(center: location.coordinate, span: span) mapView.region = region // More code later... } } } |
Walking through this method step-by-step:
- Every time the
LocationManagerupdates the location, it sends this message to its delegate, giving it the updated locations. The locations array contains all locations in chronological order, so the newest location is the last object in the array. First you check if there are any locations in the array and if there is at least one you take the newest. The next line gets the horizontal accuracy and logs it to the console. This value is a radius around the current location. If you have a value of 50, it means that the real location can be in a circle with a radius of 50 meters around the position stored inlocation. - The
ifstatement checks if the accuracy is high enough for your purposes. 100 meters is good enough for this example and you don’t have to wait too long to achieve this accuracy. In a real app, you would probably want an accuracy of 10 meters or less, but in this case it could take a few minutes to achieve that accuracy (GPS tracking takes time). - The first line stops updating the location to save battery life. The next three lines zoom the
mapViewto the location.
Build and run on your device, and keep your eyes on the console to see how the locations come in and how the accuracy gets better and better. Eventually you’ll see the map zoom to an area centered on your current location.

verticalAccuracy that is the same as horizontalAccuracy, except that it’s for the altitude of the position. So a value of 50 means that the real altitude can be 50 meters higher or lower. For both properties, negative values are invalid.
Adding Google Places
Now that you have a current location, you can load a list of POIs. To get this list, you’ll use Google’s Places API.
Google Places API requires you to register for access. If you’ve already created a Google account in the past to access APIs like Maps, go here and select Services. Then skip the following steps until you reach Enabling the Places API.
However, if you’ve never used Google Places API before, you’ll need to register for an account.

You can skip the second screen and on the third, click on Back to Developer Consoles.

Now click on Project/Create Project in the upper left and enter a name for your project. To enable the Places API, search for the line Google Places API Web Service and click the link. Click ENABLE on the top. Now click on Credentials and follow the steps to receive your API key.
Loading Points of Interest
Now that you have an API key open PlacesLoader.swift and find the line let apiKey = "Your API key" and replace the value with your API key.
This is a great time for a new test, but before you build and run, open ViewController.swift and add two new properties below the locationManager property.
fileprivate var startedLoadingPOIs = false fileprivate var places = [Place]() |
startedLoadingPOIs tracks if there is a request in progress, it can happen that the CLLocationManagerDelegate method is called multiple times even after you stopped updating the location. To avoid multiple requests you use this flag. places stores the received POIs.
Now find locationManager(manager: didUpdateLocations:). Inside the if statement, add the following code, right after the “More code later …” comment:
//1 if !startedLoadingPOIs { startedLoadingPOIs = true //2 let loader = PlacesLoader() loader.loadPOIS(location: location, radius: 1000) { placesDict, error in //3 if let dict = placesDict { print(dict) } } } |
This starts loading a list of POIs that are within a radius of 1000 meters of the user’s current position, and prints them to the console.
Build and run, and watch the console’s output. It should look like this, but with other POIs:
{ "html_attributions" = ( ); "next_page_token" = "CpQCAgEAAJWpTe34EHADqMuEIXEUvbWnzJ3fQ0bs1AlHgK2SdpungTLOeK21xMPoi04rkJrdUUFRtFX1niVKCrz49_MLOFqazbOOV0H7qbrtKCrn61Lgm--DTBc_3Nh9UBeL8h-kDig59HmWwj5N-gPeki8KE4dM6EGMdZsY1xEkt0glaLt9ScuRj_w2G8d2tyKMXtm8oheiGFohz4SnB9d36MgKAjjftQBc31pH1SpnyX2wKVInea7ZvbNFj5I8ooFOatXlp3DD9K6ZaxXdJujXJGzm0pqAsrEyuSg3Dnh3UfXPLdY2gpXBLpHCiMPh90-bzYDMX4SOy2cQOk2FYQVR5UUmLtnrRR9ylIaxQH85RmNmusrtEhDhgRxcCZthJHG4ktJk37sGGhSL3YHgptN2UExsnhzABwmP_6L_mg"; results = ( { geometry = { location = { lat = "50.5145334"; lng = "8.3931416"; }; viewport = { northeast = { lat = "50.51476485000001"; lng = "8.393168700000002"; }; southwest = { lat = "50.51445624999999"; lng = "8.3930603"; }; }; }; icon = "https://maps.gstatic.com/mapfiles/place_api/icons/lodging-71.png"; id = c64c6c1abd02f4764d00a72c4bd504ab6d152a2b; name = "Schlo\U00df-Hotel Braunfels"; photos = ( { height = 4160; "html_attributions" = ( "<a href=\"https://maps.google.com/maps/contrib/113263673214221090182/photos\">Ralph Peters</a>" ); "photo_reference" = "CoQBdwAAABZT7LYlGHmdep61gMOtwpZsYtVeHRWch0PcUZQOuICYHEWnZhKsSkVdMLx3RBTFIz9ymN10osdlqrPcxhxn-vv3iSsg6YyM18A51e3Sy0--jO2u4kCC05zeMyFp-k7C6ygsDsiOK4Dn3gsu_Bf5D-SZt_SrJqkO0Ys6CwTJ75EPEhDcRLUGnYt2tSODqn_XwxKWGhRMrOG9BojlDHFSoktoup1OsbCpkA"; width = 3120; } ); "place_id" = ChIJdadOzRdPvEcRkItOT1FMzdI; rating = "3.8"; reference = "CmRSAAAAgvVO1e988IpXI7_u0IsRFCD1U1IUoSXlW7KfXvLb0DDtToodrGbiVtGZApSKAahnClm-_o-Nuixca_azt22lrT6VGwlJ1m6P0s2TqHAEmnD2QasXW6dCaDjKxesXCpLmEhAOanf32ZUsfX7JNLfNuuUXGhRrzQg-vvkQ0pGT-iSOczT5dG_7yg"; scope = GOOGLE; types = ( lodging, "point_of_interest", establishment ); vicinity = "Hubertusstra\U00dfe 2, Braunfels"; }, |
Pardon my french! :]
If you get NULL back for a response, try increasing the radius to a larger value.
So far, your app can determine a user’s position and load a list of POIs inside the local area. You have a class that can store a place from this list, even if you don’t use it at the moment. What’s really missing is the ability to show the POIs on the map!
Displaying Places of Interest
To make an annotation on the mapView, you need another class. So go to File\New\File…, choose the iOS\Swift File and click Next. Name the file PlaceAnnotation.swift and click Create.
Inside PlaceAnnotation.swift replace the contents with the following:
import Foundation import MapKit class PlaceAnnotation: NSObject, MKAnnotation { let coordinate: CLLocationCoordinate2D let title: String? init(location: CLLocationCoordinate2D, title: String) { self.coordinate = location self.title = title super.init() } } |
Here you’ve made the class implement the MKAnnotation protocol and defined two properties and a custom init method.
Now you have everything you need to show some POIs on the map!
Go back to ViewController.swift and complete the locationManager(manager: didUpdateLocations:) method. Find the print(dict) line and replace it with this:
//1 guard let placesArray = dict.object(forKey: "results") as? [NSDictionary] else { return } //2 for placeDict in placesArray { //3 let latitude = placeDict.value(forKeyPath: "geometry.location.lat") as! CLLocationDegrees let longitude = placeDict.value(forKeyPath: "geometry.location.lng") as! CLLocationDegrees let reference = placeDict.object(forKey: "reference") as! String let name = placeDict.object(forKey: "name") as! String let address = placeDict.object(forKey: "vicinity") as! String let location = CLLocation(latitude: latitude, longitude: longitude) //4 let place = Place(location: location, reference: reference, name: name, address: address) self.places.append(place) //5 let annotation = PlaceAnnotation(location: place.location!.coordinate, title: place.placeName) //6 DispatchQueue.main.async { self.mapView.addAnnotation(annotation) } } |
Here’s a closer look at what’s happening above:
- The
guardstatement checks that the response has the expected format - This line iterates over the received POIs
- These lines get the needed information from the dictionary. The response contains a lot more information that is not needed for this app.
- With the extracted information a
Placeobject is created and appended to theplacesarray. - The next line creates a
PlaceAnnotationthat is used to show an annotation on the map view. - Finally the annotation is added to the map view. Since this manipulates the UI, the code has to be executed on the main thread.
Build and run. This time, some annotations appear on the map and when you tap one, you’ll see the name of the place. This app looks nice for now, but where is the augmented reality?!

Introducing HDAugmentedReality
You’ve done a lot of work so far, but they’ve been necessary preparations for what you’re about to do: it’s time to bring augmented reality to the app.
You may have seen the Camera button in the bottom right. Currently nothing happens if you tap the button. In this section you’ll add some action to this button and show a live preview of the camera with some augmented reality elements.
To make your life easier you’ll use the HDAugmentedReality library. It is already included in the starter project you downloaded earlier, if you want to grab the latest version you can find it on Github, but what can this lib do for you?
First, HDAugmentedReality handles the camera captioning for you so that showing live video is easy. Second, it adds the overlays for the POIs for you and handles their positioning.
As you’ll see in a moment, the last point is perhaps your greatest boon, because it saves you from having to do some complicated math! If you want to know more about the math behind HDAugmentedReality, continue on.
If, on the other hand, you want to dig immediately into the code, feel free to skip the next two sections and jump straight to Start Coding.
Warning, Math Inside!
You’re still here, so you want to learn more about the math behind HDAugmentedReality. That’s great! Be warned, however, that it’s a bit more complicated than standard arithmetic. In the following examples, we assume that there are two given points, A and B, that hold the coordinates of a specific point on the earth.
A point’s coordinates consist of two values: longitude and latitude. These are the geographic names for the x- and y-values of a point in the 2D Cartesian system.
- Longitude specifies if a point is east or west of the reference point in Greenwich, England. The value can be from +180° to -180°.
- Latitude specifies if a point is north or south of the equator. The range is from 90° at the north pole to -90° at the south pole.
If you have a look at a standard globe, you’ll see lines of longitude that go from pole to pole – these are also known as meridians. You’ll also see lines of latitude that go around the globe that are also called parallels. You can read in geography books that the distance between two parallels is around 111 km, and the distance between two meridians is also around 111km.
There are 360 meridian lines, one for every degree out of 360 degrees, and 180 lines of parallel. With this in mind, you can calculate the distance between two points on the globe with these formulas:
 * 111")
 * 111")
This gives you the distances for latitude and longitude, which are two sides of a right triangle. Using the Pythagorean theorem, you can now calculate the hypotenuse of the triangle to find the distance between the two points:

That’s quite easy but unfortunately, it’s also wrong.
If you look again at your globe, you’ll see that the distance between the parallels is almost equal, but the meridians meet at the poles. So the distance between meridians shrinks when you come closer to the poles, and is zero on the poles. This means the formula above works only for points near the equator. The closer the points are to the poles, the bigger the error becomes.
To calculate the distance more precisely, you can determine the great-circle distance. This is the distance between two points on a sphere and, as we all know, the earth is a sphere. Well OK, it is nearly a sphere, but this method gives you good results. With a known latitude and longitude for two points, you can use the following formula to calculate the great-circle distance.
 * \sin(B_{lat}) + \cos(A_{lat}) * \cos(B_{lat}) * \cos(B_{lon} - A_{lon})) * 6370")
This formula gives you the distance between two points with an accuracy of around 60 km, which is quite good if you want to know how far Tokyo is from New York. For points closer together, the result will be much better.
Phew – that was hard stuff! The good news is that CLLocation has a method, distanceFromLocation:, that does this calculation for you. HDAugmentedReality also uses this method.
Why HDAugmentedReality
You may be thinking to yourself “Meh, I still don’t see why I should use HDAugmentedReality.” It’s true, grabbing frames and showing them is not that hard and you can read about it on this site. You can calculate the distance between points with a method from CLLocation without bleeding.
So why did I introduce this library? The problem comes when you need to calculate where to show the overlay for a POI on the screen. Assume you have a POI that is to the north of you and your device is pointing to the northeast. Where should you show the POI – centered or to the left side? At the top or bottom?
It all depends on the current position of the device in the room. If the device is pointing a little towards the ground, you must show the POI nearer to the top. If it’s pointing to the south, you should not show the POI at all. This could quickly get complicated!
And that’s where HDAugmentedReality is most useful. It grabs all the information needed from the gyroscope and compass and calculates where the device is pointing and its degree of tilt. Using this knowledge, it decides if and where a POI should be displayed on the screen.
Plus, without needing to worry about showing live video and doing complicated and error-prone math, you can concentrate on writing a great app your users will enjoy using.
Start Coding
Now have a quick look at the files inside the HDAugmentedReality\Classes group:
ARAnnotation: This class is used to define an POI.ARAnnotationView: This is used to provide a view for POI.ARConfiguration: This is used to provide some basic configuration and helper methods.ARTrackingManager: This is where the hard work is done. Luckily you don’t have to deal with it.ARViewController: This controller does all the visual things for you. It shows a live video and adds markers to the view.
Setting Up the AR View
Open ViewController.swift and add another property below the places property.
fileprivate var arViewController: ARViewController! |
Now find @IBAction func showARController(_ sender: Any) and add the following to the body of the method:
arViewController = ARViewController() //1 arViewController.dataSource = self //2 arViewController.maxVisibleAnnotations = 30 arViewController.headingSmoothingFactor = 0.05 //3 arViewController.setAnnotations(places) self.present(arViewController, animated: true, completion: nil) |
- First the
dataSourcefor thearViewControlleris set. ThedataSourceprovides views for visible POIs - This is some fine tuning for the
arViewController.maxVisibleAnnotationsdefines how many views are visible at the same time. To keep everything smooth you use a value of thirty, but this means also that if you live in an exciting area with lots of POIs around you, that maybe not all will be shown. headingSmoothingFactoris used to move views for the POIs about the screen. A value of 1 means that there is no smoothing and if you turn your iPhone around views may jump from one position to another. Lower values mean that the moving is animated, but then the views may be a bit behind the “moving”. You should play a bit with this value to get a good compromise between smooth moving and speed.- This shows the
arViewController
You should have a look into ARViewController.swift for some more properties like maxDistance which defines a range in meters to show views within. So everything that is behind this value will not be shown.
Implementing the Datasource Method
Xcode complains the line where you assign self as the dataSource, to make it happy ViewController must adopt the ARDataSource protocol. This protocol has only one required method that should return a view for a POI. In most cases and also here you want to provide a custom view. Add a new file by pressing [cmd] + [n]. Choose iOS\Swift File and save it AnnotationView.swift.
Replace the content with the following:
import UIKit //1 protocol AnnotationViewDelegate { func didTouch(annotationView: AnnotationView) } //2 class AnnotationView: ARAnnotationView { //3 var titleLabel: UILabel? var distanceLabel: UILabel? var delegate: AnnotationViewDelegate? override func didMoveToSuperview() { super.didMoveToSuperview() loadUI() } //4 func loadUI() { titleLabel?.removeFromSuperview() distanceLabel?.removeFromSuperview() let label = UILabel(frame: CGRect(x: 10, y: 0, width: self.frame.size.width, height: 30)) label.font = UIFont.systemFont(ofSize: 16) label.numberOfLines = 0 label.backgroundColor = UIColor(white: 0.3, alpha: 0.7) label.textColor = UIColor.white self.addSubview(label) self.titleLabel = label distanceLabel = UILabel(frame: CGRect(x: 10, y: 30, width: self.frame.size.width, height: 20)) distanceLabel?.backgroundColor = UIColor(white: 0.3, alpha: 0.7) distanceLabel?.textColor = UIColor.green distanceLabel?.font = UIFont.systemFont(ofSize: 12) self.addSubview(distanceLabel!) if let annotation = annotation as? Place { titleLabel?.text = annotation.placeName distanceLabel?.text = String(format: "%.2f km", annotation.distanceFromUser / 1000) } } } |
- First you add a delegate protocol, that you need later.
- This creates a subclass of
ARAnnotationViewwhich is used to show a view for a POI - The view in this app simply shows a label with the name of the POI and a second label with the distance. These lines declare the needed properties and a third one you again need later.
loadUI()adds and configures the labels.
To finish the class add two more methods
//1 override func layoutSubviews() { super.layoutSubviews() titleLabel?.frame = CGRect(x: 10, y: 0, width: self.frame.size.width, height: 30) distanceLabel?.frame = CGRect(x: 10, y: 30, width: self.frame.size.width, height: 20) } //2 override func touchesEnded(_ touches: Set<UITouch>, with event: UIEvent?) { delegate?.didTouch(annotationView: self) } |
- This method is called everytime the view needs to be redrawn and you simply make sure that the frames of the label have the correct values by resetting them.
- Here you tell the delegate that a view was touched, so the delegate can decide if and which action is needed.
Now head back to ViewController.swift and add the following extension:
extension ViewController: ARDataSource { func ar(_ arViewController: ARViewController, viewForAnnotation: ARAnnotation) -> ARAnnotationView { let annotationView = AnnotationView() annotationView.annotation = viewForAnnotation annotationView.delegate = self annotationView.frame = CGRect(x: 0, y: 0, width: 150, height: 50) return annotationView } } |
Here you create a new AnnotaionView and set its delegate before you return it.
Before you can test your views in action you need another extension.
extension ViewController: AnnotationViewDelegate { func didTouch(annotationView: AnnotationView) { print("Tapped view for POI: \(annotationView.titleLabel?.text)") } } |
Before you activate the camera, you have to add a key to the Info.plist. Open the file and add the key NSCameraUsageDescription with a value of Needed for AR, just like you did for accessing location information.
Build and run, and tap the camera button on the map view to go to the ar view. The first time you do so, the system will raise a permission dialog before it gives you access to the camera. Tap a POI and look at the console.

Finishing touches
You have a complete working AR app now, you can show POIs on a camera view and detect taps on this POIs, to make your app complete you’ll add some tap handling logic now.
If you closed it open ViewController.swift and replace extension which adopts the AnnotationViewDelegate protocol with the following:
extension ViewController: AnnotationViewDelegate { func didTouch(annotationView: AnnotationView) { //1 if let annotation = annotationView.annotation as? Place { //2 let placesLoader = PlacesLoader() placesLoader.loadDetailInformation(forPlace: annotation) { resultDict, error in //3 if let infoDict = resultDict?.object(forKey: "result") as? NSDictionary { annotation.phoneNumber = infoDict.object(forKey: "formatted_phone_number") as? String annotation.website = infoDict.object(forKey: "website") as? String //4 self.showInfoView(forPlace: annotation) } } } } } |
- First you cast
annotationViewsannotation to aPlace. - Then you load additional information for this place.
- And assign it to the appropriate properties.
showInfoView(forPlace:)is a method you implement right now.
Add this method below showARController(sender:)
func showInfoView(forPlace place: Place) { //1 let alert = UIAlertController(title: place.placeName , message: place.infoText, preferredStyle: UIAlertControllerStyle.alert) alert.addAction(UIAlertAction(title: "OK", style: UIAlertActionStyle.default, handler: nil)) //2 arViewController.present(alert, animated: true, completion: nil) } |
- To show the additional info you create an alert view with the POIs name as title and an info text as message.
- Since
ViewControlleris not a part of the view hirarchy right now, you usearViewControllerto show the alert.
Build and run again and see your finished app.

Where to Go from Here?
Here is the final project with all of the code from above.
Congratulations, you now know how to make your own location based augmented reality app! And as a bonus, you’ve also gotten a short introduction to the Google Places API.
In the meantime, if you have any comments or questions, please join the forum discussion below!
The post Augmented Reality iOS Tutorial: Location Based appeared first on Ray Wenderlich.