
As an iOS developer, dependency management is something you’ll eventually encounter in your coding adventures.
Whether you want to integrate someone else’s open source project, add a library from a third party service, or even reuse code across your own projects, dependency management helps you manage these complex code relationships — and guard against some messy problems.
In this iOS dependency management tutorial, you’ll learn how to use Git Submodules to manage dependencies for your iOS application. This will include both a private dependency for something like shared code between your own code bases, as well as a separate example where you pull in an outside third party dependency as a Git Submodule.
Getting Started
Download the starter project for this tutorial. Build and run, and you should see the following:

You can try to select a photo, but the app won’t do much in response. Throughout the rest of this tutorial, you’ll add behavior to the app while integrating other dependencies with Git Submodules.
First — a little bit of background on dependency management.
What Is Dependency Management?
Dependency management is a concept that spans all software development disciplines, not just iOS development. It’s the practice of using configuration mechanisms to add extra code, and therefore extra features, to your software.
Probably the most basic form of dependency management is to simply copy and paste code into your own app. There are several problems with this approach though:
- The original reference is lost. When you copy and paste code, there’s no reference back to the original spot where the code was found, and it’s easily forgotten about.
- Updates aren’t easily integrated. When changes are made to the original code you copied, it becomes very hard to track what’s changed so you can apply those changes back to your cut and pasted code. Some third party libraries can have thousands of lines of code, spread across hundreds of files, and it’s impossible to keep things synchronized manually.
- Version information isn’t maintained. Proper software development practices call for versioning releases of your code. You’ll find this consistent in third party libraries you use in your projects. When you copy and paste code, there’s no easy way to know you’re using version 1.2.2 of library XYZ, and how will you remember to update your code when version 1.2.3 is released?
I’m sure it wasn’t hard to convince you copy and pasting code is a terrible idea. :]
Dependency Management Tools
There are several great tools to manage dependencies in iOS development, but it can be confusing to know which one to use.
CocoaPods might be the most popular. It certainly has a large number of libraries available for use.
Carthage is the younger cousin to CocoaPods. While newer, it’s written in Swift and some find it easier to use than CocoaPods.
Then there’s the Swift Package Manager, which is even newer to the scene and is stewarded by Apple through the open source community.
These are just some of the big players in the iOS dependency management game — and there’s even more options beyond those.
But what if I told you you didn’t need to use an additional tool to manage your dependencies? Would you Git excited? :]
If you’re already using Git for version management for your iOS project, you can use Git itself to manage your dependencies.
In the next section, you’ll see how to manage dependencies using Git Submodules.
Let’s Git started!
Working With A Private Dependency
As an iOS developer, you’ll often work on more than one project. You’ll also find yourself repeatedly using the same pieces of code to solve similar problems. You can easily use Git Submodules to create a dependency from one project (the main project) to another personal project (the private dependency).
Connecting a Private Dependency
Open Terminal and navigate to the folder of your sample project. Execute ls to see the contents of the folder. You’ll know you’re in the right place when it looks like this:
AndyRW|⇒ cd PhotoTagger PhotoTagger|master ⇒ ls PhotoTagger PhotoTagger.xcodeproj PhotoTagger|master ⇒ |
The first thing you need to do is initialize the project as a Git repository. Execute git init:
PhotoTagger|⇒ git init Initialized empty Git repository in /Users/andyo/Documents/AndyRW/PhotoTagger/.git/ PhotoTagger|master⚡ ⇒ |
This sets up the current folder and its contents as a Git repository, though nothing is actually version managed yet.
Next, execute git add . followed by git commit -m "Initial project":
PhotoTagger|master⚡ ⇒ git add . PhotoTagger|master⚡ ⇒ git commit -m "Initial project" [master (root-commit) 1388581] Initial project 13 files changed, 1050 insertions(+) create mode 100755 .gitignore create mode 100755 PhotoTagger.xcodeproj/project.pbxproj create mode 100755 PhotoTagger.xcodeproj/project.xcworkspace/contents.xcworkspacedata create mode 100755 PhotoTagger/AppDelegate.swift create mode 100755 PhotoTagger/Assets.xcassets/AppIcon.appiconset/Contents.json create mode 100755 PhotoTagger/Base.lproj/LaunchScreen.storyboard create mode 100755 PhotoTagger/Base.lproj/Main.storyboard create mode 100755 PhotoTagger/Info.plist create mode 100755 PhotoTagger/PhotoColor.swift create mode 100644 PhotoTagger/TagsColorTableData.swift create mode 100755 PhotoTagger/TagsColorsTableViewController.swift create mode 100755 PhotoTagger/TagsColorsViewController.swift create mode 100755 PhotoTagger/ViewController.swift PhotoTagger|master ⇒ |
This adds the contents of the project to version management and takes a snapshot of the contents as a commit.
Execute git status to confirm the state of the local repository; i.e. to confirm there are no outstanding changes that haven’t been committed:
PhotoTagger|master ⇒ git status On branch master nothing to commit, working tree clean PhotoTagger|master ⇒ |
This means your local Git repository sees no local changes. That’s a good thing, since you haven’t changed anything in the code base.
Now you’ve confirmed the state of the local Git repository for the project, it’s time to create your private dependency.
For this tutorial, the private dependency you create will be a reusable project that helps specify URL paths to the Imagga API. Not only will it be useful for this project, but any other future projects you create that use the Imagga API will be able to reuse this private dependency.
In Xcode, select File\New\Project…. Select Cocoa Touch Framework\Next.

Enter ImaggaRouter as the Product Name.

Click Next, and navigate to the parent of the PhotoTagger project folder. Then click Create to create the new project.
You should now be looking at an empty Xcode project representing your new project. Folder-wise, this project should be in the same parent folder as the PhotoTagger folder.

Now you have your private dependency project created, you’re ready to designate it as your first Git Submodule.
First, the private dependency project needs to be initialized as a Git repository itself. In Terminal, navigate into the ImaggaRouter folder and execute git init:
AndyRW|⇒ cd ImaggaRouter ImaggaRouter|⇒ git init Initialized empty Git repository in /Users/andyo/Documents/AndyRW/ImaggaRouter/.git/ |
This initializes the ImaggaRouter project as a Git repository.
Next you need to add and commit the empty project. Execute git add . followed by git commit -m "Initial ImaggaRouter":
ImaggaRouter|master⚡ ⇒ git add . git % ImaggaRouter|master⚡ ⇒ git commit -m "Initial ImaggaRouter" [master (root-commit) 554d7a1] Initial ImaggaRouter 36 files changed, 517 insertions(+) |
This tells Git to be aware of the files from the empty project. Committing them marks a “snapshot” of the state of the files.
This concludes setting up ImaggaRouter as a Git repository with an initial set of files. Now you need to add it as a submodule of PhotoTagger.
First, create a folder hierarchy to store your dependencies. Navigate to the root folder of PhotoTagger and execute mkdir Frameworks; mkdir Frameworks/Internal:
AndyRW|⇒ cd PhotoTagger PhotoTagger|⇒ mkdir Frameworks; mkdir Frameworks/Internal PhotoTagger|⇒ |
This step isn’t technically necessary for working with Git Submodules, but this folder hierarchy is a good way to keep track of the locations of dependencies in your project.
Now to finally identify ImaggaRouter as a dependency!
From the root folder of PhotoTagger, execute git submodule add ../ImaggaRouter Frameworks/Internal/ImaggaRouter/:
PhotoTagger|master ⇒ git submodule add ../ImaggaRouter Frameworks/Internal/ImaggaRouter/ Cloning into '/Users/andyo/Documents/AndyRW/PhotoTagger/Frameworks/Internal/ImaggaRouter'... done. PhotoTagger|master⚡ ⇒ |
This command tells the Git repository for PhotoTagger about the dependency on another Git repository (the one for ImaggaRouter). You’ll see this step creates a new file as well: .gitmodules.
[submodule "Frameworks/Internal/ImaggaRouter"]
        path = Frameworks/Internal/ImaggaRouter
url = ../ImaggaRouter |
This file contains the actual definition for the submodule.
You’ll also notice this file is marked as a new file from Git’s perspective.
Execute git status to see the current state of the local repository:
PhotoTagger|master⚡ ⇒ git status On branch master Changes to be committed: (use "git reset HEAD <file>..." to unstage) new file: .gitmodules new file: Frameworks/Internal/ImaggaRouter PhotoTagger|master⚡ ⇒ |
It’s nice git status is reporting changes to both the .gitmodules file and the new directory for ImaggaRouter.
On the other hand, it’s not so nice git status leaves out any information about the submodule itself. Since submodules are treated like nested repositories, git status will not report on submodules by default.
Luckily, this can be changed. Execute git config --global status.submoduleSummary true to change this default:
PhotoTagger|master⚡ ⇒ git config --global status.submoduleSummary true PhotoTagger|master⚡ ⇒ |
Check the output of git status again:
PhotoTagger|master⚡ ⇒ git status On branch master Changes to be committed: (use "git reset HEAD <file>..." to unstage) new file: .gitmodules new file: Frameworks/Internal Submodule changes to be committed: * Frameworks/Internal 0000000...554d7a1 (1): > Initial ImaggaRouter PhotoTagger|master⚡ ⇒ |
Awesome! git status now reports on the state of the submodule as well as the main project, and it indicates to you specifically what will be committed.
At this point, Git is aware of the new submodule for the project, but hasn’t actually marked a snapshot of the state. To do that, you’ll repeat the same steps from earlier.
Execute git add ., followed by git commit -m "Add ImaggaRouter dependency":
PhotoTagger|master⚡ ⇒ git add . PhotoTagger|master⚡ ⇒ git commit -m "Add ImaggaRouter dependency" [master 6a0d257] Add ImaggaRouter dependency 2 files changed, 4 insertions(+) create mode 100644 .gitmodules create mode 160000 Frameworks/Internal PhotoTagger|master ⇒ |
Now the local Git repository for the PhotoTagger project has taken a snapshot of the current project and its configuration with a dependency on ImaggaRouter.
Now you need to add the ImaggaRouter project to the Xcode project for PhotoTagger.
In Finder, navigate within the PhotoTagger folder to Frameworks/Internal/ImaggaRouter and drag ImaggaRouter.xcodeproj into the root of the PhotoTagger Xcode project.
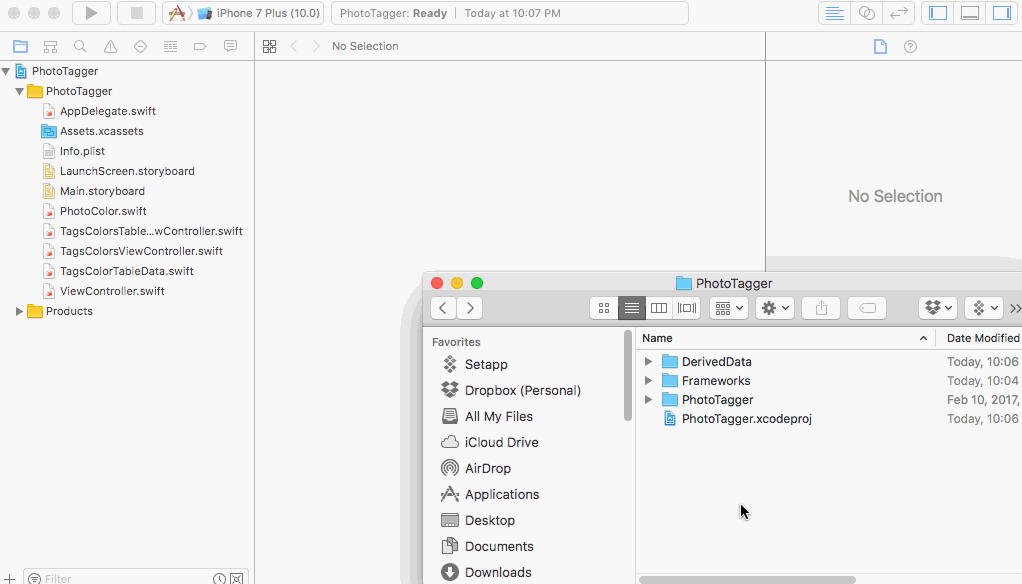
Adding the ImaggaRouter project to Xcode makes the code within it (although there’s none yet) available for use within the PhotoTagger project.
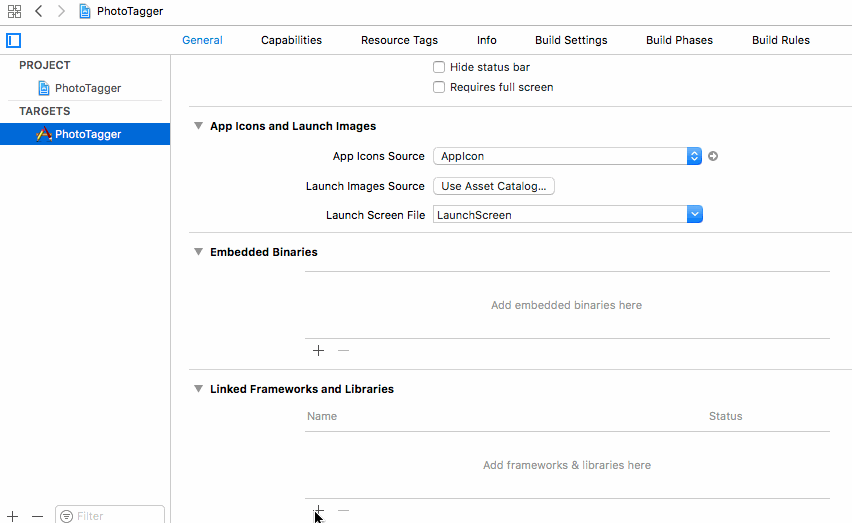
You also need to link the framework with the target. Do this in the General settings for the PhotoTagger target:
This will result in a change to PhotoTagger.xcodeproj/project.pbxproj which will need to be committed.
First, you can verify there is a local change that needs to be committed by executing git status.
PhotoTagger|master⚡ ⇒ git status On branch master Your branch is ahead of 'origin/master' by 1 commit. (use "git push" to publish your local commits) Changes not staged for commit: (use "git add <file>..." to update what will be committed) (use "git checkout -- <file>..." to discard changes in working directory) modified: PhotoTagger.xcodeproj/project.pbxproj no changes added to commit (use "git add" and/or "git commit -a") |
To commit the change, execute git add . followed by git commit -m "Add ImaggaRouter project to Xcode":
PhotoTagger|master⚡ ⇒ git add . PhotoTagger|master⚡ ⇒ git commit -m "Add ImaggaRouter project to Xcode" [master 911dee9] Add ImaggaRouter project to Xcode 1 file changed, 36 insertions(+) PhotoTagger|master ⇒ |
Congratulations – you’ve successfully connected two private projects via Git Submodules! :]
Pulling Changes From A Private Dependency
When sharing code between projects, you’ll often find you need to make changes to the shared code, and also make those changes available to other projects. Git Submodules make this easy.
You’ll add some code to ImaggaRouter, commit those changes, then use those changes from PhotoTagger.
Add a new Swift file to the ImaggaRouter project and name it ImaggaRouter.swift. Replace its contents with:
import Foundation public enum ImaggaRouter { static let baseURLPath = "http://api.imagga.com/v1" static let authenticationToken = "Basic xxx" case content case tags(String) case colors(String) var path: String { switch self { case .content: return "/content" case .tags: return "/tagging" case .colors: return "/colors" } } } |
This code begins to flesh out a routing enum for interacting with the Imagga API.
Now add and commit these changes to the ImaggaRouter repository. From the root of the ImaggaRouter project, execute git commit -am "Add initial ImaggaRouter path":
ImaggaRouter|master⚡ ⇒ git commit -am "Add initial ImaggaRouter path" [master 1523f10] Add initial ImaggaRouter path 3 files changed, 33 insertions(+) rewrite ImaggaRouter.xcodeproj/project.xcworkspace/xcuserdata/andyo.xcuserdatad/UserInterfaceState.xcuserstate (80%) create mode 100644 ImaggaRouter/ImaggaRouter.swift ImaggaRouter|master ⇒ |
This adds the most recent changes (adding an initial implementation of ImaggaRouter.swift) to the local Git repository.
git commit instead of using git add X; git commit -m "Message". The -am will add all untracked files and any files with changes to the commit. So in this case you had multiple files with changes instead of doing multiple git add X you managed to perform the functionality in one line.Now the private dependency has been updated with changes, it’s time to pull those into PhotoTagger.
From the root of the PhotoTagger project, navigate into the submodule folder for ImaggaRouter, and execute git pull:
ImaggaRouter|master ⇒ pwd /Users/andyo/Documents/AndyRW/PhotoTagger/Frameworks/Internal/ImaggaRouter ImaggaRouter|master ⇒ git pull Updating 1523f10..4d9e71a Fast-forward .gitignore | 66 ++++++++++++++++++++++++++++++++++++++++++++++++++++++++++++++++++ ImaggaRouter.xcodeproj/project.xcworkspace/xcuserdata/andyo.xcuserdatad/UserInterfaceState.xcuserstate | Bin 9652 -> 9771 bytes 2 files changed, 66 insertions(+) ImaggaRouter|master ⇒ |
This retrieves the latest changes from the submodule. You can verify this by opening ImaggaRouter.swift and taking a peek through for the changes you just made.
The submodule is maintained as a a separate Git repository within the main project’s folder hierarchy. This is useful to know because all the same Git commands can be used to inspect that repository as well.
For example, from the submodule folder Frameworks/Internal/ImaggaRouter, execute git log to look at the commits for the submodule. Since you just updated it, the latest commit should be as you would expect:
commit 1523f10dda29649d5ee281e7f1a6dedff5a8779f
Author: Andy Obusek <andyo@xyz.com>
Date:   Mon Feb 13 20:08:29 2017 -0500

    Add initial ImaggaRouter path

... cut ... |
And just to observe the differences, that this really is a separate repository, navigate back to the root folder of PhotoTagger and execute git log:
ImaggaRouter|master ⇒ cd ../../..
PhotoTagger|master⚡ ⇒ pwd
/Users/andyo/Documents/AndyRW/PhotoTagger
PhotoTagger|master⚡ ⇒ git log
commit 7303c65cc0f18174cb4846f6abe5cbfb57e17607
Author: Andy Obusek <andyo@aweber.com>
Date:   Mon Feb 13 20:24:13 2017 -0500

Add ImaggaRouter project to Xcode |
Notice how the latest commit message is different? That’s one indication you’re in a different Git repository.
While you’re in the root folder of PhotoTagger, execute git status:
PhotoTagger|master⚡ ⇒ git status On branch master Changes not staged for commit: (use "git add <file>..." to update what will be committed) (use "git checkout -- <file>..." to discard changes in working directory) modified: Frameworks/Internal/ImaggaRouter (new commits) Submodules changed but not updated: * Frameworks/Internal/ImaggaRouter 1523f10...4d9e71a (1): > Add initial ImaggaRouter path no changes added to commit (use "git add" and/or "git commit -a") PhotoTagger|master⚡ ⇒ |
This status message tells you three important pieces of information:
- There are local changes that haven’t been committed.
- There have been updates to the ImaggaRouter submodule.
- There are specific commits that are new in the ImaggaRouter submodule.
To finally integrate the latest changes to ImaggaRouter, execute git add . followed by git commit -m "Update ImaggaRouter":
PhotoTagger|master⚡ ⇒ git add . PhotoTagger|master⚡ ⇒ git commit -m "Update ImaggaRouter dquote> " [master ad3b7f8] Update ImaggaRouter 1 file changed, 1 insertion(+), 1 deletion(-) PhotoTagger|master ⇒ |
You’ve now made changes to the private dependency and pulled those changes back into the main project. You’re getting pretty good at this! :]
Working With A 3rd Party Dependency
Now you’ll add Alamofire as a dependency to your project as a Git Submodule. Alamofire is a popular networking library for iOS.
Adding Alamofire
Adding an external dependency is very similar to a private dependency. The only difference from what you’ve done so far is you’ll add Alamofire via its public github.com repository.
From the root folder of PhotoTagger, create a new folder under Frameworks named “External” by executing the following:
mkdir Frameworks/External |
Then execute git submodule add https://github.com/Alamofire/Alamofire.git Frameworks/External/Alamofire:
PhotoTagger|master ⇒ mkdir Frameworks/External PhotoTagger|master ⇒ git submodule add https://github.com/Alamofire/Alamofire.git Frameworks/External/Alamofire Cloning into '/Users/andyo/Documents/AndyRW/PhotoTagger/Frameworks/External/Alamofire'... remote: Counting objects: 5924, done. remote: Total 5924 (delta 0), reused 0 (delta 0), pack-reused 5924 Receiving objects: 100% (5924/5924), 2.51 MiB | 4.86 MiB/s, done. Resolving deltas: 100% (3937/3937), done. PhotoTagger|master⚡ ⇒ |
This adds Alamofire as a Git Submodule into a new sub-folder named Frameworks/External/Alamofire.
Execute git status to reveal the local repository’s knowledge of Alamofire needs to be committed.
To do this, execute git add . followed by git commit -m 'Add Alamofire':
PhotoTagger|master⚡ ⇒ git status On branch master Changes to be committed: (use "git reset HEAD <file>..." to unstage) modified: .gitmodules new file: Frameworks/External/Alamofire Submodule changes to be committed: * Frameworks/External/Alamofire 0000000...fa3c6d0 (660): > [PR #1927] Fixed bug in README example code around default headers. PhotoTagger|master⚡ ⇒ git add . PhotoTagger|master⚡ ⇒ git commit -m "Add Alamofire" [master 1b3e30b] Add Alamofire 2 files changed, 4 insertions(+) create mode 160000 Frameworks/External/Alamofire PhotoTagger|master ⇒ |
Now you can add Alamofire.xcodeproj to your project.
Just as before with ImaggaRouter.xcodeproj, drag Alamofire.xcodeproj into your project.

To use Alamofire, you need to add the framework as a Linked Framework to the main PhotoTagger target’s General settings.

Adding an external dependency was as simple as that!
Sometimes you come across the need to remove a dependency. Maybe it’s an old library you’re ready to stop using. Or maybe you just wanted to try out that latest and greatest new hot framework. Either way, it’s good to know how to remove dependencies that have been added as Git Submodules.
Removing A Dependency
To remove a Git Submodule dependency, first add ReactiveSwift as a dependency. Execute git submodule add https://github.com/ReactiveCocoa/ReactiveSwift.git Frameworks/External/ReactiveSwift:
PhotoTagger|master ⇒ git submodule add https://github.com/ReactiveCocoa/ReactiveSwift.git Frameworks/External/ReactiveSwift Cloning into '/Users/andyo/Documents/AndyRW/PhotoTagger/Frameworks/External/ReactiveSwift'... remote: Counting objects: 42067, done. remote: Compressing objects: 100% (37/37), done. remote: Total 42067 (delta 14), reused 0 (delta 0), pack-reused 42028 Receiving objects: 100% (42067/42067), 15.24 MiB | 5.37 MiB/s, done. Resolving deltas: 100% (25836/25836), done. PhotoTagger|master⚡ ⇒ |
Now you’ve added ReactiveSwift as a dependency. You can verify this by listing the contents of the folder where it resides by executing ls Frameworks/External/ReactiveSwift :
PhotoTagger|master⚡ ⇒ ls Frameworks/External/ReactiveSwift CONTRIBUTING.md Cartfile Cartfile.private Cartfile.resolved Carthage CodeOfConduct.md Documentation LICENSE.md Logo Package.swift README.md ReactiveSwift-UIExamples.playground ReactiveSwift.playground ReactiveSwift.podspec ReactiveSwift.xcodeproj ReactiveSwift.xcworkspace Sources Tests script PhotoTagger|master⚡ ⇒ |
To properly remove the dependency after it’s been committed, you’ll need to commit the dependency. Once again, execute git add . followed by git commit -m "Add ReactiveSwift dependency":
PhotoTagger|master⚡ ⇒ git add . PhotoTagger|master⚡ ⇒ git commit -m "Add ReactiveSwift" [master ebb1a7c] Add ReactiveSwift 2 files changed, 4 insertions(+) create mode 160000 Frameworks/External/ReactiveSwift |
Now that ReactiveSwift was added as a dependency, you’re going to remove it. To remove it, type: git rm Frameworks/External/ReactiveSwift:
PhotoTagger|master ⇒ git rm Frameworks/External/ReactiveSwift rm 'Frameworks/External/ReactiveSwift' PhotoTagger|master⚡ ⇒ |
This marks ReactiveSwift to be entirely removed from your local repository and filesystem. At this point, the changes need to be committed. Execute git commit -m "Remove ReactiveSwift":
PhotoTagger|master⚡ ⇒ git commit -m "Remove ReactiveSwift" [master 557bab4] Remove ReactiveSwift 2 files changed, 4 deletions(-) delete mode 160000 Frameworks/External/ReactiveSwift PhotoTagger|master ⇒ |
And boom, it’s gone!
Wiring It All Up
You’ll need a bit of additional code before you can tag images in your app. Rather than copy and paste a bunch of code without much explanation, the final section of this tutorial provides a wired-up solution for you. You’ll just need a secret token from the Imagga API — read on to learn how to get one.
The Imagga API
You might recognize this API from our Alamofire Tutorial: Getting Started.
Imagga is an image recognition Platform-as-a-Service that provides image tagging APIs for developers and businesses to build scalable, image-intensive cloud apps. You can play around with a demo of their auto-tagging service here.
You’ll need to create a free developer account with Imagga for this tutorial. Imagga requires an authorization header in each HTTP request, so only people with an account can use their services.
Go to https://imagga.com/auth/signup/hacker and fill out the form. After you create your account, check out the dashboard:

Listed down in the Authorization section is your secret token. Copy it into the clipboard.
Note: Make sure you copy the whole secret token. Scroll over to the right and verify you copied everything.
In the final project, open ImaggaRouter.swift and use your secret token as the value for authenticationToken.
Where to Go From Here?
Normally a final, completed version of the tutorial project is made available to you for download. Since this tutorial is made up of two projects connected via a Git Submodule, it seemed more fitting to provide the final project via a Git remote on github.com.
In addition, there’s one common task left to be explained that goes right along with this: cloning a repository that has a submodule dependency.
Bonus: Cloning A Repository With Submodules
To access the final and completed compilation of ImaggaRouter and PhotoTagger, you’ll clone a remote repository where they are stored. To do this, execute git clone --recursive https://github.com/raywenderlich/PhotoTagger.git:
temp|⇒ git clone --recursive https://github.com/raywenderlich/PhotoTagger.git Cloning into 'PhotoTagger'... remote: Counting objects: 40, done. remote: Compressing objects: 100% (24/24), done. remote: Total 40 (delta 11), reused 40 (delta 11), pack-reused 0 Unpacking objects: 100% (40/40), done. Submodule 'Frameworks/External/Alamofire' (https://github.com/Alamofire/Alamofire.git) registered for path 'Frameworks/External/Alamofire' Submodule 'Frameworks/Internal/ImaggaRouter' (https://github.com/obuseme/ImaggaRouter.git) registered for path 'Frameworks/Internal/ImaggaRouter' Cloning into '/Users/andyo/Downloads/temp/temp/PhotoTagger/Frameworks/External/Alamofire'... Cloning into '/Users/andyo/Downloads/temp/temp/PhotoTagger/Frameworks/Internal/ImaggaRouter'... Submodule path 'Frameworks/External/Alamofire': checked out 'c9c9d091b308a57ff9a744be4f2537ac9c5b4c0b' Submodule path 'Frameworks/Internal/ImaggaRouter': checked out 'ceb7415e46829c8a732fdd084b42d95c2f453fa2' Submodule 'Frameworks/External/Alamofire' (https://github.com/Alamofire/Alamofire.git) registered for path 'Frameworks/Internal/ImaggaRouter/Frameworks/External/Alamofire' Cloning into '/Users/andyo/Downloads/temp/temp/PhotoTagger/Frameworks/Internal/ImaggaRouter/Frameworks/External/Alamofire'... Submodule path 'Frameworks/Internal/ImaggaRouter/Frameworks/External/Alamofire': checked out 'c9c9d091b308a57ff9a744be4f2537ac9c5b4c0b' temp|⇒ |
The --recursive flag on the normal git clone command ensures all submodules are cloned at the same time. You can see in the output Alamofire and ImaggaRouter are also cloned. By default, this doesn’t happen with git clone.
To try these out together, you’ll need to connect the ImaggaRouter project as a dependency of the PhotoTagger project, and add your own secret token for the Imagga API.
For further reading, check out the following:
- Git Submodules in the Pro Git book
- How to Use CocoaPods with Swift
- Carthage Tutorial: Getting Started
I hope you enjoyed this tutorial, and if you have any questions or comments, please join the forum discussion below!
The post Dependency Management Using Git Submodules appeared first on Ray Wenderlich.