 When you create a Core Data app, you design an initial data model for your app. However, after you ship your app inevitably you’ll want to make changes to your data model. What do you do then? You don’t want to break the app for existing users!
You can’t predict the future, but with Core Data, you can migrate toward the future with every new release of your app. The migration process will update data created with a previous version of the data model to match the current data model.
This Core Data migrations tutorial discusses the many aspects of Core Data migrations by walking you through the evolution of a note-taking app’s data model. You’ll start with a simple app with only a single entity in its data model.
Let the great migration begin!
- If you are a beginner to Swift, check out our Swift Tutorial: A Quick Start.
- If you are a beginner to Core Data, check out our Your First Core Data App Using Swift tutorial.
When to Migrate
When is a migration necessary? The easiest answer to this common question is “when you need to make changes to the data model.”
However, there are some cases in which you can avoid a migration. If an app is using Core Data merely as an offline cache, when you update the app, you can simply delete and rebuild the data store. This is only possible if the source of truth for your user’s data isn’t in the data store. In all other cases, you’ll need to safeguard your user’s data.
That said, any time it’s impossible to implement a design change or feature request without changing the data model, you’ll need to create a new version of the data model and provide a migration path.
The Migration Process
When you initialize a Core Data stack, one of the steps involved is adding a store to the persistent store coordinator. When you encounter this step, Core Data does a few things prior to adding the store to the coordinator.
First, Core Data analyzes the store’s model version. Next, it compares this version to the coordinator’s configured data model. If the store’s model version and the coordinator’s model version don’t match, Core Data will perform a migration, when enabled.
To start the migration process, Core Data needs the original data model and the destination model. It uses these two versions to load or create a mapping model for the migration, which it uses to convert data in the original store to data that it can store in the new store. Once Core Data determines the mapping model, the migration process can start in earnest.
Migrations happen in three steps:
- First, Core Data copies over all the objects from one data store to the next.
- Next, Core Data connects and relates all the objects according to the relationship mapping.
- Finally, enforce any data validations in the destination model. Core Data disables destination model validations during the data copy.
You might ask, “If something goes wrong, what happens to the original source data store?” With nearly all types of Core Data migrations, nothing happens to the original store unless the migration completes without error. Only when a migration is successful, will Core Data remove the original data store.
Types of Migrations
In my own experience, I’ve found there are a few more migration variants than the simple distinction between lightweight and heavyweight. Below, I’ve provided the more subtle variants of migration names, but these names are not official categories by any means. You’ll start with the least complex form of migration and end with the most complex form.
Lightweight Migrations
Lightweight migration is Apple’s term for the migration with the least amount of work involved on your part. This happens automatically when you use NSPersistentContainer, or you have to set some flags when building your own Core Data stack. There are some limitations on how much you can change the data model, but because of the small amount of work required to enable this option, it’s the ideal setting.
Manual Migrations
Manual migrations involve a little more work on your part. You’ll need to specify how to map the old set of data onto the new set, but you get the benefit of a more explicit mapping model file to configure. Setting up a mapping model in Xcode is much like setting up a data model, with similar GUI tools and some automation.
Custom Manual Migrations
This is level 3 on the migration complexity index. You’ll still use a mapping model, but complement that with custom code to specify custom transformation logic on data. Custom entity transformation logic involves creating an NSEntityMigrationPolicy subclass and performing custom transformations there.
Fully Manual Migrations
Fully manual migrations are for those times when even specifying custom transformation logic isn’t enough to fully migrate data from one model version to another. Custom version detection logic and custom handling of the migration process are necessary.
Getting Started
Download the starter project for this tutorial here.
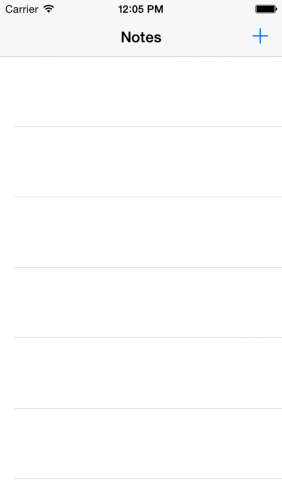
Build and run the app UnCloudNotes in the iPhone simulator. You’ll see an empty list of notes:
Tap the plus (+) button in the top-right corner to add a new note. Add a title (there is default text in the note body to make the process faster) and tap Create to save the new note to the data store. Repeat this a few times so you have some sample data to migrate.
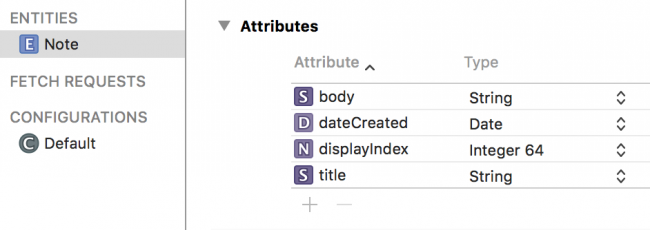
Back in Xcode, open the UnCloudNotesDatamodel.xcdatamodeld file to show the entity modeling tool in Xcode. The data model is simple — just one entity, a Note, with a few attributes.
You’re going to add a new feature to the app; the ability to attach a photo to a note. The data model doesn’t have any place to persist this kind of information, so you’ll need to add a place in the data model to hold onto the photo. But you already added a few test notes in the app. How can you change the model without breaking the existing notes?
It’s time for your first migration!
A Lightweight Migration
In Xcode, select the UnCloudNotes data model file if you haven’t already selected it. This will show you the Entity Modeler in the main work area. Next, open the Editor menu and select Add Model Version…. Name the new version UnCloudNotesDataModel v2 and ensure UnCloudNotesDataModel is selected in the Based on model field. Xcode will now create a copy of the data model.
This step will create a second version of the data model, but you still need to tell Xcode to use the new version as the current model. If you forget this step, selecting the top level UnCloudNotesDataModel.xcdatamodeld file will perform any changes you make to the original model file. You can override this behavior by selecting an individual model version, but it’s still a good idea to make sure you don’t accidentally modify the original file.
In order to perform any migration, you want to keep the original model file as it is, and make changes to an entirely new model file.
In the File Inspector pane on the right, there is a selection menu toward the bottom called Model Version. Change that selection to match the name of the new data model, UnCloudNotesDataModel v2:
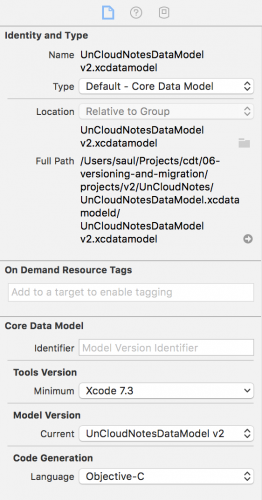
Once you’ve made that change, notice in the project navigator the little green check mark icon has moved from the previous data model to the v2 data model:

Core Data will try to first connect the persistent store with the ticked model version when setting up the stack. If a store file was found, and it isn’t compatible with this model file, a migration will be triggered. The older version is there to support migration. The current model is the one Core Data will ensure is loaded prior to attaching the rest of the stack for your use.
Make sure you have the v2 data model selected and add an image attribute to the Note entity. Set the attribute’s name to image and the attribute’s type to Transformable.
Since this attribute is going to contain the actual binary bits of the image, you’ll use a custom NSValueTransformer to convert from binary bits to a UIImage and back again. Just such a transformer has been provided for you in ImageTransformer. In the Value Transformer Name field in the Data Model Inspector on the right of the screen, enter ImageTransformer and enter UnCloudNotes in the Module field.

UnCloudNotes in this case) to allow the class loader to find the exact code you want to attach.
The new model is now ready for some code! Open Note.swift and add the following property below displayIndex:
@NSManaged var image: UIImage? |
Build and run the app. You’ll see your notes are still magically displayed! It turns out lightweight migrations are enabled by default. This means every time you create a new data model version, and it can be auto migrated, it will be. What a time saver!
Inferred Mapping Models
It just so happens Core Data can infer a mapping model in many cases when you enable the shouldInferMappingModelAutomatically flag on the NSPersistentStoreDescription. Core Data can automatically look at the differences in two data models and create a mapping model between them.
For entities and attributes that are identical between model versions, this is a straightforward data pass through mapping. For other changes, just follow a few simple rules for Core Data to create a mapping model.
In the new model, changes must fit an obvious migration pattern, such as:
- Deleting entities, attributes or relationships
- Renaming entities, attributes or relationships using the renamingIdentifier
- Adding a new, optional attribute
- Adding a new, required attribute with a default value
- Changing an optional attribute to non-optional and specifying a default value
- Changing a non-optional attribute to optional
- Changing the entity hierarchy
- Adding a new parent entity and moving attributes up or down the hierarchy
- Changing a relationship from to-one to to-many
- Changing a relationship from non-ordered to-many to ordered to-many (and vice versa)
As you see from this list, Core Data can detect, and more importantly, automatically react to, a wide variety of common changes between data models. As a rule of thumb, all migrations, if necessary, should start as lightweight migrations and only move to more complex mappings when the need arises.
As for the migration from UnCloudNotes to UnCloudNotes v2, the image property has a default value of nil since it’s an optional property. This means Core Data can easily migrate the old data store to a new one, since this change follows item 3 in the list of lightweight migration patterns.
Image Attachments
Now the data is migrated, you need to update the UI to allow image attachments to new notes. Luckily, most of this work has been done for you. :]
Open Main.storyboard and find the Create Note scene. Underneath, you’ll see the Create Note With Images scene that includes the interface to attach an image.
The Create Note scene is attached to a navigation controller with a root view controller relationship. Control-drag from the navigation controller to the Create Note With Images scene and select the root view controller relationship segue.
This will disconnect the old Create Note scene and connect the new, image-powered one instead:
Next, open AttachPhotoViewController.swift and add the following method to the UIImagePickerControllerDelegate extension:
func imagePickerController(_ picker: UIImagePickerController, didFinishPickingMediaWithInfo info: [String: Any]) { guard let note = note else { return } note.image = info[UIImagePickerControllerOriginalImage] as? UIImage _ = navigationController?.popViewController(animated: true) } |
This will populate the new image property of the note once the user selects an image from the standard image picker.
Next, open CreateNoteViewController.swift and replace viewDidAppear with the following:
override func viewDidAppear(_ animated: Bool) { super.viewDidAppear(animated) guard let image = note?.image else { titleField.becomeFirstResponder() return } attachedPhoto.image = image view.endEditing(true) } |
This will display the new image if the user has added one to the note.
Next, open NotesListViewController.swift and update tableView(_:cellForRowAt) with the following:
override func tableView(_ tableView: UITableView, cellForRowAt indexPath: IndexPath) -> UITableViewCell { let note = notes.object(at: indexPath) let cell: NoteTableViewCell if note.image == nil { cell = tableView.dequeueReusableCell( withIdentifier: "NoteCell", for: indexPath) as! NoteTableViewCell } else { cell = tableView.dequeueReusableCell( withIdentifier: "NoteCellWithImage", for: indexPath) as! NoteImageTableViewCell } cell.note = note return cell } |
This will dequeue the correct UITableViewCell subclass based on the note having an image present or not. Finally, open NoteImageTableViewCell.swift and add the following to updateNoteInfo(note:):
noteImage.image = note.image |
This will update the UIImageView inside the NoteImageTableViewCell with the image from the note.
Build and run, and choose to add a new note:
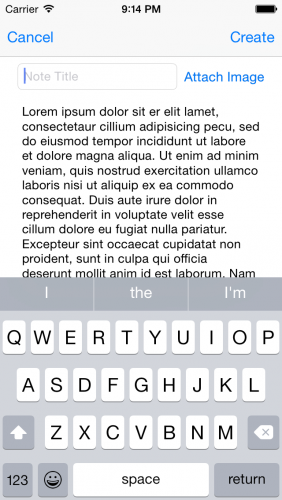
Tap the Attach Image button to add an image to the note. Choose an image from your simulated photo library and you’ll see it in your new note:

The app uses the standard UIImagePickerController to add photos as attachments to notes.
If you’re using a device, open AttachPhotoViewController.swift and set the sourceType attribute on the image picker controller to .camera to take photos with the device camera. The existing code uses the photo album, since there is no camera in the Simulator.
Where To Go From Here?
Here is the final example project from the above tutorial.
The full chapter in the Core Data by Tutorials book follows up this Core Data migrations tutorial with a series of more complex migrations. In the full book chapter, you’ll walk through creating a mapping model with entity and attribute mappings from one version to the next. You’ll also learn about custom migration policies, and how to migrate non-sequential data models.
I hope you enjoyed this Core Data migrations tutorial, and if you have any questions or comments, please join the discussion thread below!
 If you enjoyed this tutorial, you’d definitely enjoy our book Core Data by Tutorials.
The book goes into further detail on Core Data and is written for intermediate iOS developers who already know the basics of iOS and Swift development but want to learn how to leverage Core Data to persist data in their apps.
It’s been fully updated for Swift 3, iOS 10 and Xcode 8 — get it on the raywenderlich.com store today!
The post Lightweight Migrations in Core Data Tutorial appeared first on Ray Wenderlich.