
Picture this: You’re testing your latest and greatest shoot ‘em up. Enemies fly on screen as fast as your fingers can tap, then boom! A measly frame skip later and you’re nothing more than a pitiful pile of ash at the hands of some angry, bug-eyed Martian from Neptune!
In this scenario, you’re outnumbered 1000 to 1. There’s no need to give the Neptunians the upper hand with unexpected memory spikes. Sound familiar? Go ahead and pull up a chair and get up to speed on Object Pooling.
In this Unity tutorial, you’ll learn:
- All about object pooling
- How to pool a game object
- How to expand your object pool at runtime if necessary
- How to extend your object pool to accommodate different objects
By the end of this tutorial, you’ll have a generic script you can readily drop into a new game. Additionally, you’ll understand how to retrofit the same script for an existing game.
Prerequisites: You’ll need to be familiar with some basic C# and how to work within Unity’s development environment. If you need some assistance getting up to speed, check out the Unity tutorials on this site.
What is Object Pooling?
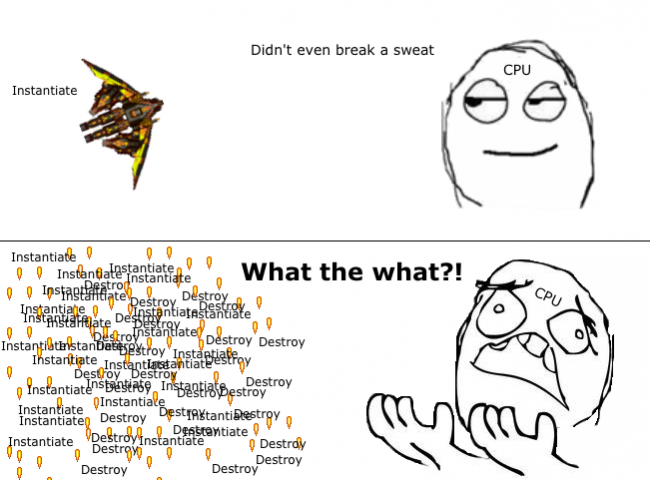
Instantiate() and Destroy() are useful and necessary methods during gameplay. Each generally requires minimal CPU time.
However, for objects created during gameplay that have a short lifespan and get destroyed in vast numbers per second, the CPU needs to allocate considerably more time.
Bullets are a great example of a GameObject that you might pool.
Additionally, Unity uses Garbage Collection to deallocate memory that’s no longer in use. Repeated calls to Destroy() frequently trigger this task, and it has a knack for slowing down CPUs and introducing pauses to gameplay.
This behavior is critical in resource-constrained environments such as mobile devices and web builds.
Object pooling is where you pre-instantiate all the objects you’ll need at any specific moment before gameplay — for instance, during a loading screen. Instead of creating new objects and destroying old ones during gameplay, your game reuses objects from a “pool”.

Getting Started
If you don’t already have Unity 5 or newer, download it from Unity’s website.
Download the starter project, unzip and open SuperRetroShooter_Starter project in Unity — it’s a pre-built vertical scroll shooter.
Note: Credit goes to Master484, Marcus, Luis Zuno and Skorpio for the medley of art assets from OpenGameArt. The royalty-free music was from the excellent Bensound.
Feel free to have a look at some of the scripts, such as Barrier; they are generic and useful, but their explanations are beyond the scope of this tutorial.
As you work through everything, it will be helpful to see what’s happening in your game’s Hierarchy during gameplay. Therefore, I recommend that you deselect Maximize on Play in the Game Tab’s toolbar.

Click the play button to see what you have. :]
Note how there are many PlayerBullet(Clone) objects instantiated in the Hierarchy when shooting. Once they hit an enemy or leave the screen, they are destroyed.
Making matters worse is the act of collecting those randomly dropped power-ups; they fill the game’s Hierarchy with bullet clones with just a few shots and destroy them all the very next second.

In its current state, Super Retro Shooter is a “bad memory citizen”, but you’ll be the hero that gets this shooter firing on all cylinders and using resources more scrupulously.
Time to Get Your Feet Wet
Click on the Game Controller GameObject in the Hierarchy. Since this object will persist in the Scene, you’ll add your object pooler script here.
In the Inspector, click the Add Component button, and select New C# Script. Give it the name ObjectPooler.
Double-click the new script to open it in MonoDevelop, and add the following code to the class:
public static ObjectPooler SharedInstance; void Awake() { SharedInstance = this; } |
Several scripts will need to access the object pool during gameplay, and public static instance allows other scripts to access it without getting a Component from a GameObject.
At the top of the script, add the following using statement:
using System.Collections.Generic; |
You’ll be using a generic list to store your pooled objects. This statement gives you access to generic data structures so that you can use the List class in your script.
Note: Generic? Nobody wants to be generic! Everybody wants to be special!
In a programming language like C#, generics allow you to write code that can be used by many different types while still enforcing type safety.
Typically, you use generics when working with collections. This approach allows you to have an array that only allows one type of object, preventing you from putting a dog inside a cat array, although that could be pretty funny. :]
Speaking of lists, add the object pool list and two new public variables:
public List<GameObject> pooledObjects; public GameObject objectToPool; public int amountToPool; |
The naming is fairly self-explanatory.
By using the Inspector in Unity, you’ll be able to specify a GameObject to pool and a number to pre-instantiate. You’ll do that in a minute.
Meanwhile, add this code to Start():
pooledObjects = new List<GameObject>(); for (int i = 0; i < amountToPool; i++) { GameObject obj = (GameObject)Instantiate(objectToPool); obj.SetActive(false); pooledObjects.Add(obj); } |
The for loop will instantiate the objectToPool GameObject the specified number of times in numberToPool. Then the GameObjects are set to an inactive state before adding them to the pooledObjects list.
Go back to Unity and add the Player Bullet Prefab to the objectToPool variable in the Inspector. In the numberToPool field, type 20.

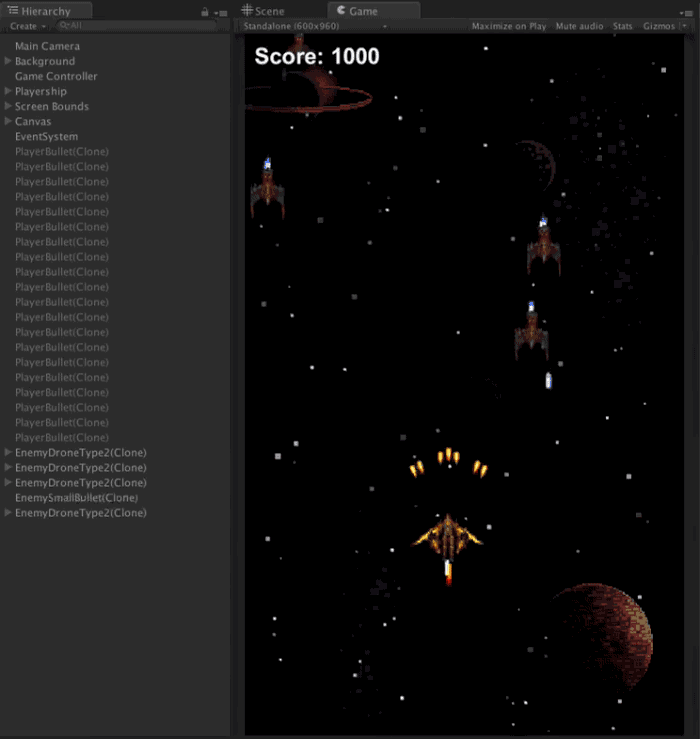
Run the game again. You should now have 20 pre-instantiated bullets in the Scene with nowhere to go.
![Well done! You now have an object pool :]](http://koenig-media.raywenderlich.com/uploads/2016/06/ScreenCap1-208x500.png)
Well done! You now have an object pool. :]
Dipping into the Object Pool
Jump back into the ObjectPooler script and add the following new method:
public GameObject GetPooledObject() { //1 for (int i = 0; i < pooledObjects.Count; i++) { //2 if (!pooledObjects[i].activeInHierarchy) { return pooledObjects[i]; } } //3 return null; } |
The first thing to note is that this method has a GameObject return type as opposed to void. This means a script can ask for a pooled object from GetPooledObject and it’ll be able to return a GameObject in response. Here’s what else is happening here:
- This method uses a
forloop to iterate through yourpooledObjectslist. - You check to see if the item in your list is not currently active in the Scene. If it is, the loop moves to the next object in the list. If not, you exit the method and hand the inactive object to the method that called
GetPooledObject. - If there are currently no inactive objects, you exit the method and return nothing.
Now that you can ask the pool for an object, you need to replace your bullet instantiation and destroy code to use the object pool instead.
Player bullets are instantiated in two methods in the ShipController script.
Shoot()ActivateScatterShotTurret()
Open the ShipController script in MonoDevelop and find the lines:
Instantiate(playerBullet, turret.transform.position, turret.transform.rotation); |
Replace both instances with the following code:
GameObject bullet = ObjectPooler.SharedInstance.GetPooledObject(); if (bullet != null) { bullet.transform.position = turret.transform.position; bullet.transform.rotation = turret.transform.rotation; bullet.SetActive(true); } |
Note: Make sure this replacement is made in both Shoot() and ActivateScatterShotTurret() before you continue.
Previously, the methods iterated through the list of currently active turrets on the player’s ship (depending on power-ups) and instantiated a player bullet at the turrets position and rotation.
You’ve set it to ask your ObjectPooler script for a pooled object. If one is available, it’s set to the position and rotation of the turret as before, and then set to active to rain down fire upon your enemy. :]
Get Back in the Pool
Instead of destroying bullets when they’re no longer required, you’ll return them to the pool.
There are two methods that destroy unneeded player bullets:
OnTriggerExit2D()in theDestroyByBoundaryscript removes the bullet when it leaves the screen.OnTriggerEnter2D()in theEnemyDroneControllerscript removes the bullet when it collides and destroys an enemy.
Open DestroyByBoundary in MonoDevelop and replace the contents of the OnTriggerExit2D method with this code:
if (other.gameObject.tag == "Boundary") { if (gameObject.tag == "Player Bullet") { gameObject.SetActive(false); } else { Destroy(gameObject); } } |
Here’s a generic script that you can attach to any number of objects that need removal when they leave the screen. You check if the object that triggered the collision has the Player Bullet tag — if yes, you set the object to inactive instead of destroying it.
Similarly, open EnemyDroneController and find OnTriggerEnter2D(). Replace Destroy(other.gameObject); with this line of code:
other.gameObject.SetActive(false); |
Wait!
Yes, I can see you hovering over the play button. After all that coding, you must be itching to check out your new object pooler. Don’t do it yet! There is one more script to modify — don’t worry, it’s a tiny change. :]
Open the BasicMovement script in MonoDevelop and rename the Start Method to OnEnable.
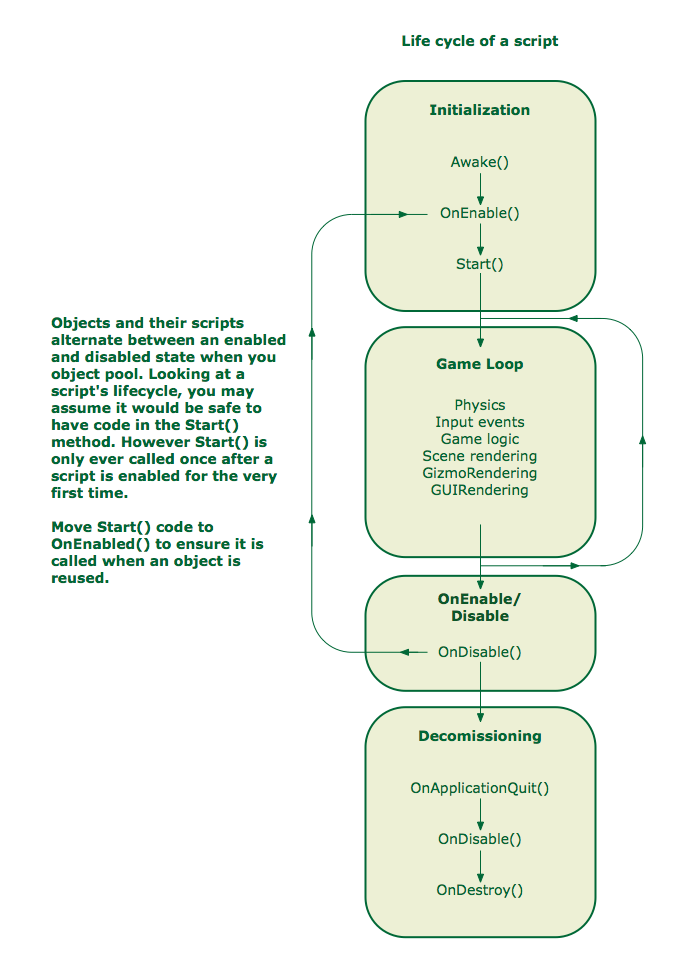
One gotcha when you use the object pool pattern is remembering that the lifecycle of your pooled object is a little different.
Ok, now click play. :]
As you shoot, the inactive player bullet clones in the Hierarchy become active. Then they elegantly return to an inactive state as they leave the screen or destroy an enemy drone.
Well Done!

But what happens when you collect all those power-ups?
Running out of ammo eh?

As the game designer, you enjoy supreme powers, such as limiting players’ firepower to encourage a more focused strategy as opposed to just shooting everything and everywhere.
You could exert your powers to do this by adjusting the number of bullets you initially pool to get this effect.
Conversely, you can also go in the other direction pool a huge number of bullets to cover all power-up scenarios. That begs a question: why would you pool 100 bullets for the elusive ultimate power-up when 90 percent of the time 50 bullets is adequate?
You would have 50 bullets in memory that you would only need rarely.

The Incredible Expanding Object Pool
Now you’ll modify the object pool so you can opt to increase the number of pooled objects at runtime if needed.
Open the ObjectPooler script in MonoDevelop and add this new public variable:
public bool shouldExpand = true; |
This code creates a checkbox in the Inspector to indicate whether it’s possible to increase the number of pooled objects.
In GetPooledObject(), replace the line return null; with the following code.
if (shouldExpand) { GameObject obj = (GameObject)Instantiate(objectToPool); obj.SetActive(false); pooledObjects.Add(obj); return obj; } else { return null; } |
If a player bullet is requested from the pool and no inactive ones can be found, this block checks to see it’s possible to expand the pool instead of exiting the method. If so, you instantiate a new bullet, set it to inactive, add it to the pool and return it to the method that requested it.
Click play in Unity and try it out. Grab some power-ups and go crazy. Your 20 bullet object pool will expand as needed.

Object Pool Party
Invariably, lots of bullets mean lots of enemies, lots of explosions, lots of enemy bullets and so on.
To prepare for the onslaught of madness, you’ll extend the object pooler so it handles multiple object types. You’ll take it a step further and will make it possible to configure each type individually from one place in the Inspector.
Add the following code above the ObjectPooler class:
[System.Serializable] public class ObjectPoolItem { } |
[System.Serializable] allows you to make instances of this class editable from within the Inspector.
Next, you need to move the variables objectToPool, amountToPool and shouldExpand into the new ObjectPoolItem class. Heads up: you’ll introduce some errors in the ObjectPooler class during the move, but you’ll fix those in a minute.
Update the ObjectPoolItem class so it looks like this:
[System.Serializable] public class ObjectPoolItem { public int amountToPool; public GameObject objectToPool; public bool shouldExpand; } |
Any instance of ObjectPoolItem can now specify its own data set and behavior.
Once you’ve added the above public variables, you need make sure to delete those variables from the ObjectPooler. Add the following to ObjectPooler:
public List<ObjectPoolItem> itemsToPool; |
This is new list variable that lets you hold the instances of ObjectPoolItem.
Next you need to adjust Start() of ObjectPooler to ensure all instances of ObjectPoolItem get onto your pool list. Amend Start() so it looks like the code below:
void Start () { pooledObjects = new List<GameObject>(); foreach (ObjectPoolItem item in itemsToPool) { for (int i = 0; i < item.amountToPool; i++) { GameObject obj = (GameObject)Instantiate(item.objectToPool); obj.SetActive(false); pooledObjects.Add(obj); } } } |
In here, you added a new foreach loop to iterate through all instances of ObjectPoolItem and add the appropriate objects to your object pool.
You might be wondering how to request a particular object from the object pool – sometimes you need a bullet and sometimes you need more Neptunians, you know?
Tweak the code in GetPooledObject so it matches the following:
public GameObject GetPooledObject(string tag) { for (int i = 0; i < pooledObjects.Count; i++) { if (!pooledObjects[i].activeInHierarchy && pooledObjects[i].tag == tag) { return pooledObjects[i]; } } foreach (ObjectPoolItem item in itemsToPool) { if (item.objectToPool.tag == tag) { if (item.shouldExpand) { GameObject obj = (GameObject)Instantiate(item.objectToPool); obj.SetActive(false); pooledObjects.Add(obj); return obj; } } } return null; } |
GetPooledObject now takes a string parameter so your game can request an object by its tag. The method will search the object pool for an inactive object that has a matching tag, and then it returns an eligible object.
Additionally, if it finds no appropriate object, it checks the relevant ObjectPoolItem instance by the tag to see if it’s possible to expand it.
Add the Tags
Get this working with bullets first, then you can add additional objects.
Reopen the ShipController script in MonoDevelop. In both Shoot() and ActivateScatterShotTurret(), look for the line:
GameObject bullet = ObjectPooler.SharedInstance.GetPooledObject(); |
Append the code so that it includes the Player Bullet tag parameter.
GameObject bullet = ObjectPooler.SharedInstance.GetPooledObject(“Player Bullet”); |
Return to Unity and click on the GameController object to open it in the Inspector.
Add one item to the new ItemsToPool list and populate it with 20 player bullets.

Click Play to make sure all that extra work changed nothing at all. :]
Good! Now you’re ready to add some new objects to your object pooler.
Change the size of ItemsToPool to three and add the two types of enemy ships. Configure the ItemsToPool instances as follows:
Element 1:
Object to Pool: EnemyDroneType1
Amount To Pool: 6
Should Expand: Unchecked
Element 2
Object to Pool: EnemyDroneType2
Amount to Pool: 6
Should Expand: Unchecked

As you did for the bullets, you need to change the instantiate and destroy methods for both types of ships.
The enemy drones are instantiated in the GameController script and destroyed in the EnemyDroneController script.
You’ve done this already, so the next few steps will go a little faster. :]
Open the GameController script. In SpawnEnemyWaves(), find the enemyType1 instantiation code:
Instantiate(enemyType1, spawnPosition, spawnRotation); |
And replace it with the following code:
GameObject enemy1 = ObjectPooler.SharedInstance.GetPooledObject("Enemy Ship 1"); if (enemy1 != null) { enemy1.transform.position = spawnPosition; enemy1.transform.rotation = spawnRotation; enemy1.SetActive(true); } |
Find this enemyType2 instantiation code:
Instantiate(enemyType2, spawnPosition, spawnRotation); |
Replace it with:
GameObject enemy2 = ObjectPooler.SharedInstance.GetPooledObject("Enemy Ship 2"); if (enemy2 != null) { enemy2.transform.position = spawnPosition; enemy2.transform.rotation = spawnRotation; enemy2.SetActive(true); } |
Finally, open the EnemyDroneController script. Currently, OnTriggerExit2D() just destroys the enemy ship when it leaves the screen. What a waste!
Find the line of code:
Destroy(gameObject); |
Replace it with the code below to ensure the enemy goes back to the object pool:
gameObject.SetActive(false); |
Similarly, in OnTriggerEnter2D(), the enemy is destroyed when it hits a player bullet. Again, find Destroy():
Destroy(gameObject); |
And replace it with the following:
gameObject.SetActive(false); |
Hit the play button and watch as all of your instantiated bullets and enemies change from inactive to active and back again as and when they appear on screen.

Elon Musk would be envious your reusable space ships!

Where to go From Here?
Thank you for taking the time to work through this tutorial. Here’s a link to the Completed Project.
In this tutorial, you retrofitted an existing game with object pooling to save your users’ CPUs from a near-certain overload and the associated consquences of frame skipping and battery burning.
You also got very comfortable jumping between scripts to connect all the pieces together.
If you want to learn more about object pooling, check out Unity’s live training on the subject.
I hope you found this tutorial useful! I’d love to know how it helped you develop something cool or take an app to the next level.
Feel free to share a link to your work in the comments. Questions, thoughts or improvements are welcome too! I look forward to chatting with you about object pooling, Unity and destroying all the aliens.
The post Object Pooling in Unity appeared first on Ray Wenderlich.