
Mission accomplished
Each app starts off the same way: a few screens, some buttons, and maybe a list or two. But as time goes on and the app grows, features start to creep their way in. Your clean data sources start to crumble under the pressure of deadlines and product managers. After a while, you’re left with the massive-view-controller ruins to maintain. Adopt IGListKit today to ease some of that burden!
IGListKit was created to make feature-creep and massive-view-controllers a thing of the past when working with UICollectionView. By creating lists with IGListKit, you can build apps with decoupled components, blazing-fast updates, and support for any type of data.
In this tutorial you will refactor a basic UICollectionView to use IGListKit, then extend the app and take it out of this world!
Getting Started
You are one of NASA’s top software engineers and on staff for the latest manned mission to Mars. The team already built the first version of the Marslink app which you can download here. After the project is downloaded, open Marslink.xcworkspace and run the app.

So far, the app simply shows a list of astronaut journal entries.
You’re tasked with adding features to this app whenever the crew needs new features. Familiarize yourself with the project by opening the Marslink\ViewControllers\ClassicFeedViewController.swift and having a look around. If you’ve ever worked with UICollectionView, what you see looks pretty standard:
ClassicFeedViewControlleris aUIViewControllersubclass that implementsUICollectionViewDataSourcein an extension.viewDidLoad()creates aUICollectionView, registers cells, sets the data source, and adds it to the view hierarchy.- The
loader.entriesarray powers the number of sections, each having just two cells (one for the date, one for the text). - Date cells are configured with the Sol date and text entry cells with
Journaltext. collectionView(_:layout:sizeForItemAt:)returns a fixed size for the date cell and calculates the size of the text for the actual entry.
Everything seems to be working just fine, but the mission director comes with some urgent product update requests:
An astronaut has just been stranded on Mars. We need you to add a weather module and realtime chat. You have 48 hours.

Engineers from JPL have some of these systems working, but they need your help putting them into the app.
If all the pressure of bringing an astronaut home wasn’t enough, NASA’s head designer just handed you requirements that each subsystem’s update in the app has to be animated, which means no reloadData().

How in the world are you supposed to integrate these new modules into an existing app and make all the transitions animated? The astronaut only has so many potatoes!
Introducing IGListKit
While UICollectionView is an incredibly powerful tool, with great power comes great responsibility. Keeping your data source and the view in sync is of utmost importance, and crashes are commonly caused by disconnects here.
IGListKit is a data-driven UICollectionView framework built by the team at Instagram. With this framework, you provide an array of objects to display in the UICollectionView. For each type of object an adapter creates something called a section controller, which has all of the details for creating cells.

IGListKit automatically diffs your objects and performs animated batch updates on the UICollectionView for whatever changed. This way you never have to write batch updates yourself, avoiding the issues listed under caveats here.
Replacing a UICollectionView with IGListKit
IGListKit does all the hard work of identifying changes in a collection and updating the appropriate rows with animation. It is also structured to easily handle multiple sections with different data and UI. With that in mind, it is a perfect solution to the new batch of requirements – so it’s time to start implementing it!
With Marslink.xcworkspace still open, right-click on the ViewControllers group and select New File…. Add a new Cocoa Touch Class that subclasses UIViewController named FeedViewController.
Open AppDelegate.swift and find the application(_:didFinishLaunchingWithOptions:) method. Find the line that pushes ClassicFeedViewController() onto the navigation controller and replace it with this:
nav.pushViewController(FeedViewController(), animated: false) |
FeedViewController is now the root view controller. You’ll keep ClassicFeedViewController.swift around for reference, but FeedViewController is where you’ll implement the new IGListKit powered collection view.
Build and run and make sure a new, empty view controller shows up on screen.

Adding the Journal loader
Open FeedViewController.swift and add the following property to the top of FeedViewController:
let loader = JournalEntryLoader() |
JournalEntryLoader is a class that loads hard-coded journal entries into an entries array.
Add the following to the bottom of viewDidLoad():
loader.loadLatest() |
loadLatest() is a JournalEntryLoader method that loads the latest journal entries.
Adding the collection view
It’s time to start adding some IGListKit specific controls to the view controller. Before you do, you need to import the framework. Near the top of FeedViewController.swift add a new import:
import IGListKit |
Note: The project in this tutorial uses CocoaPods to manage dependencies. IGListKit is written in Objective-C, so if you manually add it to your project you’ll need to #import into your bridging header
Add an initialized collectionView constant to the top of FeedViewController:
// 1 let collectionView: IGListCollectionView = { // 2 let view = IGListCollectionView(frame: CGRect.zero, collectionViewLayout: UICollectionViewFlowLayout()) // 3 view.backgroundColor = UIColor.black return view }() |
- IGListKit uses
IGListCollectionView, which is a subclass ofUICollectionView, which patches some functionality and prevents others. - This starts with a zero-sized rect since the view isn’t created yet. It uses the
UICollectionViewFlowLayoutjust as theClassicFeedViewControllerdid. - The background color is set to the NASA-approved black.
Add the following to the bottom of viewDidLoad():
view.addSubview(collectionView) |
This adds the new collectionView to the controller’s view.
Below viewDidLoad(), add the following:
override func viewDidLayoutSubviews() { super.viewDidLayoutSubviews() collectionView.frame = view.bounds } |
viewDidLayoutSubviews() is overridden, setting the collectionView frame to match the view bounds.
IGListAdapter and data source
With UICollectionView, you need some sort of data source that adopts UICollectionViewDataSource. Its job is to return section and row counts as well as individual cells.
In IGListKit, you use what is called an IGListAdapter to control the collection view. You still need a data source that conforms to the protocol IGListAdapterDataSource, but instead of returning counts and cells, you provide arrays and section controllers (more on this later).
For starters, in FeedViewController.swift add the following at the top of FeedViewController:
lazy var adapter: IGListAdapter = { return IGListAdapter(updater: IGListAdapterUpdater(), viewController: self, workingRangeSize: 0) }() |
This creates a lazily-initialized variable for the IGListAdapter. The initializer requires three parameters:
updateris an object conforming to IGListUpdatingDelegate, which handles row and section updates.IGListAdapterUpdateris a default implementation that is suitable for your usage.viewControlleris aUIViewControllerthat houses the adapter. This view controller is later used for navigating to other view controllers.workingRangeSizeis the size of the working range, which allows you to prepare content for sections just outside of the visible frame.
Add the following to the bottom of viewDidLoad():
adapter.collectionView = collectionView adapter.dataSource = self |
This connects the collectionView to the adapter. It also sets self as the dataSource for the adapter — resulting in a compiler error because you haven’t adopted the IGListAdapterDataSource protocol yet.
Fix this by extending FeedViewController to adopt IGListAdapterDataSource. Add the following to the bottom of the file:
extension FeedViewController: IGListAdapterDataSource { // 1 func objects(for listAdapter: IGListAdapter) -> [IGListDiffable] { return loader.entries } // 2 func listAdapter(_ listAdapter: IGListAdapter, sectionControllerFor object: Any) -> IGListSectionController { return IGListSectionController() } // 3 func emptyView(for listAdapter: IGListAdapter) -> UIView? { return nil } } |
FeedViewController now adheres to IGListAdapterDataSource and implements its three required methods:
objects(for:)returns an array of data objects that should show up in the collection view.loader.entriesis provided here as it contains the journal entries.- For each data object,
listAdapter(_:sectionControllerFor:)must return a new instance of a section controller. For now you’re returning a plainIGListSectionControllerto appease the compiler — in a moment, you’ll modify this to return a custom journal section controller. emptyView(for:)returns a view that should be displayed when the list is empty. NASA is in a bit of a time crunch, so they didn’t budget for this feature.
Creating Your First Section Controller
A section controller is an abstraction that, given a data object, configures and controls cells in a section of a collection view. This concept is similar to a view-model that exists to configure a view: the data object is the view-model, and the cells are the view. The section controller acts as the glue between the two.
In IGListKit, you create a new section controller for different types of data and behavior. JPL engineers already built a JournalEntry model, so you need to create a section controller that can handle it.
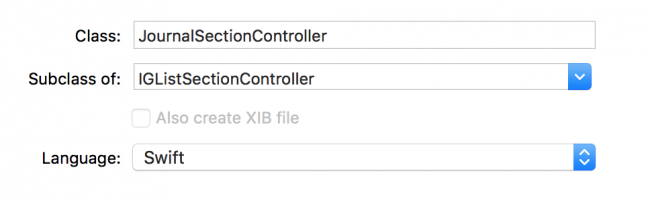
Right-click on the SectionControllers group and select New File…. Create a new Cocoa Touch Class named JournalSectionController that subclasses IGListSectionController.
Xcode doesn’t automatically import third-party frameworks, so in JournalSectionController.swift add a line at the top:
import IGListKit |
Add the following properties to the top of JournalSectionController:
var entry: JournalEntry! let solFormatter = SolFormatter() |
JournalEntry is a model class that you’ll use when implementing the data source. The SolFormatter class provides methods for converting dates to Sol format. You’ll need both shortly.
Also inside JournalSectionController, override init() by adding the following:
override init() { super.init() inset = UIEdgeInsets(top: 0, left: 0, bottom: 15, right: 0) } |
Without this, the cells between sections will butt up next to each other. This adds a 15 point padding to the bottom of JournalSectionController objects.
Your section controller needs to conform to the IGListSectionType protocol before it can be used in IGListKit. Start by adding the following extension to the bottom of the file:
extension JournalSectionController: IGListSectionType { func numberOfItems() -> Int { return 2 } func sizeForItem(at index: Int) -> CGSize { return .zero } func cellForItem(at index: Int) -> UICollectionViewCell { return UICollectionViewCell() } func didUpdate(to object: Any) { } func didSelectItem(at index: Int) {} } |
nil, you don’t have to suffer from silently missing methods or fight a dynamic runtime. It makes using IGListKit very hard to mess up.You’ve implemented the IGListSectionType protocol’s four required methods.
All methods are stubbed out implementations except for numberOfItems() — which simply returns 2 for a date and text pair. You can refer back to ClassicFeedViewController.swift and notice that you also return 2 items-per-section in collectionView(_:numberOfItemsInSection:). This is basically the same thing!
In didUpdate(to:), add the following:
entry = object as? JournalEntry |
didUpdate(to:) is used to hand an object to the section controller. Note this method will always be called before any of the cell protocol methods. Here, you save the passed object in entry.
Now that you have some data, you can start configuring your cells. Replace the placeholder implementation of cellForItem(at:) with the following:
// 1 let cellClass: AnyClass = index == 0 ? JournalEntryDateCell.self : JournalEntryCell.self // 2 let cell = collectionContext!.dequeueReusableCell(of: cellClass, for: self, at: index) // 3 if let cell = cell as? JournalEntryDateCell { cell.label.text = "SOL \(solFormatter.sols(fromDate: entry.date))" } else if let cell = cell as? JournalEntryCell { cell.label.text = entry.text } return cell |
cellForItem(at:) is called when a cell is required at a given index in the section. Here’s what you do inside:
- If the index is the first, use a
JournalEntryDateCellcell, otherwise useJournalEntryCellcell. Journal entries always appear with a date followed by the text. - Dequeue the cell from the reuse pool using the cell class, a section controller (
self), and the index. - Depending on the cell type, configure it using the
JournalEntryyou set earlier indidUpdate(to object:).
Next, replace the placeholder implementation of sizeForItem(at:) with the following:
// 1 guard let context = collectionContext, let entry = entry else { return .zero } // 2 let width = context.containerSize.width // 3 if index == 0 { return CGSize(width: width, height: 30) } else { return JournalEntryCell.cellSize(width: width, text: entry.text) } |
- The
collectionContextis aweakvariable and must be nullable. Though it should never benil, it’s best to take precaution, and Swiftguardmakes that simple! IGListCollectionContextis a context object with information about the adapter, collection view, and view controller that is using the section controller. Here you need to get the width of the container.- If the first index (a date cell), return a size as wide as the container and 30 points tall. Otherwise, use the cell helper method to calculate the dynamic text size of the cell.
The last method is didSelectItem(at:), which is called whenever someone taps on a cell. It’s a required method so you must add it, but since you aren’t doing anything when tapped just leave it empty.
This pattern of dequeuing a cell of different types, configuring, and returning sizes should all feel familiar if you’ve ever worked with UICollectionView before. Again, you can refer back to ClassicFeedViewController and see that a lot of this code is almost exactly the same!
Now you have a section controller that receives a JournalEntry object and returns and sizes two cells. It’s time to bring it all together.
Back in FeedViewController.swift, replace the contents of listAdapter(_:sectionControllerFor:) with the following:
return JournalSectionController() |
Your new journal section controller is now returned when this method is called.
Build and run the app. You should see a list of journal entries!

Adding Messages
JPL engineering is pretty happy that you got the refactor done so quickly, but they really need to establish communication with the stranded astronaut. They’ve asked you to integrate the messaging module ASAP.
Before you add any views, you first need the data.
Open FeedViewController.swift and add a new property to the top of FeedViewController:
let pathfinder = Pathfinder() |
PathFinder() acts as a messaging system, and represents the physical Pathfinder rover the astronaut dug up on Mars.
Locate objects(for:) in your IGListAdapterDataSource extension and modify the contents to match the following:
var items: [IGListDiffable] = pathfinder.messages items += loader.entries as [IGListDiffable] return items |
You might recall that this method provides data source objects to your IGListAdapter. The modification here adds the pathfinder.messages to items to provide messages for a new section controller.
IGListDiffable.Right-click the SectionControllers group to create a new IGListSectionController subclass named MessageSectionController. Add the IGListKit import to the top:
import IGListKit |
With the compiler happy, you’ll leave the rest unchanged for now.
Go back to FeedViewController.swift and update listAdapter(_:sectionControllerFor:) in the IGListAdapterDataSource extension so it appears as follows:
if object is Message { return MessageSectionController() } else { return JournalSectionController() } |
This now returns the new message section controller if the data object is of type Message.
The JPL team wants you to try and setup MessageSectionController with the following requirements:
- Receives a
Message - Has a bottom inset of 15 points
- Returns a single cell sized using the
MessageCell.cellSize(width:text:)function - Dequeues and configures a
MessageCellusing theMessageobject’stextanduser.namevalues to populate labels.
Give it a shot! The team drafted up a solution below in case you need help.
Once you’re ready, build and run to see messages integrated in the feed!

Weather on Mars
Our astronaut needs to be able to get the current weather in order to navigate around things like dust storms. JPL built another module that displays the current weather. There’s a lot of information in there though, so they ask that the weather only display when tapped.

Create one last section controller named WeatherSectionController. Start the class off with an initializer and some variables:
import IGListKit class WeatherSectionController: IGListSectionController { // 1 var weather: Weather! // 2 var expanded = false override init() { super.init() // 3 inset = UIEdgeInsets(top: 0, left: 0, bottom: 15, right: 0) } } |
- This section controller will receive a
Weatherobject indidUpdate(to:). expandedis aboolused to track if the weather section is expanded or not. It is initialized tofalseso the detail cells are initially collapsed.- Just like the other sections, use a bottom inset of 15 points.
Now add an extension to conform to IGListSectionType, as well as implementing three of the required methods:
extension WeatherSectionController: IGListSectionType { // 1 func didUpdate(to object: Any) { weather = object as? Weather } // 2 func numberOfItems() -> Int { return expanded ? 5 : 1 } // 3 func sizeForItem(at index: Int) -> CGSize { guard let context = collectionContext else { return .zero } let width = context.containerSize.width if index == 0 { return CGSize(width: width, height: 70) } else { return CGSize(width: width, height: 40) } } } |
- In
didUpdate(to:), you save the passedWeatherobject. - If the weather is expanded,
numberOfItems()returns five cells that will contain different pieces of weather data. If not expanded, a single cell is needed to display a placeholder. - The first cell should be a little larger than the others, as it displays a header. You don’t have to check the state of
expanded, because that header cell is shown as the first cell in either case.
Next you need to implement cellForItem(at:) to configure the weather cells. Here are some detailed requirements:
- The first cell should be of type
WeatherSummaryCell, others should beWeatherDetailCell. - Configure the weather summary cell with
cell.setExpanded(_:). - Configure four different weather detail cells with the following title and detail labels:
- “Sunrise” with
weather.sunrise - “Sunset” with
weather.sunset - “High” with
"\(weather.high) C" - “Low” with
"\(weather.low) C"
- “Sunrise” with
Give this cell setup a shot! The solution is just below.
The last thing that you need to do is toggle the section expanded and update the cells when tapped. Add the last required method in the IGListSectionType extension:
func didSelectItem(at index: Int) { expanded = !expanded collectionContext?.reload(self) } |
reload() reloads the entire section. You can use this whenever the contents or number of cells changes in the section controller. Since you toggle the expansion with numberOfItems(), this will add or remove cells based on the expanded flag.
Return to FeedViewController.swift, and add the following near the top of FeedViewController, with the other properties:
let wxScanner = WxScanner() |
WxScanner is the model object for weather conditions.
Next, update objects(for:) in the IGListAdapterDataSource extension so that it looks like the following:
// 1 var items: [IGListDiffable] = [wxScanner.currentWeather] items += loader.entries as [IGListDiffable] items += pathfinder.messages as [IGListDiffable] // 2 return items.sorted(by: { (left: Any, right: Any) -> Bool in if let left = left as? DateSortable, let right = right as? DateSortable { return left.date > right.date } return false }) |
You’ve updated the data source method to include currentWeather. Here are details on what this does:
- Adds the
currentWeatherto the items array. - All the data conforms to the
DataSortableprotocol, so this sorts it using that. This ensures data appears chronologically.
Finally, update listAdapter(_:sectionControllerFor:) to appear as follows:
if object is Message { return MessageSectionController() } else if object is Weather { return WeatherSectionController() } else { return JournalSectionController() } |
This now returns a WeatherSectionController when a Weather object appears.
Build and run again. You should see the new weather object at the top. Try tapping on the section to expand and contract it!

Performing Updates

JPL is ecstatic about your progress! While you were working, the director of NASA coordinated a rescue operation for the astronaut, requiring him to launch and intercept with another ship! It’s going to be a complicated launch, so he will have to liftoff at precisely the right time.
JPL engineering extended the messaging module with realtime chat and are asking you to integrate it.
Open FeedViewController.swift and add the following lines to the end of viewDidLoad():
pathfinder.delegate = self pathfinder.connect() |
The Pathfinder module is all patched up with realtime support. All you need to do is connect to the unit and respond to delegate events.
Add the following extension to the bottom of the file:
extension FeedViewController: PathfinderDelegate { func pathfinderDidUpdateMessages(pathfinder: Pathfinder) { adapter.performUpdates(animated: true) } } |
FeedViewController now conforms to PathfinderDelegate. The single method performUpdates(animated:completion:) tells the IGListAdapter to ask its data source for new objects and then update the UI. This handles objects that are deleted, updated, moved, or inserted.
Build and run to see the captain’s messages updating! All you had to do was add one single method for IGListKit to figure out what has changed in the data source and animate the changes when new data arrives.

All you need to do now is transmit the latest build to the astronaut and he’ll be coming home. A job well done!
Where To Go From here?
You can download the finished project here.
Aside from bringing a stranded astronaut home, you’ve learned a lot about the basic features of IGListKit: section controllers, adapters, and how to bring them all together. There are other important features in IGListKit like supplementary views and display events.
You can read and watch more about the origin of IGListKit at Instagram from a talk published by Realm. This talk covers a lot of the common UICollectionView problems that apps see as they get bigger.
If you’re interested in helping contribute to IGListKit, the team set up starter-task tags on Github for an easy way to get started.
The post IGListKit Tutorial: Better UICollectionViews appeared first on Ray Wenderlich.