
Take a look at a few different OAuth 2.0 libraries, and find out how to integrate them into an app.
It’s likely that you’ve bumped into OAuth 2.0 and the different families of flows while building apps to share content with your favorite social network (Facebook, Twitter, etc) or with your enterprise OAuth 2.0 server — even if you weren’t aware of what was going on under the hood. But do you know how to hook up to your service using OAuth 2.0 in an iOS app?
In this tutorial, you’ll work on a selfie-sharing app named Incognito as you learn how to use the AeroGear OAuth2 and OAuthSwift open source OAuth 2.0 libraries to share your selfies on Google Drive.
Getting Started
Download the Incognito starter project. The starter project uses CocoaPods to fetch AeroGear dependencies and contains everything you need, including generated pods and xcworkspace directories.
Open Incognito.xcworkspace in Xcode. The project is based on a standard Xcode Single View Application template, with a single storyboard which contains a single view controller ViewController.swift. All UI actions are already handled in ViewController.swift.
Build and run your project to see what the app looks like:

The app lets you pick your best selfie and add some accessories to the image. Did you recognize me behind my disguise? :]
Note: To add photos in the simulator, simply go to the home screen using Cmd + Shift + H and drag and drop your images onto the simulator.
The missing part in the app is adding the ability to share on Google Drive using two different OAuth 2.0 libraries.
Mission impossible? Nope, it’s nothing you can’t handle! :]
Instead of boring you with an introduction to the RFC6749 OAuth2 specification, let me tell you a story…
Explaining the Need for OAuth 2.0
On Monday morning, Bob, our mobile nerd bumps into Alice, another friendly geek, in front of the coffee machine. Bob seems busy, carrying a heavy bunch of documents: his boss wants him to delve into the OAuth 2.0 specification for the Incognito app.
Put any two developers in a coffee room and soon they’ll chat about geeky things, of course. Bob asks Alice:
“…what problem are we trying to solve with OAuth 2.0?”
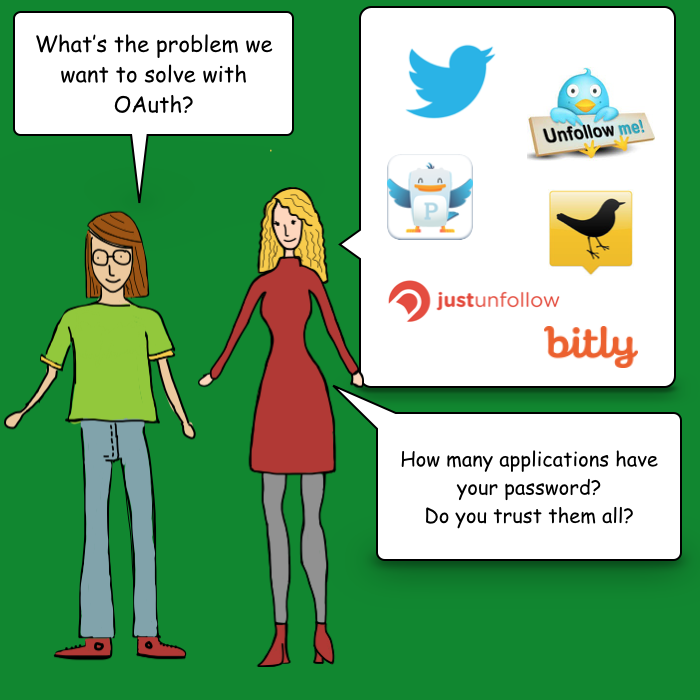
On one side, you have services in the form of APIs, such as the Twitter API, which you can use to get a list of followers or Tweets. Those APIs handle your confidential data, which is protected by a login and password.
On the other side, you have apps that consume those services. Those apps need to access your data, but do you want to trust all of them with your credentials? Maybe — but maybe not.
This brings up the concept of delegated access. OAuth2 lets users grant third-party apps access to their web resources, without sharing their passwords, through a security object known as an access token. It’s impossible to obtain the password from the access token, since your password is kept safe inside the main service. If an app wants to connect to the service, it must get its own access token. Access tokens can then be revoked if you ever want to revoke access to just that app.
OAuth 2.0 works with the following four actors:
- authorization server: responsible for authentication and authorization — it provides the access token.
- resource server: in charge of serving up resources if a valid token is provided.
- resource owner: the owner of the data — that is, the end user of Incognito.
- client: the Incognito mobile app.
The OAuth 2.0 specification describes the interactions between these actors as grant flows.
The specification details four different grant flows that can be grouped into two different families:
- 3-legged flows: the end user needs to grant permission in these cases. The implicit grant is for browser-based apps that aren’t capable of keeping tokens secure. The authorization code grant, which generates an access token and optionally a refresh token, is for clients capable of keeping tokens secure. Such clients include mobile apps which have somewhere secure they can store the token, such as in the keychain on iOS.
- 2-legged flows: the credentials are given to the app. The key difference here is that the resource owner inputs the credentials directly into the client. An example of where you see this in practice is when accessing many APIs, e.g. Parse, as a developer and put your key in your app.
You’ll use your existing Google Drive account and upload your Incognito selfies there. This is a good case for implementation of the 3-legged authorization code grant.
The Authorization Dance
Although using open source libraries hides most of the sticky details of the OAuth 2.0 protocol from you, knowing its basic inner workings will help you get the configuration right.
Here are the steps involved in the authorization code grant dance:
Step 0: Registration
Your application needs to be registered with the service you want to access. In your case, for Incognito, that’s Google Drive. Don’t worry, the following section will explain how to do that.
Step 1: Authorization Code
The dance begins when Incognito sends a request for an authorization code to the third-party service that includes:
- client ID: Provided during service registration. Defines which app is talking to the service.
- redirect URI: Where the user should be redirected after entering their credentials into the service, and granting permission.
- scope: Used to tell the service what level of permission the app should have.
The app then switches to the web browser. Once the user logs in, the Google authorization server displays a grant page: “Incognito would like to access your photos: Allow/Deny”. When the end user clicks “Allow”, the server redirects to the Incognito app using the redirect URI and sends an authorization code to the app.

Step 2: Exchange Code for Token
The authorization code is only temporary; therefore the OAuth 2.0 library has to exchange this temporary code for a proper access token, and optionally, a refresh token.
Step 3: Get Resources
Using the access token, Incognito can access protected resources on the server — that is, the resources the end-user granted access to. Your upload is free to proceed.
Ready to see this in action? First, you need to register with the OAuth 2.0 provider: Google.
Registering With your OAuth 2.0 Provider
If you don’t have a Google account, go create one now. It’s OK; I’ll wait for you. :]
Open https://console.developer.google.com in your browser; you’ll be prompted to authenticate with Google.
Click Create Project and name your new project Incognito:

Next, you need to enable the Drive API.
Click Library in left menu and search for Google Drive API and select it. On the next screen, click Enable:

Now you need to create new credentials to access your Drive accounts from the app.
Select Credentials in left menu and from the blue Create Credentials drop down, select OAuth client ID.

Then click Configure consent screen and in the screen that appears, fill out the following information:
- Email address: Select your email address
- Product name: Incognito
- Homepage URL: http://www.raywenderlich.com

Click Save and you’ll return to the Client ID screen. Select select iOS and enter com.raywenderlich.Incognito as your Bundle ID.
The authorization server will use the bundle id entered above as the redirect URI.

Finally, click Create. A popup with the Client ID appears, just click Ok.
The important parameter needed for later is the Client ID. You can grab it anytime by clicking Credentials in the left menu and picking your client ID from the OAuth ID list.

Now that you’ve registered with Google, you’re ready to start your OAuth 2.0 implementation using the first OAuth 2.0 library: AeroGear with an external browser.
Authenticating with AeroGear and External Browsers
Open ViewController.swift and add the following imports to the top of the file:
import AeroGearHttp
import AeroGearOAuth2
Now, add the following instance variable inside the ViewController class:
private let http = Http(baseURL: "https://www.googleapis.com")
You’ll use this instance of Http, which comes from the AeroGearHttp library, to perform HTTP requests.
Still in ViewController.swift, find the empty share(_:) method and add the following code to it:
//1
let googleConfig = GoogleConfig(
  clientId: "YOUR_GOOGLE_CLIENT_ID",
  scopes:["https://www.googleapis.com/auth/drive"])

//2
let gdModule = AccountManager.addGoogleAccount(config: googleConfig)
//3
http.authzModule = gdModule
//4
let multipartData = MultiPartData(data: snapshot(),
  name: "image",
  filename: "incognito_photo",
  mimeType: "image/jpg")
let multipartArray =  ["file": multipartData]
//5
http.request(method: .post, path: "/upload/drive/v2/files",  parameters: multipartArray) {
  (response, error) in
  if (error != nil) {
    self.presentAlert("Error", message: error!.localizedDescription)
  } else {
    self.presentAlert("Success", message: "Successfully uploaded!")
  }
}
Here’s what’s going on in the method above:
- Create a configuration. You’ll need to replace
YOUR_GOOGLE_CLIENT_IDabove with the Client ID from your Google Console to use the correct authorization configuration. At initialisation you also define the scope of the grant request. In the case of Incognito, you need access to the Drive API. - You then instantiate an OAuth2 module via
AccountManagerutility methods. - Next you inject the OAuth2 module into the HTTP object, which links the HTTP object to the authorization module.
- Then you create a multi-part data object to encapsulate the information you wish to send to the server.
- Finally, you use a simple HTTP call in to upload the photo. The library checks that an OAuth2 module is plugged into HTTP and makes the appropriate call for you. This will result in one of the following outcomes:
- start the authorization code grant if no access token exists.
- refresh the access token if needed.
- if all tokens are available, simply run the POST call.
Build and run your app; select an image, add an overlay of your choosing, then tap the Share button. Enter your Google credentials if you’re prompted; if you’ve logged in before, your credentials may be cached. You’ll be redirected to the grant page. Tap Accept and…
Boom — you receive the Safari Cannot Open Page error message. :[ What’s up with that?

Once you tap Accept, the Google OAuth site redirects you to com.raywenderlich.Incognito://[some url]. Therefore, you’ll need to enable your app to open this URL scheme.
Note: Safari stores your authentication response in a cookie on the simulator, so you won’t be prompted again to authenticate. To clear these cookies in the simulator, go to Hardware\Erase All Content and Settings.
Configuring the URL Scheme
To allow your user to be re-directed back to Incognito, you’ll needs to associate a custom URL scheme with your app.
Go to the Incognito\Supporting Files group in Xcode and find Info.plist. Right click on it and choose Open As\Source Code.
Add the following to the bottom of the plist, right before the closing </dict> tag:
<key>CFBundleURLTypes</key>
<array>
    <dict>
        <key>CFBundleURLSchemes</key>
        <array>
            <string>com.raywenderlich.Incognito</string>
        </array>
    </dict>
</array>
The scheme is the first part of a URL. In web pages, for example, the scheme is usually http or https. iOS apps can specify their own custom URL schemes, such as com.raywenderlich.Incognito://doStuff. The important point is to choose a custom scheme that it unique among all apps installed on your users’ devices.
The OAuth 2.0 dance uses your custom URL scheme to re-enter the application from which the request came. Custom schemes, like any URL, can have parameters. In this case, the authorization code is contained in the code parameter. The OAuth 2.0 library will extract the authorization code from the URL and pass it in the next request in exchange for the access token.
You’ll need to implement a method in Incognito’s AppDelegate class for the app to respond when it’s launched via a custom URL scheme.
Open AppDelegate.swift and add the following import statement to the top of the file:
import AeroGearOAuth2
Next, implement application(_:open:options) as shown below:
func application(_ app: UIApplication,
                 open url: URL,
                 options: [UIApplicationOpenURLOptionsKey : Any] = [:]) -> Bool {

  let notification = Notification(name: Notification.Name(AGAppLaunchedWithURLNotification),
                                  object:nil,
                                  userInfo:[UIApplicationLaunchOptionsKey.url:url])
  NotificationCenter.default.post(notification)
  return true
}
This method simply creates an Notification containing the URL used to open the app. The AeroGearOAuth2 library listens for the notification and calls the completionHandler of the POST method you invoked above.
Build and run your project again, take a snazzy selfie and dress it up. Click the share button, authenticate yourself, and lo and behold:

You can download the finished Incognito AeroGear project from this section if you wish.
Switching context to an external browser during the OAuth 2.0 authentication step is a bit clunky. There must be a more streamlined approach…
Using Embedded Safari View
Embedded Safari web views make for a more user-friendly experience. This can be achieved by using a SFSafariViewController rather than switching to the Safari app. From a security point of view, it’s a less-secure approach since your app’s code sits between the login form and the provider. Your app could use Javascript to access the credentials of the user as they type them. However, this could be an acceptable option if your end users trust your app to be secure.

You’ll revisit the share method using the OAuthSwift library, but this time, you’ll implement OAuth 2.0 using an embedded Safari view.
OAuthSwift with Embedded Safari View
You’re going to start again with a different project. So close the existing Xcode workspace, download this version of the Incognito starter project, and open the project in Xcode using the Incognito.xcworkspace file.
Build and run the project; things should look pretty familiar.
As before, you first need to import the OAuthSwift library included in the project.
Open ViewController.swift and add the following import to the top of the file:
import OAuthSwift
Still in ViewController.swift, add the following code to share():
//1
let oauthswift = OAuth2Swift(
  consumerKey:    "YOUR_GOOGLE_DRIVE_CLIENT_ID",
  consumerSecret: "",		// No secret required
  authorizeUrl:   "https://accounts.google.com/o/oauth2/auth",
  accessTokenUrl: "https://accounts.google.com/o/oauth2/token",
  responseType:   "code"
)

oauthswift.allowMissingStateCheck = true
//2
oauthswift.authorizeURLHandler = SafariURLHandler(viewController: self, oauthSwift: oauthswift)

guard let rwURL = URL(string: "com.raywenderlich.Incognito:/oauth2Callback") else { return }

//3
oauthswift.authorize(withCallbackURL: rwURL, scope: "https://www.googleapis.com/auth/drive", state: "", success: {
  (credential, response, parameters) in
  oauthswift.client.postImage("https://www.googleapis.com/upload/drive/v2/files",
    parameters: parameters,
    image: self.snapshot(),
    success: {
      //4
      (response) in
      if let _ = try? JSONSerialization.jsonObject(with: response.data, options: []) {
        self.presentAlert("Success", message: "Successfully uploaded!")
      }
    },
    failure: {
      (error) in
      self.presentAlert("Error", message: error.localizedDescription)
    })
}, failure: { (error) in
  self.presentAlert("Error", message: error.localizedDescription)
})
Here’s what’s going on in the code above:
- You first create the
OAuth2Swiftthat will handle the OAuth dance for you. Don’t forget to replaceYOUR_GOOGLE_CLIENT_IDwith the client id from the Google console. - Then initiatize the
authorizeURLHandlerto aSafariURLHandlerwhich will automatically handle displaying and dismissing aSFSafariViewController. - Next, request authorization via the
oauthswiftinstance. Thescopeparameter indicates that you are requesting access to the Drive API. - If authorization is granted, you can go ahead and upload the image.
Configuring URL Handling
Just as in the previous project, this version of Incognito has been set up to accept a custom URL scheme; all you need to do is implement the code to handle the custom URL.
Open AppDelegate.swift and add the following import:
import OAuthSwift
Then, implement application(_:open:options) as shown below:
func application(_ app: UIApplication,
                 open url: URL,
                 options: [UIApplicationOpenURLOptionsKey : Any] = [:]) -> Bool {

  OAuthSwift.handle(url: url)
  return true
}
Unlike AeroGearOAuth2, OAuthSwift uses a class method to handle parsing the returned URL. However, if you inspect the handle(_) method, you’ll see that it simply sends a Notification, just like AeroGearOAuth2 required you to do!
Build and run your project; note that when the authentication form appears, it’s not displayed within the Safari app, and no app switching happens. As well, the authentication form is presented each time you run the app since no web cookies are stored in your app by default.
Using a SFSafariViewController to authenticate with Google looks more streamlined, for sure! :]
You can download the final Incognito OAuthSwift project here.
More About Tokens
One thing you haven’t looked at is how to store those precious access and refresh tokens which you receive as part of the OAuth 2.0 dance. Where do you store them? How do you refresh an expired access token? Can you revoke your grants?
Storing tokens
The best way to store them is…on your Keychain, of course! :]

This is the default strategy adopted by OAuth2Session (from AeroGear).
If you would like to read more about the keychain, then I recommend reading our other tutorials on the subject.
Refreshing and Revoking
To refresh the access token, you simply make an HTTP call to an access token endpoint and pass the refresh token as parameter.
For example, AeroGear leaves it up to the library to determine whether the token is still valid.
OAuth 2.0 defines a different specification for revoking tokens, which makes it possible to either revoke tokens separately or all at once. Most providers revoke both access and refresh tokens at the same time.
Where To Go From Here?
You covered two open source libraries which implement OAuth 2.0 – and hopefully learned a little more about how OAuth 2.0 works under the hood.
Maybe now you’re ready to read the OAuth 2.0 specification, RFC6749?! OK, maybe not. It’s a beast of a document! But at least you now understand the fundamentals and how it relates to your app.
I hope you use one of them in your app. Once you’ve picked your favorite open source OAuth 2.0 library, contributing to it is essential. If you notice a bug, report an issue. If you know how to fix it, even better – propose a pull request.
If you have any comments or questions about this tutorial, please join the forum discussion below!
The post OAuth 2.0 with Swift Tutorial appeared first on Ray Wenderlich.