
Since the time that the iOS and Android platforms exploded onto the scene a decade ago, cross-platform development has been a goal across the mobile development world. The ability to write one app for both iOS and Android can save significant time and effort for your company and team.
There have been various tools released for cross-platform development over the years, including web-based tools such as PhoneGap from Adobe, powerful frameworks such as Xamarin from Microsoft, and newer tools such as React Native from Facebook. Each toolset has pros and cons and they have met with varying degrees of success in the mobile industry.
A more recent framework to enter the cross-platform arena is Flutter from Google, which was announced in February at Mobile World Congress 2018 to be entering a beta phase. Flutter features fast development cycles, fast UI rendering and unique UI design, and native app performance on both platforms.
Introduction to Flutter
Flutter apps are written using the Dart programming language, also originally from Google and now an ECMA standard. Dart shares many of the same features as other modern languages such as Kotlin and Swift, and can be transcompiled into JavaScript code.
As a cross-platform framework, Flutter most closely resembles React Native, as Flutter allows for a reactive and declarative style of programming. Unlike React Native, however, Flutter does not need to use a Javascript bridge, which can improve app startup times and overall performance. Dart achieves this by using Ahead-Of-Time or AOT compilation.
Another unique aspect of Dart is that it can also use Just-In-Time or JIT compilation. JIT compilation with Flutter improves the development workflow by allowing hot reload capability to refresh the UI during development without the need for an entirely new build.
As you’ll see in this tutorial, the Flutter framework is heavily built around the idea of widgets. In Flutter, widgets are not used just for the views of your app, but also for entire screens and even for the app itself.
In addition to cross-platform iOS and Android development, learning Flutter will also give you a head start on developing for the Fuschia platform, which is currently an experimental operating system in development at Google. Fuschia is thought by many to be a potential future replacement for Android.
In this tutorial, you’ll build a Flutter app that queries the GitHub API for team members in a GitHub organization and displays the team member information in a scrollable list:

You can develop the app while using either the iOS Simulator, the Android emulator, or both!
In building out the app, you’ll learn the following about Flutter:
- Setting up your development environment
- Creating a new project
- Hot reload
- Importing files and packages
- Using widgets and creating your own
- Making network calls
- Showing items in a list
- Adding an app theme
You’ll also learn a little Dart along the way! :]
Getting Started
Flutter development can be done on macOS, Linux, or Windows. While you can use any editor with the Flutter toolchain, there are IDE plugins for both Android Studio and Visual Studio Code that can ease the development cycle. We’ll use VS Code for this tutorial.
Setting up your development environment
Instructions for setting up your development machine with the Flutter framework can be found here. The basic steps vary by platform, but for the most part are:
- Clone the Flutter git repository
- Add the Flutter bin directory to your path
- Run the
flutter doctorcommand, which installs the Flutter framework including Dart and alerts you to any missing dependencies - Install missing dependencies
- Set up your IDE with a Flutter plugin/extension
- Test drive an app
The instructions provided on the Flutter web site are very well done and allow you to easily setup a development environment on your platform of choice. The remainder of this tutorial assumes you’ve setup VSCode for Flutter development, and that you’ve addressed any issues found by flutter doctor.
You should also be able to follow along pretty well if you’re using Android Studio. You’ll also need to be running either the iOS Simulator, an Android emulator, or have a provisioned iOS device or an Android device setup for development.
Note: For building and testing on the iOS Simulator or an iOS device, you’ll need to be using macOS with Xcode installed.
Creating a new project
In VS Code with the Flutter extension installed, open the command pallatte by choosing View > Command Palette… or hitting Cmd-Shift-P on macOS or Ctrl-Shift-P on Linux or Windows. Enter Flutter: New Project into the pallette and hit return.

Enter the name ghflutter for the project and hit return. Select a folder to store the project in, and then wait for Flutter to setup the project in VS Code. When the project is ready, the file main.dart will be opened in your editor.
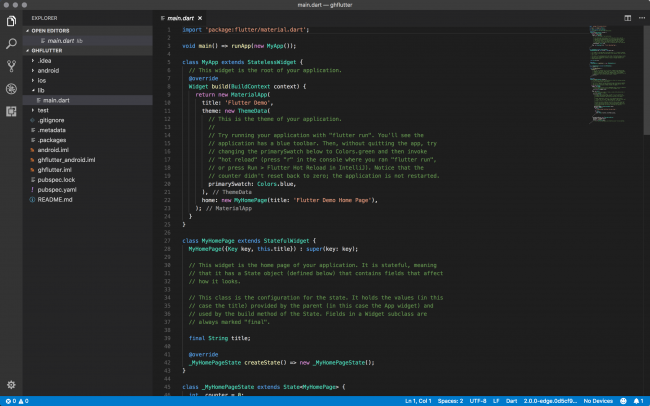
In VS Code, you see a panel on the left-hand-side that shows your project structure. There are folders for iOS and Android, as well as a lib folder that contains main.dart and will have code that applies to both platforms. You’ll be working in the lib folder only in this tutorial.
Replace the code in main.dart with the following:
import 'package:flutter/material.dart';

void main() => runApp(new GHFlutterApp());


class GHFlutterApp extends StatelessWidget {
  @override
  Widget build(BuildContext context) {
    return new MaterialApp(
      title: 'GHFlutter',
      home: new Scaffold(
        appBar: new AppBar(
          title: new Text('GHFlutter'),
        ),
        body: new Center(
          child: new Text('GHFlutter'),
        ),
      ),
    );
  }
}
The main() function near the top uses the => operator for a single line function to run the app. You have one class for the app named GHFlutterApp.
You see here that your app itself is a StatelessWidget. Most entities in a Flutter app are widgets, either stateless or stateful. You override the widget build() method to create your app widget. You’re using the MaterialApp widget that provides a number of components needed for apps following Material Design.
For this getting started tutorial, remove the test file widget_test.dart in the test folder from the project by selecting it and hitting the Delete key.
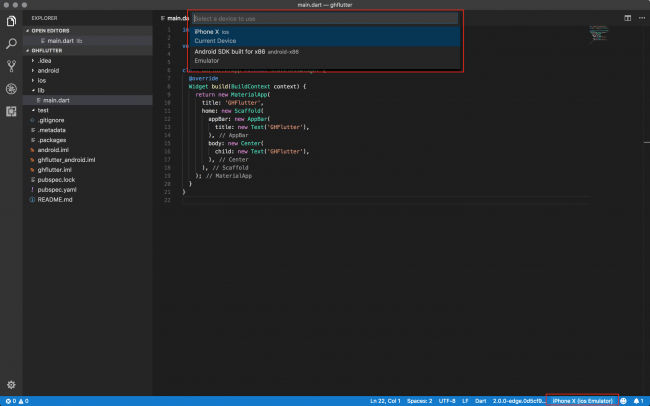
If you’re on macOS, startup the iOS simulator. You can also use an Android emulator on macOS, Linux, or Windows. If both the iOS Simulator and an Android emulator are running, you can switch between them using the menu in the bottom right of the VS Code window:
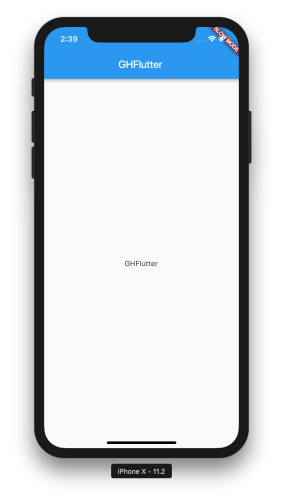
Build and run the project by hitting F5 or choosing Debug > Start Debugging. You’ll see the Debug Console open and, if running on iOS, you’ll see Xcode being used to build the project. If running on Android, you’ll see Gradle being invoked to do the build.
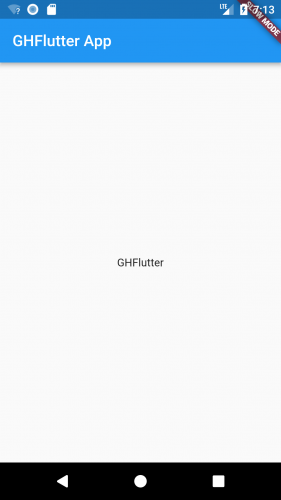
Here is the app running in the iOS simulator:
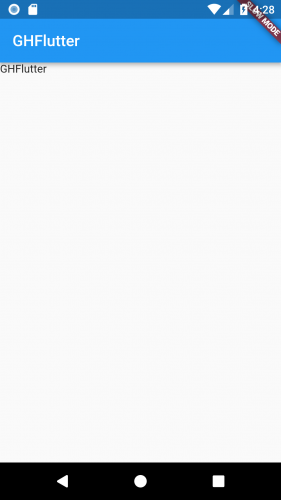
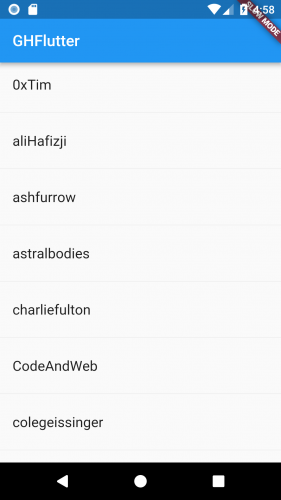
And, running in the Android emulator:
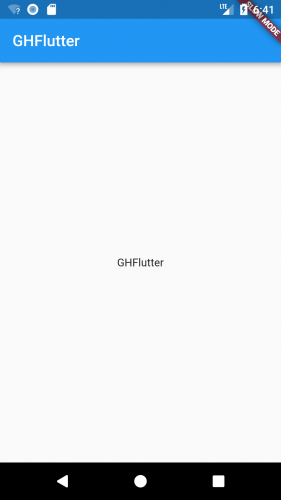
The slow mode banner you see indicates that the app is running in a debug mode.
You can stop the running app by clicking the stop button on the right of the toolbar at the top of the VS Code window:
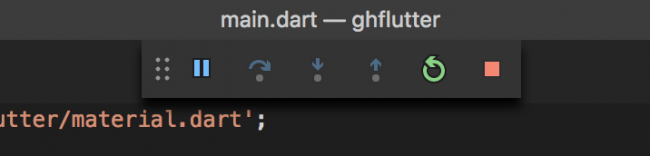
You can get back to the project view by clicking the icon in the upper left of VS Code or choosing View > Explorer.
Hot Reload
One of the best aspects of Flutter development is being able to hot reload your app as you make changes. This is similar to something like Android Studio’s Instant Run.
Build and run the app so that it’s running on the Simulator or an emulator:

Now, without stopping the running app, change the app bar string to something else:
appBar: new AppBar(
  title: new Text('GHFlutter App'),
),
Now click the hot reload button on the toolbar:
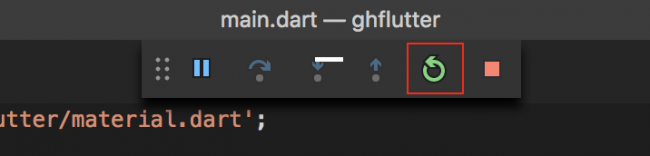
Within a second or two you should see the change reflected in the running app:
Since Flutter is in beta, the hot reload feature may not always work, but overall it’s a great time saver when you’re building out your UI.
Importing a File
Rather than keep all your Dart code in the single main.dart file, you’ll want to be able to import code from other classes you create. You’ll see an example now for importing strings, which will help when you need to localize your user-facing strings.
Create a file named strings.dart in the lib folder by right-clicking on lib and choosing New File:

Add the following class to the new file:
class Strings {
  static String appTitle = "GHFlutter";
}
Add the following import to the top of main.dart
import 'strings.dart';
Update the app title as follows:
return new MaterialApp(
  title: Strings.appTitle,
Change the other strings to use the new strings file so that the GHFlutterApp class looks as follows:
class GHFlutterApp extends StatelessWidget {
  @override
  Widget build(BuildContext context) {
    return new MaterialApp(
      title: Strings.appTitle,
      home: new Scaffold(
        appBar: new AppBar(
          title: new Text(Strings.appTitle),
        ),
        body: new Center(
          child: new Text(Strings.appTitle),
        ),
      ),
    );
  }
}
Build and run the app by hitting F5, and you should see no change, but you’re now using strings from the strings file.
Widgets
Almost every element of your Flutter app is a widget. Widgets are designed to be immutable, since using immutable widgets helps keep the app UI lightweight.
There are two fundamental types of widgets you will use:
- Stateless: widgets that depend only upon their own configuration info, such as a static image in an image view.
- Stateful: widgets that need to maintain dynamic information and do so by interacting with a State object.
Both stateless and stateful widgets redraw in Flutter apps on every frame, the difference being that the stateful widgets delegate their configuration to a State object.
To get started with making your own widgets, create a new class at the bottom of main.dart:
class GHFlutter extends StatefulWidget {
  @override
  createState() => new GHFlutterState();
}
You’ve made a StatefulWidget subclass and you’re overriding the createState() method to create its state object. Now add a GHFlutterState class above GHFlutter:
class GHFlutterState extends State<GHFlutter> {
}
GHFlutterState extends State with a parameter of GHFlutter.
The primary task you have when making a new widget is to override the build() method that gets called when the widget is rendered to the screen.
Add a build() override to GHFlutterState:
@override
Widget build(BuildContext context) {
}
Fill out build() as follows:
@override
Widget build(BuildContext context) {
  return new Scaffold (
    appBar: new AppBar(
      title: new Text(Strings.appTitle),
    ),
    body: new Text(Strings.appTitle),
  );
}
A Scaffold is a container for material design widgets. It acts as the root of a widget hierarchy. You’ve added an AppBar and a body to the scaffold, and each contains a Text widget.
Update GHFlutterApp so that it uses your new GHFlutter widget as its home attribute, instead of building a scaffold of it’s own:
class GHFlutterApp extends StatelessWidget {
  @override
  Widget build(BuildContext context) {
    return new MaterialApp(
      title: Strings.appTitle,
      home: new GHFlutter(),
    );
  }
}
Build and run the app, and you’ll see the new widget in action:
Not much has changed yet, but now you’re setup to build out the new widget.
Making Network Calls
Earlier you imported your own strings.dart file into the project. You can similarly import other packages that are part of the Flutter framework and Dart.
For example, you’ll now use packages available in the framework to make an HTTP network call and also parse the resulting response JSON into Dart objects. Add two new imports at the top of main.dart:
import 'dart:convert';

import 'package:flutter/material.dart';
import 'package:http/http.dart' as http;

import 'strings.dart';
You’ll see an indicator on the imports that are currently unused.
Dart apps are single-threaded, but Dart provides support for running code on other threads as well as running asynchrounous code that does not block the UI thread using an async/await pattern.
You’re going to make an asynchronous network call to retrieve a list of GitHub teams members. Add an empty list as a property at the top of GHFlutterState, and also add a property to hold a text style:
var _members = [];

final _biggerFont = const TextStyle(fontSize: 18.0);
The underscores at the beginning of the names make the members of the class private.
To make the asynchronous HTTP call, add a method _loadData() to GHFlutterState:
_loadData() async {
  String dataURL = "https://api.github.com/orgs/raywenderlich/members";
  http.Response response = await http.get(dataURL);
  setState(() {
    _members = JSON.decode(response.body);
  });
}
You’ve added the async keyword onto _loadData() to tell Dart that it’s asynchronous, and also the await keyword on the http.get() call that is blocking. You’re using a dataUrl value that is set to the GitHub API endpoint that retrieves members for a GitHub organization.
When the HTTP call completes, you pass a callback to setState() that runs synchronously on the UI thread. In this case, you are decoding the JSON response and assigning it to the _members list.
Add an initState() override to GHFlutterState that calls _loadData() when the state is initialized:
@override
void initState() {
  super.initState();

  _loadData();
}
Using a ListView
Now that you have a Dart list of members, you need a way to display them in a list in the UI. Dart provides a ListView widget that will let you show the data in a list. ListView acts like a RecyclerView on Android and a UITableView on iOS, recycling views as the user scrolls through the list to achieve smooth scrolling performance.
Add a _buildRow() method to GhHFlutterState:
Widget _buildRow(int i) {
  return new ListTile(
    title: new Text("${_members[i]["login"]}", style: _biggerFont)
  );
}
You are returning a ListTile widget that shows the “login” value parsed from the JSON for the ith member, and also using the text style you created before.
Update the build method to have it’s body be a ListView.builder:
body: new ListView.builder(
  padding: const EdgeInsets.all(16.0),
  itemCount: _members.length,
  itemBuilder: (BuildContext context, int position) {
    return _buildRow(position);
  }),
You’ve added padding, set the itemCount to the number of members, and set the itemBuilder using _buildRow() for a given position.
You can try a hot reload, but you may get a “Full restart may be required” message. If so, hit F5 to build and run the app:
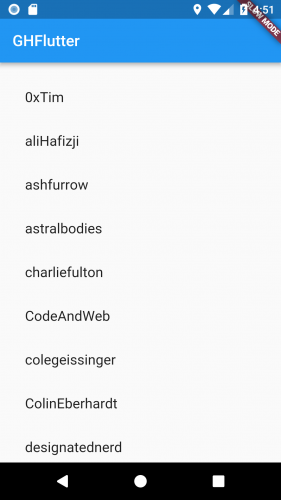
That’s just how easy it is to make a network call, parse the data, and show the results in a list!

Adding dividers
To add dividers into the list, you’re going to double the item count, and then return a Divider widget when the position in the list is odd:
body: new ListView.builder(
  itemCount: _members.length * 2,
  itemBuilder: (BuildContext context, int position) {
    if (position.isOdd) return new Divider();

      final index = position ~/ 2;

      return _buildRow(index);
    }),
Be sure not to miss the * 2 on itemCount. You’ve removed padding from the builder now that you have dividers. In itemBuilder, you’re either returning a Divider(), or instead calculating a new index by integer division and using _buildRow() to build a row item.
Try a hot reload and you should see dividers on the list:
To add padding back into each row, you want to use a Padding widget within _buildRow():
Widget _buildRow(int i) {
  return new Padding(
    padding: const EdgeInsets.all(16.0),
    child: new ListTile(
      title: new Text("${_members[i]["login"]}", style: _biggerFont)
    )
  );
}
The ListTile is now a child widget of the padding widget. Hot reload to see the padding on the rows but not on the dividers.
Parsing to Custom Types
In the previous section, the JSON parser took each member in the JSON response and added it to the _members list as a Dart Map type, the equivalent of a Map in Kotlin or a Dictionary in Swift.
However, you’ll also want to be able to use your own custom types.
Add a new Member type to the main.dart file:
class Member {
  final String login;

  Member(this.login) {
    if (login == null) {
      throw new ArgumentError("login of Member cannot be null. "
          "Received: '$login'");
    }
  }
}
A member has a login property and a constructor that throws an error if the login value is null.
Update the _members declaration in GHFlutterState so that it is a list of Member objects:
var _members = <Member>[];
Update _buildRow() to use the login property on the Member object instead of using the “login” key on the map:
title: new Text("${_members[i].login}", style: _biggerFont)
Now update the callback sent to setState() in _loadData() to turn the decoded map into a Member object and add it to the list of members:
setState(() {
  final membersJSON = JSON.decode(response.body);

  for (var memberJSON in membersJSON) {
    final member = new Member(memberJSON["login"]);
    _members.add(member);
  }
});
You’ll likely see an error if you try a hot reload, but hit F5 to build and run the app and you should see the same screen as before, except now using your new Member class.
Downloading Images with NetworkImage
Each member from GitHub has a URL for their avatar. You’ll now add that avatar to the Member class and show the avatars in the app.
Update the Member class to add an avatarUrl property that cannot be null:
class Member {
  final String login;
  final String avatarUrl;

  Member(this.login, this.avatarUrl) {
    if (login == null) {
      throw new ArgumentError("login of Member cannot be null. "
          "Received: '$login'");
    }
    if (avatarUrl == null) {
      throw new ArgumentError("avatarUrl of Member cannot be null. "
          "Received: '$avatarUrl'");
    }
  }
}
Update _buildRow() to show the avatar using a NetworkImage and the CircleAvatar widget:
Widget _buildRow(int i) {
  return new Padding(
    padding: const EdgeInsets.all(16.0),
    child: new ListTile(
      title: new Text("${_members[i].login}", style: _biggerFont),
      leading: new CircleAvatar(
        backgroundColor: Colors.green,
        backgroundImage: new NetworkImage(_members[i].avatarUrl)
      ),
    )
  );
}
By setting the avatar as the leading attribute of the ListTile, it will show before the title within the row. You’ve also set a background color on the image using the Colors class.
Now update _loadData() to use the “avatar_url” value in the map when creating a new Member:
final member = new Member(memberJSON["login"], memberJSON["avatar_url"]);
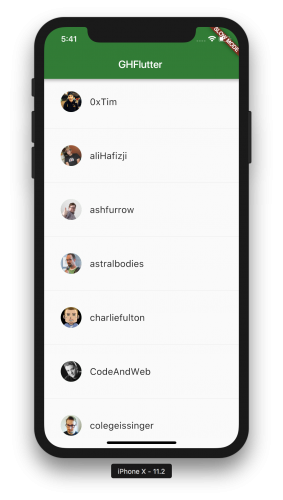
Build and run the app using F5. You’ll see your member avatars now shown in each row:
![]()
Cleaning the Code
Most of your code is now in the main.dart file. To make the code a little cleaner, you can refactor the widget and other classes you’ve added into their own files.
Create files named member.dart and ghflutter.dart in the lib folder. Move the Member class into member.dart and both the GHFlutterState and GHFlutter classes into ghflutter.dart.
You won’t need any import statments in member.dart, but the imports in ghflutter.dart should be as follows:
import 'dart:convert';

import 'package:flutter/material.dart';
import 'package:http/http.dart' as http;

import 'member.dart';
import 'strings.dart';
You also need to update the imports in main.dart, so that the entire file consists of the following:
import 'package:flutter/material.dart';

import 'ghflutter.dart';
import 'strings.dart';

void main() => runApp(new GHFlutterApp());


class GHFlutterApp extends StatelessWidget {
  @override
  Widget build(BuildContext context) {
    return new MaterialApp(
      title: Strings.appTitle,
      home: new GHFlutter(),
    );
  }
}
Build and run the app by hitting F5 and you should see no change, but the code is now a little cleaner. :]
Adding a Theme
You can easily add a theme to the app by adding a theme attribute to the MaterialApp you create in main.dart:
class GHFlutterApp extends StatelessWidget {
  @override
  Widget build(BuildContext context) {
    return new MaterialApp(
      title: Strings.appTitle,
      theme: new ThemeData(primaryColor: Colors.green.shade800),
      home: new GHFlutter(),
    );
  }
}
You’re using a shade of green as a Material Design color value for the theme.
Build and run the app by hitting F5 to see the new theme in action:

Most of the app screenshots have been from the Android emulator. You can also run the final themed app in the iOS Simulator:
Now that’s what I call cross-platform! :]
Dart 2
A new version of Dart is on its way, Dart 2. Among other things, Dart 2 adds strong compile-time checks and removes the need to use the new keyword when creating objects.
As an example, in Dart 2 the _buildRow() method would look something like:
_buildRow(int i) =>
  Padding(
    padding: EdgeInsets.all(16.0),
    child: ListTile(
        title: Text("${_members[i].login}", style: _biggerFont),
        leading: CircleAvatar(
          backgroundColor: Colors.green,
          backgroundImage: NetworkImage(_members[i].avatarUrl)
      ),
    )
  );
Instructions for trying out Dart 2 with Flutter can be found here. There may be incompatibilities with your current projects, so be sure to run the
flutter analyze --preview-dart-2
and
flutter run --preview-dart-2
commands if trying out Dart 2.
Where to go from here?
You can download the completed project using the download button at the top or bottom of this tutorial.
You should be able to open the project in either VS Code or Android Studio. Open in VS Code by just opening the root folder. You’ll need to fetch packages when opening the project.
To open the final project in Android Studio, choose Open an existing Android Studio project from the Welcome to Android Studio screen and naviagte to choose the root folder of the final project. You’ll need to then choose “Open Flutter Settings” and set the Flutter SDK path to where you cloned the flutter git repo. Then choose “Get dependencies” on the “‘Packages get’ has not been run” line in Android Studio. Choose the Project view in the project panel to see your files.
If you’re on macOS, you can run the app from Android Studio to either an Android emulator or the iOS Simulator. Try it, it’s pretty cool! :]
There’s a lot more to learn about Flutter and Dart. The best places to start are:
- The main Flutter page at flutter.io. You’ll find lots of great documentation and other information.
- See the available widgets here.
- There’s a great guide for Android developers transitioning to using Flutter here.
- A similar guide for React Native developers is here.
Stay tuned for more Flutter tutorials and screencasts!
Feel free to share your feedback, findings or ask any questions in the comments below or in the forums. I hoped you enjoyed getting started with Flutter!
The post Getting Started with Flutter appeared first on Ray Wenderlich.