Quantcast
Channel: Kodeco | High quality programming tutorials: iOS, Android, Swift, Kotlin, Unity, and more
Viewing all 4406 articles
Browse latest View live

Server Side Swift with Vapor – First 9 Chapters Now Available!

$
0
0

Great news everyone: The first early access release of our Server Side Swift with Vapor book is now available!

If you’re a beginner to web development, but have worked with Swift for some time, you’ll find it’s easy to create robust, fully featured web apps and web APIs with Vapor 3, and this book will teach you how to do it.

This release has nine chapters:

  • Chapter 2: Hello Vapor: Beginning a project using a new technology can be daunting. Vapor makes it easy to get started. It even provides handy scripts to make sure that your computer is configured correctly. In this chapter, you’ll start by installing the Vapor Toolbox, then use it to build and run your first project. You’ll finish by learning about routing, accepting data and returning JSON.
  • Get started with Vapor — no previous web development experience required!

  • Chapter 3: HTTP Basics: Before you begin your journey with Vapor, you’ll first review the fundamentals of how the web and HTTP operate, including its methods and most common response codes. You’ll also learn how Vapor differs from other Swift frameworks, its benefits, and how it can augment your web development experience.
  • Chapter 4: Async: In this chapter, you’ll learn about asynchronous and non-blocking architectures. You’ll cover Vapor’s approach to these architectures and how to use them. Finally, the chapter will provide a foundational overview of SwiftNIO, a core technology used by Vapor.
  • Chapter 5: Fluent and Persisting Models: In Chapter 2, “Hello, Vapor!”, you learned the basics of creating a Vapor app, including how to create routes. Chapter 5 explains how to use Fluent to save data in Vapor apps. You’ll also learn how to deploy your app using Vapor Cloud.
  • Learn how to deploy your projects up to Vapor Cloud!

  • Chapter 6: Configuring a Database: Databases allow you to persist data in your apps. In this chapter, you’ll learn how to configure your Vapor app to integrate with the database of your choice. Finally, you’ll deploy your app to Vapor Cloud and learn how to set up the database there.
  • Chapter 7: CRUD Database Operations: Chapter 5, “Fluent and Persisting Models”, explained the concept of models and how to store them in a database using Fluent. Chapter 7 concentrates on how to interact with models in the database. You’ll learn about CRUD operations and how they relate to REST APIs. You’ll also see how to leverage Fluent to perform complex queries on your models. Finally, like all chapters in this section, you’ll deploy your code to Vapor Cloud.
  • Chapter 8: Controllers: In previous chapters, you wrote all the route handlers in one file. This isn’t sustainable for large projects as the file quickly becomes too big and cluttered. This chapter introduces the concept of controllers to help manage your routes and models, using both basic controllers and RESTful controllers. Finally, you’ll deploy your code to Vapor Cloud.
  • Chapter 9: Parent Child Relationships: Chapter 5, “Fluent and Persisting Models”, introduced the concept of models. This chapter will show you how to set up a parent child relationship between two models. You’ll learn the purpose of these relationships, how to model them in Vapor and how to use them with routes. You’ll complete the tutorial by deploying your code to Vapor Cloud.
  • Easily send test requests and try out your Vapor projects with RESTed!

  • Chapter 10: Sibling Relationships: In Chapter 9, “Parent Child Relationships”, you learned how to use Fluent to build parent child relationships between models. Chapter 10 will show you how to implement the other type of relationship: sibling relationships. You’ll learn how to model them in Vapor and how to use them in routes. Finally, you’ll deploy your code to Vapor Cloud.

Chapters to come will show you how to test your apps, template with Leaf, build simple iPhone apps and more.

This is the first early access release for the book — keep an eye on the site for another early access release soon!

Where to Go From Here?

Here’s how you can get your early access copy of Server Side Swift with Vapor:

  • If you’ve pre-ordered Server Side Swift with Vapor, you can log in to the store and download the early access edition of Server Side Swift with Vapor here.
  • If you haven’t yet pre-ordered Server Side Swift with Vapor, you can get it at the limited-time, early access sale price of $44.99 (until April 27, 2018).

    When you order the book, you’ll get exclusive access to the upcoming early access releases of the book so you can get a jumpstart on learning all the new features of Vapor. The full edition of the book should be released late Spring 2018.

Not sure if this book is for you? Whether you’re looking to create a backend for your iOS app or want to create fully featured web apps, Vapor is the perfect platform for you.

This book starts with the basics of web development and introduces the basics of Vapor; it then walks you through creating APIs and web backends; it shows you how to create and configure databases; it explains deploying to Heroku, AWS, or Docker; it helps you test your creations and more!

Questions about the book? Ask them in the comments below!

The post Server Side Swift with Vapor – First 9 Chapters Now Available! appeared first on Ray Wenderlich.


Video Tutorial: Intermediate Debugging Part 1: Challenge: Logging

Video Tutorial: Intermediate Debugging Part 1: Conclusion

Video Tutorial: Intermediate Debugging Part 2: Introduction

Video Tutorial: Intermediate Debugging Part 2: Inspecting Variables

Video Tutorial: Intermediate Debugging Part 2: Creating Variables

Video Depth Maps Tutorial for iOS: Getting Started

$
0
0

Video Depth Maps Tutorial

Admit it. Ever since you took your first video with the iPhone, you’ve had a burning desire to break into Hollywood.

Heck, even Steven Soderbergh said he’s open to using only an iPhone to shoot movies.

Great! How can you compete with the man who brought the world Magic Mike XXL and some lesser known films such as Ocean’s Eleven and Traffic?

Simple! You can use your iOS development skills to enhance your videos, become a special effects genius and take Hollywood by storm.

So get ready, because in this video depth maps tutorial, you’ll learn how to:

  • Request depth information for a video feed.
  • Manipulate the depth information.
  • Combine the video feed with depth data and filters to create an SFX masterpiece.

Note: If you’re new to Apple’s Depth Data API, you may want to start with Image Depth Maps Tutorial for iOS: Getting Started. That tutorial also includes some nice background information on how the iPhone gets the depth information.

OK, it’s time to launch Xcode and get your formal wear ready for the Oscars!

Getting Started

For this video depth maps tutorial, you’ll need Xcode 9 or later. You’ll also need an iPhone with dual cameras on the back, which is how the iPhone generates depth information. An Apple Developer account is also required because you need to run this app on a device, not the simulator.

Once you have everything ready, download and explore the materials for this tutorial (you can find a link at the top or bottom of this tutorial).

Open the starter project, and build and run it on your device. You’ll see something like this:

Build & run starter

Note: In order to capture depth information, the iPhone has to set the wide camera zoom to match the telephoto camera zoom. Therefore, the video feed in the app is zoomed in compared to the stock camera app.

At this point, the app doesn’t do much. That’s where you come in!

Capturing Video Depth Maps Data

Capturing depth data for video requires adding an AVCaptureDepthDataOutput object to the AVCaptureSession.

AVCaptureDepthDataOutput was added in iOS 11 specifically to handle depth data, as the name suggests.

Open DepthVideoViewController.swift and add the following lines to the bottom of configureCaptureSession():

// 1
let depthOutput = AVCaptureDepthDataOutput()

// 2
depthOutput.setDelegate(self, callbackQueue: dataOutputQueue)

// 3
depthOutput.isFilteringEnabled = true

// 4
session.addOutput(depthOutput)

// 5
let depthConnection = depthOutput.connection(with: .depthData)

// 6
depthConnection?.videoOrientation = .portrait

Here’s the step-by-step breakdown:

  1. You create a new AVCaptureDepthDataOutput object
  2. Then you set the current view controller as the delegate for the new object. The callbackQueue parameter is the dispatch queue on which to call the delegate methods. For now, ignore the error; you’ll fix it later.
  3. You enable filtering on the depth data to take advantage of Apple’s algorithms to fill in any holes in the data.
  4. At this point, you’re ready to add the configured AVCaptureDepthDataOutput to the AVCaptureSession
  5. Here you get the AVCaptureConnection for the depth output in order to…
  6. …ensure the video orientation of the depth data matches the video feed.

Simple, right?

But hang on! Before you build and run the project, you first need to tell the app what to do with this depth data. That’s where the delegate method comes in.

Still in DepthVideoViewController.swift, add the following extension and delegate method at the end of the file:

// MARK: - Capture Depth Data Delegate Methods

extension DepthVideoViewController: AVCaptureDepthDataOutputDelegate {

  func depthDataOutput(_ output: AVCaptureDepthDataOutput,
                       didOutput depthData: AVDepthData,
                       timestamp: CMTime,
                       connection: AVCaptureConnection) {

    // 1
    if previewMode == .original {
      return
    }

    var convertedDepth: AVDepthData

    // 2
    if depthData.depthDataType != kCVPixelFormatType_DisparityFloat32 {
      convertedDepth = depthData.converting(toDepthDataType: kCVPixelFormatType_DisparityFloat32)
    } else {
      convertedDepth = depthData
    }

    // 3
    let pixelBuffer = convertedDepth.depthDataMap

    // 4
    pixelBuffer.clamp()

    // 5
    let depthMap = CIImage(cvPixelBuffer: pixelBuffer)

    // 6
    DispatchQueue.main.async { [weak self] in
      self?.depthMap = depthMap
    }
  }
}

Here’s what’s happening:

  1. You optimized this function to create a depth map only if the current preview mode is anything that would use the depth map.
  2. Next, you ensure the depth data is the format you need: 32 bit floating point disparity information.
  3. You save the depth data map from the AVDepthData object as a CVPixelBuffer.
  4. Using an extension included in the project, you then clamp the pixels in the pixel buffer to keep them between 0.0 and 1.0.
  5. You convert the pixel buffer into a CIImage and…
  6. …then you store this in a class variable for later use.

Phew! You’re probably itching to run this now, but before you do, there’s one small addition you need to make to view the depth map: you need to display it!

Find the AVCaptureVideoDataOutputSampleBufferDelegate extension and look for the switch statement in captureOutput(_:didOutput:from:). Add the following case:

case .depth:
  previewImage = depthMap ?? image

Build and run the project, and tap on the Depth segment of the segmented control at the bottom.

Build and run with depth

This is the visual representation of the depth data captured alongside the video data.

Video Resolutions And Frame Rates

There are a couple of things you should know about the depth data you’re capturing. It’s a lot of work for your iPhone to correlate the pixels between the two cameras and calculate the disparity.

Note: Confused by that last sentence? Check out the Image Depth Maps Tutorial for iOS: Getting Started. It has a nice explanation in the section, How Does The iPhone Do This?

To provide you with the best real-time data it can, the iPhone limits the resolutions and frame rates of the depth data it returns.

For instance, the maximum amount of depth data you can receive on an iPhone 7 Plus is 320 x 240 at 24 frames per second. The iPhone X is capable of delivering that data at 30 fps.

AVCaptureDevice does not allow you to set the depth frame rate independent of the video frame rate. Depth data must be delivered at the same frame rate or an even fraction of the video frame rate. Otherwise, a situation would arise where you have depth data but no video data, which is strange.

Because of this, you want to do two things:

  1. Set your video frame rate to ensure the maximum possible depth data frame rate.
  2. Determine the scale factor between your video data and your depth data. The scale factor is important when you start creating masks and filters.

Time to make your code better!

Again in DepthVideoViewController.swift, add the following to the bottom of configureCaptureSession():

// 1
let outputRect = CGRect(x: 0, y: 0, width: 1, height: 1)
let videoRect = videoOutput.outputRectConverted(fromMetadataOutputRect: outputRect)
let depthRect = depthOutput.outputRectConverted(fromMetadataOutputRect: outputRect)

// 2
scale = max(videoRect.width, videoRect.height) / max(depthRect.width, depthRect.height)

// 3    
do {
  try camera.lockForConfiguration()

  // 4
  if let frameDuration = camera.activeDepthDataFormat?
    .videoSupportedFrameRateRanges.first?.minFrameDuration {
    camera.activeVideoMinFrameDuration = frameDuration
  }

  // 5
  camera.unlockForConfiguration()
} catch {
  fatalError(error.localizedDescription)
}

Here’s the breakdown:

  1. You calculate a CGRect that defines the video and depth output in pixels. The methods map the full metadata output rect to the full resolution of the video and data outputs.
  2. Using the CGRect for both video and data output, you calculate the scaling factor between them. You take the maximum of the dimension because the depth data is actually delivered rotated by 90 degrees.
  3. Here you change the AVCaptureDevice configuration, so you need to lock it, which can throw an exception
  4. You then set the AVCaptureDevice‘s minimum frame duration (which is the inverse of the maximum frame rate) to be equal to the supported frame rate of the depth data
  5. Then you unlock the configuration you locked in step #3.

Ok, build and run the project. Whether or not you see a difference, your code is now more robust and future-proof. :]

What Can You Do With This Depth Data?

Well, much like in Image Depth Maps Tutorial for iOS: Getting Started, you can use this depth data to create a mask, and then use the mask to filter the original video feed.

You may have noticed a slider at the bottom of the screen for the Mask and Filtered segments. This slider controls the depth focus of the mask.

Currently, that slider seems to do nothing. That’s because there’s no visualization of the mask on the screen. You’re going to change that now!

Go back to depthDataOutput(_:didOutput:timestamp:connection:) in the AVCaptureDepthDataOutputDelegate extension. Just before DispatchQueue.main.async, add the following:

// 1
if previewMode == .mask || previewMode == .filtered {

  //2
  switch filter {

  // 3
  default:
    mask = depthFilters.createHighPassMask(for: depthMap,
                                           withFocus: sliderValue,
                                           andScale: scale)
  }  
}

In this code:

  1. You only create a mask if the Mask or the Filtered segments are active – good on you!
  2. You then switch on the type of filter selected (at the top of the iPhone screen).
  3. Finally, you create a high pass mask as the default case. You’ll fill out other cases soon.

Note: A high pass and a band-pass mask are included with the starter project. These are similar to the ones created in Image Depth Maps Tutorial for iOS: Getting Started under the section Creating a Mask

You still need to hook up the mask to the UIImageView to see it.

Go back to the AVCaptureVideoDataOutputSampleBufferDelegate extension and look for the switch statement in captureOutput(_:didOutput:from:). Add the following case:

case .mask:
  previewImage = mask ?? image

Build and run the project, and tap the Mask segment.

Build and run with mask

As you drag the slider to the left, more of the screen turns white. That’s because you implemented a high pass mask,

Good job! You laid the groundwork for the most exciting part of this tutorial: the filters!

Comic Background Effect

The iOS SDK comes bundled with a bunch of Core Image filters. One that particularly stands out is CIComicEffect. This filter gives an image a printed comic look.

Comic filter off Comic filter on

You’re going to use this filter to turn the background of your video stream into a comic.

Open DepthImageFilters.swift. This class is where all your masks and filters go.

Add the following method to the DepthImageFilters class:

func comic(image: CIImage, mask: CIImage) -> CIImage {

  // 1
  let bg = image.applyingFilter("CIComicEffect")

  // 2
  let filtered = image.applyingFilter("CIBlendWithMask",
                                      parameters: ["inputBackgroundImage": bg,
                                                   "inputMaskImage": mask])

  // 3
  return filtered
}

To break it down:

  1. You apply the CIComicEffect to the input image.
  2. Then you blend the original image with the comic image using the input mask.
  3. Finally, you return the filtered image.

Now, to use the filter, open DepthVideoViewController.swift and find captureOutput(_:didOutput:from:). Remove the default case on the switch statement and add the following case:

case .filtered:

  // 1
  if let mask = mask {

    // 2
    switch filter {

    // 3
    case .comic:
      previewImage = depthFilters.comic(image: image, mask: mask)

    // 4
    default:
      previewImage = image
    }
  } else {

    // 5
    previewImage = image
  }

This code is straightforward. Here’s what’s going on:

  1. You check to see if there is a mask, because you can’t filter without a mask!
  2. You switch on the filter selected in the UI.
  3. If the selected filter is comic, you create a new image based on your comic filter and make that the preview image.
  4. Otherwise, you just keep the video image unchanged.
  5. Finally, you handle the case where mask is nil.

Before you run the code, there’s one more thing you should do to make adding future filters easier.

Find depthDataOutput(_:didOutput:timestamp:connection), and add the following case to the switch filter statement:

case .comic:
  mask = depthFilters.createHighPassMask(for: depthMap,
                                         withFocus: sliderValue,
                                         andScale: scale)

Here, you create a high pass mask.

This looks exactly the same as the default case. After you add the other filters, you’ll be removing the default case, so it is best to make sure the comic case is in there now.

Go ahead. I know you’re excited to run this. Build and run the project and tap the Filtered segment.

Build and run with comic filter

Fantastic work! Are you feeling like a superhero in a comic book?

No Green Screen? No Problem!

That’s good and all, but maybe you don’t want to work on superhero movies? Perhaps you prefer science fiction instead?

No worries. This next filter will have you jumping for joy on the Moon! For that, you’ll need to create a makeshift green screen effect.

Open DepthImageFilters.swift and add the following method to the class:

func greenScreen(image: CIImage, background: CIImage, mask: CIImage) -> CIImage {

  // 1
  let crop = CIVector(x: 0,
                      y: 0,
                      z: image.extent.size.width,
                      w: image.extent.size.height)

  // 2
  let croppedBG = background.applyingFilter("CICrop",
                                            parameters: ["inputRectangle": crop])

  // 3
  let filtered = image.applyingFilter("CIBlendWithMask",
                                      parameters: ["inputBackgroundImage": croppedBG,
                                                   "inputMaskImage": mask])

  // 4
  return filtered
}

In this filter:

  1. You create a 4D CIVector to define a cropping boundary equal to your input image.
  2. Then you crop the background image to be the same size as the input image – important for the next step
  3. Next, you combine the input and background images by blending them based on the mask parameter.
  4. Finally, you return the filtered image

Now you just need to hook up the mask and filter logic for this back in DepthVideoViewController.swift and you’ll be ready to go.

Find captureOutput(_:didOutput:from:) in DepthVideoViewController.swift and add the following case to the switch filter statement:

case .greenScreen:

  // 1
  if let background = background {

    // 2
    previewImage = depthFilters.greenScreen(image: image,
                                            background: background,
                                            mask: mask)
  } else {

    // 3
    previewImage = image
  }

Here:

  1. You make sure the background image exists. It is created in viewDidLoad().
  2. If it exists, filter the input image with the background and the mask using the new function you just wrote.
  3. Otherwise, just use the input video image.

Next, find depthDataOutput(_:didOutput:timestamp:connection) and add the following case to the switch statement:

case .greenScreen:
  mask = depthFilters.createHighPassMask(for: depthMap,
                                         withFocus: sliderValue,
                                         andScale: scale,
                                         isSharp: true)

This code creates a high pass mask but makes the cutoff sharper (steeper slope).

Build and run the project. Move the slider around and see what objects you can put on the Moon.

Build and run with green screen

Out of this world!

Dream-like Blur Effect

Ok, ok. Maybe you don’t like the superhero or science fiction genres. I get it. You’re more of an art film type person. If so, this next filter is right up your alley.

With this filter, you’re going to blur out anything besides objects at a narrowly defined distance from the camera. This can give a dream-like feeling to your films.

Go back to DepthImageFilters.swift and add a new function to the class:

func blur(image: CIImage, mask: CIImage) -> CIImage {

  // 1
  let blurRadius: CGFloat = 10

  // 2
  let crop = CIVector(x: 0,
                      y: 0,
                      z: image.extent.size.width,
                      w: image.extent.size.height)

  // 3
  let invertedMask = mask.applyingFilter("CIColorInvert")

  // 4
  let blurred = image.applyingFilter("CIMaskedVariableBlur",
                                     parameters: ["inputMask": invertedMask,
                                                  "inputRadius": blurRadius])

  // 5
  let filtered = blurred.applyingFilter("CICrop",
                                        parameters: ["inputRectangle": crop])

  // 6
  return filtered
}

This one is a bit more complicated, but here’s what you did:

  1. You define a blur radius to use – the bigger the radius, the more the blur and the slower it will be!
  2. Once again, you create a 4D CIVector to define a cropping region. This is because blurring will effectively grow the image at the edges and you just want the original size.
  3. Then you invert the mask because the blur filter you’re using blurs where the mask is white.
  4. Next, you apply the CIMaskedVariableBlur filter to the image using the inverted mask and the blur radius as parameters.
  5. You crop the blurred image to maintain the desired size.
  6. Finally, you return the filtered image.

By now, you should know the drill.

Open DepthVideoViewController.swift and add a new case to the switch statement inside captureOutput(_:didOutput:from:):

case .blur:
  previewImage = depthFilters.blur(image: image, mask: mask)

This will create the blur filter when selected in the UI. While you’re there, you can delete the default case, as the switch filter statement is now exhaustive.

Now for the mask.

Replace the default case with the following case to the switch statement inside depthDataOutput(_:didOutput:timestamp:connection):

case .blur:
  mask = depthFilters.createBandPassMask(for: depthMap,
                                         withFocus: sliderValue,
                                         andScale: scale)

Here you create a band pass mask for the blur filter to use.

It’s time! Build and run this project. Try adjusting the sliders in the Mask & Filtered segments as well as changing the filters to see what effects you can create.

Build and run with blur

It’s so dreamy!

Where to Go From Here?

You have accomplished so much in this video depth maps tutorial. Give your self a well-deserved pat on the back.

If you want, you can download the final project using the link at the top or bottom of this project.

With your new knowledge, you can take this project even further. For instance, the app doesn’t record the filtered video stream; it just displays it. Try adding a button and some logic to save your masterpieces.

You can also add more filters or create your own! Check here for a complete list of CIFilters that are shipped with iOS.

We hope you enjoyed this video depth maps tutorial. If you have any questions or comments, please join the forum discussion below!

The post Video Depth Maps Tutorial for iOS: Getting Started appeared first on Ray Wenderlich.

Announcing the Advanced Swift Spring Fling!

$
0
0

It’s Spring once again, which means it’s time to take a fresh look at your bookshelf and grow your tutorial library!

To help you do this, we’re releasing three new books:

  • Realm: Building Modern Swift Apps with Realm Database: The perfect introduction to Realm Database and Realm Platform. Learn how to set up your first Realm database, see how to persist and read data, find out how to perform migrations and more.
  • Data Structures and Algorithms in Swift: Learn how to implement the most popular and useful data structures, and when and why you should use one particular data structure or algorithm over another.
  • Design Patterns by Tutorials: Explore the usefulness of design patterns, moving from the basic building blocks of patterns into more advanced patterns and completes the lesson with less common but incredibly useful patterns.

To celebrate these three books, we’re running a special event over the next two weeks: the Advanced Swift Spring Fling, where you can get all three books at a massive discount.

Over the next two weeks, we’ll be releasing some free chapters from our three new books so you can get a taste of what’s in store. We’re also running a giveaway where a few lucky readers can win themselves a copy of one of our new books!

And in keeping with the spirit of Spring, we’re running a time-limited sale to help you save some green:

  • Save a massive 40% over the regular price when you buy the three new books in our Advanced Swift Spring Bundle — that’s all three books for just $99.99!
  • Want to buy select books from the bundle? No problem. Save 10% on each of the new books when you buy them separately — that’s $49.49 each.

Here’s a quick overview of what’s in each book:

Data Structures and Algorithms in Swift

Learn how to implement the most common and useful data structures and algorithms in Swift!

Understanding how data structures and algorithms work in code is crucial for creating efficient and scalable apps. Swift’s Standard Library has a small set of general purpose collection types, yet they definitely don’t cover every case!

In Data Structures and Algorithms in Swift, you’ll learn how to implement the most popular and useful data structures and when and why you should use one particular datastructure or algorithm over another. This set of basic data structures and algorithms will serve as an excellent foundation for building more complex and special-purpose constructs. As well, the high-level expressiveness of Swift makes it an ideal choice for learning these core concepts without sacrificing performance.

  • You’ll start with the fundamental structures of linked lists, queues and stacks, and see how to implement them in a highly Swift-like way.
  • Move on to working with various types of trees, including general purpose trees, binary trees, AVL trees, binary search trees and tries.
  • Go beyond bubble and insertion sort with better-performing algorithms, including mergesort, radix sort, heap sort and quicksort.
  • Learn how to construct directed, non-directed and weighted graphs to represent many real-world models, and traverse graphs and trees efficiently with breadth-first, depth-first, Dijkstra’s and Prim’s algorithms to solve problems such as finding the shortest path or lowest cost in a network.
  • And much, much more!

By the end of this book, you’ll have hands-on experience solving common issues with data structures and algorithms — and you’ll be well on your way to developing your own efficient and useful implementations.

This book is in early access; the complete digital edition will be released in Late Spring 2018.

We’ll be releasing two free chapters from this book this week on Wednesday and Friday to help give you a taste of what’s inside.

“Whether you want to ace your next coding interview, or use Swift successfully in competitions on HackerRank, or want to make sure your Swift code is well designed and scalable, this is the right book for you. The authors explain data structures and algorithms with diagrams and examples and explain the Swift code implementation step by step.” – Christina Bharara

About the Authors

Kelvin Lau is a physicist turned Swift-iOS Developer. While he’s currently entrenched with iOS development, he often reminisces of his aspirations to be part of the efforts in space exploration. Outside of programming work, he’s an aspiring entrepreneur and musician. You can find him on Twitter: @kelvinlauKL.

Vincent Ngo is a software developer by day, and an iOS-Swift enthusiast by night. He believes that sharing knowledge is the best way to learn and grow as a developer. Vincent starts every morning with a homemade green smoothie in hand to fuel his day. When he is not in front of a computer, Vincent is training to play in small golf tournaments, doing headstands at various locations while on a hiking adventure, or looking up how to make tamago egg. You can find him on Twitter: @vincentngo2.

Realm: Building Modern Swift Apps with Realm Database

Create powerful, reactive iOS apps with Realm Database and Realm Cloud!

Realm finds the sweet spot between the simplicity of storing data as JSON on disk and using heavy, slow ORMs like Core Data or similar that are built on top of SQLite. The Realm Database aims to be fast, performant and provide the commodities that mobile developers need such as working with objects, type-safety, and native notifications.

Realm Database has been under active development for several years. It powers apps by some of the biggest names in the App Store, including Adidas, Amazon, Nike, Starbucks, BBC, GoPro, Virgin, Cisco, Groupon and many more who have chosen to develop their mobile apps with Realm.

Realm Platform is a relatively new commercial product which allows developers to automatically synchronize data not only across Apple devices but also between any combination of Android, iPhone, Windows, or macOS apps. Realm Platform allows you to run the server software on your own infrastructure and keep your data in-house which more often suits large enterprises. Alternatively you can use Realm Cloud which runs a Platform for you and you start syncing data very quickly and only pay for what you use.

In this book, you’ll do the following:

  • Learn how easy it is to set up your first Realm database.
  • See how to persist and read data under the CRUD model.
  • Discover how to work with Realm configurations.
  • Design smart and responsive migrations for your Realms.
  • Create a Realm Cloud instance and sync your data in real time, across all devices, anywhere.

We’ll be releasing a free chapter from this book on Monday, April 23, to help you get started with Realm Database and see what the book’s all about!

“I enjoyed the book [Realm: Building Modern Swift Apps with Realm Database] and learned much from it. The book shed light on a long time mystery. Despite the fact we previously worked with Realm never before it was so accessible and easy to understand. Book is full with down-to-earth, to-the-core, beautiful explanation, diagrams and code samples. Great to dive in to and great to keep at your desk for easy reference.” – Michal Shatz

About the Author

Marin Todorov is the author of this book. Marin is one of the founding members of the raywenderlich.com team and has worked on seven of the team’s books. Besides crafting code, Marin also enjoys blogging, teaching, and speaking at conferences. He happily open-sources code. You can find out more about Marin at www.underplot.com.

Design Patterns by Tutorials

Learn design patterns with Swift!

Design patterns are incredibly useful, no matter what language or platform you develop for. Using the right pattern for the right job can save you time, create less maintenance work for your team and ultimately let you create more great things with less effort.

Every developer should absolutely know about design patterns and how and when to apply them. That’s what you’re going to learn in this book!

  • Start with the basic building blocks of patterns such as MVC, Delegate and Strategy.
  • Move into more advanced patterns such as the Factory, Prototype and Multicast Delegate pattern.
  • Finish off with some less-common but still incredibly useful patterns including Flyweight, Command and Chain of Responsibility.

And not only does Design Patterns by Tutorials cover each pattern in theory, but you’ll also work to incorporate each pattern in a real-world app that’s included with each chapter. Learn by doing, in the step-by-step fashion you’ve come to expect in the other books in our by Tutorials series.

This book is in early access; the complete digital edition will be released in Late Spring 2018.

We’ll be releasing a free chapter from this book on Wednesday, April 25, to help you discover what the book has in store for you!

“The book all iOS and macOS developers have all been waiting for: Design Patterns by Tutorials is the best of the wisdom of that gang of four written in Swift. Need a singleton that’s ready to try in a playground, along with clear guidance about how to use it and not misuse it? This is your essential guide.” – Mark W. Powell

About the Authors

Joshua Greene is an experienced iOS developer who loves creating elegant apps. When he’s not slinging code, he enjoys martial arts, Netflix and spending time with his wonderful wife and two daughters. You can reach him on Twitter at @jrg_developer.

Jay Strawn is a former librarian and is passionate about languages both human and code based. When she’s not working as a developer, Jay enjoys being an ESL conversation partner and reading zines.

Advanced Swift Spring Bundle

To celebrate the launch of our new advanced Swift books, we’re offering a special bundle where you can get all three books at a massive discount!

Our new Advanced Swift Spring Bundle includes all three books in PDF/ePub format, with all source code included:

  • Realm: Building Modern Swift Apps with Realm Database
  • Data Structures and Algorithms in Swift
  • Design Patterns by Tutorials

That’s a $164.97 value — but you can get all three books for just $99.99 in the Advanced Swift Spring Bundle! But don’t wait: this bundle deal is only good until Friday, April 27.

Advanced Swift Spring Fling Giveaway

To celebrate the Spring Fling, we’re giving away three Advanced Swift Spring Bundles to some lucky readers!

To enter the giveaway, simply leave a comment below and answer the following question:

What are you most excited about in our new book lineup?

We’ll select three winners at random who leave a comment below before Friday, April 27. Get your entries in early!

Where to Go From Here?

To recap, here’s the schedule of events for the Advanced Swift Spring Fling:

  • April 16: Design Patterns, Data Structures, and Realm books launched
  • April 18: Free chapter from Data Structures and Algorithms in Swift
  • April 20: Swift Algorithm Club post
  • April 23: Free chapter from Realm: Building Modern Swift Apps with Realm Database
  • April 25: Free chapter from Design Patterns by Tutorials
  • April 27: Giveaway and Last Day for Discount!

If you are comfortable with Swift and iOS development and want to take your development skills to the next level, there’s no better way to do that than through the Advanced Swift Spring Bundle.

Don’t miss out on your chance to grab this bundle of three books for just $99.99 — that’s a massive savings of 40% off of the regular price! This bundle pricing is only available until Friday, April 27, 2018, so grab this great discount while you can.

We truly appreciate the support of all our readers; you help make everything we do here at raywenderlich.com possible. Thanks for your support — and don’t forget to leave a comment below to enter the giveaway!

The post Announcing the Advanced Swift Spring Fling! appeared first on Ray Wenderlich.


Unreal Engine 4 Custom Shaders Tutorial

$
0
0

Unreal Engine 4 Custom Shaders Tutorial

The material editor is a great tool for artists to create shaders thanks to its node-based system. However, it does have its limitations. For example, you cannot create things such as loops and switch statements.

Luckily, you can get around these limitations by writing your own code. To do this, you can create a Custom node which will allow you to write HLSL code.

In this tutorial, you will learn how to:

  • Create a Custom node and set up its inputs
  • Convert material nodes to HLSL
  • Edit shader files using an external text editor
  • Create HLSL functions

To demonstrate all of this, you will use HLSL to desaturate the scene image, output different scene textures and create a Gaussian blur.

Note: This tutorial assumes you already know the basics of using Unreal Engine. If you are new to Unreal Engine, check out our 10-part Unreal Engine for Beginners tutorial series.

The tutorial also assumes you are familiar with a C-type language such as C++ or C#. If you know a syntactically similar language such as Java, you should still be able to follow along.

Note: This tutorial is part of a 3-part tutorial series on shaders:

Getting Started

Start by downloading the materials for this tutorial (you can find a link at the top or bottom of this tutorial). Unzip it and navigate to CustomShadersStarter and open CustomShaders.uproject. You will see the following scene:

unreal engine shaders

First, you will use HLSL to desaturate the scene image. To do this, you need to create and use a Custom node in a post process material.

Creating a Custom Node

Navigate to the Materials folder and open PP_Desaturate. This is the material you will edit to create the desaturation effect.

unreal engine shaders

First, create a Custom node. Just like other nodes, it can have multiple inputs but is limited to one output.

unreal engine shaders

Next, make sure you have the Custom node selected and then go to the Details panel. You will see the following:

unreal engine shaders

Here is what each property does:

  • Code: This is where you will put your HLSL code
  • Output Type: The output can range from a single value (CMOT Float 1) up to a four channel vector (CMOT Float 4).
  • Description: The text that will display on the node itself. This is a good way to name your Custom nodes. Set this to Desaturate.
  • Inputs: This is where you can add and name input pins. You can then reference the inputs in code using their names. Set the name for input 0 to SceneTexture.

unreal engine shaders

To desaturate the image, replace the text inside Code with the following:

return dot(SceneTexture, float3(0.3,0.59,0.11));
Note: dot() is an intrinsic function. These are functions built into HLSL. If you need a function such as atan() or lerp(), check if there is already a function for it.

Finally, connect everything like so:

unreal engine shaders

Summary:

  1. SceneTexture:PostProcessInput0 will output the color of the current pixel
  2. Desaturate will take the color and desaturate it. It will then output the result to Emissive Color

Click Apply and then close PP_Desaturate. The scene image is now desaturated.

unreal engine shaders

You might be wondering where the desaturation code came from. When you use a material node, it gets converted into HLSL. If you look through the generated code, you can find the appropriate section and copy-paste it. This is how I converted the Desaturation node into HLSL.

In the next section, you will learn how to convert a material node into HLSL.

Converting Material Nodes to HLSL

For this tutorial, you will convert the SceneTexture node into HLSL. This will be useful later on when you create a Gaussian blur.

First, navigate to the Maps folder and open GaussianBlur. Afterwards, go back to Materials and open PP_GaussianBlur.

unreal engine shaders

Unreal will generate HLSL for any nodes that contribute to the final output. In this case, Unreal will generate HLSL for the SceneTexture node.

To view the HLSL code for the entire material, select Window\HLSL Code. This will open a separate window with the generated code.

unreal engine shaders

Note: If the HLSL Code window is blank, you need to enable Live Preview in the Toolbar.
unreal engine shaders

Since the generated code is a few thousand lines long, it’s quite difficult to navigate. To make searching easier, click the Copy button and paste it into a text editor (I use Notepad++). Afterwards, close the HLSL Code window.

Now, you need to find where the SceneTexture code is. The easiest way to do this is to find the definition for CalcPixelMaterialInputs(). This function is where the engine calculates all the material outputs. If you look at the bottom of the function, you will see the final values for each output:

PixelMaterialInputs.EmissiveColor = Local1;
PixelMaterialInputs.Opacity = 1.00000000;
PixelMaterialInputs.OpacityMask = 1.00000000;
PixelMaterialInputs.BaseColor = MaterialFloat3(0.00000000,0.00000000,0.00000000);
PixelMaterialInputs.Metallic = 0.00000000;
PixelMaterialInputs.Specular = 0.50000000;
PixelMaterialInputs.Roughness = 0.50000000;
PixelMaterialInputs.Subsurface = 0;
PixelMaterialInputs.AmbientOcclusion = 1.00000000;
PixelMaterialInputs.Refraction = 0;
PixelMaterialInputs.PixelDepthOffset = 0.00000000;

Since this is a post process material, you only need to worry about EmissiveColor. As you can see, its value is the value of Local1. The LocalX variables are local variables the function uses to store intermediate values. If you look right above the outputs, you will see how the engine calculates each local variable.

MaterialFloat4 Local0 = SceneTextureLookup(GetDefaultSceneTextureUV(Parameters, 14), 14, false);
MaterialFloat3 Local1 = (Local0.rgba.rgb + Material.VectorExpressions[1].rgb);

The final local variable (Local1 in this case) is usually a "dummy" calculation so you can ignore it. This means SceneTextureLookup() is the function for the SceneTexture node.

Now that you have the correct function, let’s test it out.

Using the SceneTextureLookup Function

First, what do the parameters do? This is the signature for SceneTextureLookup():

float4 SceneTextureLookup(float2 UV, int SceneTextureIndex, bool Filtered)

Here is what each parameter does:

  • UV: The UV location to sample from. For example, a UV of (0.5, 0.5) will sample the middle pixel.
  • SceneTextureIndex: This will determine which scene texture to sample from. You can find a table of each scene texture and their index below. For example, to sample Post Process Input 0, you would use 14 as the index.
  • Filtered: Whether the scene texture should use bilinear filtering. Usually set to false.

unreal engine shaders

To test, you will output the World Normal. Go to the material editor and create a Custom node named Gaussian Blur. Afterwards, put the following in the Code field:

return SceneTextureLookup(GetDefaultSceneTextureUV(Parameters, 8), 8, false);

This will output the World Normal for the current pixel. GetDefaultSceneTextureUV() will get the UV for the current pixel.

Note: Before 4.19, you were able to get UVs by supplying a TextureCoordinate node as an input. In 4.19, the correct way is to use GetDefaultSceneTextureUV() and supply your desired index.

This is an example of how custom HLSL can break between versions of Unreal.

Next, disconnect the SceneTexture node. Afterwards, connect Gaussian Blur to Emissive Color and click Apply.

unreal engine shaders

At this point, you will get the following error:

[SM5] /Engine/Generated/Material.ush(1410,8-76):  error X3004: undeclared identifier 'SceneTextureLookup'

This is telling you that SceneTextureLookup() does not exist in your material. So why does it work when using a SceneTexture node but not in a Custom node? When you use a SceneTexture, the compiler will include the definition for SceneTextureLookup(). Since you are not using one, you cannot use the function.

Luckily, the fix for this is easy. Set the SceneTexture node to the same texture as the one you are sampling. In this case, set it to WorldNormal.

Afterwards, connect it to the Gaussian Blur. Finally, you need to set the input pin’s name to anything besides None. For this tutorial, set it to SceneTexture.

unreal engine shaders

Note: As of writing, there is an engine bug where the editor will crash if the scene textures are not the same. However, once it works, you can freely change the scene texture in the Custom node.

Now the compiler will include the definition for SceneTextureLookup().

Click Apply and then go back to the main editor. You will now see the world normal for each pixel.

unreal engine shaders

Right now, editing code in the Custom node isn’t too bad since you are working with little snippets. However, once your code starts getting longer, it becomes difficult to maintain.

To improve the workflow, Unreal allows you to include external shader files. With this, you can write code in your own text editor and then switch back to Unreal to compile.

Using External Shader Files

First, you need to create a Shaders folder. Unreal will look in this folder when you use the #include directive in a Custom node.

Open the project folder and create a new folder named Shaders. The project folder should now look something like this:

unreal engine shaders

Next, go into the Shaders folder and create a new file. Name it Gaussian.usf. This is your shader file.

unreal engine shaders

Note: Shader files must have the .usf or .ush extension.

Open Gaussian.usf in a text editor and insert the code below. Make sure to save the file after every change.

return SceneTextureLookup(GetDefaultSceneTextureUV(Parameters, 2), 2, false);

This is the same code as before but will output Diffuse Color instead.

To make Unreal detect the new folder and shaders, you need to restart the editor. Once you have restarted, make sure you are in the GaussianBlur map. Afterwards, reopen PP_GaussianBlur and replace the code in Gaussian Blur with the following:

#include "/Project/Gaussian.usf"
return 1;

Now when you compile, the compiler will replace the first line with the contents of Gaussian.usf. Note that you do not need to replace Project with your project name.

Click Apply and then go back to the main editor. You will now see the diffuse colors instead of world normals.

unreal engine shaders

Now that everything is set up for easy shader development, it’s time to create a Gaussian blur.

Note: Since this is not a Gaussian blur tutorial, I won’t spend too much time explaining it. If you’d like to learn more, check out Gaussian Smoothing and Calculating Gaussian Kernels.

Creating a Gaussian Blur

Just like in the toon outlines tutorial, this effect uses convolution. The final output is the average of all pixels in the kernel.

In a typical box blur, each pixel has the same weight. This results in artifacts at wider blurs. A Gaussian blur avoids this by decreasing the pixel’s weight as it gets further away from the center. This gives more importance to the center pixels.

unreal engine shaders

Convolution using material nodes is not ideal due to the number of samples required. For example, in a 5×5 kernel, you would need 25 samples. Double the dimensions to a 10×10 kernel and that increases to 100 samples! At that point, your node graph would look like a bowl of spaghetti.

This is where the Custom node comes in. Using it, you can write a small for loop that samples each pixel in the kernel. The first step is to set up a parameter to control the sample radius.

Creating the Radius Parameter

First, go back to the material editor and create a new ScalarParameter named Radius. Set its default value to 1.

unreal engine shaders

The radius determines how much to blur the image.

Next, create a new input for Gaussian Blur and name it Radius. Afterwards, create a Round node and connect everything like so:

unreal engine shaders

The Round is to ensure the kernel dimensions are always whole numbers.

Now it’s time to start coding! Since you need to calculate the Gaussian twice for each pixel (vertical and horizontal offsets), it’s a good idea to turn it into a function.

When using the Custom node, you cannot create functions in the standard way. This is because the compiler copy-pastes your code into a function. Since you cannot define functions within a function, you will receive an error.

Luckily, you can take advantage of this copy-paste behavior to create global functions.

Creating Global Functions

As stated above, the compiler will literally copy-paste the text in a Custom node into a function. So if you have the following:

return 1;

The compiler will paste it into a CustomExpressionX function. It doesn’t even indent it!

MaterialFloat3 CustomExpression0(FMaterialPixelParameters Parameters)
{
return 1;
}

Look what happens if you use this code instead:

    return 1;
}

float MyGlobalVariable;

int MyGlobalFunction(int x)
{
    return x;

The generated HLSL now becomes this:

MaterialFloat3 CustomExpression0(FMaterialPixelParameters Parameters)
{
    return 1;
}

float MyGlobalVariable;

int MyGlobalFunction(int x)
{
    return x;
}

As you can see, MyGlobalVariable and MyGlobalFunction() are not contained within a function. This makes them global and means you can use them anywhere.

Note: Notice that the final brace is missing in the input code. This is important since the compiler inserts a brace at the end. If you leave in the brace, you will end up with two braces and receive an error.

Now let’s use this behavior to create the Gaussian function.

Creating the Gaussian Function

The function for a simplified Gaussian in one dimension is:

unreal engine shaders

This results in a bell curve that accepts an input ranging from approximately -1 to 1. It will then output a value from 0 to 1.

unreal engine shaders

For this tutorial, you will put the Gaussian function into a separate Custom node. Create a new Custom node and name it Global.

Afterwards, replace the text in Code with the following:

    return 1;
}

float Calculate1DGaussian(float x)
{
    return exp(-0.5 * pow(3.141 * (x), 2));

Calculate1DGaussian() is the simplified 1D Gaussian in code form.

To make this function available, you need to use Global somewhere in the material graph. The easiest way to do this is to simply multiply Global with the first node in the graph. This ensures the global functions are defined before you use them in other Custom nodes.

First, set the Output Type of Global to CMOT Float 4. You need to do this because you will be multiplying with SceneTexture which is a float4.

unreal engine shaders

Next, create a Multiply and connect everything like so:

unreal engine shaders

Click Apply to compile. Now, any subsequent Custom nodes can use the functions defined within Global.

The next step is to create a for loop to sample each pixel in the kernel.

Sampling Multiple Pixels

Open Gaussian.usf and replace the code with the following:

static const int SceneTextureId = 14;
float2 TexelSize = View.ViewSizeAndInvSize.zw;
float2 UV = GetDefaultSceneTextureUV(Parameters, SceneTextureId);
float3 PixelSum = float3(0, 0, 0);
float WeightSum = 0;

Here is what each variable is for:

  • SceneTextureId: Holds the index of the scene texture you want to sample. This is so you don’t have to hard code the index into the function calls. In this case, the index is for Post Process Input 0.
  • TexelSize: Holds the size of a texel. Used to convert offsets into UV space.
  • UV: The UV for the current pixel
  • PixelSum: Used to accumulate the color of each pixel in the kernel
  • WeightSum: Used to accumulate the weight of each pixel in the kernel

Next, you need to create two for loops. One for the vertical offsets and one for the horizontal. Add the following below the variable list:

for (int x = -Radius; x <= Radius; x++)
{
    for (int y = -Radius; y <= Radius; y++)
    {

    }
}

Conceptually, this will create a grid centered on the current pixel. The dimensions are given by 2r + 1. For example, if the radius is 2, the dimensions would be (2 * 2 + 1) by (2 * 2 + 1) or 5×5.

Next, you need to accumulate the pixel colors and weights. To do this, add the following inside the inner for loop:

float2 Offset = UV + float2(x, y) * TexelSize;
float3 PixelColor = SceneTextureLookup(Offset, SceneTextureId, 0).rgb;
float Weight = Calculate1DGaussian(x / Radius) * Calculate1DGaussian(y / Radius);
PixelSum += PixelColor * Weight;
WeightSum += Weight;

Here is what each line does:

  1. Calculate the relative offset of the sample pixel and convert it into UV space
  2. Sample the scene texture (Post Process Input 0 in this case) using the offset
  3. Calculate the weight for the sampled pixel. To calculate a 2D Gaussian, all you need to do is multiply two 1D Gaussians together. The reason you need to divide by Radius is because the simplified Gaussian expects a value from -1 to 1. This division will normalize x and y to this range.
  4. Add the weighted color to PixelSum
  5. Add the weight to WeightSum

Finally, you need to calculate the result which is the weighted average. To do this, add the following at the end of the file (outside the for loops):

return PixelSum / WeightSum;

That’s it for the Gaussian blur! Close Gaussian.usf and then go back to the material editor. Click Apply and then close PP_GaussianBlur. Use PPI_Blur to test out different blur radiuses.

unreal engine shaders

Note: Sometimes the Apply button will be disabled. Simply make a dummy change (such as moving a node) and it will reactivate.

Limitations

Although the Custom node is very powerful, it does come with its downsides. In this section, I will go over some of the limitations and caveats when using it.

Rendering Access

Custom nodes cannot access many parts of the rendering pipeline. This includes things such as lighting information and motion vectors. Note that this is slightly different when using forward rendering.

Engine Version Compatibility

HLSL code you write in one version of Unreal is not guaranteed to work in another. As noted in the tutorial, before 4.19, you were able to use a TextureCoordinate to get scene texture UVs. In 4.19, you need to use GetDefaultSceneTextureUV().

Optimization

Here is an excerpt from Epic on optimization:

Using the custom node prevents constant folding and may use significantly more instructions than an equivalent version done with built in nodes! Constant folding is an optimization that UE4 employs under the hood to reduce shader instruction count when necessary.

For example, an expression chain of Time >Sin >Mul by parameter > Add to something can and will be collapsed by UE4 into a single instruction, the final add. This is possible because all of the inputs of that expression (Time, parameter) are constant for the whole draw call, they do not change per-pixel. UE4 cannot collapse anything in a custom node, which can produce less efficient shaders than an equivalent version made out of existing nodes.

As a result, it is best to only use the custom node when it gives you access to functionality not possible with the existing nodes.

Where to Go From Here?

You can download the completed project using the link at the top or bottom of this tutorial.

If you’d like to get more out of the Custom node, I recommend you check out Ryan Bruck’s blog. He has posts detailing how to use the Custom node to create raymarchers and other effects.

If there are any effects you’d like to me cover, let me know in the comments below!

The post Unreal Engine 4 Custom Shaders Tutorial appeared first on Ray Wenderlich.

Screencast: Android Architecture Components: ViewModel

How to Make a Game Like Candy Crush with SpriteKit and Swift: Part 1

$
0
0

Update note: This SpriteKit tutorial has been updated for Xcode 9.3 and Swift 4.1 by Kevin Colligan. The original tutorial was written by Matthijs Hollemans and subsequently updated by Morten Faarkrog.

How to Make a Game Like Candy Crush with SpriteKit and Swift: Part 1

In this three-part “How to” tutorial with SpriteKit and Swift series, you’ll learn how to make a game like Candy Crush Saga named Cookie Crunch Adventure. Yum, that sounds even better than candy!

  • (You’re here) In the first part, you’ll put some of the foundation in place. You’ll set up the gameplay view, the sprites, and the logic for loading levels.
  • In the second part you’ll focus on detecting swipes, swapping cookies, and finding and removing cookie chains.
  • In the third part, you’ll work on refilling the level with new yummy cookies after successful swipes. You’ll complete the gameplay by adding support for scoring points, winning and losing, shuffling the cookies, and more.

In the process of going through this tutorial, you’ll get some excellent practice with Swift techniques such as enums, generics, subscripting, closures, and extensions. You’ll also learn a lot about game architecture and best practices.

There’s a lot to cover, so dive right in!

Note: This Swift tutorial assumes you have working knowledge of SpriteKit and Swift. If you’re new to SpriteKit, check out the SpriteKit for beginners tutorial or our book, 2D iOS & tvOS Games by Tutorials. For an introduction to Swift, see our Swift tutorials.

Getting Started

Cookie Crunch will use an architecture that is very much like the model-view-controller, or MVC, pattern that you may know from non-game apps:

  • The data model will consist of Level, Cookie and a few other classes. The models will contain the data, such as the 2D grid of cookie objects, and handle most of the gameplay logic.
  • The views will be GameScene and the SKSpriteNodes on the one hand, and UIViews on the other. The views will be responsible for showing things on the screen and for handling touches on those things. The scene in particular will draw the cookie sprites and detect swipes.
  • The view controller will play the same role here as in a typical MVC app: it will sit between the models and the views and coordinate the whole shebang.

All of these objects will communicate with each other, mostly by passing arrays and sets of objects to be modified. This separation will give each object only one job that it can do, totally independent of the others, which will keep the code clean and easy to manage.

Use the Download Materials button at the top or bottom of this tutorial to download the starter project. Open it and run it in the simulator, and you’ll see you’ve got the foundations in place for your game:

  • A tasty background image
  • Labels for your Target, Moves and Score
  • A Shuffle button

Who ate all the cookies?

The cookies are missing, of course. You’ll add those soon. But first, it’s time to tour the starter project.

GameScene.swift

The GameScene includes sound properties, which allow your app to load all sounds once and reuse them as needed:

let swapSound = SKAction.playSoundFileNamed("Chomp.wav", waitForCompletion: false)
let invalidSwapSound = SKAction.playSoundFileNamed("Error.wav", waitForCompletion: false)
let matchSound = SKAction.playSoundFileNamed("Ka-Ching.wav", waitForCompletion: false)
let fallingCookieSound = SKAction.playSoundFileNamed("Scrape.wav", waitForCompletion: false)
let addCookieSound = SKAction.playSoundFileNamed("Drip.wav", waitForCompletion: false)

It also loads the background image from the asset catalog. Since the scene’s anchorPoint is (0.5, 0.5), the background image will always be centered on all iPhone screen sizes:

override init(size: CGSize) {
  super.init(size: size)
    
  anchorPoint = CGPoint(x: 0.5, y: 0.5)
    
  let background = SKSpriteNode(imageNamed: "Background")
  background.size = size
  addChild(background)
}

GameViewController

There are two important GameViewController properties to note. The scene variable provides a reference to the GameScene.

The lazy backgroundMusic declares a variable and initializes it in the same statement, a common iOS pattern:

lazy var backgroundMusic: AVAudioPlayer? = {
    guard let url = Bundle.main.url(forResource: "Mining by Moonlight", withExtension: "mp3") else {
      return nil
    }
    do {
      let player = try AVAudioPlayer(contentsOf: url)
      player.numberOfLoops = -1
      return player
    } catch {
      return nil
    }
}()

The initialization code sits in a closure. It loads the background music MP3 and sets it to loop forever. Because the variable is marked lazy, the code from the closure won’t run until backgroundMusic is first accessed.

The GameScene is set up in viewDidLoad(). You’ll come back to that later.

The IBOutlets and IBActions correspond to objects in the Main.storyboard. You’ll connect them in the later part of the tutorial.

Main Storyboard

Remember those labels and the Shuffle button you saw in the simulator? Those were created in the Main.storyboard. They don’t work now, but you’ll fix that before we’re done.

Main Storyboard

UIKit and SpriteKit get along quite nicely

The Target, Moves and Score labels appear in nested stack views at the top of the screen. If you need a refresher, check out our Stack Views tutorial.

Assets

The starter project contains a bunch of audio and image files to make your game sound and look tasty. Audio files are in a folder named Sounds.

Sprites.atlas

Images are either in the global assets catalog (Assets.xcassets), or in a texture atlas. In Xcode, a texture atlas looks like any other folder, with a name that ends in .atlas. The special name tells Xcode to pack the images into a texture atlas when it builds the game, dramatically improving performance. To learn more about texture atlases, check out our SpriteKit Animations and Texture Atlases tutorial.

Take a look inside Sprites.atlas to find the matching-images for your game: croissants, cupcakes, donuts (yum!). Grid.atlas contains grid images (less yum).

Other items of note:

  • LevelData.swift uses Swift 4’s new Decodable API to make parsing the JSON files a snap. You’ll use it to create levels. See this JSON Parsing screencast for more.
  • Array2D.swift is a helper file which makes it easier to create two-dimensional arrays.
  • Tile.swift is empty now. But contains some hints for adding jelly.

That does it for the starter project tour!

Add Your Cookies

Enough with the pre-heating, let’s start baking! Your next steps are to:

  • Create the Cookie class.
  • Create the Level class.
  • Load levels from JSON files.
  • Serve up your cookies atop background tiles — mom taught you to always use a plate, after all!

The Cookie Class

This game’s playing field consists of a grid, 9 columns by 9 rows. Each square of this grid can contain a cookie.

Column 0, row 0 is in the bottom-left corner of the grid. Since the point (0,0) is also at the bottom-left of the screen in SpriteKit’s coordinate system, it makes sense to have everything else “upside down” — at least compared to the rest of UIKit. :]

To begin implementing this, you need to create the class representing a cookie object. Go to File\New\File…, choose the iOS\Source\Swift File template and click Next. Name the file Cookie.swift and click Create.

Replace the contents of Cookie.swift with the following:

import SpriteKit

// MARK: - CookieType
enum CookieType: Int {
  case unknown = 0, croissant, cupcake, danish, donut, macaroon, sugarCookie 
}

// MARK: - Cookie
class Cookie: CustomStringConvertible, Hashable {
  
  var hashValue: Int {
    return row * 10 + column
  }
  
  static func ==(lhs: Cookie, rhs: Cookie) -> Bool {
    return lhs.column == rhs.column && lhs.row == rhs.row
    
  }
 
  var description: String {
    return "type:\(cookieType) square:(\(column),\(row))"
  }
  
  var column: Int
  var row: Int
  let cookieType: CookieType
  var sprite: SKSpriteNode?
  
  init(column: Int, row: Int, cookieType: CookieType) {
    self.column = column
    self.row = row
    self.cookieType = cookieType
  }
}

You use two protocols that will pay dividends later:

  • CustomStringConvertible: This will make your print statements a lot easier to read.
  • Hashable: Cookies will later be used in a Set and the objects that you put into a set must conform to Hashable. That’s a requirement from Swift.

The column and row properties let Cookie keep track of its position in the 2D grid.

The sprite property is optional, hence the question mark after SKSpriteNode, because the cookie object may not always have its sprite set.

The cookieType property describes the — wait for it — type of the cookie, which takes a value from the CookieType enum. The type is really just a number from 1 to 6, but wrapping it in an enum allows you to work with easy-to-remember names instead of numbers.

You will deliberately not use cookie type Unknown (value 0). This value has a special meaning, as you’ll learn later on.

Each cookie type number corresponds to a sprite image:

In Swift, an enum isn’t useful only for associating symbolic names with numbers; you can also add functions and computed properties to an enum. Add the following code inside the enum CookieType:

var spriteName: String {
  let spriteNames = [
    "Croissant",
    "Cupcake",
    "Danish",
    "Donut",
    "Macaroon",
    "SugarCookie"]

  return spriteNames[rawValue - 1]
}

var highlightedSpriteName: String {
  return spriteName + "-Highlighted"
}

The spriteName property returns the filename of the corresponding sprite image in the texture atlas. In addition to the regular cookie sprite, there is also a highlighted version that appears when the player taps on the cookie.

The spriteName and highlightedSpriteName properties simply look up the name for the cookie sprite in an array of strings. To find the index, you use rawValue to convert the enum’s current value to an integer. Recall that the first useful cookie type, croissant, starts at 1 but arrays are indexed starting at 0, so you need to subtract 1 to find the correct array index.

Every time a new cookie gets added to the game, it will get a random cookie type. It makes sense to add that as a function on CookieType. Add the following to the enum as well:

static func random() -> CookieType {
  return CookieType(rawValue: Int(arc4random_uniform(6)) + 1)!
}

This calls arc4random_uniform(_:) to generate a random number between 0 and 5, then adds 1 to make it a number between 1 and 6. Because Swift is very strict, the result from arc4random_uniform(_:)UInt32 — must first be converted to Int, then you can convert this number into a proper CookieType value.

Now, you may wonder why you’re not making Cookie a subclass of SKSpriteNode. After all, the cookie is something you want to display on the screen. If you’re familiar with the MVC pattern, think of Cookie as a model object that simply describes the data for the cookie. The view is a separate object, stored in the sprite property.

This kind of separation between data models and views is something you’ll use consistently throughout this tutorial. The MVC pattern is more common in regular apps than in games but, as you’ll see, it can help keep the code clean and flexible.

The Level Class

Now let start building levels. Go to File\New\File…, choose the iOS\Source\Swift File template and click Next. Name the file Level.swift and click Create.

Replace the contents of Level.swift with the following:

import Foundation

let numColumns = 9
let numRows = 9 

class Level {
  private var cookies = Array2D<Cookie>(columns: numColumns, rows: numRows)
}

This declares two constants for the dimensions of the level, numColumns and numRows, so you don’t have to hardcode the number 9 everywhere.

The property cookies is the two-dimensional array that holds the Cookie objects, 81 in total, 9 rows of 9 columns.

The cookies array is private, so Level needs to provide a way for others to obtain a cookie object at a specific position in the level grid.

Add the code for this method to end of Level:

func cookie(atColumn column: Int, row: Int) -> Cookie? {
  precondition(column >= 0 && column < numColumns)
  precondition(row >= 0 && row < numRows)
  return cookies[column, row]
}

Using cookie(atColumn: 3, row: 6) you can ask the Level for the cookie at column 3, row 6. Behind the scenes this asks the Array2D for the cookie and then returns it. Note that the return type is Cookie?, an optional, because not all grid squares will necessarily have a cookie.

Notice the use of precondition to verify that the specified column and row numbers are within the valid range of 0-8.

Now to fill up that cookies array with some cookies! Later on you will learn how to read level designs from a JSON file but for now, you’ll fill up the array yourself, just so there is something to show on the screen.

Add the following two methods to the end of Level:

func shuffle() -> Set<Cookie> {
  return createInitialCookies()
}

private func createInitialCookies() -> Set<Cookie> {
  var set: Set<Cookie> = []

  // 1
  for row in 0..<numRows {
    for column in 0..<numColumns {

      // 2
      let cookieType = CookieType.random()

      // 3
      let cookie = Cookie(column: column, row: row, cookieType: cookieType)
      cookies[column, row] = cookie

      // 4
      set.insert(cookie)
    }
  }
  return set
}

Both methods return a Set. A Set is a collection, like an array, but it allows each element to appear only once, and it doesn't store the elements in any particular order.

shuffle() fills up the level with random cookies. Right now it just calls createInitialCookies(), where the real work happens. Here's what it does, step by step:

  1. The method loops through the rows and columns of the 2D array. This is something you’ll see a lot in this tutorial. Remember that column 0, row 0 is in the bottom-left corner of the 2D grid.
  2. Then it picks a random cookie type using the method you added earlier.
  3. Next, it creates a new Cookie and adds it to the 2D array.
  4. Finally, it adds the new Cookie to a Set. shuffle() returns this set of cookies to its caller.

One of the main difficulties when designing your code is deciding how the different objects will communicate with each other. In this game, you often accomplish this by passing around a collection of objects, usually a Set or Array.

In this case, after you create a new Level and call shuffle() to fill it with cookies, the Level replies, “Here is a set with all the new Cookies I just added.” You can take that set and, for example, create new sprites for all the cookies it contains. In fact, that’s exactly what you’ll do in the next section.

Build the app and make sure you're not getting any compilation errors.

Open GameScene.swift and add the following properties to the class:

var level: Level!

let tileWidth: CGFloat = 32.0
let tileHeight: CGFloat = 36.0

let gameLayer = SKNode()
let cookiesLayer = SKNode()

The scene has a public property to hold a reference to the current level.

Each square of the 2D grid measures 32 by 36 points, so you put those values into the tileWidth and tileHeight constants. These constants will make it easier to calculate the position of a cookie sprite.

To keep the SpriteKit node hierarchy neatly organized, GameScene uses several layers. The base layer is called gameLayer. This is the container for all the other layers and it’s centered on the screen. You’ll add the cookie sprites to cookiesLayer, which is a child of gameLayer.

Add the following lines to init(size:) to add the new layers. Put this after the code that creates the background node:

addChild(gameLayer)

let layerPosition = CGPoint(
    x: -tileWidth * CGFloat(numColumns) / 2,
    y: -tileHeight * CGFloat(numRows) / 2)

cookiesLayer.position = layerPosition
gameLayer.addChild(cookiesLayer)

This adds two empty SKNodes to the screen to act as layers. You can think of these as transparent planes you can add other nodes in.

Remember that earlier you set the anchorPoint of the scene to (0.5, 0.5)? This means that when you add children to the scene their starting point (0, 0) will automatically be in the center of the scene.

However, because column 0, row 0 is in the bottom-left corner of the 2D grid, you want the positions of the sprites to be relative to the cookiesLayer’s bottom-left corner, as well. That’s why you move the layer down and to the left by half the height and width of the grid.

Adding the sprites to the scene happens in addSprites(for:). Add it after init(size:):

func addSprites(for cookies: Set<Cookie>) {
  for cookie in cookies {
    let sprite = SKSpriteNode(imageNamed: cookie.cookieType.spriteName)
    sprite.size = CGSize(width: tileWidth, height: tileHeight)
    sprite.position = pointFor(column: cookie.column, row: cookie.row)
    cookiesLayer.addChild(sprite)
    cookie.sprite = sprite
  }
}

private func pointFor(column: Int, row: Int) -> CGPoint {
  return CGPoint(
    x: CGFloat(column) * tileWidth + tileWidth / 2,
    y: CGFloat(row) * tileHeight + tileHeight / 2)
}

addSprites(for:) iterates through the set of cookies and adds a corresponding SKSpriteNode instance to the cookie layer. This uses a helper method, pointFor(column:, row:), that converts a column and row number into a CGPoint that is relative to the cookiesLayer. This point represents the center of the cookie’s SKSpriteNode.

Open GameViewController.swift and add a new property to the class:

var level: Level!

Next, add these two new methods:

func beginGame() {
  shuffle()
}

func shuffle() {
  let newCookies = level.shuffle()
  scene.addSprites(for: newCookies)
}

beginGame() kicks off the game by calling shuffle(). This is where you call Level's shuffle() method, which returns the Set containing new Cookie objects. Remember that these cookie objects are just model data; they don’t have any sprites yet. To show them on the screen, you tell GameScene to add sprites for those cookies.

The only missing piece is creating the actual Level instance. Add the following lines in viewDidLoad(), just before the code that presents the scene:

level = Level()
scene.level = level

After creating the new Level instance, you set the level property on the scene to tie together the model and the view.

Finally, make sure you call beginGame() at the end of viewDidLoad() to set things in motion:

beginGame()

Build and run, and you should finally see some cookies:

finally, some cookies!

Loading Levels from JSON Files

Not all the levels in Candy Crush Saga have grids that are a simple square shape. You will now add support for loading level designs from JSON files. The five designs you’re going to load still use the same 9x9 grid, but they leave some of the squares blank.

Look in the Levels folder in the starter project and you’ll see several files.

Level JSON

Click on Level_1.json to look inside. You’ll see that the contents are structured as a dictionary containing three elements: tiles, targetScore and moves.

The tiles array contains nine other arrays, one for each row of the level. If a tile has a value of 1, it can contain a cookie; a 0 means the tile is empty.

Open Level.swift and add a new property and method:

private var tiles = Array2D<Tile>(columns: numColumns, rows: numRows)

func tileAt(column: Int, row: Int) -> Tile? {
  precondition(column >= 0 && column < numColumns)
  precondition(row >= 0 && row < numRows)
  return tiles[column, row]
}

The tiles variable describes the structure of the level. This is very similar to the cookies array, except now you make it an Array2D of Tile objects.

Whereas the cookies array keeps track of the Cookie objects in the level, tiles simply describes which parts of the level grid are empty and which can contain a cookie:

Wherever tiles[a, b] is nil, the grid is empty and cannot contain a cookie.

Now that the instance variables for level data are in place, you can start adding the code to fill in the data.

Add the new init(filename:) initializer to Level.swift:

init(filename: String) {
  // 1
  guard let levelData = LevelData.loadFrom(file: filename) else { return }
  // 2
  let tilesArray = levelData.tiles
  // 3
  for (row, rowArray) in tilesArray.enumerated() {
    // 4
    let tileRow = numRows - row - 1
    // 5
    for (column, value) in rowArray.enumerated() {
      if value == 1 {
        tiles[column, tileRow] = Tile()
      }
    }
  }
}

Here's what this initializer does, step-by-step:

  1. Load the data level from a specific JSON file. Note that this function may return nil — it returns an optional — and you use guard to handle this situation.
  2. Create a “tiles” array.
  3. Step through the rows using built-in enumerated() function, which is useful because it also returns the current row number.
  4. In SpriteKit (0, 0) is at the bottom of the screen, so you have to reverse the order of the rows here. The first row you read from the JSON corresponds to the last row of the 2D grid.
  5. Step through the columns in the current row. Every time you find a 1, create a Tile object and place it into the tiles array.

You still need to put this new tiles array to good use. Inside createInitialCookies(), add an if-clause inside the two for-loops, around the code that creates the Cookie object:

// This line is new
if tiles[column, row] != nil {

  let cookieType = ...
  ...
  set.insert(cookie)
}

Now the app will only create a Cookie object if there is a tile at that spot.

One last thing remains: In GameViewController.swift’s viewDidLoad(), replace the line that creates the level object with:

level = Level(filename: "Level_1")

Build and run, and now you should have a non-square level shape:

level 1 rendered on screen

Who are you calling a square?

Making the Tiles Visible

To make the cookie sprites stand out from the background a bit more, you can draw a slightly darker “tile” sprite behind each cookie. These new tile sprites will live on their own layer, the tilesLayer. The graphics are included in the starter project, in Grid.atlas.

In GameScene.swift, add three new properties:

let tilesLayer = SKNode() 
let cropLayer = SKCropNode() 
let maskLayer = SKNode()

This makes three layers: tilesLayer, cropLayer, which is a special kind of node called an SKCropNode, and maskLayer. A crop node only draws its children where the mask contains pixels. This lets you draw the cookies only where there is a tile, but never on the background.

In init(size:), add these lines below the code that creates the layerPosition:

tilesLayer.position = layerPosition
maskLayer.position = layerPosition
cropLayer.maskNode = maskLayer
gameLayer.addChild(tilesLayer)
gameLayer.addChild(cropLayer)

Make sure you add the children nodes in the correct order so tiles appear behind the cropLayer (which contains your cookies.) SpriteKit nodes with the same zPosition are drawn in the order they were added.

Replace this line:

gameLayer.addChild(cookiesLayer)

With this:

cropLayer.addChild(cookiesLayer)

Now, instead of adding the cookiesLayer directly to the gameLayer, you add it to this new cropLayer.

Add the following method to GameScene.swift, as well:

func addTiles() {
  // 1
  for row in 0..<numRows {
    for column in 0..<numColumns {
      if level.tileAt(column: column, row: row) != nil {
        let tileNode = SKSpriteNode(imageNamed: "MaskTile")
        tileNode.size = CGSize(width: tileWidth, height: tileHeight)
        tileNode.position = pointFor(column: column, row: row)
        maskLayer.addChild(tileNode)
      }
    }
  }

  // 2
  for row in 0...numRows {
    for column in 0...numColumns {
      let topLeft     = (column > 0) && (row < numRows)
        && level.tileAt(column: column - 1, row: row) != nil
      let bottomLeft  = (column > 0) && (row > 0)
        && level.tileAt(column: column - 1, row: row - 1) != nil
      let topRight    = (column < numColumns) && (row < numRows)
        && level.tileAt(column: column, row: row) != nil
      let bottomRight = (column < numColumns) && (row > 0)
        && level.tileAt(column: column, row: row - 1) != nil

      var value = topLeft.hashValue
      value = value | topRight.hashValue << 1
      value = value | bottomLeft.hashValue << 2
      value = value | bottomRight.hashValue << 3

      // Values 0 (no tiles), 6 and 9 (two opposite tiles) are not drawn.
      if value != 0 && value != 6 && value != 9 {
        let name = String(format: "Tile_%ld", value)
        let tileNode = SKSpriteNode(imageNamed: name)
        tileNode.size = CGSize(width: tileWidth, height: tileHeight)
        var point = pointFor(column: column, row: row)
        point.x -= tileWidth / 2
        point.y -= tileHeight / 2
        tileNode.position = point
        tilesLayer.addChild(tileNode)
      }
    }
  }
}

Here's what's going on.

  1. Wherever there’s a tile, the method now draws the special MaskTile sprite into the layer functioning as the SKCropNode’s mask.
  2. This draws a pattern of border pieces in between the level tiles.

    Imagine dividing each tile into four quadrants. The four boolean variables — topLeft, bottomLeft, topRight, topLeft — indicate which quadrants need a background. For example, a tile surrounded on all sides wouldn't need any border, just a full background to fit in seamlessly to the tiles around it. But in a square level, a tile in the lower-right corner would need a background to cover the top-left only, like so:

    The code checks which tile is required, and selects the right sprite.

Finally, open GameViewController.swift. Add the following line to viewDidLoad(), immediately after you present the scene:

scene.addTiles()

Build and run and notice how nice your cookies look!

Looks good enough to eat!

Where to Go From Here?

You can download the completed version of the project to this point using the Download Materials button at the top or bottom of this tutorial.

Your game is shaping up nicely, but there’s still a way to go before it's finished. For now give yourself a cookie for making it through part one!

In the next part, you’ll work on detecting swipes, swapping cookies and finding cookie chains. You're in for a treat ;]

While you eat your cookie, take a moment to let us hear from you in the forums!

Credits: Free game art from Game Art Guppy.

Portions of the source code were inspired by Gabriel Nica's Swift port of the game.

The post How to Make a Game Like Candy Crush with SpriteKit and Swift: Part 1 appeared first on Ray Wenderlich.

How to Make a Game Like Candy Crush with SpriteKit and Swift: Part 2

$
0
0

Update note: This SpriteKit tutorial has been updated for Xcode 9.3 and Swift 4.1 by Kevin Colligan. The original tutorial was written by Matthijs Hollemans and subsequently updated by Morten Faarkrog.

How to Make a Game Like Candy Crush with SpriteKit and Swift: Part 2

Welcome back to our “How to Make a Game Like Candy Crush” tutorial with SpriteKit and Swift series.

  • In the first part, you toured the starter project, built the game foundation and wrote the logic for loading levels.
  • (You’re here) In the second part, you’ll focus on detecting swipes and swapping cookies.
  • In the third part, you’ll work on finding and removing chains, refilling the board and keeping score.

This tutorial picks up where you left off in the last part. Use the Download Materials button at the top or bottom of this tutorial to download the starter project if you need it.

Add Swipe Gestures

In Cookie Crunch Adventure, you want the player to be able to swap two cookies by swiping left, right, up or down.

Detecting swipes is a job for GameScene. If the player touches a cookie on the screen, it might be the start of a valid swipe motion. Which cookie to swap with the touched cookie depends on the direction of the swipe.

To recognize the swipe motion, you’ll use the touchesBegan, touchesMoved and touchesEnded methods from GameScene.

Go to GameScene.swift and add two private properties to the class:

private var swipeFromColumn: Int?
private var swipeFromRow: Int?

These properties record the column and row numbers of the cookie that the player first touched when she started her swipe movement. These are implicitly initialized to nil, as they are optionals.

You first need to add a new convertPoint(_:) method. It’s the opposite of pointFor(column:, row:), so add this right below it.

private func convertPoint(_ point: CGPoint) -> (success: Bool, column: Int, row: Int) {
  if point.x >= 0 && point.x < CGFloat(numColumns) * tileWidth &&
    point.y >= 0 && point.y < CGFloat(numRows) * tileHeight {
    return (true, Int(point.x / tileWidth), Int(point.y / tileHeight))
  } else {
    return (false, 0, 0)  // invalid location
  }
}

This method takes a CGPoint that is relative to the cookiesLayer and converts it into column and row numbers. The return value of this method is a tuple with three values: 1) the boolean that indicates success or failure; 2) the column number; and 3) the row number. If the point falls outside the grid, this method returns false for success.

Now add touchesBegan(_:with:):

override func touchesBegan(_ touches: Set<UITouch>, with event: UIEvent?) {
  // 1
  guard let touch = touches.first else { return }
  let location = touch.location(in: cookiesLayer)
  // 2
  let (success, column, row) = convertPoint(location)
  if success {
    // 3
    if let cookie = level.cookie(atColumn: column, row: row) {
      // 4
      swipeFromColumn = column
      swipeFromRow = row
    }
  }
}

The game will call touchesBegan(_:with:) whenever the user puts her finger on the screen. Here’s what the method does, step by step:

  1. It converts the touch location, if any, to a point relative to the cookiesLayer.
  2. Then, it finds out if the touch is inside a square on the level grid by calling convertPoint(_:). If so, this might be the start of a swipe motion. At this point, you don’t know yet whether that square contains a cookie, but at least the player put her finger somewhere inside the 9x9 grid.
  3. Next, the method verifies that the touch is on a cookie rather than on an empty square. You'll get a warning here about cookie being unused, but you'll need it later so ignore the warning.
  4. Finally, it records the column and row where the swipe started so you can compare them later to find the direction of the swipe.

To perform a valid swipe, the player also has to move her finger out of the current square. You’re only interested in the general direction of the swipe, not the exact destination.

The logic for detecting the swipe direction goes into touchesMoved(_:with:), so add this method next:

override func touchesMoved(_ touches: Set<UITouch>, with event: UIEvent?) {
  // 1
  guard swipeFromColumn != nil else { return }

  // 2
  guard let touch = touches.first else { return }
  let location = touch.location(in: cookiesLayer)

  let (success, column, row) = convertPoint(location)
  if success {

    // 3
    var horizontalDelta = 0, verticalDelta = 0
    if column < swipeFromColumn! {          // swipe left
      horizontalDelta = -1
    } else if column > swipeFromColumn! {   // swipe right
      horizontalDelta = 1
    } else if row < swipeFromRow! {         // swipe down
      verticalDelta = -1
    } else if row > swipeFromRow! {         // swipe up
      verticalDelta = 1
    }

    // 4
    if horizontalDelta != 0 || verticalDelta != 0 {
      trySwap(horizontalDelta: horizontalDelta, verticalDelta: verticalDelta)

      // 5
      swipeFromColumn = nil
    }
  }
}

Here is what this does:

  1. If swipeFromColumn is nil, then either the swipe began outside the valid area or the game has already swapped the cookies and you need to ignore the rest of the motion. You could keep track of this in a separate boolean but using swipeFromColumn is just as easy; that's why you made it an optional.
  2. This is similar to what touchesBegan(_:with:) does to calculate the row and column numbers currently under the player’s finger.
  3. Here the method figures out the direction of the player’s swipe by simply comparing the new column and row numbers to the previous ones. Note that you’re not allowing diagonal swipes. Since you're using else if statements, only one of horizontalDelta or verticalDelta will be set.
  4. trySwap(horizontalDelta:verticalDelta:) is called only if the player swiped out of the old square.
  5. By setting swipeFromColumn back to nil, the game will ignore the rest of this swipe motion.

The hard work of cookie swapping goes into a new method:

private func trySwap(horizontalDelta: Int, verticalDelta: Int) {
  // 1
  let toColumn = swipeFromColumn! + horizontalDelta
  let toRow = swipeFromRow! + verticalDelta
  // 2
  guard toColumn >= 0 && toColumn < numColumns else { return }
  guard toRow >= 0 && toRow < numRows else { return }
  // 3
  if let toCookie = level.cookie(atColumn: toColumn, row: toRow),
    let fromCookie = level.cookie(atColumn: swipeFromColumn!, row: swipeFromRow!) {
    // 4
    print("*** swapping \(fromCookie) with \(toCookie)")
  }
}

This is called "try swap" for a reason. At this point, you only know that the player swiped up, down, left or right, but you don’t yet know if there is a cookie to swap in that direction.

  1. You calculate the column and row numbers of the cookie to swap with.
  2. It is possible that the toColumn or toRow is outside the 9x9 grid. This can occur when the user swipes from a cookie near the edge of the grid. The game should ignore such swipes.
  3. The final check is to make sure that there is actually a cookie at the new position. You can't swap if there’s no second cookie! This happens when the user swipes into a gap where there is no tile.
  4. When you get here, it means everything is OK and this is a valid swap! For now, you log both cookies to the Xcode console.

For completeness’s sake, you should also implement touchesEnded(_:with:), which is called when the user lifts her finger from the screen, and touchesCancelled(_:with:), which happens when iOS decides that it must interrupt the touch (for example, because of an incoming phone call).

Add the following:

override func touchesEnded(_ touches: Set<UITouch>, with event: UIEvent?) {
  swipeFromColumn = nil
  swipeFromRow = nil
}

override func touchesCancelled(_ touches: Set<UITouch>, with event: UIEvent?) {
  touchesEnded(touches, with: event)
}

If the gesture ends, regardless of whether it was a valid swipe, you reset the starting column and row numbers to nil.

Build and run, and try out different swaps:

Valid swipe

You won’t see anything happen in the game yet, but the debug pane logs your attempts to make a valid swap.

Animating the Swaps

To describe the swapping of two cookies, you'll create a new type: Swap. This is another model object whose only purpose it is to say, “The player wants to swap cookie A with cookie B.”

Create a new Swift File named Swap.swift. Replace its contents with the following:

struct Swap: CustomStringConvertible {
  let cookieA: Cookie
  let cookieB: Cookie
  
  init(cookieA: Cookie, cookieB: Cookie) {
    self.cookieA = cookieA
    self.cookieB = cookieB
  }
  
  var description: String {
    return "swap \(cookieA) with \(cookieB)"
  }
}

Now that you have an object that can describe an attempted swap, the question becomes: Who will handle the logic of actually performing the swap? The swipe detection logic happens in GameScene, but all the real game logic so far is in GameViewController.

That means GameScene must have a way to communicate back to GameViewController that the player performed a valid swipe and that a swap must be attempted. One way to communicate is through a delegate protocol, but since this is the only message that GameScene must send back to GameViewController, you’ll use a closure.

Add the following property to the top of GameScene.swift:

var swipeHandler: ((Swap) -> Void)?

The type of this variable is ((Swap) -> Void)?. Because of the -> you can tell this is a closure or function. This closure or function takes a Swap object as its parameter and does not return anything.

It’s the scene’s job to handle touches. If it recognizes that the user made a swipe, it will call the closure that's stored in the swipe handler. This is how it communicates back to the GameViewController that a swap needs to take place.

Still in GameScene.swift, add the following code to the bottom of trySwap(horizontal:vertical:), replacing the print() statement:

if let handler = swipeHandler {
  let swap = Swap(cookieA: fromCookie, cookieB: toCookie)
  handler(swap)
}

This creates a new Swap object, fills in the two cookies to be swapped and then calls the swipe handler to take care of the rest. Because swipeHandler can be nil, you use optional binding to get a valid reference first.

GameViewController will decide whether the swap is valid; if it is, you'll need to animate the two cookies. Add the following method to do this in GameScene.swift:

func animate(_ swap: Swap, completion: @escaping () -> Void) {
  let spriteA = swap.cookieA.sprite!
  let spriteB = swap.cookieB.sprite!

  spriteA.zPosition = 100
  spriteB.zPosition = 90

  let duration: TimeInterval = 0.3

  let moveA = SKAction.move(to: spriteB.position, duration: duration)
  moveA.timingMode = .easeOut
  spriteA.run(moveA, completion: completion)

  let moveB = SKAction.move(to: spriteA.position, duration: duration)
  moveB.timingMode = .easeOut
  spriteB.run(moveB)

  run(swapSound)
}

This is basic SKAction animation code: You move cookie A to the position of cookie B and vice versa.

The cookie that was the origin of the swipe is in cookieA and the animation looks best if that one appears on top, so this method adjusts the relative zPosition of the two cookie sprites to make that happen.

After the animation completes, the action on cookieA calls a completion block so the caller can continue doing whatever it needs to do. That’s a common pattern for this game: The game waits until an animation is complete and then it resumes.

Now that you've handled the view, there's still the model to deal with before getting to the controller! Open Level.swift and add the following method:

func performSwap(_ swap: Swap) {
  let columnA = swap.cookieA.column
  let rowA = swap.cookieA.row
  let columnB = swap.cookieB.column
  let rowB = swap.cookieB.row

  cookies[columnA, rowA] = swap.cookieB
  swap.cookieB.column = columnA
  swap.cookieB.row = rowA

  cookies[columnB, rowB] = swap.cookieA
  swap.cookieA.column = columnB
  swap.cookieA.row = rowB
}

This first makes temporary copies of the row and column numbers from the Cookie objects because they get overwritten. To make the swap, it updates the cookies array, as well as the column and row properties of the Cookie objects, which shouldn’t go out of sync. That’s it for the data model.

Go to GameViewController.swift and add the following method:

func handleSwipe(_ swap: Swap) {
  view.isUserInteractionEnabled = false

  level.performSwap(swap)
  scene.animate(swap) {
    self.view.isUserInteractionEnabled = true
  }
}

You first tell the level to perform the swap, which updates the data model and then, tell the scene to animate the swap, which updates the view. Over the course of this tutorial, you’ll add the rest of the gameplay logic to this function.

While the animation is happening, you don’t want the player to be able to touch anything else, so you temporarily turn off isUserInteractionEnabled on the view. You turn it back on in the completion block that is passed to animate(_:completion:).

Also add the following line to viewDidLoad(), just before the line that presents the scene:

scene.swipeHandler = handleSwipe

This assigns the handleSwipe(_:) function to GameScene’s swipeHandler property. Now whenever GameScene calls swipeHandler(swap), it actually calls a function in GameViewController.

Build and run the app. You can now swap the cookies! Also, try to make a swap across a gap — it won’t work!

Swap cookies

Highlighting the Cookies

In Candy Crush Saga, the candy you swipe lights up for a brief moment. You can achieve this effect in Cookie Crunch Adventure by placing a highlight image on top of the sprite.

The texture atlas has highlighted versions of the cookie sprites that are brighter and more saturated. The CookieType enum already has a function to return the name of this image.

Time to improve GameScene by adding this highlighted cookie on top of the existing cookie sprite. Adding it as a new sprite, as opposed to replacing the existing sprite’s texture, makes it easier to crossfade back to the original image.

In GameScene.swift, add a new private property to the class:

private var selectionSprite = SKSpriteNode()

Add the following method:

func showSelectionIndicator(of cookie: Cookie) {
  if selectionSprite.parent != nil {
    selectionSprite.removeFromParent()
  }

  if let sprite = cookie.sprite {
    let texture = SKTexture(imageNamed: cookie.cookieType.highlightedSpriteName)
    selectionSprite.size = CGSize(width: tileWidth, height: tileHeight)
    selectionSprite.run(SKAction.setTexture(texture))

    sprite.addChild(selectionSprite)
    selectionSprite.alpha = 1.0
  }
}

This gets the name of the highlighted sprite image from the Cookie object and puts the corresponding texture on the selection sprite. Simply setting the texture on the sprite doesn't give it the correct size but using an SKAction does.

You also make the selection sprite visible by setting its alpha to 1. You add the selection sprite as a child of the cookie sprite so that it moves along with the cookie sprite in the swap animation.

Add the opposite method, hideSelectionIndicator():

func hideSelectionIndicator() {
  selectionSprite.run(SKAction.sequence([
    SKAction.fadeOut(withDuration: 0.3),
    SKAction.removeFromParent()]))
}

This method removes the selection sprite by fading it out.

What remains, is for you to call these methods. First, in touchesBegan(_:with:), in the if let cookie = ... section — Xcode is helpfully pointing it out with a warning — add:

showSelectionIndicator(of: cookie)

And in touchesMoved(_:with:), after the call to trySwap(horizontalDelta:verticalDelta:), add:

hideSelectionIndicator()

There is one last place to call hideSelectionIndicator(). If the user just taps on the screen rather than swipes, you want to fade out the highlighted sprite, too. Add these lines to the top of touchesEnded():

if selectionSprite.parent != nil && swipeFromColumn != nil {
  hideSelectionIndicator()
}

Build and run, and light up some cookies! :]

A Smarter Way to Fill the Array

When you run the game now, there may already be such chains on the screen. That’s no good; you only want matches after the user swaps two cookies or after new cookies fall down the screen.

Here’s your rule: Whenever it’s the user’s turn to make a move, no matches may exist on the board. To guarantee this is the case, you have to make the method that fills up the cookies array a bit smarter.

Go to Level.swift and find createInitialCookies(). Replace the single line that calculates the random cookieType with the following:

var cookieType: CookieType
repeat {
  cookieType = CookieType.random()
} while (column >= 2 &&
  cookies[column - 1, row]?.cookieType == cookieType &&
  cookies[column - 2, row]?.cookieType == cookieType)
  || (row >= 2 &&
    cookies[column, row - 1]?.cookieType == cookieType &&
    cookies[column, row - 2]?.cookieType == cookieType)

This piece of logic picks the cookie type at random and makes sure that it never creates a chain of three or more.

If the new random cookie causes a chain of three, the method tries again. The loop repeats until it finds a random cookie that does not create a chain of three or more. It only has to look to the left or below because there are no cookies yet on the right or above.

Run the app and verify that there are no longer any chains in the initial state of the game.

Track Allowable Swaps

You only want to let the player swap two cookies if it would result in either (or both) of these cookies making a chain of three or more.

You need to add some logic to the game to detect whether a swap results in a chain. To accomplish this, you'll build a list of all possible moves after the level is shuffled. Then you only have to check if the attempted swap is in that list. You're going to need a set of Swaps which means Swap must be Hashable.

Open Swap.swift and add Hashable to the struct declaration:

struct Swap: CustomStringConvertible, Hashable {

Next add the following methods to implement Hashable:

var hashValue: Int {
  return cookieA.hashValue ^ cookieB.hashValue
}

static func ==(lhs: Swap, rhs: Swap) -> Bool {
  return (lhs.cookieA == rhs.cookieA && lhs.cookieB == rhs.cookieB) ||
    (lhs.cookieB == rhs.cookieA && lhs.cookieA == rhs.cookieB)
}

You declare that a swap is equal if it refers to the same two cookies, regardless of the order.

In Level.swift, add a new property:

private var possibleSwaps: Set<Swap> = []

Again, you’re using a Set here instead of an Array because the order of the elements in this collection isn’t important. This Set will contain Swap objects. If the player tries to swap two cookies that are not in the set, then the game won’t accept the swap as a valid move.

At the start of each turn, you need to detect which cookies the player can swap. You’re going to make this happen in shuffle(). Still in Level.swift, replace that method with:

func shuffle() -> Set<Cookie> {
  var set: Set<Cookie>
  repeat {
    set = createInitialCookies()
    detectPossibleSwaps()
    print("possible swaps: \(possibleSwaps)")
  } while possibleSwaps.count == 0

  return set
}

As before, this calls createInitialCookies() to fill up the level with random cookie objects. But then it calls a new method that you will add shortly, detectPossibleSwaps(), to fill up the new possibleSwaps set.

detectPossibleSwaps() will use a helper method to see if a cookie is part of a chain. Add this method now:

private func hasChain(atColumn column: Int, row: Int) -> Bool {
  let cookieType = cookies[column, row]!.cookieType

  // Horizontal chain check
  var horizontalLength = 1

  // Left
  var i = column - 1
  while i >= 0 && cookies[i, row]?.cookieType == cookieType {
    i -= 1
    horizontalLength += 1
  }

  // Right
  i = column + 1
  while i < numColumns && cookies[i, row]?.cookieType == cookieType {
    i += 1
    horizontalLength += 1
  }
  if horizontalLength >= 3 { return true }

  // Vertical chain check
  var verticalLength = 1

  // Down
  i = row - 1
  while i >= 0 && cookies[column, i]?.cookieType == cookieType {
    i -= 1
    verticalLength += 1
  }

  // Up
  i = row + 1
  while i < numRows && cookies[column, i]?.cookieType == cookieType {
    i += 1
    verticalLength += 1
  }
  return verticalLength >= 3
}

A chain is three or more consecutive cookies of the same type in a row or column.

Given a cookie in a particular square on the grid, this method first looks to the left. As long as it finds a cookie of the same type, it increments horizontalLength and keeps going left. It then checks the other three directions.

Now that you have this method, you can implement detectPossibleSwaps(). Here’s how it will work at a high level:

  1. It will step through the rows and columns of the 2-D grid and simply swap each cookie with the one next to it, one at a time.
  2. If swapping these two cookies creates a chain, it will add a new Swap object to the list of possibleSwaps.
  3. Then, it will swap these cookies back to restore the original state and continue with the next cookie until it has swapped them all.
  4. It will go through the above steps twice: once to check all horizontal swaps and once to check all vertical swaps.

It’s a big one, so you’ll take it in parts!

First, add the outline of the method:

func detectPossibleSwaps() {
  var set: Set<Swap> = []

  for row in 0..<numRows {
    for column in 0..<numColumns {
      if let cookie = cookies[column, row] {

        // TODO: detection logic goes here
      }
    }
  }

  possibleSwaps = set
}

This is pretty simple: The method loops through the rows and columns, and for each spot, if there is a cookie rather than an empty square, it performs the detection logic. Finally, the method places the results into the possibleSwaps property. Ignore the two warnings for now.

The detection will consist of two separate parts that do the same thing but in different directions. First you want to swap the cookie with the one on the right, and then you want to swap the cookie with the one above it. Remember, row 0 is at the bottom so you’ll work your way up.

Add the following code where it says “TODO: detection logic goes here”:

// Have a cookie in this spot? If there is no tile, there is no cookie.
if column < numColumns - 1,
  let other = cookies[column + 1, row] {
  // Swap them
  cookies[column, row] = other
  cookies[column + 1, row] = cookie

  // Is either cookie now part of a chain?
  if hasChain(atColumn: column + 1, row: row) ||
    hasChain(atColumn: column, row: row) {
    set.insert(Swap(cookieA: cookie, cookieB: other))
  }

  // Swap them back
  cookies[column, row] = cookie
  cookies[column + 1, row] = other
}

This attempts to swap the current cookie with the cookie on the right, if there is one. If this creates a chain of three or more, the code adds a new Swap object to the set.

Now add the following code directly below the code above:

if row < numRows - 1,
  let other = cookies[column, row + 1] {
  cookies[column, row] = other
  cookies[column, row + 1] = cookie

  // Is either cookie now part of a chain?
  if hasChain(atColumn: column, row: row + 1) ||
    hasChain(atColumn: column, row: row) {
    set.insert(Swap(cookieA: cookie, cookieB: other))
  }

  // Swap them back
  cookies[column, row] = cookie
  cookies[column, row + 1] = other
}

This does exactly the same thing, but for the cookie above instead of on the right.

Now run the app and you should see something like this in the Xcode console:

possible swaps: [
swap type:SugarCookie square:(6,5) with type:Cupcake square:(7,5),
swap type:Croissant square:(3,3) with type:Macaroon square:(4,3),
swap type:Danish square:(6,0) with type:Macaroon square:(6,1),
swap type:Cupcake square:(6,4) with type:SugarCookie square:(6,5),
swap type:Croissant square:(4,2) with type:Macaroon square:(4,3),
. . .

Block Unwanted Swaps

Time to put this list of possible moves to good use. Add the following method to Level.swift:

func isPossibleSwap(_ swap: Swap) -> Bool {
  return possibleSwaps.contains(swap)
}

This looks to see if the set of possible swaps contains the specified Swap object.

Finally call the method in GameViewController.swift, inside handleSwipe(_:). Replace the existing handleSwipe(_:) with the following:

func handleSwipe(_ swap: Swap) {
  view.isUserInteractionEnabled = false

  if level.isPossibleSwap(swap) {
    level.performSwap(swap)
    scene.animate(swap) {
      self.view.isUserInteractionEnabled = true
    }
  } else {
    view.isUserInteractionEnabled = true
  }
}

Now the game will only perform the swap if it’s in the list of sanctioned swaps.

Build and run to try it out. You should only be able to make swaps if they result in a chain.

It’s also fun to animate attempted swaps that are invalid, so add the following method to GameScene.swift:

func animateInvalidSwap(_ swap: Swap, completion: @escaping () -> Void) {
  let spriteA = swap.cookieA.sprite!
  let spriteB = swap.cookieB.sprite!

  spriteA.zPosition = 100
  spriteB.zPosition = 90

  let duration: TimeInterval = 0.2

  let moveA = SKAction.move(to: spriteB.position, duration: duration)
  moveA.timingMode = .easeOut

  let moveB = SKAction.move(to: spriteA.position, duration: duration)
  moveB.timingMode = .easeOut

  spriteA.run(SKAction.sequence([moveA, moveB]), completion: completion)
  spriteB.run(SKAction.sequence([moveB, moveA]))

  run(invalidSwapSound)
}

This method is similar to animate(_:completion:), but here it slides the cookies to their new positions and then immediately flips them back.

In GameViewController.swift, change the else clause inside handleSwipe(_:) to:

scene.animateInvalidSwap(swap) {
  self.view.isUserInteractionEnabled = true
}

Now run the app and try to make a swap that won’t result in a chain:

Where to Go From Here?

You can download the project to this point using the Download Materials button at the top or bottom of this tutorial.

Good job on finishing the second part of this tutorial series. You've done a really great job laying down the foundation for your game.

In part 3, you’ll work on finding and removing chains, refilling the level with new yummy cookies after successful swipes and keeping score.

While you take a well-deserved break, take a moment to let us hear from you in the forums.

Credits: Free game art from Game Art Guppy. The music is by Kevin MacLeod. The sound effects are based on samples from freesound.org.

Portions of the source code were inspired by Gabriel Nica's Swift port of the game.

The post How to Make a Game Like Candy Crush with SpriteKit and Swift: Part 2 appeared first on Ray Wenderlich.

How to Make a Game Like Candy Crush with SpriteKit and Swift: Part 3

$
0
0

Update note: This SpriteKit tutorial has been updated for Xcode 9.3 and Swift 4.1 by Kevin Colligan. The original tutorial was written by Matthijs Hollemans and subsequently updated by Morten Faarkrog.

How to Make a Game Like Candy Crush with SpriteKit and Swift: Part 3

Welcome back to our “How to Make a Game Like Candy Crush” tutorial with SpriteKit and Swift series.

  • In the first part, you built the game foundation.
  • In the second part, you worked on swipes and swapping cookies.
  • (You’re here) In the third part, you’ll find and remove chains, refill the grid and keep score.

This tutorial picks up where you left off in the last part. Use the Download Materials button at the top or bottom of this tutorial to download the starter project if you need it.

Getting Started

You’ve done everything needed to allow the player to swap cookies. Swaps always lead to a chain of three or more matching cookies. The next thing to do is to remove those matching cookies from the screen and reward the player with points.

This is the sequence of events:

Finding the Chains

The game only lets the player make a swap if it will result in a chain of three or more cookies of the same type. But a single swipe could create multiple chains. To find them all, you’ll make a class that describes a chain.

Go to File\New\File…, choose the iOS\Source\Swift File template and click Next. Name the file Chain.swift and click Create.

Replace the contents of Chain.swift with:

class Chain: Hashable, CustomStringConvertible {
  var cookies: [Cookie] = []

  enum ChainType: CustomStringConvertible {
    case horizontal
    case vertical

    var description: String {
      switch self {
      case .horizontal: return "Horizontal"
      case .vertical: return "Vertical"
      }
    }
  }

  var chainType: ChainType

  init(chainType: ChainType) {
    self.chainType = chainType
  }

  func add(cookie: Cookie) {
    cookies.append(cookie)
  }

  func firstCookie() -> Cookie {
    return cookies[0]
  }

  func lastCookie() -> Cookie {
    return cookies[cookies.count - 1]
  }

  var length: Int {
    return cookies.count
  }

  var description: String {
    return "type:\(chainType) cookies:\(cookies)"
  }

  var hashValue: Int {
    return cookies.reduce (0) { $0.hashValue ^ $1.hashValue }
  }

  static func ==(lhs: Chain, rhs: Chain) -> Bool {
    return lhs.cookies == rhs.cookies
  }
}

A chain has a list of cookie objects and a type: it’s either horizontal — a row of cookies — or vertical — a column. The type is defined as an enum; it is nested inside Chain because these two things are tightly coupled. You can also add more complex chain types, such as L- and T-shapes.

You’re using an array to store cookies and not a set because you need to know their order. This makes it easier to combine multiple chains into a single one — or to detect L- or T-shapes.

Open Level.swift. You’re going to add a method named removeMatches(), but before you get to that, you need a couple of helper methods to do the heavy lifting of finding chains.

To find a chain, you’ll need a pair of for loops that step through each square of the level grid.

While stepping through the cookies in a row horizontally, you want to find the first cookie that starts a chain. You know a cookie begins a chain if at least the next two cookies on its right are of the same type. Then, you skip over all cookies of the same type until you find one that breaks the chain. You repeat this until you’ve looked at all possibilities.

Add this method to scan for horizontal chains:

private func detectHorizontalMatches() -> Set<Chain> {
  // 1
  var set: Set<Chain> = []
  // 2
  for row in 0..<numRows {
    var column = 0
    while column < numColumns-2 {
      // 3
      if let cookie = cookies[column, row] {
        let matchType = cookie.cookieType
        // 4
        if cookies[column + 1, row]?.cookieType == matchType &&
          cookies[column + 2, row]?.cookieType == matchType {
          // 5
          let chain = Chain(chainType: .horizontal)
          repeat {
            chain.add(cookie: cookies[column, row]!)
            column += 1
          } while column < numColumns && cookies[column, row]?.cookieType == matchType

          set.insert(chain)
          continue
        }
      }
      // 6
      column += 1
    }
  }
  return set
}

Here’s how this method works:

  1. You create a new set to hold the horizontal chains. Later, you’ll remove the cookies in these chains from the playing field.
  2. You loop through the rows and columns. You don’t need to look at the last two columns because these cookies can never begin a new chain.
  3. You skip over any gaps in the level design.
  4. You check whether the next two columns have the same cookie type.
  5. At this point, there is a chain of at least three cookies, but potentially there are more. This steps through all the matching cookies until it finds a cookie that breaks the chain or the end of the grid. Then, it adds all the matching cookies to a new Chain.
  6. If the next two cookies don’t match the current one or if there is an empty tile, then there is no chain, so you skip over the cookie.

Next, add this method to scan for vertical cookie matches:

private func detectVerticalMatches() -> Set<Chain> {
  var set: Set<Chain> = []

  for column in 0..<numColumns {
    var row = 0
    while row < numRows-2 {
      if let cookie = cookies[column, row] {
        let matchType = cookie.cookieType

        if cookies[column, row + 1]?.cookieType == matchType &&
          cookies[column, row + 2]?.cookieType == matchType {
          let chain = Chain(chainType: .vertical)
          repeat {
            chain.add(cookie: cookies[column, row]!)
            row += 1
          } while row < numRows && cookies[column, row]?.cookieType == matchType

          set.insert(chain)
          continue
        }
      }
      row += 1
    }
  }
  return set
}

The vertical version has the same kind of logic, but loops first by column and then by row.

You don’t immediately remove the cookies from the level as soon as you detect that they’re part of a chain because they may be part of two chains at the same time.

Now that the two match detectors are ready, add the implementation for removeMatches():

func removeMatches() -> Set<Chain> {
  let horizontalChains = detectHorizontalMatches()
  let verticalChains = detectVerticalMatches()

  print("Horizontal matches: \(horizontalChains)")
  print("Vertical matches: \(verticalChains)")

  return horizontalChains.union(verticalChains)
}

This method calls the two helper methods and then combines their results into a single set. Later, you’ll add more logic to this method but for now you’re only interested in finding the matches and returning the set.

You still need to call removeMatches() from somewhere and that somewhere is GameViewController.swift. Add this helper method:

func handleMatches() {
  let chains = level.removeMatches()
  // TODO: do something with the chains set
}

Later, you'll fill out this method with code to remove cookie chains and drop other cookies into the empty tiles.

In handleSwipe(), replace the call to scene.animateSwap(swap) and its completion closure with this:

scene.animate(swap, completion: handleMatches)

Build and run, and swap two cookies to make a chain. You should now see something like this in Xcode’s console:

Removing Chains

Now you’re going to remove those cookies with a nice animation.

First, you need to update the data model by removing the Cookie objects from the array for the 2D grid. When that’s done, you can tell GameScene to animate the sprites for these cookies out of existence.

Removing the cookies from the model is simple enough. Add the following method to Level.swift:

private func removeCookies(in chains: Set<Chain>) {
  for chain in chains {
    for cookie in chain.cookies {
      cookies[cookie.column, cookie.row] = nil
    }
  }
}

Each chain has a list of cookies and each cookie knows its position in the grid, so you simply set that element to nil to remove the cookie from the data model.

In removeMatches(), replace the print() statements with the following:

removeCookies(in: horizontalChains)
removeCookies(in: verticalChains)

That takes care of the data model. Now switch to GameScene.swift and add the following method:

func animateMatchedCookies(for chains: Set<Chain>, completion: @escaping () -> Void) {
  for chain in chains {
    for cookie in chain.cookies {
      if let sprite = cookie.sprite {
        if sprite.action(forKey: "removing") == nil {
          let scaleAction = SKAction.scale(to: 0.1, duration: 0.3)
          scaleAction.timingMode = .easeOut
          sprite.run(SKAction.sequence([scaleAction, SKAction.removeFromParent()]),
                     withKey: "removing")
        }
      }
    }
  }
  run(matchSound)
  run(SKAction.wait(forDuration: 0.3), completion: completion)
}

This loops through all the chains and all the cookies in each chain, and then triggers the animations.

Because the same Cookie could be part of two chains, you need to ensure you add only one animation to the sprite, not two. That's why the action is added using the key "removing". If such an action already exists, you won't add a new animation to the sprite.

When the shrinking animation is done, the sprite is removed from the cookie layer. The wait(forDuration:) action at the end ensures that the rest of the game will only continue after the animations finish.

Open GameViewController.swift and replace handleMatches() with the following to call this new animation:

func handleMatches() {
  let chains = level.removeMatches()

  scene.animateMatchedCookies(for: chains) {
    self.view.isUserInteractionEnabled = true
  }
}

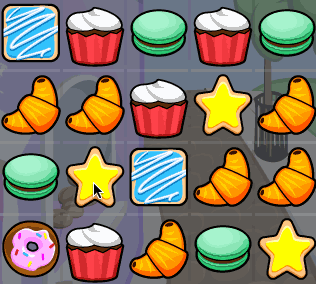
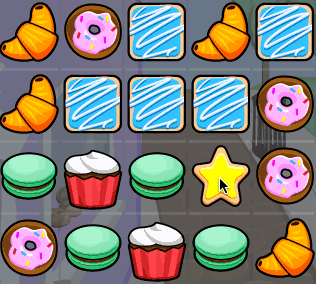
Try it out. Build and run, and make some matches.

Dropping Cookies Into Empty Tiles

Removing cookie chains leaves holes in the grid. Other cookies should now fall down to fill up those holes. You’ll tackle this in two steps:

  1. Update the model.
  2. Animate the sprites.

Add this new method to Level.swift:

func fillHoles() -> [[Cookie]] {
    var columns: [[Cookie]] = []
    // 1
    for column in 0..<numColumns {
      var array: [Cookie] = []
      for row in 0..<numRows {
        // 2
        if tiles[column, row] != nil && cookies[column, row] == nil {
          // 3
          for lookup in (row + 1)..<numRows {
            if let cookie = cookies[column, lookup] {
              // 4
              cookies[column, lookup] = nil
              cookies[column, row] = cookie
              cookie.row = row
              // 5
              array.append(cookie)
              // 6
              break
            }
          }
        }
      }
      // 7
      if !array.isEmpty {
        columns.append(array)
      }
    }
    return columns
}

This method detects where there are empty tiles and shifts any cookies down to fill up those tiles. It starts at the bottom and scans upward. If it finds a square that should have a cookie but doesn’t, it then finds the nearest cookie above it and moves that cookie to the empty tile.

Here is how it all works:

  1. You loop through the rows, from bottom to top.
  2. If there’s a tile at a position but no cookie, then there’s a hole. Remember that the tiles array describes the shape of the level.
  3. You scan upward to find the cookie that sits directly above the hole. Note that the hole may be bigger than one square — for example, if this was a vertical chain — and that there may be holes in the grid shape, as well.
  4. If you find another cookie, move that cookie to the hole.
  5. You add the cookie to the array. Each column gets its own array and cookies that are lower on the screen are first in the array. It’s important to keep this order intact, so the animation code can apply the correct delay. The farther up the piece is, the bigger the delay before the animation starts.
  6. Once you’ve found a cookie, you don't need to scan up any farther so you break out of the inner loop.
  7. If a column does not have any holes, then there's no point in adding it to the final array.

At the end, the method returns an array containing all the cookies that have been moved down, organized by column.

You’ve already updated the data model for these cookies with the new positions, but the sprites need to catch up. GameScene will animate the sprites and GameViewController is the in-between object to coordinate between the the model (Level) and the view (GameScene).

Switch to GameScene.swift and add a new animation method:

func animateFallingCookies(in columns: [[Cookie]], completion: @escaping () -> Void) {
  // 1
  var longestDuration: TimeInterval = 0
  for array in columns {
    for (index, cookie) in array.enumerated() {
      let newPosition = pointFor(column: cookie.column, row: cookie.row)
      // 2
      let delay = 0.05 + 0.15 * TimeInterval(index)
      // 3
      let sprite = cookie.sprite!   // sprite always exists at this point
      let duration = TimeInterval(((sprite.position.y - newPosition.y) / tileHeight) * 0.1)
      // 4
      longestDuration = max(longestDuration, duration + delay)
      // 5
      let moveAction = SKAction.move(to: newPosition, duration: duration)
      moveAction.timingMode = .easeOut
      sprite.run(
        SKAction.sequence([
          SKAction.wait(forDuration: delay),
          SKAction.group([moveAction, fallingCookieSound])]))
    }
  }

  // 6
  run(SKAction.wait(forDuration: longestDuration), completion: completion)
}

Here’s how this works:

  1. As with the other animation methods, you should only call the completion block after all the animations are finished. Because the number of falling cookies may vary, you can’t hardcode this total duration but instead have to compute it.
  2. The higher up the cookie is, the bigger the delay on the animation. That looks more dynamic than dropping all the cookies at the same time. This calculation works because fillHoles() guarantees that lower cookies are first in the array.
  3. Likewise, the duration of the animation is based on how far the cookie has to fall — 0.1 seconds per tile. You can tweak these numbers to change the feel of the animation.
  4. You calculate which animation is the longest. This is the time the game must wait before it may continue.
  5. You perform the animation, which consists of a delay, a movement and a sound effect.
  6. You wait until all the cookies have fallen down before allowing the gameplay to continue.

Now you can tie it all together. Open GameViewController.swift. Replace the existing handleMatches() with the following:

func handleMatches() {
  let chains = level.removeMatches()
  scene.animateMatchedCookies(for: chains) {
    let columns = self.level.fillHoles()
    self.scene.animateFallingCookies(in: columns) {
      self.view.isUserInteractionEnabled = true
    }
  }
}

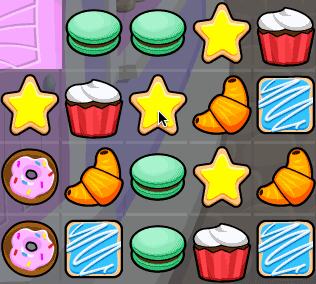
This now calls fillHoles() to update the model, which returns the array that describes the fallen cookies and then passes that array onto the scene so it can animate the sprites to their new positions. Build and run to try it out!

Adding New Cookies

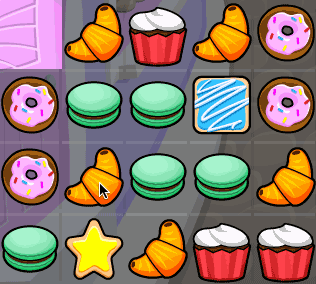
There’s one more thing to do to complete the game loop. Falling cookies leave their own holes at the top of each column.

You need to top up these columns with new cookies. Add a new method to Level.swift:

func topUpCookies() -> [[Cookie]] {
  var columns: [[Cookie]] = []
  var cookieType: CookieType = .unknown

  for column in 0..<numColumns {
    var array: [Cookie] = []

    // 1
    var row = numRows - 1
    while row >= 0 && cookies[column, row] == nil {
      // 2
      if tiles[column, row] != nil {
        // 3
        var newCookieType: CookieType
        repeat {
          newCookieType = CookieType.random()
        } while newCookieType == cookieType
        cookieType = newCookieType
        // 4
        let cookie = Cookie(column: column, row: row, cookieType: cookieType)
        cookies[column, row] = cookie
        array.append(cookie)
      }

      row -= 1
    }
    // 5
    if !array.isEmpty {
      columns.append(array)
    }
  }
  return columns
}

Here’s how it works:

  1. You loop through the column from top to bottom. This while loop ends when cookies[column, row] is not nil — that is, when it has found a cookie.
  2. You ignore gaps in the level, because you only need to fill up grid squares that have a tile.
  3. You randomly create a new cookie type. It can’t be equal to the type of the last new cookie, to prevent too many "freebie" matches.
  4. You create the new Cookie object and add it to the array for this column.
  5. As before, if a column does not have any holes, you don't add it to the final array.

The array that topUpCookies() returns contains a sub-array for each column that had holes. The cookie objects in these arrays are ordered from top to bottom. This is important to know for the animation method coming next.

Switch to GameScene.swift and the new animation method:

func animateNewCookies(in columns: [[Cookie]], completion: @escaping () -> Void) {
  // 1
  var longestDuration: TimeInterval = 0

  for array in columns {
    // 2
    let startRow = array[0].row + 1

    for (index, cookie) in array.enumerated() {
      // 3
      let sprite = SKSpriteNode(imageNamed: cookie.cookieType.spriteName)
      sprite.size = CGSize(width: tileWidth, height: tileHeight)
      sprite.position = pointFor(column: cookie.column, row: startRow)
      cookiesLayer.addChild(sprite)
      cookie.sprite = sprite
      // 4
      let delay = 0.1 + 0.2 * TimeInterval(array.count - index - 1)
      // 5
      let duration = TimeInterval(startRow - cookie.row) * 0.1
      longestDuration = max(longestDuration, duration + delay)
      // 6
      let newPosition = pointFor(column: cookie.column, row: cookie.row)
      let moveAction = SKAction.move(to: newPosition, duration: duration)
      moveAction.timingMode = .easeOut
      sprite.alpha = 0
      sprite.run(
        SKAction.sequence([
          SKAction.wait(forDuration: delay),
          SKAction.group([
            SKAction.fadeIn(withDuration: 0.05),
            moveAction,
            addCookieSound])
          ]))
    }
  }
  // 7
  run(SKAction.wait(forDuration: longestDuration), completion: completion)
}

This is very similar to the “falling cookies” animation. The main difference is that the cookie objects are now in reverse order in the array, from top to bottom. This is what the method does:

  1. The game is not allowed to continue until all the animations are complete, so you calculate the duration of the longest animation to use later in step 7.
  2. The new cookie sprite should start out just above the first tile in this column. An easy way to find the row number of this tile is to look at the row of the first cookie in the array, which is always the top-most one for this column.
  3. You create a new sprite for the cookie.
  4. The higher the cookie, the longer you make the delay, so the cookies appear to fall after one another.
  5. You calculate the animation’s duration based on far the cookie has to fall.
  6. You animate the sprite falling down and fading in. This makes the cookies appear less abruptly out of thin air at the top of the grid.
  7. You wait until the animations are done before continuing the game.

Finally, in GameViewController.swift, once again replace handleMatches() with the following:

func handleMatches() {
  let chains = level.removeMatches()
  scene.animateMatchedCookies(for: chains) {
    let columns = self.level.fillHoles()
    self.scene.animateFallingCookies(in: columns) {
      let columns = self.level.topUpCookies()
      self.scene.animateNewCookies(in: columns) {
        self.view.isUserInteractionEnabled = true
      }
    }
  }
}

Try it out by building and running.

A Cascade of Cookies

When the cookies fall down to fill up the holes and new cookies drop from the top, these actions sometimes create new chains of three or more. You need to remove these matching chains and ensure other cookies take their place. This cycle should continue until there are no matches left on the board. Only then should the game give control back to the player.

Handling these possible cascades may sound like a tricky problem, but you’ve already written all the code to do it! You just have to call handleMatches() again and again and again until there are no more chains.

In GameViewController.swift, inside handleMatches(), change the line that sets isUserInteractionEnabled to:

self.handleMatches()

Yep, you’re seeing that right: handleMatches() calls itself. This is called recursion and it’s a powerful programming technique. There’s only one thing you need to watch out for with recursion: at some point, you need to stop it, or the app will go into an infinite loop and eventually crash.

For that reason, add the following to the top of handleMatches(), right after the line that calls level.removeMatches()

if chains.count == 0 {
  beginNextTurn()
  return
}

If there are no more matches, the player gets to move again and the function exits to prevent another recursive call.

Finally, add this new method:

func beginNextTurn() {
  level.detectPossibleSwaps()
  view.isUserInteractionEnabled = true
}

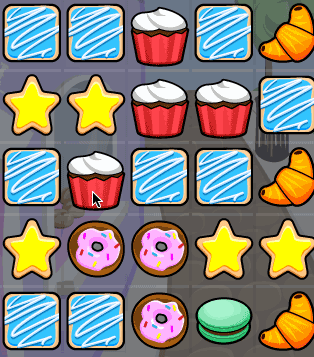
We now have an endless supply of cookies. Build and run to see how this looks.

Scoring Points

In Cookie Crunch Adventure, the player’s objective is to score a certain number of points within a maximum number of swaps. Both of these values come from the JSON level file.

GameViewController.swift includes all the necessary properties to hold the data, and Main.storyboard holds the views which display it.

Because the target score and maximum number of moves are stored in the JSON level file, you should load them into Level. Add the following properties to Level.swift:

var targetScore = 0
var maximumMoves = 0

Still in Level.swift, add these two lines at the end of init(filename:):

targetScore = levelData.targetScore
maximumMoves = levelData.moves

Copy the values retrieved from the JSON into the level itself.

Back in GameViewController.swift, add the following method:

func updateLabels() {
  targetLabel.text = String(format: "%ld", level.targetScore)
  movesLabel.text = String(format: "%ld", movesLeft)
  scoreLabel.text = String(format: "%ld", score)
}

You’ll call this method after every turn to update the text inside the labels.

Add the following lines to the top of beginGame(), before the call to shuffle():

movesLeft = level.maximumMoves
score = 0
updateLabels()

This resets everything to the starting values. Build and run, and your display should look like this:

Calculating the Score

The scoring rules are simple:

  • A 3-cookie chain is worth 60 points.
  • Each additional cookie in the chain increases the chain’s value by 60 points.

Thus, a 4-cookie chain is worth 120 points, a 5-cookie chain is worth 180 points and so on.

It’s easiest to store the score inside the Chain object, so each chain knows how many points it’s worth.

Add the following to Chain.swift:

var score = 0

The score is model data, so it needs to be calculated by Level. Add the following method to Level.swift:

private func calculateScores(for chains: Set<Chain>) {
  // 3-chain is 60 pts, 4-chain is 120, 5-chain is 180, and so on
  for chain in chains {
    chain.score = 60 * (chain.length - 2)
  }
}

Now call this method from removeMatches(), just before the return statement:

calculateScores(for: horizontalChains)
calculateScores(for: verticalChains)

You need to call it twice because there are two sets of chain objects.

Now that the level object knows how to calculate the scores and stores them inside the Chain objects, you can update the player’s score and display it onscreen.

This happens in GameViewController.swift, so open that. Inside handleMatches(), just before the call to self.level.fillHoles(), add the following lines:

for chain in chains {
  self.score += chain.score
}
self.updateLabels()

This simply loops through the chains, adds their scores to the player’s total and then updates the labels.

Try it out. Swap a few cookies and observe your increasing score:

Animating Point Values

It would be fun to show the point value of each chain with a cool little animation. In GameScene.swift, add a new method:

func animateScore(for chain: Chain) {
  // Figure out what the midpoint of the chain is.
  let firstSprite = chain.firstCookie().sprite!
  let lastSprite = chain.lastCookie().sprite!
  let centerPosition = CGPoint(
    x: (firstSprite.position.x + lastSprite.position.x)/2,
    y: (firstSprite.position.y + lastSprite.position.y)/2 - 8)

  // Add a label for the score that slowly floats up.
  let scoreLabel = SKLabelNode(fontNamed: "GillSans-BoldItalic")
  scoreLabel.fontSize = 16
  scoreLabel.text = String(format: "%ld", chain.score)
  scoreLabel.position = centerPosition
  scoreLabel.zPosition = 300
  cookiesLayer.addChild(scoreLabel)

  let moveAction = SKAction.move(by: CGVector(dx: 0, dy: 3), duration: 0.7)
  moveAction.timingMode = .easeOut
  scoreLabel.run(SKAction.sequence([moveAction, SKAction.removeFromParent()]))
}

This creates a new SKLabelNode with the score and places it in the center of the chain. The numbers will float up a few pixels before disappearing.

Call this new method from animateMatchedCookies(for:completion:), right after for chain in chains:

animateScore(for: chain)

When using SKLabelNode, SpriteKit needs to load the font and convert it to a texture. That only happens once, but it does create a small delay, so it’s smart to pre-load this font before the game starts in earnest.

Open GameScene.swift, and at the bottom of init(size:), add the following line:

let _ = SKLabelNode(fontNamed: "GillSans-BoldItalic")

Now try it out. Build and run, and score some points!

Handle Combo Scenarios

What makes games like Candy Crush Saga fun is the ability to make combos, or more than one match in a row.

Of course, you should reward the player for making a combo by giving extra points. To that effect, you’ll add a combo multiplier, where the first chain is worth its normal score, but the second chain is worth twice its score, the third chain is worth three times its score, and so on.

In Level.swift, add the following private property:

private var comboMultiplier = 0

Replace calculateScores(for:) with:

private func calculateScores(for chains: Set<Chain>) {
  // 3-chain is 60 pts, 4-chain is 120, 5-chain is 180, and so on
  for chain in chains {
    chain.score = 60 * (chain.length - 2) * comboMultiplier
    comboMultiplier += 1
  }
}

The method now multiplies the chain’s score by the combo multiplier and then increments the multiplier so it’s one higher for the next chain.

You also need a method to reset this multiplier on the next turn. Add the following method to Level.swift:

func resetComboMultiplier() {
  comboMultiplier = 1
}

Open GameViewController.swift and find beginGame(). Add this line just before the call to shuffle():

level.resetComboMultiplier()

Add the same line at the top of beginNextTurn().

And now you have combos. Try it out!

Handle Winning and Losing Scenarios

The player only has so many moves to reach the target score. Fail, then it’s game over. The logic for this isn’t difficult to add.

Create a new method in GameViewController.swift:

func decrementMoves() {
  movesLeft -= 1
  updateLabels()
}

This simply decrements the counter keeping track of the number of moves and updates the onscreen labels.

Call it from the bottom of beginNextTurn():

decrementMoves()

Build and run to see it in action. After each swap, the game clears the matches and decreases the number of remaining moves by one.

Of course, you still need to detect when the player runs out of moves (game over!) or when the target score is reached (success and eternal fame!), and respond accordingly.

The Look of Victory or Defeat

Main.storyboard contains an image view that you’ll update with a win or lose graphic. First, make sure the view doesn’t make an early appearance.

Open GameViewController.swift, and in viewDidLoad(), before you present the scene, make sure to hide this image view:

gameOverPanel.isHidden = true

Add the property for the tap recognizer at the top of the file:

var tapGestureRecognizer: UITapGestureRecognizer!

Now add a new method to show the game over panel:

func showGameOver() {
  gameOverPanel.isHidden = false
  scene.isUserInteractionEnabled = false

  self.tapGestureRecognizer = UITapGestureRecognizer(target: self, action: #selector(hideGameOver))
  self.view.addGestureRecognizer(self.tapGestureRecognizer)
}

This un-hides the image view, disables touches on the scene to prevent the player from swiping and adds a tap gesture recognizer that will restart the game.

Add one more method:

@objc func hideGameOver() {
  view.removeGestureRecognizer(tapGestureRecognizer)
  tapGestureRecognizer = nil

  gameOverPanel.isHidden = true
  scene.isUserInteractionEnabled = true

  beginGame()
}

This hides the game over panel again and restarts the game.

The logic that detects whether it’s time to show the game over panel goes into decrementMoves(). Add the following lines to the bottom of that method:

if score >= level.targetScore {
  gameOverPanel.image = UIImage(named: "LevelComplete")
  showGameOver()
} else if movesLeft == 0 {
  gameOverPanel.image = UIImage(named: "GameOver")
  showGameOver()
}

If the current score is greater than or equal to the target score, the player has won the game! If the number of moves remaining is 0, the player has lost the game.

In either case, the method loads the proper image into the image view and calls showGameOver() to put it on the screen.

Try it out. When you beat the game, you should see this:

Animating the Transitions

It looks a bit messy with this banner on top of all those cookies, so add some animation here. Add these two methods to GameScene.swift:

func animateGameOver(_ completion: @escaping () -> Void) {
  let action = SKAction.move(by: CGVector(dx: 0, dy: -size.height), duration: 0.3)
  action.timingMode = .easeIn
  gameLayer.run(action, completion: completion)
}

func animateBeginGame(_ completion: @escaping () -> Void) {
  gameLayer.isHidden = false
  gameLayer.position = CGPoint(x: 0, y: size.height)
  let action = SKAction.move(by: CGVector(dx: 0, dy: -size.height), duration: 0.3)
  action.timingMode = .easeOut
  gameLayer.run(action, completion: completion)
}

animateGameOver() animates the entire gameLayer out of the way. animateBeginGame() does the opposite and slides the gameLayer back in from the top of the screen.

The very first time the game starts, you also want to call animateBeginGame() to perform this same animation. It looks better if the game layer is hidden before that animation begins, so add the following line to GameScene.swift in init(size:), immediately addChild(gameLayer):

gameLayer.isHidden = true

Now open GameViewController.swift and replace showGameOver():

func showGameOver() {
  gameOverPanel.isHidden = false
  scene.isUserInteractionEnabled = false

  scene.animateGameOver {
    self.tapGestureRecognizer = UITapGestureRecognizer(target: self, action: #selector(self.hideGameOver))
    self.view.addGestureRecognizer(self.tapGestureRecognizer)
  }
}

Note that the tap gesture recognizer is now added after the animation is complete. This prevents the player from tapping while the game is still performing the animation.

In GameViewController.swift’s beginGame(), just before the call to shuffle(), call animateBeginGame():

scene.animateBeginGame { }

The completion block for this animation is currently empty. You’ll put something there soon.

Now when you tap after game over, the cookies will drop down the screen to their starting positions. Sweet!

Whoops! Something’s not right. It appears you didn’t properly remove the old cookie sprites.

Add this new method to GameScene.swift to perform the cleanup:

func removeAllCookieSprites() {
  cookiesLayer.removeAllChildren()
}

And call it as the very first thing from shuffle() inside GameViewController.swift:

scene.removeAllCookieSprites()

Build and run and your game should reset cleanly.

Manual Shuffling

There’s one more situation to manage: it may happen that there is no way to swap any of the cookies to make a chain. In that case, the player is stuck.

There are different ways to handle this. Candy Crush Saga automatically reshuffles the cookies. But in Cookie Crunch, you’ll give that power to the player. You will allow the player to shuffle at any time by tapping a button, but it will cost the player a move.

Add the following two lines to shuffleButtonPressed(_:) in GameViewController.swift:

shuffle()
decrementMoves()

Tapping the shuffle button costs a move, so this also calls decrementMoves().

In showGameOver(), add the following line to hide the shuffle button:

shuffleButton.isHidden = true

Also do the same thing in viewDidLoad(), so the button is hidden when the game first starts.

In beginGame(), in the animation’s completion block, put the button back on the screen again:

self.shuffleButton.isHidden = false

If you build and run now, you'll see the shuffle is a bit abrupt. It would look much nicer if the new cookies appeared with a cute animation. In GameScene.swift, go to addSprites(for:) and add the following lines inside the for loop, after the existing code:

// Give each cookie sprite a small, random delay. Then fade them in.
sprite.alpha = 0
sprite.xScale = 0.5
sprite.yScale = 0.5

sprite.run(
  SKAction.sequence([
    SKAction.wait(forDuration: 0.25, withRange: 0.5),
    SKAction.group([
      SKAction.fadeIn(withDuration: 0.25),
      SKAction.scale(to: 1.0, duration: 0.25)
      ])
    ]))

This gives each cookie sprite a small, random delay and then fades them into view. It looks like this:

Going to the Next Level

Wouldn't it be cool if your game automatically switched to the next level upon completing the current one? Once again, this is easy to do.

First, in Level.swift add the following global constant for keeping track of the number of levels right below numRows:

let numLevels = 4 // Excluding level 0

Next, in GameViewController.swift add the following property for keeping track of the level the user is currently playing:

var currentLevelNumber = 1

Now you need a way to know what level to use when loading your game scene. Still in GameViewController.swift replace the current viewDidLoad() method with the following:

override func viewDidLoad() {
  super.viewDidLoad()
  
  // Setup view with level 1
  setupLevel(number: currentLevelNumber)
  
  // Start the background music.
  backgroundMusic?.play()
}

And implement setupLevel(_:) as follows:

func setupLevel(number levelNumber: Int) {
  let skView = view as! SKView
  skView.isMultipleTouchEnabled = false

  // Create and configure the scene.
  scene = GameScene(size: skView.bounds.size)
  scene.scaleMode = .aspectFill

  // Setup the level.
  level = Level(filename: "Level_\(levelNumber)")
  scene.level = level

  scene.addTiles()
  scene.swipeHandler = handleSwipe

  gameOverPanel.isHidden = true
  shuffleButton.isHidden = true

  // Present the scene.
  skView.presentScene(scene)

  // Start the game.
  beginGame()
}

As you can see, this is almost the exact same code as you had in viewDidLoad() before, except for the line that setup the actual level instance. Now you choose the level number dynamically :]

Next, in decrementMoves() after the line:

gameOverPanel.image = UIImage(named: "LevelComplete")

add the following to update the current level number.

currentLevelNumber = currentLevelNumber < numLevels ? currentLevelNumber + 1 : 1

Notice that this is only called if the player actually completes the level. Rather than congratulating the player when all levels are complete, you simply go back to level 1. This way the game goes on forever!

Now there's only one last change you need to make before having implemented this awesome level-changing feature to your game. In hideGameOver() replace the line beginGame() with:

setupLevel(number: currentLevelNumber)

Build and run, and your game should now go to the next level when a user completes the current one.

Where to Go From Here?

Congrats for making it to the end! This has been a long but "Swift" tutorial, and you're coming away with all the basic building blocks for making your own match-3 games.

You can download the completed version of the project using the Download Materials button at the top or bottom of this tutorial.

Here are ideas for other features you could add:

  • Special cookies when the player matches a certain shape. (Candy Crush Saga gives you a cookie that can clear an entire row when you match a 4-in-a-row chain.)
  • Bonus points or power-ups for L- or T-shapes
  • Jelly levels: Some tiles are covered in jelly. You have X moves to remove all the jelly. This is where the Tile class comes in handy. You can give it a Bool jelly property and if the player matches a cookie on this tile, set the jelly property to false to remove the jelly.
  • Hints: If the player doesn’t make a move for two seconds, light up a pair of cookies that make a valid swap.

Credits: Free game art from Game Art Guppy. The music is by Kevin MacLeod. The sound effects are based on samples from freesound.org.

Some of the techniques used in this source code are based on a blog post by Emanuele Feronato.

The post How to Make a Game Like Candy Crush with SpriteKit and Swift: Part 3 appeared first on Ray Wenderlich.

Data Structures and Algorithms in Swift: Heap Sort

$
0
0

This is an excerpt taken from Chapter 17, “Heap Sort” of our book Data Structures and Algorithms in Swift. The book covers everything from basic data structures like linked lists and queues, all the way up to merge sort, weighted graphs, Dijkstra’s algorithm, and other advanced data structure concepts and algorithms. Enjoy!

Heapsort is another comparison-based algorithm that sorts an array in ascending order using a heap. This chapter builds on the heap concepts presented in Chapter 12, “The Heap Data Structure”.

Heapsort takes advantage of a heap being, by definition, a partially sorted binary tree with the following qualities:

  1. In a max heap, all parent nodes are larger than their children.
  2. In a min heap, all parent nodes are smaller than their children.

The diagram below shows a heap with parent node values underlined:

Getting Started

Download the starter project for this chapter and open up the starter playground. This playground already contains an implementation of a max heap. Your goal is to extend Heap so it can also sort. Before you get started, let’s look at a visual example of how heap sort works.

Example

For any given unsorted array, to sort from lowest to highest, heap sort must first convert this array into a max heap.

This conversion is done by sifting down all the parent nodes so they end up in the right spot. The resulting max heap is:

Which corresponds with the following array:

Because the time complexity of a single sift down operation is O(log n), the total time complexity of building a heap is O(n log n).

Let’s look at how to sort this array in ascending order.

Because the largest element in a max heap is always at the root, you start by swapping the first element at index 0 with the last element at index n – 1. As a result of this swap, the last element of the array is in the correct spot, but the heap is now invalidated. The next step is thus to sift down the new root note 5 until it lands in its correct position.

Note that you exclude the last element of the heap as we no longer consider it part of the heap, but of the sorted array.

As a result of sifting down 5, the second largest element 21 becomes the new root. You can now repeat the previous steps, swapping 21 with the last element 6, shrinking the heap and sifting down 6.

Starting to see a pattern? Heap sort is very straightforward. As you swap the first and last elements, the larger elements make their way to the back of the array in the correct order. You simply repeat the swapping and sifting steps until you reach a heap of size 1. The array is then fully sorted.

Note: This sorting process is very similar to selection sort from Chapter 14.

Implementation

Next, you’ll implement this sorting algorithm. The actual implementation is very simple, as the heavy lifting is already done by the siftDown method:

extension Heap {
  func sorted() -> [Element] {
    var heap = Heap(sort: sort, elements: elements) // 1
    for index in heap.elements.indices.reversed() { // 2
      heap.elements.swapAt(0, index) // 3
      heap.siftDown(from: 0, upTo: index) // 4
    }
    return heap.elements
  }
}

Here’s what’s going on:

  1. You first make a copy of the heap. After heap sort sorts the elements array, it is no longer a valid heap. By working on a copy of the heap, you ensure the heap remains valid.
  2. You loop through the array, starting from the last element.
  3. You swap the first element and the last element. This moves the largest unsorted element to its correct spot.
  4. Because the heap is now invalid, you must sift down the new root node. As a result, the next largest element will become the new root.

Note that in order to support heap sort, you’ve added an additional parameter upTo to the siftDown method. This way, the sift down only uses the unsorted part of the array, which shrinks with every iteration of the loop.

Finally, give your new method a try:

let heap = Heap(sort: >, elements: [6, 12, 2, 26, 8, 18, 21, 9, 5])
print(heap.sorted())

This should print:

[2, 5, 6, 8, 9, 12, 18, 21, 26]

Performance

Even though you get the benefit of in-memory sorting, the performance of heap sort is O(n log n) for its best, worse and average cases. This is because you have to traverse the whole list once, and every time you swap elements you must perform a sift down, which is an O(log n) operation.

Heap sort is also not a stable sort because it depends on how the elements are laid out and put into the heap. If you were heap sorting a deck of cards by their rank, for example, you might see their suit change order with respect to the original deck.

Where to Go From Here?

If you want to check the results of your work against ours, you can find the completed project in the downloads for this tutorial.

Heap sort is a natural application of the heap data structure and you now should have a solid grasp on how heap sorting works. You will use this as a fundamental building block in future chapters as you build your algorithm repertoire.

If you enjoyed what you learned in this tutorial, why not check out the complete Data Structures and Algorithms in Swift book, available on our store in early access?

In Data Structures and Algorithms in Swift, you’ll learn how to implement the most popular and useful data structures and when and why you should use one particular datastructure or algorithm over another. This set of basic data structures and algorithms will serve as an excellent foundation for building more complex and special-purpose constructs.

As well, the high-level expressiveness of Swift makes it an ideal choice for learning these core concepts without sacrificing performance.

  • You’ll start with the fundamental structures of linked lists, queues and stacks, and see how to implement them in a highly Swift-like way.
  • Move on to working with various types of trees, including general purpose trees, binary trees, AVL trees, binary search trees and tries.
  • Go beyond bubble and insertion sort with better-performing algorithms, including mergesort, radix sort, heap sort and quicksort.
  • Learn how to construct directed, non-directed and weighted graphs to represent many real-world models, and traverse graphs and trees efficiently with breadth-first, depth-first, Dijkstra’s and Prim’s algorithms to solve problems such as finding the shortest path or lowest cost in a network.
  • And much, much more!

By the end of this book, you’ll have hands-on experience solving common issues with data structures and algorithms — and you’ll be well on your way to developing your own efficient and useful implementations.

To celebrate the launch of the book, it’s currently on sale as part of our Advanced Swift Spring Bundle for a massive 40% off. But don’t wait too long, as this deal is only on until Friday, April 27.

If you have any questions or comments on this tutorial, feel free to join the discussion below!

The post Data Structures and Algorithms in Swift: Heap Sort appeared first on Ray Wenderlich.

Building an Android Library Tutorial

$
0
0

Building an Android Library Tutorial

An Android library is structurally the same as an Android app module. It can include everything needed to build an app, including source code, resource files, and an Android manifest. However, instead of compiling into an APK that runs on a device, an Android library compiles into an Android Archive (AAR) file that you can use as a dependency for an Android app module.

In this tutorial, you’ll get to learn everything about building an Android library, from creation to publishing it for others to consume.

In the process, you’ll learn:

  • How to create an Android library
  • How to publish your Android library
  • How to use your Android library
  • Best practices around building Android libraries

Note: If you’re new to Android Development, it’s highly recommended that you work through Beginning Android Development and Kotlin for Android to get a grip on the basic tools and concepts. Other prerequisites include knowledge of using the bash/Terminal, git and Gradle. You’ll also need Android Studio 3.0 or later, and to publish your library you’ll need to have a GitHub account.

Introduction

Code reuse has been around since the advent of code, and Android is no exception. The end goal of every library developer is to simplify abstract complexities of code and package the code for others to reuse in their projects.

As Android developer, you often come across situations where some code is a good candidate to get reused in the future. It is in these situations when packaging that code as an Android Library/SDK makes the most sense.

Every Android developer is different in their own ways. At the same time, there are no set standards around building Android libraries. What that means is that developers come up with their own version of the solution and usually that leads to inconsistencies. Best practices, if defined and followed, could make things more streamlined. In case of library/SDK development, the goal should be to design better APIs so as to enable intended usage. Along with that, you also need to make sure that the API users are clear about its intended use and limitations.

The above holds true for every library and not only for Android library development. If you spent some time solving a problem and believe that others might be facing the same problem, then abstract it into an Android Library. At the very least, it is going to save you precious time in the future when you revisit the same problem. And hopefully a bigger group of Android developers will benefit from your Android library. So it is a win-win in either case.

It’s important to note, however, that the reason to create an Android library should not just be because you think so. If a solution already exists then use that, and if it does not solve your issue then you could make a request for the feature in the existing Android library. Brownie points to you if you decide to solve the problem and contribute back to the existing Android library. The advantage of that is huge because you helped to make the ecosystem better and in the process helped a lot of other Android developers. Better still you did not have to spend a lot of time managing an Android library but your code is going to get used by others.

Phew! Looks like you are all set to embark on the journey to becoming a better Android Library developer! Let’s dive right into it! :]

Getting Started

Begin by downloading the materials for this tutorial at the top or bottom of the page.

Inside, you will find the XML Layouts and associated Activities containing some boilerplate code for the app, along with helper scripts for publishing the Android library to Bintray, and some resources such as Drawables and Strings that you’ll use later on in this tutorial.

If you already have Android Studio open, click File\Import Project and select the top-level project folder you just downloaded. If not, start up Android Studio and select Open an existing Android Studio project from the welcome screen, again choosing the top-level project folder for the starter project you just downloaded. Be sure to accept any prompts to update to the latest Gradle plugin or to download the correct build tools.

Take some time to familiarize yourself with the project before you carry on. MainActivity contains three EditText which you can use to enter email, password and credit card number. When you tap the Validate button, you’ll pass the text entered in the EditText fields and validate them via already declared methods.

Another thing to note is the usage of the ext variable from the project’s build.gradle file in the app/build.gradle file. You will be defining more ext variables in this tutorial and referencing them in the same way later on.

Build and run the app. You should see the following:

Starter app

You will see it does not do anything right now. That is where you come in. Next up you are going to create the Android library which will validate the entered text in the fields. Let’s get rolling!

Creating the Android Library

Inside your Android Studio, click File\New\NewModule…

New module

Select Android Library and hit Next.

New library

You will be at the Configure the new module step of the wizard. At this point, you are required to provide a name for your library , module name, package name and minimum SDK. Put validatetor as library name and module name, com.raywenderlich.android.validatetor as package name and set the minimum SDK to be at 14.

Configure the new module

Once done, hit Finish and go get yourself a coffee. Just kidding, wait or be back in 5 minutes tops (Gradle doing what it does best, compiling and building stuff…) for the next steps!

Looks like you are back and you also have your Android library module named validatetor setup in your project.

Go through the new module added to your project and get familiar with its files. An important thing to note is that under the validatetor module the folder src/com.raywenderlich.android.validatetor/ is empty!

Hmm, that seems odd. Usually, the app module has at least the MainActivity.kt or MainActivity.java inside the same path under it. Well, let me clear this up for you! The reason it is empty is because it is a library and not an app. You need to write the code that the app module will later on consume.

You need to set your Android library up for future steps. To do that, Add ext variables to the project’s(root) build.gradle file inside the already defined ext block, below the Project variables

ext {
  // Project
  ..

  // ValidateTor Library Info
  libVersionCode = 1
  libVersionName = '1.0.0'
}

Next, update your validatetor/build.gradle file to use the ext variables from project’s build.gradle file.

  1. Update compileSdkVersion and buildToolsVersion:
    compileSdkVersion rootProject.ext.compileSdkVersion
    buildToolsVersion rootProject.ext.buildToolsVersion
    
  2. Update minSdkVersion, targetSdkVersion, versionCode and versionName:
    minSdkVersion rootProject.ext.minSdkVersion
    targetSdkVersion rootProject.ext.targetSdkVersion
    versionCode rootProject.ext.libVersionCode
    versionName rootProject.ext.libVersionName
    
  3. Update the version field for the support library dependency:
    testImplementation "com.android.support:appcompat-v7:$supportLibVersion"
    
  4. Update version field for the junit dependency:
    testImplementation "junit:junit:$rootProject.ext.junitVersion"
    

All the above makes sure is that your code is consistent when it comes to defining versions. It also enables control over all these from the project’s build.gradle file.

Next, you have to write the logic of validating the strings that will be included in the validatetor library. The validation code is not the focus of this tutorial, so you’ll just use the Java files from the download materials in the validatetor-logic-code folder.

Once downloaded, extract the files and copy all the files:

Copy files

Paste the copied files inside your validatetor module under src/com.raywenderlich.android.validatetor/ folder.

Paste files

This is what your project will look like now:

validatetor project

Adding your Android Library to your app

Open your app’s build.gradle file and add the following inside dependencies after // Testing dependencies

// added validatetor Android library module as a dependency
implementation project(':validatetor')

Now sync up your project Gradle files. That is it. You have just added the validatetor Android library module to your app.

This is one of the ways of adding an Android library to an app project. There are more ways to add an Android library to your app which will be discussed later on in the tutorial.

Now that you have the validatetor library added as a dependency, you can reference the library code in your app.

You will now put in place the validation code using the validatetor library for all three EditText fields in your app.

Note: you will be referencing the Java-based Android library inside the Kotlin MainActivity class. There is no difference in usage except for following the Kotlin syntax

Navigate to the app module and open the MainActivity.kt file inside the root package of the project to edit.

  1. Create an instance of ValidateTor:
    private lateinit var validateTor: ValidateTor
    
  2. Initialize the instance of ValidateTor by appending the following to onCreate():
    // Initialize validatetor instance
    validateTor = ValidateTor()
    
  3. Inside validateCreditCardField(editText:) replace // TODO: Validate credit card number...:
    if (validateTor.isEmpty(str)) {
       editText.error = "Field is empty!"
    }
    
    if (!validateTor.validateCreditCard(str)) {
        editText.error = "Invalid Credit Card number!"
    } else {
        Toast.makeText(this, "Valid Credit Card Number!", Toast.LENGTH_SHORT).show()
    }
    
  4. Inside validatePasswordField(editText:) replace // TODO: Validate password...:
    if (validateTor.isEmpty(str)) {
        editText.error = "Field is empty!"
    }
    
    if (validateTor.isAtleastLength(str, 8)
           && validateTor.hasAtleastOneDigit(str)
           && validateTor.hasAtleastOneUppercaseCharacter(str)
           && validateTor.hasAtleastOneSpecialCharacter(str)) {
        Toast.makeText(this, "Valid Password!", Toast.LENGTH_SHORT).show()
    } else {
         editText.error = "Password needs to be a minimum length of 8 characters and should have at least 1 digit, 1 upppercase letter and 1 special character "
    }
    
  5. Inside validateEmailField(editText:) replace // TODO: Validate email...:
    if (validateTor.isEmpty(str)) {
        editText.error = "Field is empty!"
    }
    
    if (!validateTor.isEmail(str)) {
        editText.error = "Invalid Email"
    } else {
        Toast.makeText(this, "Valid Email!", Toast.LENGTH_SHORT).show()
    }
    

Run your app. You can now enter text in the EditText fields and hit the Validate button to run validations on the text entered. You can use the test credit card number 4111111111111111, a 4 with fifteen 1’s. :]

Final app using library

You have successfully used the validatetor library in your sample app.

Next up you will make your Android library available to others for use in their own apps by publishing to JCenter.

Publishing your Android library

In order to proceed with publishing your library for this tutorial, you’ll need to first put your Android project into a public repo on your GitHub account. Create a public repo in your GitHub account and push all the files to repo. If you don’t have a GitHub account, please just read along to see the steps involved with publishing the library.

You just created your shiny new validatetor Android library and used it in your own app by referencing it as a module dependency.

Right now only you can use this library because the library module is available to your project only. In order to make validatetor library available to others, you will have to publish the library as a Maven artifact on a public Maven repository. You have 3 options here

  1. JCenter
  2. MavenCentral
  3. Jitpack

You will publish your validatetor library to JCenter as it is the most common one and a superset of MavenCentral.

Setup your Bintray Account

You first need to create an account on Bintray.

  1. Register for an Open Source Account at bintray.com/signup/oss:

    Create bintray account

  2. Click on the activation link in the activation email they sent you and login into your account.
  3. Click on Add New Repository:

    Add new Bintray repository

  4. Fill out the form as in the following screenshot and click Create. An important thing to note is that type has to be Maven:

    New Maven repository

  5. You should now have a Maven repository. The URL for it should be of the form https://bintray.com/[bintray_username]/maven. If you’re not already on the Maven repository page, you can browse to it by clicking on it from your Bintray profile page:

    Repository list

  6. Click on Edit button from inside your Maven repository:

    Edit repository

  7. Enable GPG signing for artifacts uploaded to your Maven repository on Bintray:

    Enable GPG signing

Get API Key and Link GitHub Account

Next, you need to get your API key to push your Android library to this Maven repository later on, and also link your GitHub account to Bintray.

  1. Open your profile:

    Bintray profile

  2. Click on Edit:

    Edit profile

  3. Navigate to the API Key list item and copy the API key using the button on the top right:

    API Key

  4. Go to your Bintray profile, hit the Edit button, go to the Accounts tab, and click Link your GitHub account to link your GitHub account to Bintray.

Get your project ready for publishing

To begin, back in Android Studio, switch to the Project view:

Project view

Add API keys

Double click your local.properties file and append the below

bintray.user=[your_bintray_username]
bintray.apikey=[your_bintray_apikey]

Note:[your_bintray_apikey] is the key you copied earlier from your Bintray account. [your_bintray_username] is your Bintray username

Add other details

Open your gradle.properties file and append the following:

# e.g. nisrulz
POM_DEVELOPER_ID=[your_github_username]

# e.g. Nishant Srivastava
POM_DEVELOPER_NAME=[your_name]

# e.g. youremail@gmail.com
POM_DEVELOPER_EMAILID=[your_email_id]

# You can modify the below based on the license you want to use.
POM_LICENCE_NAME=The Apache Software License, Version 2.0
POM_LICENCE_URL=http://www.apache.org/licenses/LICENSE-2.0.txt
POM_ALL_LICENCES='Apache-2.0'

# e.g. com.github.nisrulz
GROUP=[your_base_group]

POM_PACKAGING=aar

Note: You should ideally put the above code block inside your global gradle.properties because these would be common to all libraries you publish

Setup helper scripts

There is a folder named scripts under your project.

scripts folder

Drag and drop this folder into your validatetor module. You will see the move dialog on dropping it on the validatetor module. Click OK in the dialog.

Move dialog

Once moved, your project structure under validatetor module will look like

validatetor module structure

Add details specific to your Android library

Open your project’s build.gradle file and append the following to the ext block below // ValidateTor Library Info, updating the values based on your specifics instead of mine where needed:

libPomUrl = 'https://github.com/[github_username]/[repo_name]'
libGithubRepo = 'nisrulz/validatetor'
libModuleName = 'validatetor'
libModuleDesc = 'Android library for fast and simple string validation.'
libBintrayName = 'validatetor'

Setup publishing plugin and helper script

  1. Add the publishing plugins under // NOTE: Do not place your application... inside your project’s build.gradle file
    // Required plugins added to classpath to facilitate pushing to JCenter/Bintray
    classpath 'com.jfrog.bintray.gradle:gradle-bintray-plugin:1.7.3'
    classpath 'com.github.dcendents:android-maven-gradle-plugin:2.0'
    
  2. Apply the helper script to the very bottom of the
    validatetor/build.gradle file
    // applied specifically at the bottom
    apply from: './scripts/bintrayConfig.gradle'
    

Publish to Bintray

Next, execute the following command inside your project folder using the command line in a Terminal window:

./gradlew clean build install bintrayUpload -Ppublish=true

Let me explain what the above line does

  • ./gradlew: Execute Gradle wrapper
  • clean: Execute the clean gradle task, which cleans up the repository of unused references
  • build: Execute the build gradle task, which builds the whole project. This generates the aar file, i.e. your Android library package
  • install: Execute the install gradle task, which is used to create the Maven artifact (aar file + POM file) and then add it to the local Maven repository. This task is available from the plugin you added earlier
  • bintrayUpload: Execute the bintrayUpload gradle task, which is used to publish the installed Maven artifact to the Bintray hosted Maven repository. This task is available from the plugin you added earlier
  • -Ppublish=true: This is simply a flag used to control the publishing of the artifact to a Bintray account. This is required to push the artifact to the Bintray account and is defined in the helper script

Once your command completes successfully, head over to your Bintray account and navigate to your Maven repository. You should see the following:

Unpublished items

Hit Publish.

Awesome. Your Android library is now published on Bintray. In order to use the library as it stands as a Maven repositiry, you would have to take the following steps:

  1. In your project’s build.gradle file you will have append the below under allprojects/repositories
    // e.g. url 'https://dl.bintray.com/nisrulz/maven'
    maven { url 'https://dl.bintray.com/[bintray_username]/maven' }
    
  2. To add it to your app, use the below (replace the module dependency you added earlier)
    // e.g. implementation 'com.github.nisrulz:validatetor:1.0'
    implementation '[group_name_you_defined_in_gradle_properties]:[library_name]:[library_version]'
    

But you can eliminate the first step altogether, because jcenter() is the default repository for dependencies. So you need to publish your library to JCenter.

Publish to JCenter

  • Goto binray.com and navigate to your Maven repository.
  • Find your library and open it by clicking its name.
  • Mouse over Maven Central tab and you should be able to see a popup like shown below

    JCenter dialog

  • Select Click here to get it included link. This will initiate your request to include your Android library in JCenter

After this you will have to wait for an email from JCenter confirming that your Android library is published on JCenter.

Once published, you or anyone interested can use your Android library by adding to their app/build.gradle file under the dependencies block.

// e.g. implementation 'com.github.nisrulz:validatetor:1.0'
implementation '[group_name_you_defined_in_gradle_properties]:[library_name]:[library_version]'

You can try it out once you have the email from JCenter. When doing so, remove the import on the local validatetor module.

Note: You do not need to reference your Bintray Maven repository anymore. Your validatetor Android Library is hosted from JCenter now.

Sweet. You just published your Android library for everyone. Feels good, right? :]

Using your Android library

You have already seen three ways of referencing an Android library in your app projects. They are summarized as:

  • Adding as module dependency:
    // inside app/build.gradle file
    implementation project(':validatetor')
    
  • Adding as a dependency from a remote Maven repository, i.e. a Bintray hosted Maven repository:
    // project's build.gradle file, under allprojects/repositories
    maven { url 'https://dl.bintray.com/nisrulz/maven' }
    
    // inside app/build.gradle file
    implementation 'com.github.nisrulz:validatetor:1.0'
    
  • Adding as a dependency from a public Maven repository, i.e. JCenter:
    // inside app/build.gradle file
    implementation 'com.github.nisrulz:validatetor:1.0'
    

But what about if you have a local AAR file?

First, you need to drop your AAR file inside the app/libs folder.

Then to add the local AAR file as a dependency you need to add the below to your app/build.gradle file

dependencies {
  compile(name:'nameOfYourAARFileWithoutExtension', ext:'aar')
}
repositories {
  flatDir {
    dirs 'libs'
  }
}

Then sync your Gradle files. You will have a working dependency. Cheers!

Best practices for building Android libraries

Hopefully, you now have an understanding about building and publishing an Android library. That’s great, but let’s also look at some of the best practices to follow when building Android libraries.

  1. Ease of use

    When designing an Android library, three library properties are important to keep in mind:

    • Intuitive: It should do what a user of the library expects it to do without having to look up the documentation.
    • Consistent: The code for the Android library should be well thought out and should not change drastically between versions. Follows semantic versioning.
    • Easy to use, hard to misuse: It should be easily understandable in terms of implementation and its usage. The exposed public methods should have enough validation checks to make sure people cannot use their functionality other than what they were coded and intended for. Provide sane defaults and handle scenarios when dependencies are not present.
  2. Avoid multiple arguments

    Don’t do this

    // Do not DO this
    void init(String apikey, int refresh, long interval, String type, String username, String email, String password);
    
    // WHY? Consider an example call:
    void init("0123456789","prod", 1000, 1, "nishant", "1234","nisrulz@gmail.com");
    
    // Passing arguments in the right order is easy to mess up here :(
    

    Instead do this

    // Do this
     void init(ApiSecret apisecret);
     
    // where ApiSecret is
     public class ApiSecret {
       String apikey; int refresh;
       long interval; String type;
       String name; String email; String pass;
       // constructor
       // validation checks (such as type safety)
       // setter and getters
     }
    

    Or use the Builder pattern:

    AwesomeLib awesomelib = new AwesomeLib.AwesomeLibBuilder()
                                            .apisecret(mApisecret).refresh(mRefresh)
                                            .interval(mInterval).type(mType)
                                            .username(mUsername).email(mEmail).password(mPassword)
                                            .build();
    
  3. Minimize permissions

    Every permission you add to your Android library’s AndroidManifest.xml file will get merged into the app that adds the Android library as a dependency.

    • Minimize the number of permissions you require in your Android library.
    • Use Intents to let dedicated apps do the work for you and return the processed result.
    • Enable and disable features based on whether you have the permission or not. Do not let your code crash just because you do not have a particular permission. If possible, have a fallback functionality when the permission isn’t approved. To check if you have a particular permission granted or not, use the following Kotlin function:
      fun hasPermission(context: Context, permission: String): Boolean {
        val result = context.checkCallingOrSelfPermission(permission)
        return result == PackageManager.PERMISSION_GRANTED
      }
      
  4. Minimize requisites

    Requiring a feature by declaring it in the AndroidManifest.xml file of your Android library, via

    // Do not do this
    <uses-feature android:name="android.hardware.bluetooth" />
    

    means that this would get merged into the app AndroidManifest.xml file during the manifest-merger phase of the build and thus hide the app in the Play Store for devices that do not have Bluetooth (this is something the Play Store does as filtering).

    So an app that was earlier visible to a larger audience would now be visible to a smaller audience, just because the app added your library.

    The solution is simple. Simply do not add the line to the AndroidManifest.xml file for your Android Library. Instead use the following Java code snippet to detect the feature from your library during runtime and enable/disable feature accordingly:

    // Runtime feature detection
    String feature = PackageManager.FEATURE_BLUETOOTH;
    public boolean isFeatureAvailable(Context context, String feature) {
       return context.getPackageManager().hasSystemFeature(feature);
    }
    // Enable/Disable the functionality depending on availability of feature
    
  5. Support different versions

    A good rule of thumb: support the full spectrum of Android versions with your library:

    android { ...
      defaultConfig {
        ...
        minSdkVersion 9
        targetSdkVersion 27
        ...
       }
    }
    

    Internally detect the version and enable/disable features or use a fallback in the Android library:

    if (Build.VERSION.SDK_INT >= Build.VERSION_CODES.O) {
          // Enable feature supported on API for Android Oreo and above
    } else {
         // Disable the feature for API below Android Oreo or use a fallback
    }
    
  6. Provide documentation

    • Provide a README file or a Wiki which explains the library API and its correct usage.
    • Include javadocs and other comments in the code wherever you see the need. Your code will be read by others so make sure it is understandable.
    • Bundle a sample app that is the most simplistic app showcasing how the Android library can be used. The sample project you used in this tutorial could serve as an example project.
    • Maintain a changelog

Where to Go From Here?

You can find the final project in the zip file you can download using the button at the top and bottom of the tutorial.

You can see my version of the source code on GitHub here and the published library here.

Contrary to usual belief, Android library development is different from app development. The differentiating factor is that apps target certain platforms and are consumed by users directly, but an Android library is consumed by Android developers and has to cover a much larger spectrum of platforms to enable its use by app supporting lower or higher platforms alike.

Hopefully, after finishing this tutorial you have a solid understanding of building and publishing better Android libraries.

If you want to learn more about Android library development, checkout Google’s official documentation.

I hope you enjoyed this tutorial on building an Android library, and if you have any questions or comments, please join the forum discussion below!

The post Building an Android Library Tutorial appeared first on Ray Wenderlich.


Data Structures and Algorithms in Swift: Radix Sort

$
0
0

This is an excerpt taken from Chapter 16, “Radix Sort” of our book Data Structures and Algorithms in Swift. The book covers everything from basic data structures like linked lists and queues, all the way up to merge sort, weighted graphs, Dijkstra’s algorithm, and other advanced data structure concepts and algorithms. Enjoy!

In this chapter, you’ll look at a completely different model of sorting. So far, you’ve been relying on comparisons to determine the sorting order. Radix sort is a non-comparative algorithm for sorting integers in linear time.

There are multiple implementations of radix sort that focus on different problems. To keep things simple, in this chapter you’ll focus on sorting base 10 integers while investigating the least significant digit (LSD) variant of radix sort.

Example

To show how radix sort works, you’ll sort the following array:

var array = [88, 410, 1772, 20]

Radix sort relies on the positional notation of integers, as shown here:

First, the array is divided into buckets based on the value of the least significant digit: the ones digit.

These buckets are then emptied in order, resulting in the following partially-sorted array:

array = [410, 20, 1772, 88]

Next, repeat this procedure for the tens digit:

The relative order of the elements didn’t change this time, but you’ve still got more digits to inspect.

The next digit to consider is the hundreds digit:

For values that have no hundreds position (or any other position without a value), the digit will be assumed to be zero.

Reassembling the array based on these buckets gives the following:

array = [20, 88, 410, 1772]

Finally, you need to consider the thousands digit:

Reassembling the array from these buckets leads to the final sorted array:

array = [20, 88, 410, 1772]

When multiple numbers end up in the same bucket, their relative ordering doesn’t change. For example, in the zero bucket for the hundreds position, 20 comes before 88. This is because the previous step put 20 in a lower bucket than 80, so 20 ended up before 88 in the array.

Implementation

Download the materials and open up the starter project for this chapter. In the Sources directory, create a new file named RadixSort.swift. Add the following to the file:

extension Array where Element == Int {

  public mutating func radixSort() {

  }
}

Here you’ve added a radixSort method to arrays of integers via an extension. Start implementing the radixSort method using the following:

public mutating func radixSort() {
  // 1
  let base = 10
  // 2
  var done = false
  var digits = 1
  while !done {
  
  }
}

This bit is fairly straightforward:

  1. You’re sorting base 10 integers in this instance. Since you’ll be using this value multiple times in the algorithm, you store it in a constant base.
  2. You declare two variables to track your progress. Radix sort works in multiple passes, so done serves as a flag that determines whether the sort is complete. The digits variable keeps track of the current digit you’re looking at.

Next, you’ll write the logic that sorts each element into buckets (also known as Bucket sort).

Bucket Sort

Write the following inside the while loop:

// 1
var buckets: [[Int]] = .init(repeating: [], count: base)
// 2
forEach {
  number in
  let remainingPart = number / digits
  let digit = remainingPart % base
  buckets[digit].append(number)
}
// 3
digits *= base
self = buckets.flatMap { $0 }

Here’s what you’ve written:

  1. You instantiate the buckets using a two-dimensional array. Because you’re using base 10, you need 10 buckets.
  2. You place each number in the correct bucket.
  3. You update digits to the next digit you wish to inspect and update the array using the contents of buckets. flatMap will flatten the two-dimensional array to a one-dimensional array, as if you’re emptying the buckets into the array.

When Do You Stop?

Your while loop currently runs forever, so you’ll need a terminating condition in there somewhere. You’ll do that as follows:

  1. At the beginning of the while loop, add done = true.
  2. Inside the closure of forEach, add the following:
if remainingPart > 0 {
  done = false
}

Since forEach iterates over all the integers, as long as one of the integers still has unsorted digits, you’ll need to continue sorting.

With that, you’ve learned about your first non-comparative sorting algorithm! Head back to the playground page and write the following to try out your code:

example(of: "radix sort") {
  var array = [88, 410, 1772, 20]
  print("Original array: \(array)")
  array.radixSort()
  print("Radix sorted: \(array)")
}

You should see the following console output:

---Example of: radix sort---
Original: [88, 410, 1772, 20]
Radix sorted: [20, 88, 410, 1772]

Where to Go From Here?

If you want to check the results of your work against ours, you can find the completed project in the downloads for this tutorial.

Radix sort is one of the fastest sorting algorithms. The average time complexity of radix sort is O(k × n), where k is the number of significant digits of the largest number, and n is the number of integers in the array.

Radix sort works best when k is constant, which occurs when all numbers in the array have the same count of significant digits. Its time complexity then becomes O(n). Radix sort also incurs a O(n) space complexity, as you need space to store each bucket.

If you enjoyed what you learned in this tutorial, why not check out the complete Data Structures and Algorithms in Swift book, available on our store in early access?

In Data Structures and Algorithms in Swift, you’ll learn how to implement the most popular and useful data structures and when and why you should use one particular datastructure or algorithm over another. This set of basic data structures and algorithms will serve as an excellent foundation for building more complex and special-purpose constructs.

As well, the high-level expressiveness of Swift makes it an ideal choice for learning these core concepts without sacrificing performance.

  • You’ll start with the fundamental structures of linked lists, queues and stacks, and see how to implement them in a highly Swift-like way.
  • Move on to working with various types of trees, including general purpose trees, binary trees, AVL trees, binary search trees and tries.
  • Go beyond bubble and insertion sort with better-performing algorithms, including mergesort, radix sort, heap sort and quicksort.
  • Learn how to construct directed, non-directed and weighted graphs to represent many real-world models, and traverse graphs and trees efficiently with breadth-first, depth-first, Dijkstra’s and Prim’s algorithms to solve problems such as finding the shortest path or lowest cost in a network.
  • And much, much more!

By the end of this book, you’ll have hands-on experience solving common issues with data structures and algorithms — and you’ll be well on your way to developing your own efficient and useful implementations.

To celebrate the launch of the book, it’s currently on sale as part of our Advanced Swift Spring Bundle for a massive 40% off. But don’t wait too long, as this deal is only on until Friday, April 27.

If you have any questions or comments on this tutorial, feel free to join the discussion below!

The post Data Structures and Algorithms in Swift: Radix Sort appeared first on Ray Wenderlich.

Custom Keyboard Extensions: Getting Started

$
0
0

Keyboard Extensions

Until iOS 8, your ability to create a custom keyboard in iOS was very limited. Your only option was to create a custom input view to UITextField and UITextView, which meant you could only use your custom keyboard from within your own application.

Then like a hero appearing over the horizon, app extensions came to the rescue! These give you the ability to provide content to apps outside of your own. Keyboard extensions specifically allow your custom interfaces to provide input text to any app the user likes.

In this tutorial, you’ll walk through creating a custom keyboard extension that can be used by other apps.

Keyboard Extension Concepts

Custom keyboard extensions let users add additional keyboards to the list of available keyboards. A great example of an additional keyboard is the emoji keyboard built-in to iOS. If you enable this keyboard, you can tap the globe in the lower left corner of the default system keyboard to switch to it (assuming it’s the next one available).

A custom keyboard can fully replace the system keyboard, or act as a supplement like the emoji keyboard.

Your custom keyboard extensions provide UI that handles user interactions, such as button taps. They convert these actions into Strings and send them to the host text input view. This gives you the freedom to use any of the iOS supported unicode characters.

But just because you added a custom keyboard doesn’t mean it will always be available. Here are some examples where a custom keyboard might be forbidden:

  • Secure text input fields when the secureTextEntry is set to true.
  • Text input with the keyboard types UIKeyboardTypePhonePad and UIKeyboardTypeNamePhonePad due to carrier character limitations.
  • An app author declines the use of keyboard extensions through the AppDelegate method application(_:shouldAllowExtensionPointIdentifier:).

Managing User Expectations

Your success as a keyboard maker depends on your ability to meet the high expectation of users. There’s no room for error with keyboards. Most users have learned to expect certain functionality from their Apple devices, and the best way to understand the subtleties behind keyboard design is to study and play around with the system keyboard.

You’ll find that the default iOS keyboard is responsive, clean, responds dynamically depending on the type of text entry, provides autocorrection and text replacement, and just works.

These are just some of the expectations your users will have. Your job is to meet or exceed those expectations. Remember that the keyboard should never get in the way of what the user is trying to do, and you’ve got most of the UX solved right there.

Requirements

Just like standard iOS apps, there are certain requirements that your keyboard must fulfill before Apple will approve it:

  • Next Keyboard Button: All keyboards require a way to switch to the next keyboard in the user’s enabled keyboards list. On the system keyboard, the globe key performs this action. It’s recommended to place this key in the bottom left-hand corner, as the system keyboard does, for consistency.
  • App Purpose: Every keyboard extension must come bundled within a host app. This app must actually serve a purpose and provide the user with acceptable functionality. Yes, that measurement is subjective, and yes, that means you’ll actually have to put some time and thought into your host app!
  • Trust: Constant news of data leaks has made users extremely sensitive about their data. As one of the main points where data flows into your apps, keyboards are a potentially vulnerable place for user data. It’s the keyboard author’s responsibility to ensure the safety of users’ keystroke data. Don’t unintentionally create a key-logger!

With all that background information, you’re probably itching to get your hands dirty.

Getting Started

In this tutorial, you’ll create a Morse Code keyboard. And don’t worry if you’re not already fluent in Morse code… because you will be by the end of this tutorial!

Here’s the scenario: you’ve created an awesome app for teaching people Morse code, but they can only practice while using your app. Now that you’ve learned that keyboard extensions exist, you’ve decided to provide the same great functionality to your users outside of the app!

Download the materials for this project and open the starter project in Xcode; you can find the link at the top or bottom of this tutorial. This is the host app you’ll use to deliver a keyboard extension.

Build and run the starter app. You’ll see the Morse code trainer screen:

This app lets the user practice Morse code using a custom keyboard and cheat sheet.

Morse code uses a series of “dot” and “dash” signals to represent letters. This implementation shows you the current series of signals and the number or letter it represents within the gray bar above the keyboard.

Try tapping combinations of dots and dashes to make letters. To complete a letter and move on to the next one, tap the space key. To enter an actual space, tap the space key twice.

After you’re comfortable with the keyboard functionality, you might be thinking, “My work here is done!” That would be an awesome tutorial, but unfortunately you can only use this keyboard within the sample app — and that defeats the whole purpose of a custom keyboard!

To better understand what’s already provided in the host app and what’s left to do in the keyboard extension, expand the folders in the Project navigator and look around:

Here’s a quick summary of what the files do:

  • PracticeViewController.swift: Sets up the demo app UI and functionality.
  • MorseColors.swift: Keyboards should support color schemes for both a light and dark display. This file defines color schemes for each type.
  • MorseData.swift: Provides a way to convert from a series of “dots” and “dashes” to the equivalent letter and vice versa.
  • KeyboardButton.swift: A UIButton subclass to customize the look and feel of keyboard keys.
  • MorseKeyboardView.swift / MorseKeyboardView.xib: A custom UIView that handles the layout and functionality of a Morse keyboard. This is where all the Morse-specific logic resides. It declares the protocol MorseKeyboardViewDelegate to notify its delegate to perform certain actions on the text input view. This will allow you to use MorseKeyboardView as both a keyboard input view as well as a keyboard extension.

Now that you’re familiar with the containing app, it’s time to make a keyboard extension!

Creating a Keyboard Extension

To create a keyboard extension on an existing project, go to File ▸ New ▸ Target…, select iOS and choose Custom Keyboard Extension. Click Next and name your keyboard MorseKeyboard. Make sure you select MorseCoder for Embedded in Application.

Click Finish to create your extension. If you get a popup to active the scheme, select Activate.

Xcode creates a new folder in the Project navigator for the extension. Expand MorseKeyboard to reveal its contents.

Take a look at each of the created keyboard extension files:

  • KeyboardViewController.swift: A UIInputViewController subclass that acts as the primary view controller for custom keyboard extensions. This is where you’ll connect the MorseKeyboardView and implement any custom logic for the keyboard similar to how it’s done in PracticeViewController.
  • Info.plist: A plist that defines the metadata for your extension. The NSExtension item contains keyboard specific settings. You’ll cover the importance of this item later in the tutorial.

And that’s it. Two files is all you need to get going with a keyboard extension!

Open KeyboardViewController.swift to get a closer look at the generated template. You’ll notice a lot of code within viewDidLoad(). As mentioned earlier, the main requirement of a custom keyboard is that it provides a key to switch to other keyboards.

This code programmatically adds a UIButton to the keyboard with an action of handleInputModeList(from:with:). This method provides two different pieces of functionality:

  • Tapping the button will switch to the next keyboard in the list of user-enabled keyboards.
  • Long-pressing the button will present the keyboard list.

Time to run and test the keyboard! Unfortunately, running and debugging a keyboard extension is a little more involved than a typical app.

Enabling a Custom Keyboard

Select the MorseKeyboard scheme from the scheme selector at the top of Xcode.

Build and run the scheme, and you’ll be able to choose which app to embed it in. For your purposes, select Safari since it has a text field for you to use, and click Run.

After Safari loads, minimize the app (Press Command + Shift + H if on a simulator). Open the Settings app and go to General ▸ Keyboard ▸ Keyboards and select Add New Keyboard…. Finally, select MorseCoder.

Fortunately, you only need to add the keyboard once to each of your devices. Close the Settings app and open Safari. Select the address bar to present the system keyboard.

Note: If the iOS system keyboard doesn’t present itself in the Simulator, that may be because you’ve configured it to treat your computer’s keyboard as a connected hardware keyboard. To undo this, go and toggle Hardware ▸ Keyboard ▸ Connect Hardware Keyboard.

Once you see the system keyboard, long-press on the globe key. Select the newly added MorseKeyboard.

And there you have it: your very lacklustre keyboard! If you tap or long-press the Next keyboard button, you can switch back to the system keyboard.

That’s enough of this basic functionality. It’s time to join the keyboard big leagues with some custom UI!

Customizing Keyboard UI

Rather than having to recreate the UI in both your container app and extension, you can share the same code across both targets.

In the Project navigator, Command-click the following six files to select them:

  • MorseColors.swift
  • MorseData.swift
  • KeyboardButton.swift
  • MorseKeyboardView.swift
  • MorseKeyboardView.xib
  • Assets.xcassets

Now open the File inspector and add the selected files to the MorseKeyboard target:

This will add these files to both compilation targets, the freestanding MorseCoder app and the MoreKeyboard app extension. This is perhaps the simplest way to share code — use exactly the same source code file twice, for different targets which create different build products.

Now that your keyboard extension has access to these files, you can reuse the same UI. Open KeyboardViewController.swift and replace the entire contents of KeyboardViewController with:

// 1
var morseKeyboardView: MorseKeyboardView!

override func viewDidLoad() {
  super.viewDidLoad()
  
  // 2
  let nib = UINib(nibName: "MorseKeyboardView", bundle: nil)
  let objects = nib.instantiate(withOwner: nil, options: nil)
  morseKeyboardView = objects.first as! MorseKeyboardView
  guard let inputView = inputView else { return }
  inputView.addSubview(morseKeyboardView)
  
  // 3
  morseKeyboardView.translatesAutoresizingMaskIntoConstraints = false
  NSLayoutConstraint.activate([
    morseKeyboardView.leftAnchor.constraint(equalTo: inputView.leftAnchor),
    morseKeyboardView.topAnchor.constraint(equalTo: inputView.topAnchor),
    morseKeyboardView.rightAnchor.constraint(equalTo: inputView.rightAnchor),
    morseKeyboardView.bottomAnchor.constraint(equalTo: inputView.bottomAnchor)
    ])
}

KeyboardViewController now only contains code to set up the keyboard view. Here’s what you created:

  1. A property to hold reference to a MorseKeyboardView object.
  2. An instance of MorseKeyboardView is added to the controller’s root inputView.
  3. Constraints pinning morseKeyboardView to the superview are added and activated.

Rather than building out the UI from scratch, you’re simply reusing the same code from the host app. Build and run the keyboard extension through Safari. Select the address bar and long-press the globe key to select MorseKeyboard.

Things are looking a little better: The keys are clickable, and the correct letter is being shown within the keyboard preview, but the address bar isn’t updating.

Note: You’ll notice that the height of the keyboard is different from that of the system keyboard. Keyboard extensions automatically infer their height based on the nib’s Auto Layout constraints.

Things look great, but something’s missing: the mandatory next keyboard button!

Open MorseKeyboardView.xib and you’ll see there’s already a next keyboard globe added to the nib.

Hmm… it looks like something’s hiding the next keyboard key. Open MorseKeyboardView.swift and look at the method setNextKeyboardVisible(_:).

This is a custom method that actives and deactivates certain constraints to hide or show the next keyboard key. It exists because there are situations where you need to hide the key.

UIInputViewController defines a property needsInputModeSwitchKey that tells your custom keyboard whether or not it’s required to show a next keyboard key. An example of when this might be false is when your keyboard is running on an iPhone X. This device provides a next keyboard key below a raised keyboard by default, so you don’t need to add your own.

You’ll use this property to control the visibility of the globe key. Open KeyboardViewController.swift and add the following line to the bottom of viewDidLoad():

morseKeyboardView.setNextKeyboardVisible(needsInputModeSwitchKey)

This tells the Morse keyboard whether or not to hide the next keyboard key based on the value of needsInputModeSwitchKey.

To test this out, you’ll need to run the keyboard on multiple devices. Build and run on both an iPhone X and any other iPhone. Remember to add the keyboard through Settings ▸ General ▸ Keyboard ▸ Keyboards ▸ Add New Keyboard… if you’re running a new device.

You should see that the iPhone X hides your custom next keyboard key because there’s already a system globe key. You’ll also see your custom key as expected on the other device.

Right now your key doesn’t do anything, but frankly, neither do any of the other buttons. It’s time to fix that!

Attaching Keyboard Actions

Just like the template, you’ll add an action to the globe key programmatically. Add the following code to the end of viewDidLoad():

morseKeyboardView.nextKeyboardButton.addTarget(self, 
                                               action: #selector(handleInputModeList(from:with:)), 
                                               for: .allTouchEvents)

This adds handleInputModeList as an action to the next keyboard key which will automatically handle switching for you.

All of the remaining MorseKeyboardView keys have already been attached to actions within the view. The reason they currently aren’t doing anything is because you haven’t implemented a MorseKeyboardViewDelegate to listen for these events.

Add the following extension to the bottom of KeyboardViewController.swift:

// MARK: - MorseKeyboardViewDelegate
extension KeyboardViewController: MorseKeyboardViewDelegate {
    func insertCharacter(_ newCharacter: String) {

    }

    func deleteCharacterBeforeCursor() {

    }

    func characterBeforeCursor() -> String? {
        return nil
    }
}

MorseKeyboardView handles all of the Morse-related logic and will call different combinations of these methods after the user taps a key. You’ll implement each of these method stubs one at a time.

insertCharacter(_:) tells you that it’s time to insert a new character after the current cursor index. In PracticeViewController.swift, you directly add the character to the UITextField using the code textField.insertText(newCharacter).

The difference here is that a custom keyboard extension doesn’t have direct access to the text input view. What you do have access to is a property of type of UITextDocumentProxy.

A UITextDocumentProxy provides textual context around the current insertion point without direct access to the object – that’s because it’s a proxy.

To see how this works, add the following code to insertCharacter(_:):

textDocumentProxy.insertText(newCharacter)

This tells the proxy to insert the new character for you. To see this work, you’ll need to set the keyboard view’s delegate. Add the following code to viewDidLoad() after assigning the morseKeyboardView property:

morseKeyboardView.delegate = self

Build and run the keyboard extension in Safari to test this new piece of functionality. Try pressing different keys and watch as gibberish appears in the address bar.

It’s not exactly working as expected, but that’s only because you haven’t implemented the other two MorseKeyboardViewDelegate methods.

Add the following code to deleteCharactersBeforeCursor():

textDocumentProxy.deleteBackward()

Just as before with insert, you’re simply telling the proxy object to delete the character before the cursor.

To wrap up the delegate implementation, replace the contents of characterBeforeCursor() with the following code:

// 1
guard let character = textDocumentProxy.documentContextBeforeInput?.last else {
  return nil
}
// 2
return String(character)

This method tells MorseKeyboardView what the character before the cursor is. Here’s how you accomplished this from a keyboard extension:

  1. textDocumentProxy exposes the property documentContextBeforeInput that contains the entire string before the cursor. For the Morse keyboard, you only need the final letter.
  2. Return the Character as a String.

Build and run the MorseKeyboard scheme and attach it to Safari. Switch to your custom keyboard and give it a try. You should see the correct letter for the pattern you type show up in the address bar!

Up to this point you’ve been indirectly communicating with the text input view, but what about communicating in the reverse direction?

Responding to Input Events

Because UIInputViewController implements the UITextInputDelegate, it receives updates when certain events happen on the text input view.

Note: Unfortunately, at the time of writing, despite many years having passed since this functionality was added to UIKit, not all these methods function as documented.

Caveat coder.

You’ll focus on the textDidChange(_:) delegate method and how you can use this within your keyboard extensions. Don’t let the name fool you – this method is not called when the text changes. It’s called after showing or hiding the keyboard and after the cursor position or the selection changes. This makes it a great place to adjust the color scheme of the keyboard based on the text input view’s preference.

In KeyboardViewController, add the following method implementation below viewDidLoad():

override func textDidChange(_ textInput: UITextInput?) {
  // 1
  let colorScheme: MorseColorScheme

  // 2
  if textDocumentProxy.keyboardAppearance == .dark {
    colorScheme = .dark
  } else {
    colorScheme = .light
  }

  // 3
  morseKeyboardView.setColorScheme(colorScheme)
}

This code checks the text input view’s appearance style and adjusts the look of the keyboard accordingly:

  1. MorseColorScheme is a custom enum type defined in MorseColors.swift. It defines a dark and light color scheme.
  2. To determine what color scheme to use, you check the textDocumentProxy property keyboardAppearance. This provides a dark and light option as well.
  3. You pass the determined colorScheme to setColorScheme(_:) on the Morse keyboard to update its scheme.

To test this out, you’ll need to open the keyboard in a text input with a dark mode. Build and run the extension in Safari. Minimize the app and swipe down to show the search bar.

Notice that the default keyboard is now dark. Switch to the Morse keyboard.

Voilà! Your custom keyboard can now adapt to the text input view that presented it! Your keyboard is in a really great spot… but why stop there?

Autocorrection and Suggestions

Adding autocorrection and suggestions similar to those of the system keyboard fulfills a common expectation of keyboards. If you do this, however, you’ll need to provide your own set of words and logic. iOS does not automatically provide this for you.

It does, however, provide you with a way to access the following device data:

  • Unpaired first and last names from the user’s Address Book.
  • Text shortcuts defined in the Settings ▸ General ▸ Keyboard ▸ Text Replacement.
  • A very limited common words dictionary.

iOS does this through the UILexicon class. You’ll learn how this works by implementing auto text replacement on the Morse keyboard.

In KeyboardViewController, add the following under the declaration for morseKeyboardView:

var userLexicon: UILexicon?

This will hold the lexicon data for the device as a source of words to compare against what the user typed.

To request this data, add the following code to the end of viewDidLoad():

requestSupplementaryLexicon { lexicon in
  self.userLexicon = lexicon
}

This method requests the supplementary lexicon for the device. On completion, you’re given a UILexicon object that you save in the userLexicon property you just defined.

In order to know if the current word matches one in the lexicon data, you’ll need to know what the current word is.

Add the following computed property under userLexicon:

var currentWord: String? {
  var lastWord: String?
  // 1
  if let stringBeforeCursor = textDocumentProxy.documentContextBeforeInput {
    // 2
    stringBeforeCursor.enumerateSubstrings(in: stringBeforeCursor.startIndex...,
                                           options: .byWords)
    { word, _, _, _ in
      // 3
      if let word = word {
        lastWord = word
      }
    }
  }
  return lastWord
}

Let’s break down how this code gets the current word based on the cursor location:

  1. You again use documentContextBeforeInput to get the text before the cursor.
  2. You enumerate each word of the string by using enumerateSubstrings.
  3. Unwrap word and save it in lastWord. When this enumeration ends, whatever lastWord contains will be the last word before the cursor.

Now that you have the currently typed word, you’ll need a place to do the autocorrection or replacement. The most common place for this is after pressing the Space key.

Add the following extension to the end of the file:

// MARK: - Private methods
private extension KeyboardViewController {
  func attemptToReplaceCurrentWord() {
    // 1
    guard let entries = userLexicon?.entries,
      let currentWord = currentWord?.lowercased() else {
        return
    }

    // 2
    let replacementEntries = entries.filter {
      $0.userInput.lowercased() == currentWord
    }

    if let replacement = replacementEntries.first {
      // 3
      for _ in 0..<currentWord.count {
        textDocumentProxy.deleteBackward()
      }

      // 4
      textDocumentProxy.insertText(replacement.documentText)
    }
  }
}

This is a good chunk of code, so let's go through it step by step:

  1. Ensure that the user lexicon and current word exist before continuing.
  2. Filter the lexicon data by comparing userInput to the current word. This property represents the word to replace. An example of this is replacing "omw" with "On my way!".
  3. If you find a match, delete the current word from the text input view.
  4. Insert the replacement text defined using the lexicon property documentText.

And that's it! To call this method after entering a space, add the following code to the top of insertCharacter(_:) before the call to insertText(_:):

if newCharacter == " " {
  attemptToReplaceCurrentWord()
}

This code makes sure to only perform a text replacement after entering the literal space character. This avoids replacing text while pressing the Space key to start a new letter.

Give this new functionality a try! Build and run the keyboard target in Safari. Type "omw" and then press Space twice.

Cheat Sheet:

– – – space – – space • – – space space

You should see the letters "omw" replaced by "On my way!". This happens because iOS automatically adds this as a text replacement. You can play around with this functionality by adding more words to Settings ▸ General ▸ Keyboard ▸ Text Replacement or by running this on your phone and typing a name from your contacts.

Although this only works with a limited scope of words, it's essential for a custom keyboard to provide the user with this functionality as users have learned to expect this from the system keyboard.

With that, you've wrapped up the basic and intermediate functionality of a keyboard extension... but what if you want more?

Requesting Open Access

In order to do more advanced things from a keyboard extension, you'll need to request those privileges from the user. Open Access is a permission that the user can choose to allow or disallow. It gives your extension a number of capabilities, including:

  • Location Services and Address Book, including names, places, and phone numbers.
  • Keyboard and containing app can employ a shared container which allows features like iCloud and In-App Purchases.
  • Network access for connecting with web services.
  • Ability to edit keyboard’s custom autocorrect lexicon via the containing app.

But as Uncle Ben once said, "with great power comes great responsibility." It's up to you to safely handle this sensitive user data.

To get a taste of this power, you'll request access to the user's location from the keyboard extension. Why would a keyboard need the user's location? Well, Morse code is most commonly associated with SOS messages when in distress. It would be great to automatically insert the current location after typing "SOS"!

The first thing you'll need is the user's location. You'll use the Core Location framework to do this. Add the following import to the top of KeyboardViewController.swift:

import CoreLocation

Next, add a property to store current user location under currentWord:

var currentLocation: CLLocation?

To set this property, you'll use the CLLocationManagerDelegate protocol. Add the following extension to the bottom of the file:

// MARK: - CLLocationManagerDelegate
extension KeyboardViewController: CLLocationManagerDelegate {
  func locationManager(_ manager: CLLocationManager, didUpdateLocations locations: [CLLocation]) {
    currentLocation = locations.first
  }
}

Updates to the user's location trigger a call to this method. To start location updates you'll need to create a CLLocationManager instance. Add the following property under currentLocation:

let locationManager = CLLocationManager()

To have locationManager start updating the location, you'll have to set up some properties. Add the following code to the end of viewDidLoad():

locationManager.requestWhenInUseAuthorization()
locationManager.delegate = self
locationManager.desiredAccuracy = kCLLocationAccuracyBest
locationManager.distanceFilter = 100
locationManager.startUpdatingLocation()

This tells the location manager object to only generate location updates while the keyboard is in use.

Note: For more on using CoreLocation to access location data, check out the Apple documentation.

The last thing to do is insert the current location after typing the "SOS" message. Replace the current definition of insertCharacter(_:) with this new definition:

func insertCharacter(_ newCharacter: String) {
  if newCharacter == " " {
    // 1
    if currentWord?.lowercased() == "sos",
      let currentLocation = currentLocation {
      // 2
      let lat = currentLocation.coordinate.latitude
      let lng = currentLocation.coordinate.longitude
      textDocumentProxy.insertText(" (\(lat), \(lng))")
    } else {
      // 3
      attemptToReplaceCurrentWord()
    }
  }

  textDocumentProxy.insertText(newCharacter)
}

Here's what this does:

  1. You check if the current word is "sos" and that you have the user's location.
  2. You insert the current latitude and longitude of the user into the text input view.
  3. If the current word isn't "sos" or you have no location information, then do as you did before and attempt to replace the current word.

It's time to see if your old-school-distress-signal-meets-modern-tech mechanism works. Build and run the keyboard extension in Safari and type out "sos".

Cheat Sheet:

• • • space – – – space • • • space space

Andddd nothing... That's a bummer. Check the console, and you'll see something like this:

terminal

Of course! You're missing some privacy settings in the keyboard property list.

Open Info.plist from within the MorseKeyboard folder. Select Bundle version and click the + symbol to add a new key-value pair.

Type NSLocationWhenInUseUsageDescription for the key and use whatever user friendly message you'd like for requesting access as the value.

Note: At this point, you could technically run the extension on the simulator and see a successful SOS location. There's a bug on the iOS Simulator where you're able to access this data without requesting open access.

Next, expand NSExtension and then NSExtensionAttributes to see the options available to your keyboard extension.

Each of these settings are pretty self explanatory, but if you'd like to learn more about them, check out the Apple documentation

To request open access to get user location data, change the value of RequestsOpenAccess to YES. This means that when installing the keyboard, your users can decide whether to allow access.

Since you've already installed the keyboard, you'll have to give it access manually. Build and run the extension to push these latest changes to your device.

Minimize the app and go to Settings ▸ General ▸ Keyboard ▸ Keyboards ▸ MorseKeyboard and switch the toggle on. Tap Allow on the alert to give full access to your keyboard.

Build and run the extension in Safari one last time. After switching to the keyboard you'll be prompted to allow access to location data. Tap Allow and give "sos" another try.

And there it is! The keyboard is successfully accessing your current location and inserting it into the text input view!

Where To Go From Here?

You can download the final project using the link at the top or bottom of this tutorial.

With this newfound keyboard extension knowledge, you're well on your way to making something truly useful for the world.

This only scratches the surface of all the functionality you could add to a keyboard extension. If you want a deeper dive, check out the Apple Custom Keyboard documentation and Chapter 14 of iOS 8 by Tutorials.

Thanks for following along. As always, if you have any questions or comments on this tutorial, feel free to join the discussion below!

The post Custom Keyboard Extensions: Getting Started appeared first on Ray Wenderlich.

Introducing Realm: Building Modern Swift Apps with Realm Database

$
0
0

This is an excerpt taken from Chapter 2, “Your First Realm App” of our book Realm: Building Modern Swift Apps with Realm Database. In the book, you’ll take a deep dive into the Realm Database, learn how to set up your first Realm database, see how to persist and read data, find out how to perform migrations and more. You’ll also take a look at the synchronization features of Realm Cloud to perform real-time sync of your data across all devices. Enjoy!

The idea of this chapter is to get you started with Realm without delving too much into the details of the APIs you’re going to use. This will hopefully inspire you to try and find the right APIs, figure out what they do, and perhaps even browse through RealmSwift’s source code.

Now you’ll take a leap of faith and dive right into creating an iOS app that uses Realm to persist data on disk while following this tutorial-style chapter.

Have no fear though, as the rest of this book will teach you just about everything there is to learn about Realm in detail. You’re going to learn the mechanics behind everything you’re about to do in this chapter and much, much more.

I invite you to work through this chapter’s exercises with an open mind. This chapter is simply about getting a feeling for using Realm in your Swift code.

Getting Started

The theme of to-do apps as an educational tool might be getting old by now, but the simple truth is that a to-do app does a great job of demonstrating how to build an app based on data persistence. A to-do app includes features like fetching a list of to-do items from disk, adding, modifying and deleting items, and using the data with some of the common UIKit components such as a table view, an alert view, buttons, and more.

In this chapter, you’re going to work on a to-do app that’s built on the Realm Database. This will be very useful as you learn the basics of CRUD operations with Realm.

Note: Create, Read, Update and Delete are the basic persistence operations you can perform on mostly any data entity. Often times, this set of operations will be referred by the acronym CRUD. Just don’t mix up a CRUD app with a crude app!

To get started, open the macOS Terminal app (or another similar app of your choice), navigate to the current chapter’s starter project folder, run pod install (as described in Chapter 1) and open the newly created Xcode workspace.

Note: The starter projects in this book contain some UI boilerplate and other non-database related code. Sometimes Xcode might show code warnings since the starter code “misses” some parts which you will add while working through the tasks in the respective chapter.

Open Main.storyboard to get an idea of the app’s basic structure:

The project consist of a single table view controller with a custom to-do item cell.

The source code structure follows a general pattern for all of the projects in this book:

  • The Classes folder is a catch-all location for code that doesn’t fall under one of the other folders mentioned below. In this project, it includes an extension on UIViewController to add a simple API to present alerts on screen, as well as a handy extension on UITableView.
  • Assets is where you’ll find the app’s launch screen, meta information plist file, and the asset catalog.
  • Scenes contains all of the app’s scenes; including their view controller, view and view model code, when available. In this project, you have a single view controller and a custom table cell class.
  • Entities contains the Realm object classes you’ll be persisting to disk. This is practically your data models, but backed by Realm. You have a single class called ToDoItem in this project. In later chapters, you’ll be working on more complex database schemas, but this simple schema will suffice for now.

The projects in this book all follow a similar code structure, but you aren’t forced to use this structure in your own work. We’ve provided it as a guideline so you’ll know where to look for files as later projects in this book become more complicated.

If you run the starter app right now, you’ll see that it compiles and displays an empty to-do list on screen:

Realm Objects

Realm objects are basically a standard data model, much like any other standard data model you’ve defined in your apps. The only difference is they’re backed by Realm persistence and abilities.

You won’t dive into Realm objects at this stage, as you’ll be going into more detail on how to define Realm models and persist them in the next section of this book. In this chapter, you’re going to waltz through these model definitions, and get straight into action.

In fact, the MyToDo starter project already includes a class that will serve as the data model for storing to-do items. Open Entities/ToDoItem.swift and notice the ToDoItem class.

There are a few interesting points to note here, but you’ll be learning more about these subjects in the next chapters.

Dynamic Properties

First and foremost, you should recognize that the ToDoItem class subclasses Object. Object is a base class all of your Realm-backed data entities must inherit from. This allows Realm to introspect them and persist them to disk.

Another interesting oddity in this class is that all of its properties are defined as dynamic:

dynamic var id = UUID().uuidString
dynamic var text = ""
dynamic var isCompleted = false

This allows Realm to implement some custom, behind-the-scenes logic, to automatically map these properties to the data persisted to disk.

With the help of the dynamic keyword, a model class serves as a loose proxy between your app’s code and the data stored on disk, as seen in this simple schema:

Primary Key

ToDoItem also features a convenience init(_) and overrides a static method called primaryKey() from its parent class. Realm will call primaryKey() to decide which property will be used as the object’s primary key.

The primary key stores unique values that are used to identify objects in the database. For example, if you’re storing Car objects in the database, their uniquely identifying primary key can be their registration plate:

To make things easy, the id property, which is the primary key of ToDoItem, is automatically given a unique string UUID value. The UUID Foundation class lets you easily generate unique identifiers like these:

DB4722D0-FF33-408D-B79F-6F5194EF018E
409BC9B9-3BD2-42F0-B59D-4A5318EB3195
D9B541AF-16BF-41AC-A9CF-F5F43E5B1D9B

Ordinary Code

You’ll find that the class looks very much like a common Swift class. This is one of the greatest things about Realm! You don’t have to go out of your way to adapt your code to work with the persistence layer. You always work with native classes like ToDoItem, while Realm does the heavy-lifting behind the scenes automatically.

To recap: ToDoItem is a class you can persist on disk because it inherits from Realm’s base Object class. The class is pretty much ready to go, so you can start adding the code to read and write to-do items from and to disk.

Reading Objects From Disk

In this section, you’re going to write code to retrieve any persisted ToDoItem objects and display their data in the main scene of your app.

Let’s start off by adding a method to fetch all to-do items from the Realm file on disk. Open Entities/ToDoItem.swift and insert in the extension at the bottom:

static func all(in realm: Realm = try! Realm()) -> Results<ToDoItem> {
  return realm.objects(ToDoItem.self)
    .sorted(byKeyPath: ToDoItem.Property.isCompleted.rawValue)
}

You just added a static all(in:) method which, by default, fetches all to-do items from your default Realm file. Having a realm parameter with a default value allows you to easily work with the default Realm, but also leaves room for using an arbitrary Realm, if needed.

You can actually have more than a single Realm file in your app, as you might want to separate out the data your app uses into different “buckets”. You’ll learn more about this in Chapter 7, “Multiple Realms/Shared Realms”.

Note: You maybe outraged by the use of try! and of course you will have right to be. For brevity’s sake the book code will only focus on Realm’s APIs but if you’d like to learn more about error handling or other Swift related topics do check the “Swift Apprentice” book on raywenderlich.com where we cover Swift itself in great detail.

If you look further down the code, you’ll spot the objects(_) and sorted(byKeyPath:) methods, which are some of the APIs you’re going to use throughout this book. objects(_) fetches objects of a certain type from disk, and sorted(byKeyPath:) sorts them by the value of a given property or key path.

In your code, you ask Realm to return all persisted objects of type ToDoItem and sort them by their isCompleted property. This will sort incomplete items to the start of the list and completed ones to the end. The method returns a Results, a generic results type which gives you dynamic access to the result set.

Next up will be updating your view controller to use this new method to fetch and display the to-do items.

Open Scenes/ToDoListController.swift and spot the items property towards the top of the file. It is an Optional type where you’ll store the result fetched from Realm.

Next, append to viewDidLoad():

items = ToDoItem.all()

This code uses your new all(in:) method to ask Realm for all persisted ToDoItems.

Currently, the app doesn’t display any items when launched, since you don’t have any data stored. You’ll fix that by adding some default to-do items in case the user hasn’t created any.

Creating Some Test Data

Open AppDelegate.swift and add inside the empty initializeRealm() method:

let realm = try! Realm()
guard realm.isEmpty else { return }

You start by getting an instance of the default Realm by initializing it without any arguments. Then, you check if the Realm is empty using the handy isEmpty property. If the Realm isn’t empty, you simply return since there’s no need to add test data.

Don’t worry about the creation of a new Realm in the first line. Initializing a Realm object simply creates a handle to the file on disk. Furthermore, this handle is shared across your app, and returned each time you use Realm() on the same thread. Therefore, you’re not duplicating your data, or consuming any extra memory — all pieces of code in this app work with the same Realm instance and the same file on disk.

Next, add code to create some test data, right after your guard statement:

try! realm.write {
  realm.add(ToDoItem("Buy Milk"))
  realm.add(ToDoItem("Finish Book"))
}

This quick piece of code persists two objects to disk. And by quick, I mean that it’s literally only four lines of code!

You start a write transaction by using realm.write and add two new ToDoItem objects from within the transaction body. To persist objects, you simply create them as you would any other class, and hand them off to Realm.add(_) which adds them to your Realm.

Last but not least, call initializeRealm from application(_:didFinishLaunchingWithOptions:). Just before return true, add the following:

initializeRealm()

Build and run the project to see your new code in action:

That was easier than expected, wasn’t it? To be fair, the starter project did include some code to make your life a tad less complicated, but it’s clear how easy it is to fetch items from disk and persist new ones when needed.

Open Scenes/ToDoListController.swift one more time and look for the UITableViewDataSource implementations in the bottom of the file:

  • tableView(_:numberOfRowsInSection:) uses items?.count to return the number of objects fetched in the items result set.
  • tableView(_:cellForRowAt:) uses an index subscript to get the object at the required index path items?[indexPath.row] and use its properties to configure the cell.

Additionally, the next class extension defines some delegate methods from the UITableViewDelegate protocol that enable swipe-to-delete on table cells. You’ll write the code to actually delete items a bit later in this chapter.

Adding an Item

Next, you’ll add code to allow the user to add new to-do items to their list.

Since this is one of the CRUD operations, let’s add the relevant method to the ToDoItem class. Open Entities/ToDoItem.swift and add right below your all(in:) method:

@discardableResult
static func add(text: String, in realm: Realm = try! Realm()) 
  -> ToDoItem {
  let item = ToDoItem(text)
  try! realm.write {
    realm.add(item)
  }
  return item
}

add(text:in:) lets you create a new ToDoItem instance and persist it to a Realm of your choice. This is a useful shortcut when you don’t intend to use an object outside of the context of the database.

You’re already familiar with the type of code above. You create a new ToDoItem instance, open a write transaction, and use Realm.add(_) to persist the object.

You can now add some UI code to your view controller to let the user input new to-do items and add them to the app’s Realm.

Back in Scenes/ToDoListController.swift, scroll to addItem(), which is a method already connected to the + button in your navigation bar. Add inside addItem():

userInputAlert("Add Todo Item") { text in
  ToDoItem.add(text: text)
}

userInputAlert(_) is a UIViewController extension method (found in the Classes folder of the starter project) that presents a new alert controller on the screen and asks the user to enter some text. Once the user taps OK, you’ll receive the user-provided text in a closure.

In the callback closure, you use the new method you just created to create and persist a new to-do item to disk: ToDoItem.add(text: text).

Run the project one more time and tap on the + button. userInputAlert(_:_:) will display an alert on screen and let you enter the text for a new to-do.

Tapping OK will execute your callback and save the new to-do item to disk.

As you might have noticed, the table view still only displays the two items you fetched when initially loading the view controller.

Use Realm Studio to open the app database default.realm from the Simulator folders and check its contents. For this, you can use the SimPholders tool as mentioned in Chapter 1, “Hello Realm”:

Realm Studio displays a list of all classes stored in your file on the left-hand side and a spreadsheet-like UI on the right side letting you browse all the data persisted in the file:

Hey, that new to-do item has been successfully added – you can find it at the bottom of the list!

In fact, if you re-run the project, you’ll see it appear in your app as well:

It seems like you need a way to refresh the table view whenever the database changes.

Reacting to Data Changes

One sub-optimal way to do this is to refresh the table view from addItem(). But going down this path means you’ll need to refresh the table view from every other method that modifies your data, such as when you delete an item, or set its completion status, and so on. Leaving that aside, the real issue is how to refresh the table if you commit a change from another class, which runs somewhere in the background, and is completely decoupled from the view controller?

Fortunately, Realm provides a powerful solution to this. Realm’s own change notifications mechanism lets your classes read and write data independently and be notified, in real-time, about any changes that occurred.

Realm’s own notification system is incredibly useful, because it lets you cleanly separate your data persistence code. Let’s look at an example which uses two classes:

  • A networking class which persists JSON as Realm objects on a background queue.
  • A view controller displaying the fetched objects in a collection view.

Without Realm and change notifications, you’ll need to make one class a delegate of the other (in a way that inevitably couples them) or use NotificationCenter to broadcast update notifications.

With Realm, the two classes can cleanly separate their concerns. One will only write to the database the other only reads and observes changes:


With this setup, it would be trivial to do something like test the class that writes objects to the database without creating a view controller. In addition, in the event the app goes offline, the view controller won’t care at all about the fact the class responsible for writing objects isn’t doing any work at the moment.

Relying on Realm’s built-in change notifications lets you separate concerns extremely well and keeps your app’s architecture simple and clean.

Let’s see how that looks in practice.

Open Scenes/ToDoListController.swift and add a new property at the top of the class:

private var itemsToken: NotificationToken?

A notification token keeps a reference to a subscription for change notifications. You’ll be using notifications throughout the book so you’ll get to learn all about them, starting in Chapter 6, “Notifications and Reactive Apps”.

Continue in viewWillAppear(_) where you’ll set your notification token:

itemsToken = items?.observe { [weak tableView] changes in
  guard let tableView = tableView else { return }

  switch changes {
  case .initial:
    tableView.reloadData()
  case .update(_, let deletions, let insertions, let updates):
    tableView.applyChanges(deletions: deletions, insertions: insertions, updates: updates)
  case .error: break
  }
}

You call observe(_) on the to-do items result set, which lets Realm know that you want to receive updates any time the result set changes.

For example, if you add a to-do item, Realm will call your observe callback. If you remove a to-do item, Realm will call your callback. If you change a property on one of your to-do items … yes, you guessed right — Realm will call your callback.

The observe(_) callback closure is the place to implement any UI code that will reflect the latest data changes in your app’s UI. In the code above, you receive detailed information about what items have been inserted, modified, or deleted. If any changes occurred in your result set, you call the applyChanges(_) extension method to apply them on screen, and you also take care of simply reloading the table view with the initial data at the time of observing changes.

Note: The callback is called on the same thread you create the subscription on. In your code above you create the subscription in viewWillAppear(_) and is therefore safe to update the app’s UI without any extra checks.

That’s as far as you’ll take this right now. Later on, you’ll learn about the notification data in greater detail.

Next, since you start observing items in viewWillAppear(_), it makes sense to stop the observation in viewWillDisappear(_).

Add the following to viewWillDisappear(_):

itemsToken?.invalidate()

invalidate() invalidates the token and cancels the data observation.

Run the project again. This time, as soon as you enter a new to-do item, it’ll appear in your list with a nice accompanying animation:

Now that you have the table all reactive and animated, you can add the remaining CRUD operations. Thanks to Realm’s change notifications, the table will reflect any changes automatically. Isn’t that great?

Modifying a Persisted Object

You just learned how to add new objects to your app’s Realm, but how would you modify an object that has already been persisted?

Obviously, you first need to fetch the object from the database and then modify it somehow. In this section of the chapter, you’re going to add code to complete (and un-complete?) a to-do task.

Open Entities/ToDoItem.swift and add a new method below add(text:in:):

func toggleCompleted() {
  guard let realm = realm else { return }
  try! realm.write {
    isCompleted = !isCompleted
  }
}

toggleCompleted() is a new method which allows you to easily toggle the status of a to-do item from incomplete to completed and vice-versa.

Every object persisted to a Realm has a realm property which provides you with quick access to the Realm where the object is currently persisted on.

You start by unwrapping the ToDoItems’ realm and start a new write transaction, just like you did before.

From within the transaction, you toggle isCompleted. As soon as the transaction has been successfully committed, that change is persisted on disk and propagated throughout your observation to change notifications. You can now add the code to toggle the item whenever the user taps the right button on each to-do item cell.

Switch back to Scenes/ToDoListController.swift and add the following method below addItem():

func toggleItem(_ item: ToDoItem) {
  item.toggleCompleted()
}

This method calls your newly created toggleCompleted() on a given to-do item object. You can use toggleItem(_) in the code that configures each individual to-do cell.

Scroll down to tableView(_:cellForRowAt:) and insert inside the callback closure for cell.configureWith:

self?.toggleItem(item)

When the user taps the cell button, it will call your code back and invoke toggleItem(item), which will toggle that item’s status.

That should take care of toggling to-do items in your project.

Run the app one more time and try tapping the status button of some of those to-do items:

As soon as you modify any of the to-do objects, the view controller is being notified about the change and the table view reflects the latest persisted data.

You’ll also notice that items you mark as completed will animate towards the bottom of the list. This is because Realm’s Results class reorders the objects in the collection according to the sorting you applied when you initially started observing changes. If you look back to ToDoItem.all(in:), you’ll see you’re sorting the results by their isCompleted property — incomplete tasks first, and completed last.

Deleting Items

Last but not least, you’re going to let the user delete items from their list.

This is quite similar to adding and modifying items: you’re going to add a new method on ToDoItem and then add the relevant code in the view controller to react to user events.

Thanks to the two UITableViewDelegate methods already included in the starter code of ToDoListController, the table view already reacts to left-swipes and displays a red Delete button:

This provides a good starting point for this chapter’s last task. Let’s get down to business!

Open Entities/ToDoItem.swift and add one last method to the extension, below toggleCompleted():

func delete() {
  guard let realm = realm else { return }
  try! realm.write {
    realm.delete(self)
  }
}

Just like before, you get a reference to the object’s Realm and then start a write transaction to perform your updates.

Note: As you’ll learn later on, if you try modifying a persisted object without starting a write transaction, your code will throw an exception. You can only modify managed objects inside a Realm write transaction.

Since the class is a Realm object, you can simply call realm.delete(self) to delete the current object from the Realm.

Finally, you need to add a few more lines in your view controller to call your new delete() method. Back in Scenes/ToDoListController.swift add below toggleItem(_:):

func deleteItem(_ item: ToDoItem) {
  item.delete()
}

Then, scroll down to tableView(_:commit:forRowAt:) and append at the bottom:

deleteItem(item)

This will call your new deleteItem(_) method, which in turn invokes the delete() method on the to-do item.

Run the app one last time, swipe left on a to-do item, and tap Delete:

Just like the previous features you added, the deletion of the object from the Realm is reflected in the table, accompanied by a pleasant animation.

With that last piece of code, your simple CRUD application is complete. You’ve learned a bit about fetching objects from a Realm file, adding and modifying existing objects, and how to react to data changes and keeping your read and write code separate.

In fact, you already possess the knowledge to create simple Realm apps! However, since working with Realm has so many advantages, you’ll want to expand your knowledge as soon as possible. Worry not, we’ve got you covered. The rest of this book provides everything you’ll need to learn about Realm in detail.

Challenges

Challenge 1: Enhance Your To-Do app With More Features

To warm up for the next chapter, work through a few small tasks to polish your to-do application.

Start by modifying the existing code so it only allows the deletion of completed tasks. Way to simulate ticking items off the list!

Finally, add a feature which allows the user to tap a cell and be presented with an alert where they can edit the current to-do item’s text. Once they close the alert, the text change will be persisted, and the UI should be updated accordingly.

This chapter didn’t go into much detail in regards to the various available APIs, so don’t worry too much if you can’t figure out how to complete this challenge . You can open the challenge folder of this chapter and peek at the completed solution code. At this point, it’s not expected you can figure out everything on your own.

These challenges might not be very complex, but they’ll get you writing some simple Realm code to warm up for the grand tour of Realm’s object features in the next chapter.

Where to Go From Here?

If you enjoyed what you learned in this tutorial, why not check out the complete Realm: Building Modern Swift Apps with Realm Database book?

Realm finds the sweet spot between the simplicity of storing data as JSON on disk and using heavy, slow ORMs like Core Data or similar that are built on top of SQLite. The Realm Database aims to be fast, performant and provide the commodities that mobile developers need such as working with objects, type-safety, and native notifications.

In this book, you’ll do the following:

  • Learn how easy it is to set up your first Realm database.
  • See how to persist and read data under the CRUD model.
  • Discover how to work with Realm configurations.
  • Design smart and responsive migrations for your Realms.
  • Create a Realm Cloud instance and sync your data in real time, across all devices, anywhere.

Realm Database has been under active development for several years. It powers apps by some of the biggest names in the App Store, including Adidas, Amazon, Nike, Starbucks, BBC, GoPro, Virgin, Cisco, Groupon and many more who have chosen to develop their mobile apps with Realm.

Realm Platform is a relatively new commercial product which allows developers to automatically synchronize data not only across Apple devices but also between any combination of Android, iPhone, Windows, or macOS apps. Realm Platform allows you to run the server software on your own infrastructure and keep your data in-house which more often suits large enterprises. Alternatively, you can use Realm Cloud which runs a Platform for you and you start syncing data very quickly and only pay for what you use.

To celebrate the launch of the book, it’s currently on sale as part of our Advanced Swift Spring Bundle for a massive 40% off. But don’t wait too long, as this deal is only on until Friday, April 27.

If you have any questions or comments on this tutorial, feel free to join the discussion below!

The post Introducing Realm: Building Modern Swift Apps with Realm Database appeared first on Ray Wenderlich.

RWDevCon 2018 Live – Podcast S07.5

$
0
0

In this special episode recorded LIVE at RWDevCon 2018, Janie and Dru talk about Season 7, a behind the scenes look, and what is happening in Season 8.

[Subscribe in iTunes] [RSS Feed]

Interested in sponsoring a podcast episode? We sell ads via Syndicate Ads, check it out!

Join our season

This season we are looking for new technologies and developer experiences to share. Email us or comment on the forum attached to the episode notes on the RayWenderlich.com site.

Contact Us

Where To Go From Here?

We hope you enjoyed this episode of our podcast. Be sure to subscribe in iTunes to get notified when the next episode comes out.

We’d love to hear what you think about the podcast, and any suggestions on what you’d like to hear in future episodes. Feel free to drop a comment here, or email us anytime at podcast@raywenderlich.com.

The post RWDevCon 2018 Live – Podcast S07.5 appeared first on Ray Wenderlich.

Screencast: Android Architecture Components: LiveData

Viewing all 4406 articles
Browse latest View live


<script src="https://jsc.adskeeper.com/r/s/rssing.com.1596347.js" async> </script>