Quantcast
Channel: Kodeco | High quality programming tutorials: iOS, Android, Swift, Kotlin, Unity, and more
Viewing all 4395 articles
Browse latest View live

Basic iOS Security: Keychain and Hashing

$
0
0
Update note: This tutorial has been updated for Xcode 9.2, Swift 4, iOS 11 and the iPhone X by Ryan Ackermann. The original tutorial was written by Chris Lowe.

Basic iOS Security: Keychain and Hashing

One of the most important aspects of software development also happens to be considered one of the most mysterious and scary (and is thus avoided like the plague): application security. Users expect their applications to run correctly, keep their information private, and protect that information from potential threats.

In this tutorial, you will dive into the basics of iOS security. You’ll work with some basic cryptographic hashing methods to securely store user input in the iOS keychain – keeping your users’ data private and protected.

Apple has several APIs that will help keep your applications secure, and you’ll explore these while working with the keychain. In addition, you’ll use CryptoSwift – a well-reviewed, open-source library that implements cryptographic algorithms.

Getting Started

Use the Download Materials button at the top or bottom of this tutorial to download the starter project.

The sample app allows users to log in and see photos of their friends. Most of the app is already connected for you; your job is to secure the app.

Once you unzip the download materials, be sure to open Friendvatars.xcworkspace to properly include all the CocoaPod dependencies. Build and run to see that the app opens to a login screen:

iOS Security

Currently, nothing happens when you tap Sign In. This is because there isn’t a way to save the user’s credentials. That’s what you’re going to add first.

Why Security is Important

Before you dive into the code, you should understand why security in your application is necessary. The security of your application is especially critical if you’re storing private user data such as emails, passwords, or bank account information.

iOS Security

Why does Apple take security so seriously? From the photos you take, to the number of steps that were achieved during the day, your iPhone stores a lot of personal data. Keeping this data safe is very important.

Who are the attackers in the iOS ecosystem, and what do they want? An attacker might be a criminal, a business competitor, even a friend or relative. Not all attackers want the same thing. Some might want to cause damage or corrupt information, while others might want to see what presents they are getting for their birthdays.

It’s your job to make sure that the data being held by your application is protected against potential threats. Fortunately, Apple has built many strong APIs that simplify this task.

Apple’s Keychain

One of the most important security elements for Apple developers is the iOS Keychain, which is a specialized database for storing metadata and sensitive information. Using Keychain is the best practice for storing small pieces of data that are critical to your app such as secrets and passwords.

Why use the Keychain over simpler solutions? Wouldn’t storing the base-64 encoding the user’s password in UserDefaults be enough? Definitely not! It’s trivial for an attacker to recover a password stored that way. Security is difficult, and attempting your own custom solution is not a good idea. Even if your app is not for a financial institution, storing private user input should not be taken lightly.

iOS Security

Interacting with the Keychain directly is complicated, especially in Swift. You have to use the Security framework that is mostly written in C.

Fortunately, you can avoid using these low level APIs by borrowing a Swift wrapper from Apple’s sample code GenericKeychain. KeychainPasswordItem provides an easy-to-use Swift interface to the Keychain and is already included in the starter project.

Time to dive into code!

Using the Keychain

Open AuthViewController.swift. This view controller is responsible for the login form you saw initially. If you scroll down to the Actions section, you’ll notice that signInButtonPressed isn’t doing anything. Time to change that. Add the following to the bottom of the Helpers section:

private func signIn() {
  // 1
  view.endEditing(true)
  
  // 2
  guard let email = emailField.text, email.count > 0 else {
    return
  }
  guard let password = passwordField.text, password.count > 0 else {
    return
  }
  
  // 3
  let name = UIDevice.current.name
  let user = User(name: name, email: email)
}

Here’s what is going on:

  1. You dismiss the keyboard to confirm that the user’s action did something.
  2. You take the email and password the user input. If either is zero length, then you don’t want to continue. In a real world application, you should show the user an error here as well.
  3. You assign a name to the user which, for purposes of this tutorial, you take from the device name.
Note: You can change the name of your Mac (used by the sim) by going to System Preferences ▸ Sharing and changing the computer’s name at the top. Additionally you can change your iPhone’s name by going to Settings ▸ General ▸ About ▸ Name.

Now add the following in signInButtonPressed:

signIn()

This calls your signIn method when signInButtonPressed is triggered.

Find textFieldShouldReturn and replace the break under case TextFieldTag.password.rawValue with:

signIn()

Now signIn() is called when the user taps return on the keyboard while the password field has focus and contains text.

signIn() is not complete yet. You still need to store the user object as well as the password. You’ll implement this in a helper class.

Open AuthController.swift, which is a static class that will hold the logic related to authentication for this app.

First, add the following at the top of the file above isSignedIn :

static let serviceName = "FriendvatarsService"

This defines the service name that will be used to identify the app’s data in the Keychain. To use this constant, create a signIn method at the end of the class like so:

class func signIn(_ user: User, password: String) throws {
  try KeychainPasswordItem(service: serviceName, account: user.email).savePassword(password)
  
  Settings.currentUser = user
}

This method stores the user’s login information securely in the Keychain. It creates a KeychainPasswordItem with the service name you defined along with a unique identifier (account).

For this application, the user’s email is used as the identifier for the Keychain, but other examples could be a user ID or username that is unique. Finally, Settings.currentUser is set with user – this is stored in UserDefaults.

This method should not be considered complete! Storing the user’s password directly isn’t the best practice. For example, if an attacker compromised Apple’s Keychain, he could read your user’s passwords in plain text. A better solution is to store a hash built from the user’s identity.

At the top of AuthController.swift add the following below the Foundation import:

import CryptoSwift

CryptoSwift is one of the most popular collections of many standard cryptographic algorithms written in Swift. Cryptography is difficult and needs to be done correctly to be useful. Using a popular library for security means you don’t have to be responsible for the implementation of standardized hashing functions. The best cryptography is open to the public for review.

Note: Apple’s CommonCrypto framework provides many useful hashing functions for you, but it’s not easy to interact with it in Swift. This is why for this tutorial we opted for the CryptoSwift library.

Next add the following above signIn:

class func passwordHash(from email: String, password: String) -> String {
  let salt = "x4vV8bGgqqmQwgCoyXFQj+(o.nUNQhVP7ND"
  return "\(password).\(email).\(salt)".sha256()
}

This method takes an email and password, and returns a hashed string. The salt is a unique string used to make common passwords, well, uncommon. sha256() is a CryptoSwift method that completes a type of SHA-2 hash on your input string.

In the example from earlier, an attacker who compromised Keychain would find this hash. The attacker might create a table of commonly used passwords and their hashes to compare against this hash. If you hashed just the user’s input without salting, and the password existed in the attackers hash table, the password would be compromised.

Incorporating a salt increases the complexity of the attack. Furthermore, you combine the user’s email and password with the salt to create a hash that won’t be easily cracked.

Note: For authentication with a server backend, the app and server would share the same salt. This allows them to build hashes in the same way and compare the two hashes to verify identity.

Back in signIn(_:password:), replace the line that calls savePassword with this:

let finalHash = passwordHash(from: user.email, password: password)
try KeychainPasswordItem(service: serviceName, account: user.email).savePassword(finalHash)

signIn now stores a strong hash, rather than a raw password. Now it’s time to add this to the view controller.

Head back to AuthViewController.swift and add the following to the bottom of signIn():

do {
  try AuthController.signIn(user, password: password)
} catch {
  print("Error signing in: \(error.localizedDescription)")
}

Although this will store the user and save a hashed password, it’ll take a little more for the app to be signed in. AppController.swift needs a way to be notified when authentication changes.

You may have noticed that AuthController.swift has a static variable named isSignedIn. Currently, it’s always returning false even if the user signs in.

In AuthController.swift, update isSignedIn to:

static var isSignedIn: Bool {
  // 1
  guard let currentUser = Settings.currentUser else {
    return false
  }
  
  do {
    // 2
    let password = try KeychainPasswordItem(service: serviceName, account: currentUser.email).readPassword()
    return password.count > 0
  } catch {
    return false
  }
}

Here’s what’s going on:

  1. Right away, you check the current user stored in UserDefaults. If no user exists, there won’t be an identifier to lookup the password hash from the Keychain, so you indicate they are not signed in.
  2. You read the password hash from the Keychain, and if a password exists and isn’t blank, the user is considered logged in.

Now handleAuthState in AppController.swift will work correctly, but it would take a fresh app launch after signing in to update the UI correctly. Instead, a good way to notify the app of a state change such as authentication is through notifications.

Add the following to the bottom of AuthController.swift:

extension Notification.Name {
  
  static let loginStatusChanged = Notification.Name("com.razeware.auth.changed")
  
}

It’s good practice to use a reverse domain identifier when composing custom notifications, which is usually derived from the app’s bundle identifier. Using a unique identifier can help when debugging so anything related to your notification stands out from other frameworks mentioned in your logs.

To use this custom notification name, add the following to the bottom of signIn(_:password:):

NotificationCenter.default.post(name: .loginStatusChanged, object: nil)

This will post a notification that can be observed by other parts of the application.

Inside of AppController.swift, add an init method above show(in:):

init() {
  NotificationCenter.default.addObserver(
    self,
    selector: #selector(handleAuthState),
    name: .loginStatusChanged,
    object: nil
  )
}

This will register AppController as an observer of your login notification. It will call handleAuthState when triggered.

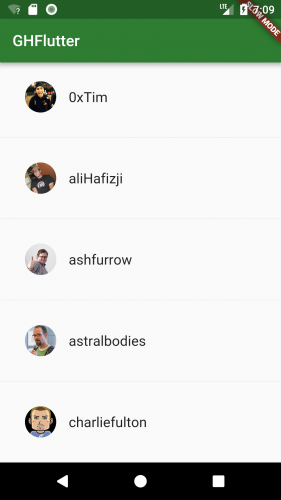
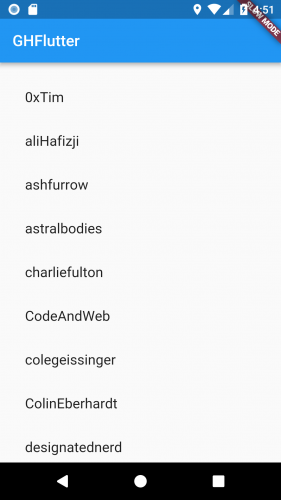
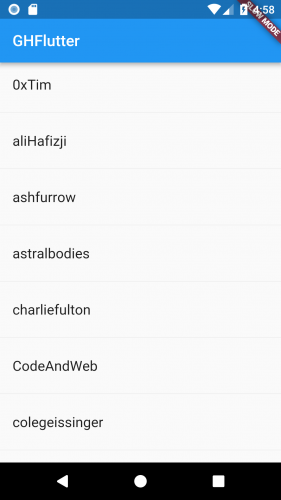
Build and run. After signing in using any email and password combination, you’ll see the a list of friends:

You’ll notice that there aren’t any avatars, just names of friends. That’s not very pleasing to look at. You should probably sign out and forget about this unfinished app. Oh come on, even the sign out button doesn’t work. Time to leave a 1 star review and really give it to the developer!

Signing in works great, but there isn’t a way to sign out of the app. This is actually pretty easy to achieve, since there’s a notification that will signal any authentication state change.

Head back to AuthController.swift and add the following method below signIn(_:password:):

class func signOut() throws {
  // 1
  guard let currentUser = Settings.currentUser else {
    return
  }
  
  // 2
  try KeychainPasswordItem(service: serviceName, account: currentUser.email).deleteItem()
  
  // 3
  Settings.currentUser = nil
  NotificationCenter.default.post(name: .loginStatusChanged, object: nil)
}

This one is fairly simple but here’s the breakdown:

  1. You check if you’ve stored a current user, and bail out early if you haven’t.
  2. You delete the password hash from the Keychain.
  3. You clear the user object and post the notification.

To wire this up, jump over to FriendsViewController.swift and add the following to the currently empty signOut:

try? AuthController.signOut()

Your new method is called to clear out the signed in user’s data when the Sign Out button is selected.

It’s a good idea to handle errors in your applications, but for the sake of this tutorial you’ll just ignore any error.

Build and run, then tap the Sign Out button.

Now you have a complete example of authentication working in an app!

Hashing

You did a great job getting authentication set up! However the fun isn’t over yet. Now you’ll address that blank space in front of the names in the friends view.

In FriendsViewController.swift, there is a list of User model objects displayed. You also want to show avatar images for each user in the view. Since there are only two attributes on the User, a name and email, how are you supposed to show an image?

It turns out there is a service that takes an email address and associates it with an avatar image: Gravatar! If you haven’t heard of Gravatar before, it’s commonly used on blogs and forums to globally associate an email address with an avatar. This simplifies things so that users don’t have to upload a new avatar to every forum or site they join.

Each of these users has an avatar associated with their email already. So the only thing you have to do is make a request to Gravatar and get their images. To do so, you’ll create a MD5 hash of their email to build the request URL.

If you look at the docs on Gravatar’s site, you’ll see you need a hashed email address to build a request. This will be a piece of cake since you can leverage CryptoSwift. Add the following, in place of the comment about Gravatar, in tableView(_:cellForRowAt:):

// 1
let emailHash = user.email.trimmingCharacters(in: .whitespacesAndNewlines)
                          .lowercased()
                          .md5()

// 2
if let url = URL(string: "https://www.gravatar.com/avatar/" + emailHash) {
  URLSession.shared.dataTask(with: url) { data, response, error in
    guard let data = data, let image = UIImage(data: data) else {
      return
    }
    
    // 3
    self.imageCache.setObject(image, forKey: user.email as NSString)
    
    DispatchQueue.main.async {
      // 4
      self.tableView.reloadRows(at: [indexPath], with: .automatic)
    }
  }.resume()
}

Here’s the breakdown:

  1. First you normalize the email according to Gravatar’s docs, then you create a MD5 hash.
  2. You construct the Gravatar URL and URLSession. You load a UIImage from the returned data.
  3. You cache the image to avoid repeat fetches for an email address.
  4. You reload the row in the table view so the avatar image shows up.

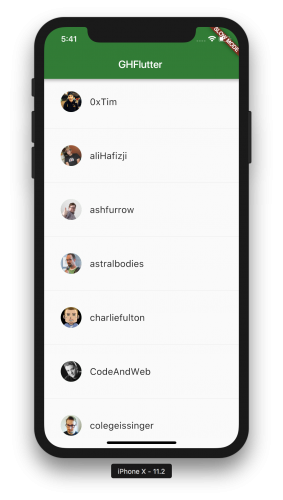
Build and run. Now you can view your friends’ avatar images and names:

Note: If your email returns the default white on blue G, then head over to Gravatar’s site and upload your own avatar and join your friends!

Where to Go From Here?

You now have a complete app the handles basic iOS security and authentication, and you can view avatars powered by Gravatar. You learned about the importance of security, about the iOS keychain and some best practices like storing hashes instead of plain text values. Hopefully, you also had a great time learning about this!

You can download the completed version of the project using the Download Materials button at the top or bottom of this tutorial.

If you’re interested in more ways to secure your applications, learn to use biometric sensors on the latest Apple products in this tutorial.

You can also read more about Apple’s Security framework if you want to really dig into the framework.

Finally, be sure to explore more security algorithms provided by CryptoSwift.

I hope you enjoyed this tutorial! If you have any questions or comments, please join the discussion below!

The post Basic iOS Security: Keychain and Hashing appeared first on Ray Wenderlich.


Video Tutorial: Server Side Swift with Vapor Part 3: Conclusion

Video Tutorial: Server Side Swift with Vapor Part 3: Edit and Delete Acronyms

What’s New in Android Studio 3

$
0
0

What’s New in Android Studio 3

At I/O 2017, Google announced first-party support of the Kotlin programming language for Android Development, with Kotlin tools built right-in to an upcoming version of Android Studio.

Almost every Android developer around the world was excited for this change. Many have wanted an alternative to Java for several reasons, but until now had to use external plugins to achieve such a task.

On October 27, 2017, Android Studio 3.0 went to a stable version and many Android developers began to develop completely in Kotlin. We at raywenderlich.com are no exception, and most of our Android tutorials are now written in this great programming language.

But Kotlin support is only one of the changes in Android Studio 3. In this tutorial, you will learn about some of the other improvements that Android Studio 3 has to offer.

You will also learn about some of the best movies ever made thanks to our sample app: Color Movies.

Grab some popcorn and let’s code!

Note: For this project, I assume that you know the basics of Android development with Kotlin. You should also know how to set up and run Android Studio and the Android Emulator. If you need some help with that, check out our Beginning Android Development with Kotlin tutorial.

Getting Started

To kick things off, start by downloading the materials for this tutorial (you can find a link at the top or bottom of the page). The sample project has everything you need to try the new features in Android Studio 3.

Launch Android Studio 3.0.1 or greater, and in the Welcome to Android Studio window select Import Project (Eclipse, ADT, etc).
Welcome to Android Studio

Select the high-level project directory and click OK.
Project Directory

If you explore the project, you will find a folder with models, a folder for the API services, a Kotlin extension file, an activity and a layout file. It is not necessary that you analyze them in detail since you won’t be heavily editing these files. Instead, we are going to focus on the advantages that Android Studio 3.0 provides to work with them.

Build and Run the app on an emulator or device. You should see this:

First run

The screen of our activity contains a button and some text. Don’t press the button just yet. First, you will need to obtain an API Key.

Obtaining the NY Times API Key

For this tutorial you will use the NY Times Open API, a popular web service for retrieving movie and book reviews.

Fortunately, getting an API Key is as easy as going to https://developer.nytimes.com/signup

Note: You will be asked to select an API. Choose Movie Reviews API.

Once you have acquired your API key, open the NYTimesApi.kt file under the models folder and replace the part that says <key> with your own.

@GET("svc/movies/v2/reviews/search.json?api-key=<key>")
fun getReviews(): Call<MovieResponse>

Build and Run:
Run with key

Press the New Movie button to get an awesome movie suggestion:

New Movie

Now we are ready to try all the new features in Android Studio 3! :]

Development

Kotlin

The newest and most anticipated feature is app development in Kotlin. One of the best parts of Kotlin is that this language is 100% interoperable with Java. Therefore, the most popular libraries that you know and love will work without any issue with the help of Gradle.

This project uses Retrofit, one of the most popular Android Networking libraries written in Java.

To see how libraries are implemented in Android Studio 3, open the build.gradle file of the app:
Open app build.gradle

Android Studio 3 Gradle configuration has changed since the last version, due to changes in the Android Studio Gradle plugin version 3.0.0+. Among other changes, we now typically use implementation instead of compile:

dependencies {
    implementation fileTree(dir: 'libs', include: ['*.jar'])
    implementation"org.jetbrains.kotlin:kotlin-stdlib-jre7:$kotlin_version"
    implementation 'com.android.support:appcompat-v7:26.1.0'
    implementation 'com.android.support.constraint:constraint-layout:1.0.2'
    implementation 'com.squareup.retrofit2:converter-moshi:2.3.0'
    implementation "com.android.support:design:$supportVersion"
    testImplementation 'junit:junit:4.12'
    androidTestImplementation 'com.android.support.test:runner:1.0.1'
    androidTestImplementation
}

Also, you no longer need to specify the Android build tools version in build.gradle. The plugin will use the minimum required version by default. So, you can now omit the android.buildToolsVersion property.

Note: We are not going to cover all the changes in the Gradle plugin because that would be beyond the scope of this tutorial. If you want more information, you can check out the official documentation or our Gradle Tutorial for Android. :]

Navigate to the models package and open the Link.kt file.
Open Link model file

This class consists of a single statement thanks to the power of the data classes in Kotlin:

data class Link(val type: String,
                val url: String,
                val suggested_link_text: String)

To give you an idea of how much code you were saved, this would be the Java counterpart:

public class Link {

    private String type;
    private String url;
    private String suggested_link_text;
    
    public Link(String type, String url, String suggested_link_text) {
        this.type = type;
        this.url = url;
        this.suggested_link_text = suggested_link_text;
    }
    
    public String getType() {
        return type;
    }
    
    public String getUrl() {
        return url;
    }
    
    public String getSuggested_link_text() {
        return suggested_link_text;
    }

}

Cool right?
Data classes are cool

You are not going to learn all ins and outs of Android Development with Kotlin in this project. I invite you to explore our Kotlin for Android tutorial if you want to learn more.

Custom and Downloadable Fonts

Beginning with Android Studio 3, we can let the system request fonts from a provider application instead of bundling them into our APKs, or let our APK download fonts. Custom font support in your app is provided on older Android devices via support library 26 and above.

Custom and downloadable fonts have several benefits including:

  • Android Studio 3 design editor support
  • Increased app installation success rate
  • Reduced APK size
  • Less memory and data usage since they are only fetched over the network when needed.

To try this new feature you are going to modify the Color Movies app to use a custom font from Google Fonts.

Open activity_main.xml in the res/layout folder.
Open activity_main.xml

In the Android Studio design editor preview, you will notice that the font is the usual sans serif:
Normal font

Select the TextView that displays the movie review:
Select TextView

Go to the fontFamily dropdown menu, scroll down and select More Fonts…
More Fonts

A menu will show up that lets you select between Android’s native fonts or custom Downloadable fonts from Google Fonts:
Font menu

Look for the Aldrich font either by scrolling down or by using the search field, and select it:
Aldrich

To use the custom font we have two options: Create downloadable font or Add font to the project.

Downloadable fonts are usually the best choice since they let Android download it only when necessary, saving memory and mobile data usage.

Make sure that Create downloadable font is selected and click OK.

Your layout preview should now look like this:
Layout preview

There is also a new file under your resfolder:
font folder
The aldrich.xml file contains all the information needed by Android devices to download your font when needed.

Now you need to add the same font to the remaining TextViews. Fortunately, now that you have added it to your res folder all you have to do is select it in the fontFamily dropdown menu:

fontFamily dropdown

The little clip-shaped icon indicates that it is a downloadable font instead of a native font.

After you have finished changing the font for both TextViews your layout should look like this:
New preview

Build and Run the app:
App with fonts

Now your app has a nice custom font that Android will automatically download when needed!

Click on New Movie to see your new font in action:

Ne font in action

Wow, Maze Runner has a great review! We should head to the movies right now! :]

There is a lot more to learn about custom fonts in Android. If you want to learn more, please make sure to check out our Custom and Downloadable Fonts tutorial.

Adaptive Icons

A long time ago, smartphones were the only devices running Android. But as Android’s popularity grew, so did the variety of devices using the operating system. Nowadays, there are gadgets ranging from small watches to huge Ultra HD wide screen TV’s.

This is changing the way we approach our app designs, including our app icons.

Android Studio 3 and Android 8.0 (API level 26) introduce the possibility to create Adaptive icons, which can display a variety of shapes and sizes across different devices.

Adaptive icons consist of 2 fundamental pieces:

  • Foreground Layer: The image or logo that represents your app.
  • Background Layer: Your background color or gradient.

Adaptive icons

In Android 7.1 and earlier, icons measured 48 x 48 dp. Now you must size your icon according to the following guidelines:

  • Both layers must measure 108 x 108 dp.
  • The inner 72 x 72 dp of the icon appears within the masked viewport.
  • The system reserves the outer 18 dp on each of the 4 sides to create interesting visual effects, such as parallax or pulsing.

In the next section I will show you how to create adaptive icons using the new and improved Asset Studio in Android Studio 3.

Note: It is highly recommended that you get a custom icon created by a professional designer if you plan to release your app in Google’s Play Store.

Asset Studio

Go back to your emulator’s home screen and look for your app’s icon. You will notice that it is the default one provided by Android Studio:
Default icon

Back in Android Studio 3, right click on your res folder and select New/Image Asset
New Image Asset menu

The Asset Studio will pop up, which allows you to create all kinds of icons and assets for your app.
Asset Studio

In Icon Type you can choose between Launcher Icons (Adaptive and Legacy), Launcher Icons (Legacy only), Action Bar and Tab Icons and Notification Icons. Leave the default option Launcher Icons (Adaptive and Legacy) selected and leave the name as ic_launcher.
Asset Studio menus

Below you have 3 tabs: Foreground Layer, Background Layer and Legacy.

In Foreground Layer you will choose the image that best represents your app. This could be any image that your trusted designer provides you. But for the moment you will use the material icons included with Android.

In Asset Type select Clip Art. Note how the preview is automatically updated:
Clip art

Click on Clip Art
Clip art

A dialog will appear with a large variety of icons to choose from:
Icon chooser

Type moviein the search field and select the one named movie filter:
movie filter icon

Click OK. Your icon should look like this:
Asset Studio update

Now let’s change the color. Click on the hexadecimal code in front of Color:
Color

You can choose a color for your image, either with the Eyedropper, RGB Code, hexadecimal or the color palette.
Color chooser

Choose white by typing FFFFFF in the hexadecimal field:
Hex for white

Click Choose. Your design should look like this:
New icon design

The foreground is completed, now you are going to work on the background.

In the tabs, select Background Layer:
Background layer

We can choose a background image or a solid color. In our case we are going to select Color:
Color background

Click on the color’s hexadecimal code. A dialog will show up just like the one you used to modify the clip art image:
Color chooser

Here you can choose the background color for your app’s icon. I’m going to select purple (4E00A6) because it is my favorite color, but you can choose the one you like the most:
Purple background

Click Choose. Your icon should look like this:
new icon design

Finally, select the Legacy tab:
Legacy tab

Here you can specify if you are going to generate an icon for APIs lower than 25 and what it will look like. Leave the default settings and click Next.

A dialog will ask you to confirm the output directory for your resources. It will also warn you that some files will be overwritten:
New icon dialog

Do not worry about the warning. We want the previous files to be overwritten. Click Finish.

Your res/mipmap folder now contains your own design:
new icon file

Build and Run and check out your brand-new icon:
New app icon

You just created your first adaptive icon using the Asset Studio in Android Studio 3!
Yay!

Android Emulator

Google Play System Images in Android Oreo

Just like for previous API levels, the Android Oreo system image now contains Play Store services. This is very useful to test your apps that make use of several Google APIs like maps and localization.

To create an AVD with Play Store services installed just make sure that you have Google APIs in the device’s target:
Google APIs

Quick Boot

In the early days of Android development, the emulator could take more than an hour to load. Therefore, you had to resort to several hacks or third-party emulators to speed up your development process.
Ouch!

But things are changing. If you have a modern computer, an Android emulator created using Android Studio 3 should take less than a minute to first load. And it should run fast thanks to virtualization technology such as HAXM from Intel on macOS and Windows and KVM on Linux.

The developers at Google have decided to go even further and introduced a new and powerful feature called Quick Boot. Once enabled, when you initiate an AVD for the first time, a cold boot will occur (like powering on a device), but all other times the previous state will be restored (like waking your phone), unless you manually ask for a cold boot.

You’ll need Android Emulator 27.0.2 or greater to use Quick Boot.

Android Emulator Version

New AVD’s you create will use Quick Boot by default. To use this feature on an existing AVD, go to your AVD’s configuration (the pencil icon):
AVD configuration

Click Show Advanced Settings:
Show Advanced Settings

Scroll down to Emulated Performance and make sure that Quick Boot is checked.
Quick Boot option

Start your virtual device and select More in the left menu:
AVD menu

Go to the Settings menu and select Yes on Save quick-boot state on exit:
Save quick-boot state

And that’s it!

Every time you close your emulator the state will be saved.
Saving emulator state

And when you start your emulator again, the previous session will be restored:
Restoring emulator state

Android Profiler

A very important aspect of an app’s development process is testing. In Android Studio 3, the Android Profiler replaces the old Android Monitor.

You can use the new the Android Profiler to measure CPU usage, Memory and Data usage, and even certain parts of your code execution thanks to the Event Timeline.

In this tutorial you will explore the Network Profiler and the Event Timeline since they are the easiest to understand if you have previous experience with web services.

Network Profiler

Build and Run your app and go to the View/Tool Windows menu and click on Android Profiler.

Tool Windows menu

You can also access it from the toolbar at the bottom of Android Studio 3:
Android Studio toolbar

The Android Profiler will appear at the bottom, where Logcat was showing:
Android Profiler

The Android Profiler has 3 main sections:

  • (1) CPU Profiler: Helps you to monitor your device’s CPU usage by triggering a sample or instrumented CPU trace.
  • (2) Memory Profiler: Helps you to measure your app’s current memory usage by identifying memory leaks that can lead to freezes or app crashes.
  • (3) Network Profiler: Allows you to monitor the network activity of your app such as web requests or mobile data usage

Select your current emulator in the device dropdown:
Device dropdown

Click on Network to open the Network Profiler:
Network profiler

In your app, click on the New Movie button and see what happens in the Network Profiler:
Make an API call
We are going to analyze in detail what happened when you made a request to the NY Times API.

Stop live monitoring by pressing the Live button:
Stop Live monitoring

Use the lower scrolling bar to make the request’s graph easier to see in your network profiler:
Scroll graph

Select the graph by clicking and dragging:
Select graph

A panel will appear with the request’s Name, Size, Type, Status code, Time and its respective Timeline details.
Network call panel

Select the request. Another panel will appear with detailed information about the request sent and the data received:
Request details

Thanks to the Network Profiler you can analyze very deeply what happens when you make a web request. You don’t even need to use external applications to analyze the JSON response.

Take a moment to explore the response data such as the status code, size, json, url, etc.

Isn’t it wonderful how easy it is to analyze web requests with the network profiler?

Yay!

Press the Live button and click on the back arrow to return to the the Android Profiler:
Return to Live

Timeline

The top part of the Android Profiler is the Event Timeline:
Event Timeline

As the name suggests, it helps you to monitor the events that happen during the execution of your app such as touches, rotations, activity states, etc.

Rotate your emulator’s screen using the side controls or by pressing Ctrl + L to rotate left or Ctrl + R to rotate to right. You will notice how your profiler immediately begins to display several changes:
Rotate event

First, you will see the lifecycle states of your MainActivity: saved – stopped – destroyed:
Lifecycle states

Then, the name of the new activity that is currently in the foreground, along with an icon indicating the type of event that triggered its creation(rotation):
Event icon

Thanks to the Event Timeline it is very easy to know what’s going on behind the scenes. But you are not only limited to rotation events, let’s try a couple more:

Press the New Movie button to trigger a touch event:
Touch event

Change the emultor’s volume to trigger a sound event:
Sound event

Exploring all the different events would take way too much time, but I invite you to play around with the emulator to get familiar with them.

If you want to learn more about the Android Profiler, Google has a great article about the subject.

I don’t know about you, but I want to watch a movie before diving into this new Android Development with Kotlin world! :]

Build and Run your app one last time to get a movie suggestion:

Last app run

24 Frames? Sounds like fun!

Let me know which movie you got in the comments below : ]

Where to go from Here

You can download the completed project using the download button at the top or bottom of this tutorial.

If you want to learn more about all the changes in Android Studio 3, I encourage you to read Google’s Official Documentation about the release. It has all you need to know about the new Android development tools at your disposal.

There are many topics that we covered on a high-level like Custom and Downloadable Fonts, Gradle Changes and Adaptive Icons, in order to keep things short and sweet. But remember that you can always refer to our Android Development Tutorials to dig deeper into those subjects

I hope you enjoyed this tutorial, and if you have any questions or comments, please join the forum discussion below!

The post What’s New in Android Studio 3 appeared first on Ray Wenderlich.

Video Tutorial: Server Side Swift with Vapor Part 4: Introduction

Video Tutorial: Server Side Swift with Vapor Part 4: Passwords

Video Tutorial: Server Side Swift with Vapor Part 4: API Authentication

Video Tutorial: Server Side Swift with Vapor Part 4: Web Authentication


Video Tutorial: Server Side Swift with Vapor Part 4: Conclusion

How to Submit An App to Apple: From No Account to App Store – Part 1

$
0
0
Update note: This tutorial has been updated by Rony Rozen. The original post was written by Gustavo Ambrozio and updated by Tony Dahbura.
submit an app

Learn how to join the Apple Developer program, submit an app and get published on the App Store!

Learn how to submit an app to Apple in this two-part series. This tutorial documents every step of becoming an Apple iOS developer – from literally no account, to published on the App Store!

You’ll learn how to sign up for Apple’s iOS Developer Program, how to generate the various certificates needed, how to configure your app, and how to submit an app to the App Store for approval.

To create this tutorial, I created a completely new App Store account and submitted a new app to the App Store, keeping careful note of each step along the way.

This tutorial will walk through the process to submit an app called Drop Charge, which comes from 2D iOS & tvOS Games by Tutorials. The app has already been approved and can be downloaded for free from the App Store here. You should use your own app as you follow along.

For this tutorial, you will need US$99 (or the equivalent fee applicable in your country), a valid credit card, and a browser. This may go without saying, but to develop apps, you’ll need a Mac computer, with macOS installed. Lastly, you’ll want to have at least one real iDevice to test your app before submitting it to the App Store.

Finally, you will need Xcode, Apple’s development software. You can download Xcode from the Mac App store now or wait until it’s covered later in the tutorial.

It will help to approach this tutorial with some patience and perspective. Becoming a registered developer is a lengthy process and is sometimes repetitive. Just remember: in the end you will be able to submit an app (or multiple apps) to the App Store for potential fortune and glory!

Getting Started

The first step on the path to the App Store is to register as an Apple developer. Becoming an Apple developer is free, but this won’t enable you to submit an app to the App Store — to do that you must pay the aforementioned US$99 fee.

You may already have a developer account with Apple. If so, feel free to skip this section.

If you don’t yet have an Apple developer account, go to the Apple Developer Site and in the upper right click the Account link:

submit an app

On the following page, you can choose to create a new Apple ID or use an existing one. If you want, you can save time and use the Apple ID you already use for your iTunes purchases. Keep in mind that it may be better to have two different IDs to keep your personal and professional lives separate.

So, click Create Apple ID:

submit an app

Fill in your email, password and security information. Use an email address that you check often because Apple sends frequent updates on the program and on the status of apps you’ve submitted for approval.

submit an app

Scroll down and complete the remaining security questions and the captcha prompt, then click Continue:

submit an app

Check the email account you specified when registering. You should receive an email just like this:

submit an app

The next page will prompt you to enter the code emailed to you. Enter the code and click Continue:

submit an app

You now have a developer account Apple ID. Great work! :] Log in to the developer site using your new ID:

submit an app

The next page is the mandatory legal agreement. As always, it’s a good idea to consult with your lawyer before signing this and future agreements mentioned in this tutorial. When you’re ready, click the checkbox. Then click Submit:

submit an app

Cool, you’re now an Apple developer! You have access to the libraries and tools, but you need to join the paid program to submit apps to the app store.

submit an app

Joining the Developer Program

Being a registered Apple developer gives you access to a lot of information, but to be able to send apps to the App Store (and to have access to certain associated portals) you need to enroll in Apple’s Developer Program. In the past, there were three programs: iOS, OS X, and Safari. Now there is one program and the same fee (US$99 per year) covers all platforms.

If you followed along with the previous section, you should be in the right place. If you skipped the previous section because you already have an Apple developer account, go to the Developer Member Center, and log in.

Once logged in, click the Join the Apple Developer Program link on the lower center of the page. Then, click Enroll:

submit an app

The following page describes enrollment as an Individual or as a Company. For this tutorial, you’ll see how to enroll as an individual. If you choose to enroll as a company, the process will be slightly more complicated (you will need to submit documents to prove your involvement with the company).

There are two main benefits to enrolling as a company:

  • You’ll be able to invite other people to join your developer account (great for groups of developers working together on the same app).
  • The Seller field on the App Store will display your company name (and not your first and last name).

So, if you think one of these may be relevant to you now or in the future, maybe it’s worth dealing with the extra paperwork of signing up as a company, instead of as an individual.

Once you’ve made your decision, click Start Your Enrolment:

submit an app

The sebsequent page asks if you want to enroll as an individual, as a company, or as a government organization. For the purposes of this tutorial, select Individual / Sole Proprietor / Single Person Business, and click Continue:

submit an app

Enter your billing/business information to verify your identity. Apple will attempt to confirm this information with your credit card company, so make sure you enter it correctly. Fill in the remaining fields and at the bottom you’ll see another license agreement. When you’re ready, check the box and click Continue:

submit an app

Review your information and when you’re ready to submit, click Continue:

submit an app

Now you will be prompted with the cost and summary for the purchase. You have the option for automatic renewal every year, which saves having to remember to renew and prevents any chance that your apps become unavailable (apps will be removed from the store once the account is no longer active).

Check Automatic Renewal if you want this option, then click Purchase:

submit an app

You’ll now have to log in again using your newly created Apple ID.

Note: The following steps only apply to countries with online Apple Stores. For countries without online Apple Stores, the process will be slightly different, requiring you to fax your credit card information to Apple. If you’re in one of those countries, follow Apple’s instructions and skip to the next section.

Still here? Great. Fill out the payment screen. Verify your billing information for the purchase. You will be asked to agree to the Terms & Conditions. Once you’re ready, check the box and click Continue. Finally, confirm your intent to purchase the membership:

submit an app

You will then be greeted by a thank you screen. Congrats!

First Steps On Your New Account

After submitting and paying for your iOS Developer registration, you’ll need to wait for Apple to process your order. If you had to fax your information to Apple because you’re in a country without an online Apple Store, you’ll need a little more patience. In either case, eventually you’ll get an email from Apple like this one:

submit an app

At the same time, you should receive an email from iTunes Connect.

At this point you should download Xcode by proceeding to the Apple App Store using the App Store icon on your application dock. Apple places the latest non-beta release in the App Store. Search for Xcode or click here. While you will only be using Xcode very briefly in this tutorial, there are many other excellent tutorials on RayWenderlich.com to teach you how to use it!

Now go to the Developer Center and sign in. After providing your credentials, you’ll finally be in!

The Developer Center has a LOT of information. There are programming guides, downloadable code, documentation, videos, the very helpful developer forum and a support center.

Spend some time exploring to familiarize yourself with what’s available. Be aware that some of this information may be confidential, especially if it involves beta versions of any SDKs or Tools.

In this tutorial, you’re going to focus on two areas that you’ll use a lot when developing your apps: the Certificates, IDs & Profiles area and iTunes Connect.

Here’s a brief introduction to each of them.

Certificates, IDs & Profiles

As you may already know, a non-jailbroken iOS device is only able to run apps approved by Apple and installed through the App Store.

Apple achieves this by requiring that every app run by iOS has a signed Apple Certificate. Apps installed from the App Store come bundled with a certificate, which the system verifies before it allows the app to run. If there’s no signature or if the signature is invalid, the app won’t run.

As a developer, you need to be able to run your apps on your own devices on a regular basis as you’re developing them. In order to do this, you need a way to create and sign your own certificates.

That’s where the Certificates, IDs & Profiles area comes in. This section allows you to generate what Apple calls “profiles”. Profiles, sometimes called “code signing identities,” are files generated by the Developer Center that allow Xcode to sign your apps in a way that allows iOS on your devices to identify them as valid.

There are two types of profiles:

  • Development profiles. These are tied to specific devices, so the app can only run on those.
  • Distribution profiles. These are used to sign your app before you submit it to Apple for approval. Although they contain no device-specific information, you can’t use them to install apps on any device yourself because Apple still has to sign the app after the approval process.

The Certificates, IDs & Profiles area can also generate push certificates in case your app wants to send push notifications.

iTunes Connect

iTunes Connect is the portal you’ll use to submit an app. This is where you’ll register a new app, enter the app’s description and screenshots, choose the price, and configure game center and in-app purchases.

This is also the portal you’ll use to agree to new contracts, set your financial data (so you can bank that profit) and check your sales.

You’ll spend the rest of part one working in the Certificates, IDs & Profiles area. In Part Two of this tutorial, you’ll look at iTunes Connect.

Certificates, IDs and Profiles

Now, you’re going to use the Certificates, IDs and Profiles area to set up the information you need in order to deploy your app to your device (and later, the App Store).

Note that there is a simpler way to do this in Xcode called Automatic Device Provisioning, which you will cover in Part Two. But for now, you’re going to go through the process step-by-step. You’ll understand how things work better this way, and it’s very useful to know when submitting to the App Store.

If you still have your Developer Center page in front of you (if not, log in again), simply click the Certificates, IDs & Profiles link on the left side or click on the gear icon in the middle of the page:

submit an app

There are many things you’ll need to do from this area. Some of them you’ll only have to do once, such as generating your certificates and registering your devices. Others you’ll have to repeat for every app you make, such as generating development and distribution profiles.

Generating Certificates

First you’ll need to generate two certificates: one for your development profiles, and another for your distribution profiles. As the text on the page explains, you can request a certificate either via Xcode or manually. Since it’s really useful for you to understand the manual process, in this tutorial you’ll be uploading a Certificate Signing Request (or CSR) from your Mac.

Make sure the drop down in the upper left says iOS, tvOS, watchOS, then click on the + in the upper right:

submit an app

On the next page, select iOS App Development as the certificate type and click Continue at the bottom:

submit an app

The portal then shows an explanation of how to generate a CSR using Keychain Access. To follow the instructions, you need to open the Keychain Access app on your Mac. If you don’t know where it is, search for it using Spotlight.

Once the program is open, choose Keychain Access\Certificate Assistant\Request a Certificate From a Certificate Authority…:

submit an app

In the Certificate Assistant window, fill in your email address and name, choose Saved to disk and click Continue:

submit an app

Save the file somewhere on your Mac. That’s your CSR created, now to generate that certificate.

Go back to the Developer Center in your browser; you should now click Continue.

submit an app

Click Choose File…, locate the CSR file you just created and select it, then click Continue.

submit an app

You will now see a screen that says your certificate is ready. Click Download, and double-click the development certificate file to install it in the keychain:

submit an app

Click Add in the Keychain Access dialog to complete the installation:

submit an app

Now that you have your certificate for your development profiles, you need to create a certificate for your production or distribution profiles. In your browser, click Add Another. Under Production select App Store and Ad Hoc, and click Continue at the bottom as before:

submit an app

Go through the same process as before to submit the same certificate signing request you used for your development certificate.

When it’s ready, click Download, and double-click the distribution certificate file to install it in the keychain.

Note: The distribution certificate is called ios_distribution.cer, whereas the development certificate you downloaded before is called ios_development.cer.

Note: You may have noticed some text at the bottom of the screens talking about Intermediate Certificates. When you launch Xcode, or if you have already launched Xcode, it will install these automatically for you. Should you ever need to install them for some reason in the future just click the + as if creating a new certificate and scroll down to the link to download the file:

submit an app

This will download a file called AppleWWDRCA.cer. Double-click this file to install it. It will open Keychain Access again in case you closed it.

Now look in Keychain Access and you will see your two installed certificates as follows:

submit an app

Note: If you do not see the message This certificate is valid with a green check-mark, then you have either not launched Xcode yet, or you need to install the Intermediate Certificates, as described above. The easiest fix is to launch Xcode and let it update the intermediate certificate for you.

You can now close Keychain Access.

Registering Devices

The next step is to register your devices. In your browser on the left-side menu, click Devices\All and then, on the right, +:

submit an app

You need to get the UDID of the device(s) you want to use to run your apps. There are many ways to get a device’s UDID: there are free apps available that will do it for you, or you can use Xcode’s organizer. Here, you’ll get the UDID using iTunes.

Open iTunes and plug the device into your computer. Select the device from the menu bar under the player controls. iTunes will display your device name, capacity, version and serial number. Click on the serial number and it will change to your device’s UDID:

submit an app

Now simply right-click on the number and select Copy to copy the UDID to your clipboard.

Go back to your browser, enter a device name (which can be anything you want) and paste the UDID into the appropriate field. When you’re done, click Continue

submit an app

You will now be prompted to confirm the registration. Click Register.

Your device is now registered, and will appear in your list of devices:

submit an app

You can come back later to register additional devices, belonging to friends and beta testers.

Note: Apple allows you to register up to 100 devices of each type (iPhones, iPads, AppleTVs, etc.) per year to your account. If you register a device and later remove it, it still counts towards your total for the year. At the end of the year, when you renew your membership, you’ll get the chance to decide which registered devices to carry over to the next membership year and which to remove (making room for new devices). At any given moment, you can’t have more than 100 devices of each type.

Creating App IDs

Now that your device is registered, you need to create an App ID. Every app you build will need its own App ID. On the side menu, click Identifiers\App IDs:

submit an app

You’ll see a brief explanation of the App ID concept. In a nutshell, an App ID is a combination of a 10-character “seed” prefix generated by Apple, and a suffix created by you, defined as a Bundle ID search string. Together they create a unique identifier for your app.

Here are some important things to know about App IDs:

  • If you want to share keychain information between your apps, you can elect to have all of your apps share the same seed prefix. For example, say you have a suite of apps that all make use of the same website via a login. If the apps share the same seed prefix, and one app saves the user’s login information to the iOS keychain, any other app in the suite can get this login information from the keychain.
  • You can create two different types of App ID: an Explicit App ID, or a Wildcard App ID. Explicit App IDs must be used when you wish to incorporate services such as in-app purchases or iCloud. Wildcard App IDs should be used when you want to use the same App ID for multiple apps.
  • In an Explicit App ID, the Bundle ID search string has to be unique for each of your apps. It will be used by Apple’s push notifications service, for in-app purchases and for other services such as iCloud storage.
  • Apple recommends that you use “a reverse-domain name style string” for the Bundle ID. For an Explicit App ID, the suggested format is “com.domainname.appname”; for a Wildcard App ID, the suggested format is “com.domainname.*”.
  • Remember, if you use a Wildcard App ID, you won’t be able to use any of the neat services normally available, such as push notifications or in-app purchases. You might not plan to use these services now, but if you change your mind, you won’t be able to change your App ID without creating a new app.

Now that you know all about App IDs, it’s time to create one. On the right side of the screen click +.

Fill out the description (usually just your app’s name). The seed ID will usually be your Team ID. Now, make sure Explicit App ID is selected, and enter the Bundle ID – remember to use a reverse-domain name style string for this, including the name of the app at the end. Click Continue when done:

submit an app

You will be prompted to confirm your values, click Register at the bottom. Then you will see a Registration Complete message.

You are now ready to create the provisioning profiles.

Provisioning Profiles

On the side menu, click Provisioning Profiles\All:

submit an app

You’ll see a brief explanation describing getting started with iOS provisioning profiles. A provisioning profile brings together a certificate, an App ID and device identifiers. When you get back to Xcode (you’re almost there), you’ll use the provisioning profile you created to bring everything together.

You use Development provisioning profiles to build and install versions of your app during your development process. You use Distribution provisioning profiles when you submit your apps to the App Store.

On the right side of the screen click on the +.

Choose iOS App Development, then click Continue:

submit an app

The next screen asks you to select an App ID for this new profile. Choose the one you just created and click Continue:

submit an app

The following screen asks you to select the certificates for the profile. If you have multiple members on a team, they can be selected here. Select your certificate and click Continue:

submit an app

The next screen asks which registered devices this profile should include. Select the relevant device(s) and click Continue:

submit an app

Finally, enter a name for this profile. You will use the name you specify to identify the profile among other profiles, so make it as descriptive as possible. Click Continue:

diagram

The final page shows your generated profile and allows you to download it. Go ahead and click Download.

submit an app

Since you are already here, go ahead and generate the distribution profile. You won’t actually need this profile until you’re ready to submit the app for approval, but since you’re here, it’s worth doing now. Click Add Another at the bottom:

submit an app

Under Distribution, select App Store and click Continue:

submit an app

The next steps are the same as for the development profile. Follow the screens along, name the distribution profile something descriptive and unique, and download it as you did the development profile.

Now find the files you just downloaded on your computer, and double-click each of them in turn, causing Xcode to launch. Verify the profiles are there by opening a project or starting a new one for this test. Click on the Project in the left pane. Select General and make sure the Bundle Identifier is the same as the App ID you created earlier (otherwise, the provisioning profile won’t match).

Select Build Settings, select All, search for “signing” and change the value for Code Signing Style to Manual. Then, click the word None next to the entry Provisioning Profile. Your profiles will be listed:

submit an app

Run the App on a Physical Device

Finish the first part of the tutorial by actually running your app on a physical device. Change the value of Code Signing Identity from “iOS Developer” to “iPhone Developer: XXX” as it appears in the drop-down menu. Then, go back to General and make sure that the value of Deployment Target is lower than, or equal to, the iOS version currently installed on your test device. Finally, connect your device to your computer and select it from the drop down menu on the top left.

When you’re ready, just click the Play button and wait. This may take a while on the first run.

submit an app

You have just run your app on a real device. Isn’t that exciting? Enjoy the moment, and when you’re ready to learn more about what just happened and what the next steps are, keep reading. I’ll wait… :]

Where To Go From Here?

If you followed the whole process outlined above and completed each step in the process, then you’ve taken a huge step towards submitting your first app to the App Store – congrats! Hopefully the process is a bit less intimidating now.

In Part Two of this tutorial series showing how to submit an app, you’ll learn everything you need to know about actually submitting your app to the App Store, while learning more about Xcode’s Automatic Device Provisioning along the way.

If you have any questions or comments about what you’ve done so far, please join in the forum discussion below!

The post How to Submit An App to Apple: From No Account to App Store – Part 1 appeared first on Ray Wenderlich.

How to Submit An App to Apple: From No Account to App Store – Part 2

$
0
0
Update note: This tutorial has been updated by Rony Rozen. The original post was written by Gustavo Ambrozio and updated by Tony Dahbura.
submit an app

Learn how to join the Apple Developer program, submit an app and get published on the App Store!

You’re on your way to becoming a published iOS developer! In Part One, you went through the developer registration process, used the iOS Developer Center to register your devices, created certificates and profiles, and finally brought it all together by running the app on a physical device.

Now, in Part Two, you’ll use iTunes Connect to send Apple the information they need to pay you for your apps and, finally, you’ll submit your app to Apple for approval.

Getting Started

Before we actually get started you should know, rather than setting up the provisioning profiles manually as you did in Part One, there’s an easier way to get your apps running on your devices.

The truth is, in some situations — such as when working with more than one developer account — the automatic provisioning you’re about to see just doesn’t work. But here’s how to do it to save yourself time, when you can.

Open Xcode, if you haven’t already. For this tutorial, the screenshots and instructions are applicable for version 9.2, but should work for future Xcode versions as well.

Once in Xcode, open the Devices window (Shift-Command-2), plug in your iOS device and select it from the menu on the left. If this is the first time you’ve connected your device while Xcode is running, Xcode may take some time to sort itself out. You’ll see a message saying that it’s “processing symbol files.” Eventually, your screen should look something like this:

submit an app

Now select Xcode\Preferences… (or Command-,) and choose Accounts:

submit an app

Click + in the lower left, select Apple ID, and click Continue:

submit an app

Enter your developer account credentials and click Sign In.

Entering your credentials this way allows Xcode to connect automatically to the Provisioning Portal on your behalf. It will also detect any connected devices and automatically register them with the Provisioning Portal if they aren’t there already.

Next you will see a screen that shows your information. Note that your role is Agent. This is the “super user” account and has the most permissions of any role. If your account is set up as a company or business — not an individual developer — you’ll have the ability to add other folks to your account. These other developers can have the role of Member or Admin.

At the bottom of the screen, you will see two buttons:

  • Download Manual Profiles: downloads profiles that haven’t been added to Xcode yet.
  • Manage Certificates: enables you to create additional certificates, similar to what you did via the Developer Portal in the previous part of this tutorial.

You can now close the preferences pane.

Remember that there will be times you’ll still need to know how to do this using the Provisioning Portal, so it’s a good thing you’ve seen how to do it the hard way first. Here are some situations in which you’ll need to know the old-school way:

  • You’re working for a person or company that has their own account, and you need to use their account instead of your own.
  • You need to test app services, such as Game Center, In-App Purchase, Data Protection, or iCloud. For these you need a provisioning profile with a bundle ID that does not use a Wildcard App ID. As you recall from the first part of this tutorial, Wildcard App IDs work with every app but do not allow you to test these services. In this case, you’ll need a provisioning profile with an Explicit App ID.
  • You’re building a beta version of an app for someone’s device and you don’t have access to the device itself, just the UDID.

Running Your App On Your Device – Reminder

For this section of the tutorial, you need an app to test on your device. This tutorial uses the Drop Charge app from 2D iOS & tvOS Games by Tutorials.

In the previous part of this tutorial, you ran your app on a physical device. Now you’ll go into a bit more detail about how that works.

One of the things you did was open Project navigator, click on the project node of the tree, click General, and set Deployment Target at or below the iOS version on your device.

Deployment Target is a fancy way of saying “the minimum version of iOS that your code supports”. Be careful though! If, for example, you set the Deployment Target to iOS 8.0 but use an API that is only available on iOS 9, your app will crash! The safest thing to do is to test your code on a device running the oldest version of iOS you want to support.

Make sure the Bundle Identifier is the same as the bundle identifier you used for the App ID you registered in the Provisioning Portal:

submit an app

Next, you must point Xcode to the correct provisioning profiles. Click Build Settings and search for the word “signing”. In the search results list under the Code Signing Identity section, click the drop downs for the Debug and Release entries and choose the correct certificates. Then, under the Provisioning Profile section, choose the matching provisioning profiles from those presented by Xcode.

You should select your Developer Certificate & Profile for the Debug build, and your Distribution Certificate & Profile for the Release build:

submit an app

Finally, make sure the device you want to run on is connected to your Mac, then choose that device using in scheme chooser on the top left.

Press Command-B to build the project. You may see a prompt saying “codesign wants to sign using key ‘privateKey’ in your keychain”. The Mac is letting you know Xcode wants to access your credentials. Enter your password and click Always Allow.

If there are any problems with your profiles, you’ll see something like this popup in Xcode:

submit an app

In this example, the Bundle ID had been accidentally mis-typed. Xcode will gladly go make you a new profile for you, but you do not want that so don’t click Fix Issue. Select Cancel instead and go back and correct the Bundle ID manually.

Press Command-B to build again. Now everything should be OK:

submit an app

Press Command-R to run the app. In a few moments you should see your app running on your device! That’s always an exciting moment :]

Last Stop: iTunes Connect

Now it’s time to get to know iTunes Connect. Go to: https://developer.apple.com/membercenter and log in with your iOS Developer credentials.

Click iTunes Connect:

submit an app

Note: You can also connect directly to iTunes Connect via the url: https://itunesconnect.apple.com

The first time you connect, you’ll see a brief introduction panel. You may wish to skip this in future:

submit an app

Also, if it’s your first time, you’ll have to accept the Terms of Service.

You’ll now see the main iTunes Connect dashboard. There are many things to do here. This tutorial will show you the basic steps to get your app submitted, but if you want the gritty details, you can check out the complete iTunes Connect Developer Guide.

First things first: if you want to get paid for your apps, there’s some “paperwork” you must fill out. It’s better to get this stuff out of the way now. The process may vary a bit from country to country.

If all of your apps (or at least the first) will be free, you can skip this section and go right to Submitting Your App below.

If you’re still here, click Agreements, Tax and Banking:

submit an app

The first time in, you’ll have to electronically sign one contract for paid applications that covers all terms of payment.

Click Request. On the next page, you’ll agree to Apple’s terms. You can also view the pricing matrix if you’d like. When you’re ready, select the checkbox and click Submit.

Contact Information

To set up your contact information, click the first Set Up button, under Contact Info. There, you can select Add New Contact. Add yourself as the new contact and click Save when done.

This tutorial assumes that you are an individual developer and have no employees. As such, you can give yourself all the roles. Change every drop down menu and click Done:

submit an app

Bank Information

Now click Set Up under Bank Info. Since this is your first time here, you’ll have to click Add Bank Account.

Choose the appropriate Bank Country and click Next. If you choose anything other than United States, be aware that the steps from now on may be different.

Your bank’s ABA Routing number is located on your checks or statements. Enter the correct ABA Routing Number, and click Next.

Next, you must look for your bank’s branch. Look for one in your city but don’t expect to find an exact match for your branch. Don’t worry, it doesn’t have to be exact. Once you’ve made your selection, click Next.

Check the information and click Next.

Now comes the important piece: your account number. This is also found on your checks or statements. Fill out all the details for your account and click Next.

Confirm all the information, check the box indicating that it’s correct, and finally, click Save.

You can now select this new bank account and click Save. That wasn’t that bad, was it? :]

Tax Information

You’re almost done. At a minimum, you must complete the US tax forms. Under Tax Info, click Set Up.

You must complete the US form regardless of other forms you may also need to complete. Click Set Up under U.S. Tax Forms.

Fill out all the required information. If something is unclear, check out the W-9 instructions available for download from the upper-left corner of the page. Verify that everything is correct and click Submit.

Notice that the Status field in the Contracts In Process panel now says “Processing” – Apple is verifying the information you provided. This may take an hour or so to become active; you may even see a deposit in your account followed by a withdrawal of the same amount.

Once all your contracts have been verified, the Contracts in Process panel will disappear, and you’ll be left with the Contracts In Effect:

submit an app

Click Done to go back to the main iTunes Connect Dashboard.

And now for the fun part!

Submitting Your App

To submit an app, there are certain items you’ll need to get in order before you can go any further. Make sure you have the following ready:

  • Your app’s name.
  • The app’s description.
  • Your app’s icon, sized 1024 by 1024 pixels.
  • Screenshots for all supported devices (more details about sizes can be found here).

Notes: Your images can be in JPEG or PNG format. At least one screenshot is required for each device your app supports (maximum 10 for each).

Once you’ve got all this assembled, click My Apps in iTunes Connect:

submit an app

Click +, then select New App. The first time you attempt to submit a new app, you’ll need to provide your company name as you’d like it to appear on the App Store for all of your future apps. This is something that you have to do before you can move on and you cannot change this value in the future. So, you’d better put some thought into it… :] This value will appear right below the app name and will be clickable, so users can see all of your apps in one place. You can use your first and last name or you can come up with a cool company name (it doesn’t have to be a real legal entity) that no one has used before on the App Store.

submit an app

Complete the form as follows:

  • Platforms: Choose iOS.
  • Name: enter the name of your app as it should appear on the App Store. Must be unique.
  • Primary Language: select from the choices.
  • Bundle ID: select the correct ID from the drop down of IDs you registered earlier.
  • SKU: a unique ID for your app in the Apple system that is not seen by users. You can use letters, numbers, hyphens, periods, and underscores. The SKU must start with a letter or number.

Click Create:

submit an app

Now the details screen appears:

submit an app

Click App Information. Fill out the Category fields based on your app information. If your app gathers data or your app is “Made for Kids” you must have a privacy policy posted — the Privacy Policy URL should contain the address for this. Scroll through the rest of the settings and set any that are appropriate for your app. Click Save.

Now click Pricing and Availability.

Select All Prices and Currencies for more information about the price tiers. Don’t forget that Apple takes 30% and you get 70% of the selected price. Now choose your desired price tier or indicate that your app will be free. You can specify different prices within different date ranges if you wish by selecting Plan a Price Change. For now, just add one entry. The Start Date will default to today; the End Date will be set to “No End Date”.

Click the radio button if you want your app to be offered at a discount to educational institutions when they purchase multiple copies at once. You can also offer your app to businesses at a discount for multiple purchases.

Once you’re done, click Save.

Click 1.0 Prepare for Submission:

submit an app

This section is where you’ll add all the assets for your app that will appear on the App Store. The first step is to upload your app’s icon and at least one screenshot. If your app is universal, you’ll need to submit screenshots for the iPhone and for the iPad. When you have what you need, just drag and drop the screenshots over for each device type.

Tips: You can make your screenshots with the Simulator by clicking Command-S when your app is running. Make sure to run the simulator in 100% scale mode.

Click Save when you’ve added all the screenshots you need.

Scroll down and complete the the description — this is what the users will see in the app store — and keywords.

Consider the keywords; these are quite important. Only your app’s name and keywords are indexed in iTunes’ search engine, so brainstorm words that potential users might try to find your app or your competitors’ apps. You can only change keywords when submitting updates, so choose wisely.

Enter the URL for your website support page. It can be a simple page that allows users to email you if they want to compliment you on your great work :]

Skip the Build section for now and scroll down to General App Information. Add your icon — it must be 1024 by 1024 pixels.

Set the version number; it should be the same as in your app’s Xcode project. Future versions of this app that you’ll submit must have increasing version numbers. You can’t submit version 1.1 after you’ve already submitted version 1.2.

Also, speaking of future versions of your app, once a version is released, you cannot roll back to a previous version. You’ll have to submit a new version, wait for Apple to approve it, and release it to replace the version you’d like to replace. As long as you haven’t released the version, even if Apple has approved it, it won’t be available to your users.

Fill out a copyright notice, a contact email and affiliated websites.

Click Edit next to Rating. Enter the categories appropriate for your app. Be honest, as the reviewer can make changes to this section if they disagree. Click Done:

submit an app

Scroll down to App Review Information. This section is designed to help the person at Apple who reviews and approves your app. Use the Notes area to provide information you want the reviewer to know. For example, if users need to sign up at a website or within the app in order to use it, provide some credentials here to make the reviewer’s job easier.

Also, if your app requires special hardware, ensure that you explain that here too, and try to have a way for the reviewer to use the app without the hardware. Complete the contact information so that the reviewer can reach you to discuss things if needed.

Finally, use the Version Release section to indicate when you want the app to be released. Since this is the first version, just leave the Automatically release this version option selected.

Now click Save.

The Submit for Review button on the top right will be enabled if there were no issues with what you entered.

If you try to click Submit for Review, you will get a message saying that there were one or more errors on the page — your app has not been uploaded yet!

submit an app

submit an app

Remember you skipped the Build section? Now you need to actually upload your app using Xcode.

Submit An App With Xcode

Your application should now be tested and ready to roll. All you need to do is submit to Apple for approval. This is surprisingly easy considering what you’ve been through already. It’s a good idea to take a moment and make yourself familiar with Apple’s most common rejection reasons to know what needs extra attention and what to avoid.

Go to Xcode and choose Generic iOS Device in the scheme chooser:

submit an app

Then choose Product\Archive:

submit an app

If everything is okay with the build, Xcode will open the Organizer window with your app in the Archives tab. You don’t really need to click Validate… here because this will be done when you submit anyway, and Xcode should have already validated against most problems. So save yourself some time and click Upload to App Store….

You will then be prompted with App Store distribution options. All checkboxes should be selected by default. Leave them like this and click Next:

submit an app

The next screen asks you to select your distribution certificate and provisioning profiles. Select the ones you created earlier in this tutorial, and click Next. Finally, once Xcode is done doing some of its magic, you’ll be presented with a summary page of the app you’re about to submit. Click Upload.

Your app will start uploading to iTunes Connect. Various messages will be displayed as code is compiled, verified and code-signed. When the upload finishes, you should see the following message:

submit an app

Just smile and click Done :]

You’re almost done; only a couple of steps remain. Switch back to iTunes Connect, scroll down to the Build area you skipped earlier and click Select a build before you submit your app. If you don’t see that option, refresh the page. If you still don’t see it, check your email. There may have been a problem with the binary you submitted to Apple.

Select the build Xcode just uploaded and click Done.

Click Save at the top right.

Finally, click Submit for Review.

You’ll be asked several questions. Answer them honestly, then click Submit:

submit an app

And you’re done! Can you believe it? You should receive a couple of emails from iTunes Connect telling you your app has been uploaded and is waiting for review. Your app’s status has also changed. It should now be Waiting For Review.

All you have to do now is wait for Apple to approve your app! You will receive emails about every change in your app’s status. Usually after a few days the status should change to “In Review,” then to “Approved.” Unless you chose a future release date, a few minutes after approval your app’s status will shift to “Processing For App Store,” then a few minutes later to “Ready For Sale.”

In iTunes Connect, you can click Activity on the top bar, followed by App Store Versions to see the status of your app throughout the process. The review time for your apps will vary based on traffic, but in general it takes around 5-10 days for most people.

If your app is not approved, Apple will email you with more information. They have become pretty good at specifying the exact problem and explaining how you can fix it. If this happens, just fix the problem and re-submit. If something is unclear, you can respond to their comments and your reviewer will usually reply in a timely manner.

Where To Go From Here?

If you’ve followed this tutorial on how to submit an app all the way, that was a long journey: from no account to an app on the App Store! You may not have an app ready to submit yet, but you should now feel confident about the submission and approval process once you do.

If you’ve submitted your first app while you were going through this tutorial, congratulations! Now go get ready for your next update or your next big app!

As mentioned earlier, there’s a whole lot more information available about the various aspects of iTunes Connect in the complete iTunes Connect Developer Guide.

If you have any questions or comments about what you’ve done, please join in the forum discussion below!

The post How to Submit An App to Apple: From No Account to App Store – Part 2 appeared first on Ray Wenderlich.

MVVM and CoreML – Podcast S07 E12

$
0
0

In this episode Dru and Janie welcome back Arthur Mayes to discuss some new tools and how and when to use them. Arthur explains MVVM, then Janie ‘gives us some computer learning’ for CoreML.

[Subscribe in iTunes] [RSS Feed]

This episode was sponsored by Brother International.

Interested in sponsoring a podcast episode? We sell ads via Syndicate Ads, check it out!

Episode Links

MVVM

CoreML

Contact Us

Where To Go From Here?

We hope you enjoyed this episode of our podcast. Be sure to subscribe in iTunes to get notified when the next episode comes out.

We’d love to hear what you think about the podcast, and any suggestions on what you’d like to hear in future episodes. Feel free to drop a comment here, or email us anytime at podcast@raywenderlich.com.

The post MVVM and CoreML – Podcast S07 E12 appeared first on Ray Wenderlich.

Origami Studio Tutorial For Mobile Prototyping: Getting Started

$
0
0

This Origami Studio tutorial was written with version 84231315 and macOS High Sierra 10.13.2.

Origami Studio Icon

Introduction

If you want your project to stand out in the crowded App Store, a good idea isn’t good enough. The best apps have beautiful interactions in the user interface, clever navigations or subtle animations to lend polish. For most of us, getting the right level of pizazz into a project doesn’t come easily. What you need, then, is a tool to help you to build prototypes quickly and efficiently to test your ideas. Enter Origami Studio!

Getting Started

Origami Studio is a macOS desktop application written and used by Facebook. There is also a mobile app counterpart, which allows you to view your prototypes on a real device. It’s designed to help you to build and quickly test user interface interactions and flows. It’s not designed to be a drag and drop development environment, so don’t think you can build your next MVP with Origami. Rather, you might use Origami to put several prototypes of your next design idea in front of potential users to gather their opinions before spending the time to build it properly in code.

First, you’ll have to download Origami Studio. Head over to https://origami.design and hit the big blue button! While that’s downloading, you can download the rest of the materials you’ll need using the Download Materials at the top or bottom of this tutorial. Once both downloads are complete, install Origami Studio and double-click Getting Started (Start).origami to open the starter project.

Note: When you open any of the downloaded projects, you’ll probably see a dialog like the one below. Just click Upgrade All.
upgrade all patches

Introduction to the Interface

Before you start building a prototype, take a look around the user interface of Origami Studio itself. Your window should look like the image of the starter project below. On the top left of the window, you can find a green area which looks like a phone screen with the standard macOS traffic light buttons on the left of its title bar, and three buttons on the right. This is the Viewer. It shows your prototype and allows you to interact with it. Move your mouse over the viewer and notice how the cursor changes to represent a finger tap.

The Starter Project

On the right of the main window, there is the Layer Inspector. If you’ve used tools like Photoshop or Sketch before, you should be comfortable with the concept of Layers. In case you haven’t, a Layer represents an area on the screen. Layers have properties — such as size, background color and opacity — and can be grouped together to form more complex components. If you’re familiar with UIKit, you can consider a Layers like CALayer or UIView.

The big dark grey area — between the Viewer and Layer Inspector — is the Patch Editor. Patches add functionalities to your prototype (like functions in code) and with this editor you can create new functionalities in your prototype.

Creating a Simple Interaction

Theory is all very well, but there’s nothing like actually creating things. It’s time to start adding some functionalities to our prototype. In this example, you’re simply going to change the background color of the prototype when you tap on the screen.

Select the Color Fill layer in the Layer Inspector. On the right hand side, click the Touch button and select Tap in the dropdown.

Add a Tap to a Layer

A purple Interaction patch appears in the Patch Editor. Patches, like functions, take inputs (on the left hand side of the patch) and convert them to outputs (on the right hand side). This Interaction patch is linked to a layer, and changes its outputs when the layer is tapped. Tap the green background. Notice how the Down checkbox on the right hand side of the Interaction patch is selected while your mouse button is pressed. Similarly, the Tap output flicks on briefly for each tap. If you’re using a trackpad that measures force, the Force output similarly changes depending on how hard you press.

An Interaction Patch

Next, create a new Color Fill layer by clicking the New Layer button (the plus icon) at the top of the Layer Inspector. Select Color Fill in the pop-up dialog. The Viewer will now have turned grey, and the image will have disappeared. This is because the new Color Fill layer is on top of the green Color Fill layer and the icon image. In the Layer Inspector, move the new layer below the origami_icon layer. Select the new Color Fill layer and set its Opacity property to 0. The Viewer should look as before. Next, double-click in the Patch Editor. A pop-up dialog appears. Type Switch and hit enter. A new, grey, patch will appear.

Wiring up Your Prototype

Bring your attention back to the Interaction patch. Next to each of its inputs and outputs there is a little dot, called Port. If you click and hold on an output port and move your mouse, you’ll notice a blue line connecting the output to your cursor, very similar to connecting outlets and actions in Xcode’s Interface Builder.

Click the port for the Tap output and drag it over to the Flip input port on the Switch patch. Release and an orange line should connect the tap output from the Interaction patch to the flip output on the Switch patch. Click the green background in the Viewer a few times and notice the state stored in the Switch patch by the value of its On/Off output.

Flippnig a switch

Click the On/Off port in the Switch patch and drag it over to the top Color Fill layer in the Layer Inspector. Hold briefly over the name of the layer and it will expand the list of properties. Highlight the Opacity property of the layer and release the mouse. You have just linked the tap gesture on the green layer with the opacity property of the grey layer, represented by the Color Fill patch that has appeared in the Patch Editor.

Connecting a Port to a Property

Tap the green background and watch it turning grey. Tap again to turn it back. Congratulations, your first prototype! You can find the finished prototype in the materials you downloaded earlier.

RW News

For the rest of this tutorial, you’re going to focus on building a prototype news app called RW News, modeling the Apple News app in iOS 11. Find and open RW News App (Start).origami. The starter project contains three top level layers, as shown in the Layer Inspector. Only the Loading Screen is currently visible: a dark green screen with the Ray Wenderlich logo at the top and a static progress ring in the middle. The prototype also includes layers for a Feed Screen and a Detail Screen, which you’ll use later on in the tutorial.

The start of the RW News App

Animations

As first step of the tutorial, you’re going to animate the loading indicator to show the app is starting up. To make the progress ring spin, double-click the patch editor and insert a Repeating Animation. Connect the port on the progress output to the Progress property of the Progress Ring by dragging from the port to the layer, as you did with the Opacity property before.

Connecting the Progress Ring to a repeating animation

The output from the repeating animation cycles from 0 to 1 to 0, and the progress in the ring now animates to match. This is nice, but not exactly what you’re looking for.

A simple spinner

In order to achieve a more realistic spinner, you’re going to have to get creative. Unselect the Mirrored input in the Repeating Animation patch. Then, select the Loading Screen layer in the Layer Inspector and click the New Layer icon. Choose a Progress Ring layer; it appears in the middle of your prototype on top of the existing one. Change its title to Progress Ring 2 by double-clicking it in the Layer Inspector.

Adding another preogress ring

Then, change its opacity to 0 and its inactive color to the same green of the active color in the first progress ring. In order to produce the animation we want, you’re going to alternate which progress ring to show for each animation loop. To do this, you want to use the patch editor to switch the opacity of the second progress ring every time the animation reaches 1.

Double-click the patch editor and insert an Equals patch. Set the First Value input to 1 and connect the Progress output from the Repeating Animation patch to the Second Value input in the Equals patch. Next, add a Switch patch and connect the output from the Equals patch to its Flip input. Notice the switch turns on and off for each cycle in the animation. Connect the output of the switch to the opacity property of the second progress ring. Finally, connect the output from the Repeating Animation to the Progress property of the second progress ring.

A proper spinner

And there it is! A beautiful spinner.

A better spinner

Transitions

Next, the prototype needs a transition to the Feed Screen after a short period of loading. Double-click the patch editor and add a When Prototype Starts patch, followed by a Wait patch. Change the Duration input in the wait patch to 3, and connect the output of the When Prototype Starts patch to the Start input in the Wait patch.

Restart your prototype by clicking the leftmost button on the Viewer – the clockwise “refresh” arrow — or Cmd + R. Wait three seconds and you should see the output of the Wait patch switch on. Finally, connect the output from the Wait patch to the Present property of the Feed Screen layer.

Restart the prototype again and wait another three seconds. Nothing happens. What gives? Earlier, only the loading screen was visible. It’s time to fix that! Hover over the Feed Screen in the Layer Inspector and click the eye icon to the right of the Touch icon. The Feed View should appear, showing a single story. Restart the prototype to check the spinner is shown for three seconds, then the feed view is presented as expected.

A simple transition

Getting Fancy

The transition is all good and nice, but Origami is all about the bling and that default transition is, well, a little boring. Time to add some personality!

If you’ve ever used the Uber app, you’ll likely have noticed how it transitions from loading to the main screen with a zoom effect, where the loading screen zooms out until it is replaced by the map screen. You’re going to build a similar effect now.

Uber Transition

To prototype your fancy transition, you need an opaque layer with a hole, which will act as a mask over the Feed Screen. The hole will start small in the center of the screen and the layer will animate to scale up until the hole is bigger than the screen. Rather than trying to create a shape with a hole in Origami, the sample project provides one for you already, created in Sketch and imported into Origami. A nifty trick for more complicated designs!

Animating the Mask

Add a Classic Animation patch near your Wait patch. Connect the output of the Wait patch to the Number input on the Classic Animation patch. Next, add a Transition patch. Transition patches take an input which varies between 0 and 1 (such as the progress of an animation) and smoothly scale that between its Start and End inputs.

Connect the output from the Classic Animation to the Progress input of the Transition, set the Start input to 0.5 and the End input to 2.5. Now, as the Classic Animation progresses from 0 to 1, the output from the transition patch will progress from 0.5 to 2.5.

In the Layer Inspector, expand the Feed Screen Group by clicking its disclosure arrow, and locate the Combined Shape layer. Connect the output from the Transition patch to the Scale property of the Combined Shape layer and set the Combined Shape layers Opacity to 1.

Restart the prototype and watch your beautiful new transition!

An Uber style transition

Using the inputs on the Classic Animation patch you can easily alter the duration and curve of the animation. Change the values, restart the prototype and see how that impacts the animation.

A Finishing Touch

Keep your eye on the progress ring patches. Notice how the Progress property is still continually updating long after the transition has completed? This is wasteful as the progress rings are not onscreen any more. As a final touch, double-click the Patch Editor and add a Not patch. Connect its output to the Enable property of the Repeating Animation patch driving the progress rings. Connect the output of the Classic Animation patch to the input of the Not patch. This will stop the progress rings from spinning once they are no longer visible.

Building a News Feed

The feed view is pretty basic at the moment. A single story which doesn’t respond to any interaction. Time to fix that!

First, add vertical scrolling to the view. Since this is such a common UI paradigm, Origami Studio makes it really simple. Locate the group called Feed Screen Content within the Feed Screen group — it contains all the content in the feed. On the right hand side, click the Touch button and select Scroll Y in the dropdown. Verify that swiping the feed in the viewer now works correctly.

Our feed is still looking a little thin, with just a single story. You could add multiple stories individually, but this would be tedious and error-prone. Moreover, it would be difficult to update if you later want to make a change across all stories.

Don’t worry, Origami has you covered. Enter Loops! Just like in code, a loop allows you to repeat an operation; in this instance, displaying and laying out a layer or group.

Going Loopy

Add a Loop patch to your project, followed by Multiply (x) and Plus (+) patches. Connect the Index output from the loop patch to the first input in the multiply patch, and the output from the multiply patch to the first input in the plus patch.

Update the second input in the multiply patch to be 190, and the second input in the plus patch to be 50. This tells the prototype to set the output from the plus patch to be 190i + 50, where i is the index in the loop. Connect the output from the plus patch to the Y Position property of News Cell group and watch the feed story is repeated along the vertical axis.

Looping Feed Stories

Grid Layout

Building layout manually like this is fairly easy, but Origami provides an easier method that’s more declarative. Delete the four patches added in Going Loopy and insert a Grid Layout patch. Set the inputs for the Grid Layout patch as follows:

  • Columns: 1
  • X Position: 0
  • Y Position: 50
  • Width: 375
  • Item Height: 190
  • Padding: 0

Connect the Position output of the Grid Layout patch to the Position property of News Cell. The Grid Layout patch hasn’t been told how many items to add. To do this, you’re going to use a Loop Builder patch. Loop Builders are like data: they specify the number of some type (text, images, colors) and can be used to populate loops with values.

Find the project folder containing the prototype in the Finder. Locate the News Items directory and drag it, from the Finder, onto the Patch Editor. This creates a Loop Builder patch containing the four images in the directory. Connect the Index output from the Loop Builder patch to the Index input of the Grid Layout patch.

Notice the change in the Viewer: the Feed is back! Finally, connect the Images output from the Loop Builder to the Image property of the Cell Image layer within the News Cell group. Each cell now has a unique image.

Adding Personalized Content

To finish the Feed, add two new Loop Builder patches. The first will be connected to the Text property of the Title layer and the second to the Text property of the Subtitle layer. Create the two patches manually. In the contextual menu (right-click on the patch title) set the number of inputs for both to 4, and the type to Text.

Paste the following text into the patch, one line for each input:

Titles

  • i18n
  • Top Libraries
  • Android Wear
  • Transitions

Subtitles

  • In this tutorial, learn how to prepare your app to support multiple languages, including regional numeric formats, rules for plurals, and much more.
  • What are the best iOS developer libraries? Ask 10 colleagues and you’ll get 10 different answers. This article reveals the most popular — by the numbers.
  • In this Android Wear tutorial, you’ll learn how to build an Android app for the Android Wear platform using the Kotlin language.
  • iOS supports custom transitions between view controllers. In this tutorial you’ll implement a UIViewController transition animation like the Ping app.

Connect the Strings output of each Loop Builder patch to the Text property in the relevant layer. Your Feed screen should now be populated with dummy data, each cell containing its own personalized content.

The News Feed

More Complicated Transitions

If you own an iPhone and have ever used the Apple News app, you may have noticed the subtle transition when navigating from the main feed to an individual story. The GIF below is a demonstration in case you’ve not. Notice how the push transition animation appears to expand from the center of the image in the item cell, and how the pop animation zooms back to that image. Pretty neat, huh?

In this final section of the tutorial you’re going to learn how to build a prototype with this kind of effect.

Apple News Transition

Interactions

In order to respond to touch events, the prototype needs to contain interactions. An interaction is defined as a touch event on a specific layer, and Origami provides the Interaction Patch for just this purpose.

Add an Interaction Patch to the prototype. Make sure the Enable input is ticked and set the Layer input by clicking on None and choosing the Cell Image layer.

In the viewer, click on the top most image in the prototype and watch the Down and Tap outputs trigger. Add a second Interaction patch under the first, and this time select the Story Image layer within the Detail Screen Group for its Layer input. These two interactions will form the basis of your transition: clicking the image in the cell to push the Detail Screen, then clicking the Story Image in the Detail Screen to pop back to the Feed.

Next, add a Switch patch, and wire it up so the Tap output from the first interaction turns the Switch on, and the Tap output from the second interaction turns it off again. Wire the output of the switch to a new Classic Animation patch. This Classic Animation is going to drive six transitions to create the effect.

Customizing the Detail Screen Transition

Start by changing the opacity of the Detail Screen layer. Add a transition patch, and connect the output from the Classic Animation patch to its Progress input. Connect its output to the Detail Screen layers Opacity property, then make sure the Detail Screen is visible by clicking the eye icon for the layer in the Layer Inspector.

Tap the image in the cell and notice a mini Detail Screen appearing right where you tapped. Tap again and it disappears, as expected. Feel free to change the starting position of the Detail Screen by adjusting its Position property to get the starting position you want.

Next, add a Transition patch to change the Scale of the Detail Screen from 0.5 to 1.0, and, as before, connect it up to the output of the Classic Animation. Tap the image and watch the Detail Screen appear and grow. Tap again and watch it shrink and disappear.

Finally for the Detail Screen. It needs to move it such that it rests in the right position on the screen. Add a third Transition patch, wire it up to the Classic Animation patch as before but this time connect it to the Position property of the Detail Screen layer.

Edit the patch by accessing the contextual menu (right-click in the header of the patch) and change its Type from Number to Position. Set the start position to (x: -17, y: -159) and its end position to (x: 0, y:0). Once again, tap the image and notice the change in the transition. Feel free to tweak the values to make the transition suit your preferences.

Apple News Style Pop Detail View

Customizing the Feed Screen Transition

To complete the effect, you need to scale, translate and fade the cell containing the tapped image to give the appearance of the cell becoming the Detail Screen.

As before, connect three new transition patches to the output from the Classic Animation (remembering to update the type of one of them to Position). This time, wire up the output for each transition to the Scale, Opacity and Position properties of the Inner Content layer of the Feed Screen.

Experiment setting different values for the Position and Scale values. As a sensible place to start, try changing the Position from (x: 0, y: 0) to (x: -230, y: 550) and the Scale from 1 to 2.5. Invert the Opacity so it starts at 1 and ends at 0.

Tap the image – it’s nearly there!

Nearly finised buidling the Feed Transition

When the feed image is tapped, the top cell and title transition, but the rest of the cells don’t. These cells don’t appear in the layer hierarchy as shown in Layer Inspector, so how do you get them to move as well?

Origami provides a Loop Select patch for exactly this purpose.

Break the connection between the Interaction patch for the Cell Image layer and the Switch by dragging the connection out of the Switch. Now, insert and connect a Loop Select patch between them. Restart the prototype and tap the top image to review your masterpiece. Nice job!

The Final Transition

Where to Go From Here?

You can download the completed version of the project using the Download Materials button at the top or bottom of this tutorial.

Hopefully, this tutorial has given you an insight into the power and flexibility of Origami Studio for building interactive prototypes for your mobile apps. You’ve only just scratched the surface of this powerful tool!

To find out more and continue your adventure, check out the excellent tutorials on the Origami Studio website and other examples of projects created at Facebook.

The documentation provides a complete overview of all the built in patches as well as a detailed descriptions of all the inputs and outputs for each patch.

Learn how to preview your prototype on a real device, use a pop animation to create bouncy animations simply or add sounds to your prototype.

Finally, there’s a thriving community on Facebook as well.

If you’re interested in other prototyping tools, check out the tutorial on Framer.

If you have any questions or comments about this tutorial, come join the discussion below!

The post Origami Studio Tutorial For Mobile Prototyping: Getting Started appeared first on Ray Wenderlich.

Getting Started with Flutter

$
0
0

Getting Started with Flutter

Since the time that the iOS and Android platforms exploded onto the scene a decade ago, cross-platform development has been a goal across the mobile development world. The ability to write one app for both iOS and Android can save significant time and effort for your company and team.

There have been various tools released for cross-platform development over the years, including web-based tools such as PhoneGap from Adobe, powerful frameworks such as Xamarin from Microsoft, and newer tools such as React Native from Facebook. Each toolset has pros and cons and they have met with varying degrees of success in the mobile industry.

A more recent framework to enter the cross-platform arena is Flutter from Google, which was announced in February at Mobile World Congress 2018 to be entering a beta phase. Flutter features fast development cycles, fast UI rendering and unique UI design, and native app performance on both platforms.

Introduction to Flutter

Flutter apps are written using the Dart programming language, also originally from Google and now an ECMA standard. Dart shares many of the same features as other modern languages such as Kotlin and Swift, and can be transcompiled into JavaScript code.

As a cross-platform framework, Flutter most closely resembles React Native, as Flutter allows for a reactive and declarative style of programming. Unlike React Native, however, Flutter does not need to use a Javascript bridge, which can improve app startup times and overall performance. Dart achieves this by using Ahead-Of-Time or AOT compilation.

Another unique aspect of Dart is that it can also use Just-In-Time or JIT compilation. JIT compilation with Flutter improves the development workflow by allowing hot reload capability to refresh the UI during development without the need for an entirely new build.

As you’ll see in this tutorial, the Flutter framework is heavily built around the idea of widgets. In Flutter, widgets are not used just for the views of your app, but also for entire screens and even for the app itself.

In addition to cross-platform iOS and Android development, learning Flutter will also give you a head start on developing for the Fuschia platform, which is currently an experimental operating system in development at Google. Fuschia is thought by many to be a potential future replacement for Android.

In this tutorial, you’ll build a Flutter app that queries the GitHub API for team members in a GitHub organization and displays the team member information in a scrollable list:

Final apps

You can develop the app while using either the iOS Simulator, the Android emulator, or both!

In building out the app, you’ll learn the following about Flutter:

  • Setting up your development environment
  • Creating a new project
  • Hot reload
  • Importing files and packages
  • Using widgets and creating your own
  • Making network calls
  • Showing items in a list
  • Adding an app theme

You’ll also learn a little Dart along the way! :]

Getting Started

Flutter development can be done on macOS, Linux, or Windows. While you can use any editor with the Flutter toolchain, there are IDE plugins for both Android Studio and Visual Studio Code that can ease the development cycle. We’ll use VS Code for this tutorial.

Setting up your development environment

Instructions for setting up your development machine with the Flutter framework can be found here. The basic steps vary by platform, but for the most part are:

  1. Clone the Flutter git repository
  2. Add the Flutter bin directory to your path
  3. Run the flutter doctor command, which installs the Flutter framework including Dart and alerts you to any missing dependencies
  4. Install missing dependencies
  5. Set up your IDE with a Flutter plugin/extension
  6. Test drive an app

The instructions provided on the Flutter web site are very well done and allow you to easily setup a development environment on your platform of choice. The remainder of this tutorial assumes you’ve setup VSCode for Flutter development, and that you’ve addressed any issues found by flutter doctor.

You should also be able to follow along pretty well if you’re using Android Studio. You’ll also need to be running either the iOS Simulator, an Android emulator, or have a provisioned iOS device or an Android device setup for development.

Note: For building and testing on the iOS Simulator or an iOS device, you’ll need to be using macOS with Xcode installed.

Creating a new project

In VS Code with the Flutter extension installed, open the command pallatte by choosing View > Command Palette… or hitting Cmd-Shift-P on macOS or Ctrl-Shift-P on Linux or Windows. Enter Flutter: New Project into the pallette and hit return.

New project

Enter the name ghflutter for the project and hit return. Select a folder to store the project in, and then wait for Flutter to setup the project in VS Code. When the project is ready, the file main.dart will be opened in your editor.

Project ready

In VS Code, you see a panel on the left-hand-side that shows your project structure. There are folders for iOS and Android, as well as a lib folder that contains main.dart and will have code that applies to both platforms. You’ll be working in the lib folder only in this tutorial.

Replace the code in main.dart with the following:

import 'package:flutter/material.dart';

void main() => runApp(new GHFlutterApp());


class GHFlutterApp extends StatelessWidget {
  @override
  Widget build(BuildContext context) {
    return new MaterialApp(
      title: 'GHFlutter',
      home: new Scaffold(
        appBar: new AppBar(
          title: new Text('GHFlutter'),
        ),
        body: new Center(
          child: new Text('GHFlutter'),
        ),
      ),
    );
  }
}

The main() function near the top uses the => operator for a single line function to run the app. You have one class for the app named GHFlutterApp.

You see here that your app itself is a StatelessWidget. Most entities in a Flutter app are widgets, either stateless or stateful. You override the widget build() method to create your app widget. You’re using the MaterialApp widget that provides a number of components needed for apps following Material Design.

For this getting started tutorial, remove the test file widget_test.dart in the test folder from the project by selecting it and hitting the Delete key.

If you’re on macOS, startup the iOS simulator. You can also use an Android emulator on macOS, Linux, or Windows. If both the iOS Simulator and an Android emulator are running, you can switch between them using the menu in the bottom right of the VS Code window:

Switch devices

Build and run the project by hitting F5 or choosing Debug > Start Debugging. You’ll see the Debug Console open and, if running on iOS, you’ll see Xcode being used to build the project. If running on Android, you’ll see Gradle being invoked to do the build.

Here is the app running in the iOS simulator:

First iOS run

And, running in the Android emulator:

First Android run

The slow mode banner you see indicates that the app is running in a debug mode.

You can stop the running app by clicking the stop button on the right of the toolbar at the top of the VS Code window:

The VS Code toolbar

You can get back to the project view by clicking the icon in the upper left of VS Code or choosing View > Explorer.

Hot Reload

One of the best aspects of Flutter development is being able to hot reload your app as you make changes. This is similar to something like Android Studio’s Instant Run.

Build and run the app so that it’s running on the Simulator or an emulator:

Before hot reload

Now, without stopping the running app, change the app bar string to something else:

appBar: new AppBar(
  title: new Text('GHFlutter App'),
),

Now click the hot reload button on the toolbar:

Hot reload button

Within a second or two you should see the change reflected in the running app:

After hot reload

Since Flutter is in beta, the hot reload feature may not always work, but overall it’s a great time saver when you’re building out your UI.

Importing a File

Rather than keep all your Dart code in the single main.dart file, you’ll want to be able to import code from other classes you create. You’ll see an example now for importing strings, which will help when you need to localize your user-facing strings.

Create a file named strings.dart in the lib folder by right-clicking on lib and choosing New File:

Creating a new file

Add the following class to the new file:

class Strings {
  static String appTitle = "GHFlutter";
}

Add the following import to the top of main.dart

import 'strings.dart';

Update the app title as follows:

return new MaterialApp(
  title: Strings.appTitle,

Change the other strings to use the new strings file so that the GHFlutterApp class looks as follows:

class GHFlutterApp extends StatelessWidget {
  @override
  Widget build(BuildContext context) {
    return new MaterialApp(
      title: Strings.appTitle,
      home: new Scaffold(
        appBar: new AppBar(
          title: new Text(Strings.appTitle),
        ),
        body: new Center(
          child: new Text(Strings.appTitle),
        ),
      ),
    );
  }
}

Build and run the app by hitting F5, and you should see no change, but you’re now using strings from the strings file.

Widgets

Almost every element of your Flutter app is a widget. Widgets are designed to be immutable, since using immutable widgets helps keep the app UI lightweight.

There are two fundamental types of widgets you will use:

  • Stateless: widgets that depend only upon their own configuration info, such as a static image in an image view.
  • Stateful: widgets that need to maintain dynamic information and do so by interacting with a State object.

Both stateless and stateful widgets redraw in Flutter apps on every frame, the difference being that the stateful widgets delegate their configuration to a State object.

To get started with making your own widgets, create a new class at the bottom of main.dart:

class GHFlutter extends StatefulWidget {
  @override
  createState() => new GHFlutterState();
}

You’ve made a StatefulWidget subclass and you’re overriding the createState() method to create its state object. Now add a GHFlutterState class above GHFlutter:

class GHFlutterState extends State<GHFlutter> {
}

GHFlutterState extends State with a parameter of GHFlutter.

The primary task you have when making a new widget is to override the build() method that gets called when the widget is rendered to the screen.

Add a build() override to GHFlutterState:

@override
Widget build(BuildContext context) {
​    
}

Fill out build() as follows:

@override
Widget build(BuildContext context) {
  return new Scaffold (
    appBar: new AppBar(
      title: new Text(Strings.appTitle),
    ),
    body: new Text(Strings.appTitle),
  );
}

A Scaffold is a container for material design widgets. It acts as the root of a widget hierarchy. You’ve added an AppBar and a body to the scaffold, and each contains a Text widget.

Update GHFlutterApp so that it uses your new GHFlutter widget as its home attribute, instead of building a scaffold of it’s own:

class GHFlutterApp extends StatelessWidget {
  @override
  Widget build(BuildContext context) {
    return new MaterialApp(
      title: Strings.appTitle,
      home: new GHFlutter(),
    );
  }
}

Build and run the app, and you’ll see the new widget in action:

Using GHFlutter Widget

Not much has changed yet, but now you’re setup to build out the new widget.

Making Network Calls

Earlier you imported your own strings.dart file into the project. You can similarly import other packages that are part of the Flutter framework and Dart.

For example, you’ll now use packages available in the framework to make an HTTP network call and also parse the resulting response JSON into Dart objects. Add two new imports at the top of main.dart:

import 'dart:convert';

import 'package:flutter/material.dart';
import 'package:http/http.dart' as http;

import 'strings.dart';

You’ll see an indicator on the imports that are currently unused.

Dart apps are single-threaded, but Dart provides support for running code on other threads as well as running asynchrounous code that does not block the UI thread using an async/await pattern.

You’re going to make an asynchronous network call to retrieve a list of GitHub teams members. Add an empty list as a property at the top of GHFlutterState, and also add a property to hold a text style:

var _members = [];

final _biggerFont = const TextStyle(fontSize: 18.0);

The underscores at the beginning of the names make the members of the class private.

To make the asynchronous HTTP call, add a method _loadData() to GHFlutterState:

_loadData() async {
  String dataURL = "https://api.github.com/orgs/raywenderlich/members";
  http.Response response = await http.get(dataURL);
  setState(() {
    _members = JSON.decode(response.body);
  });
}

You’ve added the async keyword onto _loadData() to tell Dart that it’s asynchronous, and also the await keyword on the http.get() call that is blocking. You’re using a dataUrl value that is set to the GitHub API endpoint that retrieves members for a GitHub organization.

When the HTTP call completes, you pass a callback to setState() that runs synchronously on the UI thread. In this case, you are decoding the JSON response and assigning it to the _members list.

Add an initState() override to GHFlutterState that calls _loadData() when the state is initialized:

@override
void initState() {
  super.initState();

  _loadData();
}

Using a ListView

Now that you have a Dart list of members, you need a way to display them in a list in the UI. Dart provides a ListView widget that will let you show the data in a list. ListView acts like a RecyclerView on Android and a UITableView on iOS, recycling views as the user scrolls through the list to achieve smooth scrolling performance.

Add a _buildRow() method to GhHFlutterState:

Widget _buildRow(int i) {
  return new ListTile(
    title: new Text("${_members[i]["login"]}", style: _biggerFont)
  );
}

You are returning a ListTile widget that shows the “login” value parsed from the JSON for the ith member, and also using the text style you created before.

Update the build method to have it’s body be a ListView.builder:

body: new ListView.builder(
  padding: const EdgeInsets.all(16.0),
  itemCount: _members.length,
  itemBuilder: (BuildContext context, int position) {
    return _buildRow(position);
  }),

You’ve added padding, set the itemCount to the number of members, and set the itemBuilder using _buildRow() for a given position.

You can try a hot reload, but you may get a “Full restart may be required” message. If so, hit F5 to build and run the app:

Showing members

That’s just how easy it is to make a network call, parse the data, and show the results in a list!

Wow so easy

Adding dividers

To add dividers into the list, you’re going to double the item count, and then return a Divider widget when the position in the list is odd:

body: new ListView.builder(
  itemCount: _members.length * 2,
  itemBuilder: (BuildContext context, int position) {
    if (position.isOdd) return new Divider();

      final index = position ~/ 2;

      return _buildRow(index);
    }),

Be sure not to miss the * 2 on itemCount. You’ve removed padding from the builder now that you have dividers. In itemBuilder, you’re either returning a Divider(), or instead calculating a new index by integer division and using _buildRow() to build a row item.

Try a hot reload and you should see dividers on the list:

With dividers

To add padding back into each row, you want to use a Padding widget within _buildRow():

Widget _buildRow(int i) {
  return new Padding(
    padding: const EdgeInsets.all(16.0),
    child: new ListTile(
      title: new Text("${_members[i]["login"]}", style: _biggerFont)
    )
  );
}

The ListTile is now a child widget of the padding widget. Hot reload to see the padding on the rows but not on the dividers.

Parsing to Custom Types

In the previous section, the JSON parser took each member in the JSON response and added it to the _members list as a Dart Map type, the equivalent of a Map in Kotlin or a Dictionary in Swift.

However, you’ll also want to be able to use your own custom types.

Add a new Member type to the main.dart file:

class Member {
  final String login;

  Member(this.login) {
    if (login == null) {
      throw new ArgumentError("login of Member cannot be null. "
          "Received: '$login'");
    }
  }
}

A member has a login property and a constructor that throws an error if the login value is null.

Update the _members declaration in GHFlutterState so that it is a list of Member objects:

var _members = <Member>[];

Update _buildRow() to use the login property on the Member object instead of using the “login” key on the map:

title: new Text("${_members[i].login}", style: _biggerFont)

Now update the callback sent to setState() in _loadData() to turn the decoded map into a Member object and add it to the list of members:

setState(() {
  final membersJSON = JSON.decode(response.body);

  for (var memberJSON in membersJSON) {
    final member = new Member(memberJSON["login"]);
    _members.add(member);
  }
});

You’ll likely see an error if you try a hot reload, but hit F5 to build and run the app and you should see the same screen as before, except now using your new Member class.

Downloading Images with NetworkImage

Each member from GitHub has a URL for their avatar. You’ll now add that avatar to the Member class and show the avatars in the app.

Update the Member class to add an avatarUrl property that cannot be null:

class Member {
  final String login;
  final String avatarUrl;

  Member(this.login, this.avatarUrl) {
    if (login == null) {
      throw new ArgumentError("login of Member cannot be null. "
          "Received: '$login'");
    }
    if (avatarUrl == null) {
      throw new ArgumentError("avatarUrl of Member cannot be null. "
          "Received: '$avatarUrl'");
    }
  }
}

Update _buildRow() to show the avatar using a NetworkImage and the CircleAvatar widget:

Widget _buildRow(int i) {
  return new Padding(
    padding: const EdgeInsets.all(16.0),
    child: new ListTile(
      title: new Text("${_members[i].login}", style: _biggerFont),
      leading: new CircleAvatar(
        backgroundColor: Colors.green,
        backgroundImage: new NetworkImage(_members[i].avatarUrl)
      ),
    )
  );
}

By setting the avatar as the leading attribute of the ListTile, it will show before the title within the row. You’ve also set a background color on the image using the Colors class.

Now update _loadData() to use the “avatar_url” value in the map when creating a new Member:

final member = new Member(memberJSON["login"], memberJSON["avatar_url"]);

Build and run the app using F5. You’ll see your member avatars now shown in each row:

Showing avatars

Cleaning the Code

Most of your code is now in the main.dart file. To make the code a little cleaner, you can refactor the widget and other classes you’ve added into their own files.

Create files named member.dart and ghflutter.dart in the lib folder. Move the Member class into member.dart and both the GHFlutterState and GHFlutter classes into ghflutter.dart.

You won’t need any import statments in member.dart, but the imports in ghflutter.dart should be as follows:

import 'dart:convert';

import 'package:flutter/material.dart';
import 'package:http/http.dart' as http;

import 'member.dart';
import 'strings.dart';  

You also need to update the imports in main.dart, so that the entire file consists of the following:

import 'package:flutter/material.dart';

import 'ghflutter.dart';
import 'strings.dart';

void main() => runApp(new GHFlutterApp());


class GHFlutterApp extends StatelessWidget {
  @override
  Widget build(BuildContext context) {
    return new MaterialApp(
      title: Strings.appTitle,
      home: new GHFlutter(),
    );
  }
}  

Build and run the app by hitting F5 and you should see no change, but the code is now a little cleaner. :]

Adding a Theme

You can easily add a theme to the app by adding a theme attribute to the MaterialApp you create in main.dart:

class GHFlutterApp extends StatelessWidget {
  @override
  Widget build(BuildContext context) {
    return new MaterialApp(
      title: Strings.appTitle,
      theme: new ThemeData(primaryColor: Colors.green.shade800), 
      home: new GHFlutter(),
    );
  }
}  

You’re using a shade of green as a Material Design color value for the theme.

Build and run the app by hitting F5 to see the new theme in action:

Theme on Android

Most of the app screenshots have been from the Android emulator. You can also run the final themed app in the iOS Simulator:

Theme on iOS

Now that’s what I call cross-platform! :]

Dart 2

A new version of Dart is on its way, Dart 2. Among other things, Dart 2 adds strong compile-time checks and removes the need to use the new keyword when creating objects.

As an example, in Dart 2 the _buildRow() method would look something like:

_buildRow(int i) =>
  Padding(
    padding: EdgeInsets.all(16.0),
    child: ListTile(
        title: Text("${_members[i].login}", style: _biggerFont),
        leading: CircleAvatar(
          backgroundColor: Colors.green,
          backgroundImage: NetworkImage(_members[i].avatarUrl)
      ),
    )
  );

Instructions for trying out Dart 2 with Flutter can be found here. There may be incompatibilities with your current projects, so be sure to run the

flutter analyze --preview-dart-2

and

flutter run --preview-dart-2

commands if trying out Dart 2.

Where to go from here?

You can download the completed project using the download button at the top or bottom of this tutorial.

You should be able to open the project in either VS Code or Android Studio. Open in VS Code by just opening the root folder. You’ll need to fetch packages when opening the project.

To open the final project in Android Studio, choose Open an existing Android Studio project from the Welcome to Android Studio screen and naviagte to choose the root folder of the final project. You’ll need to then choose “Open Flutter Settings” and set the Flutter SDK path to where you cloned the flutter git repo. Then choose “Get dependencies” on the “‘Packages get’ has not been run” line in Android Studio. Choose the Project view in the project panel to see your files.

If you’re on macOS, you can run the app from Android Studio to either an Android emulator or the iOS Simulator. Try it, it’s pretty cool! :]

There’s a lot more to learn about Flutter and Dart. The best places to start are:

  • The main Flutter page at flutter.io. You’ll find lots of great documentation and other information.
  • See the available widgets here.
  • There’s a great guide for Android developers transitioning to using Flutter here.
  • A similar guide for React Native developers is here.

Stay tuned for more Flutter tutorials and screencasts!

Feel free to share your feedback, findings or ask any questions in the comments below or in the forums. I hoped you enjoyed getting started with Flutter!

The post Getting Started with Flutter appeared first on Ray Wenderlich.

Screencast: Accessing Data using OAuth


Owner of Wee Taps and Full-Time Indie Illustrator & Designer: A Top Designer Interview With Paddy Donnelly

$
0
0

Indie Designer, Paddy Donnelly

Welcome to another installment of our Top App Dev Interview series!

This time there’s a slight twist: we’re actually interviewing a designer. I guess that makes this a Top App Designer Interview. :]

Each interview in this series focuses on a successful mobile app, developer or designer and the path they took to get where they are today. Today’s special guest is Paddy Donnelly.

Paddy Donnelly is an Irish illustrator who now lives in Belgium. With over 14 years experience as an illustrator and designer, Paddy now gets to make living drawing dinosaurs, and his 5-year-old self is very happy about this.

Paddy is comfortable working in a number of different illustration styles depending on the type of project. He has been creating kids apps for iOS under the brand Wee Taps and wishes that Pluto was still a planet. He also redesigned the raywenderlich.com website a few years back!

Love For Pixels

I understand you were previously a designer, and now focus more on illustration. What made you decide to make the switch, and were there any challenges making this career switch?

I’ve been working as a designer for about 14 years. I got my start in web design and have moved through desktop apps, mobile apps, print design, games and the last few years have been all about illustration. Now I’m focusing a lot more on illustrating children’s picture books, which is a totally different experience.

I’ve had a love for illustration since I was a kid, but it’s only after working in the design industry for so many years that I felt I could really dive into it as a career.

About 10 years ago, each website was something unique. A totally different design, based on what the website was about. Web designers were really creative, however, I feel that web design ‘found its groove’ a few years ago and we’ve gone through a period of all websites having this same basic structure and look and feel. Mobile apps also went the same way and I didn’t really enjoy the ‘flat design’ era. I do appreciate good, minimal design, however creatively I longed for something a bit different.

I wanted every project to be something new and challenging and didn’t want to start from a template. That’s maybe why illustration appeals to me. No two projects are alike and you can really express yourself in the piece.

There are of course challenges to working as an illustrator vs a designer. There is a lot of competition and it’s really difficult to break into the children’s publishing market, however, I’m enjoying trying something new.

Paddy now focuses on illustrations.

Imagine someone commissions you to create an illustration. What is your general process, how long does it usually take you and what tools do you use?

This depends on a lot of different factors. The first step is to discuss the concept with the client, their goals for the piece etc. Then I’d move on to rough sketching and often I’d use mood boards to show what I’m thinking in terms of style. Then it’s on to the digital illustration. Timing depends on the size, style, complexity etc.

I use a Wacom Tablet with Photoshop and Illustrator. I use a lot of Kyle Webster’s brushes in my illustration pieces.

What illustration are you most proud of, and why?

This is a tough one. Well, one of the most amazing opportunities I’ve had was to create the unlockable stickers for Foursquare’s Swarm app. That has been so much fun coming up with crazy sticker ideas, and also knowing that something you created is used by millions of people is pretty mind-blowing.

Sticker pack designed by Paddy for Foursquare’s app.

Recently I’ve created a couple of kids illustration pieces, one symbolising the struggle with dyslexia and one about Little Red Riding Hood that I’m pretty proud of.

Being a designer is such a creative outlet for me. It’s great to be able to imagine a creative solution in your mind and then work hard to realise that solution. Seeing a finished product is always satisfying, and hearing good feedback from users. Getting to be creative every day is perhaps the best thing.

What recommendations do you have for app developers looking to hire designers or illustrators? For example: where should they look to hire someone, and do you have any tips for working well with a designer/illustrator?

I’d say get involved in the project as soon as possible in the process so that both you and the designer know what’s expected and are both thinking about solutions. I always try to involve the developer even at the idea stage, as I think it’s far too late to hand a completed design to a developer and say ‘build this’.

If you get involved early in the process, developers can give you ideas on what new technologies are available, tricks you can use to speed up the workflow and give you an idea of what’s possible within the budget/timescale.

In terms of finding a designer, most clients contact me after visiting my portfolio site or through sites like Dribbble. I’ve also now just recently signed with an agent, The Bright Agency so now I get a lot of illustration projects through them. Instagram is also a good way to get your work out there. So any one of these avenues is a great starting point to finding a super designer..

If one of our readers wants to become “an awesome illustrator just like Paddy”, and has 4 years to do so, how would you recommend they spend their time?

  1. Work hard.
  2. Be nice to people.

These two rules are essential. There are no shortcuts. You just need to do more and more work to get better.

If your job is your passion, then all the better. Then you can constantly be adding to your portfolio, just for fun. And definitely, make connections with people. I’ve gotten so many great projects through other designers and developers I have worked with, met at conferences, interacted with online.

Be nice to people because it’s a small world and an even smaller industry.

Indie Life

How did you transition from a “normal job” to being a freelancer? And what are the challenges working on your own?

Start. Just make the leap. There’s something that has been rattling around in the back of your head for a while now. An idea. Something you’ve always wanted to do. It might not work. It’s scary. Everyone is scared. Just start it.

Essentially I just took more and more freelance work on in the evenings and weekends until I was sure that there was enough work out there for me, then I made the leap.

I quite like working on my own, from home. It doesn’t bother me, in fact, I really enjoy the peace and quiet. Forcing myself to keep active and get out of the house can sometimes be a challenge, but I’m getting better at that.

Paddy’s simple, yet beautifully creative workspace.

Paddy, can you tell me what an average day looks like for you? (i.e. 8:00 wake up…)

My current routine looks something similar to this;

  • 8am: Wake up
  • 8:15am: Coffee
  • 9am-10am: Breakfast and emails
  • 10am-12pm: Illustration work
  • 12pm-2pm: Usually do something active, head into town, go for a walk or coffee
  • 2pm-6pm: More illustration work
  • 6pm-7pm: Dinner
  • 7pm-11pm: Either do more work, usually creating pieces for my portfolio, writing, Netflix.

Many of our readers have had a challenging time making a successful business out of selling apps on the App Store. Out of the apps you’ve worked on, have any been a success financially?

We’ve had a bit of luck with a few of our kids apps however it’s all been dependent on Apple choosing to feature us or not. That’s the only thing that’s really worked I’ve found.

A few times our apps got picked up in a feature list, or sometimes in a banner in the App Store and we get a spike. We couldn’t give our freelance lives up just yet based on the revenue, however, it’s a nice extra passive income each month. It is very tough though making a living in the App Store. There is so much competition now.

I guess create something unique and look at what technologies Apple is focusing on and create something in that space to be in with a chance of featuring.

Focus

Developers really struggle with procrastination. What kind of distractions do you get and how do you handle them?

Paddy is at his best in the morning!

I do get distracted a lot, however, I also keep pretty flexible working hours. Working for myself from home means I can get a burst of creativity in the morning, take a break to do something else and then continue on in the afternoon or in the evening.

In the last few months I’ve really switched up my schedule and I am working when I’m feeling it, rather than sticking to a 9-5. I’ve found that’s really helped with being creative. Just keep the deadlines in mind, and disable the “autoplay” on YouTube.

For me, my noise-cancelling headphones and Spotify are the number one things that keep me focused. When I can close off the rest of the world and get in the zone, I can be creative.

How do you manage the wearing of multiple hats, for example managing clients and then doing the design?

Over the years I’ve figured out the kind of design work I really like to do and I stick to those areas.

Keeping focused on what I like to do and being honest with clients about not doing other types of design work has been important to me and my workflow. I haven’t had much trouble with the invoicing and contracts side of things. I have a pretty standard workflow now after working for so many years.

I’ve found what works for me and I think good communication with your clients is vital.

Paddy has really found what he loves to do!

Can you tell me more about your business process? For example; What do you use to create invoices? How do you make sure payments are received on time?

I’m a huge fan of Freeagent it’s a lifesaver. So easy to keep all your client contacts, invoices, time sheets together. I always work with contracts and require deposits before I start on a project. That’s really important.

Good communication with a client and settings expectations is also important. Make sure in your contract that it says you don’t deliver the final work or source files before your final invoice is paid is my ultimate advice.

Where To Go From Here?

And that concludes our Top Designer Interview with Paddy Donnelly. Huge thanks to Paddy for sharing his journey with the community :]

Having a clear direction on your career seems to be key to Paddy’s success. Paddy knows exactly where to get his clients, understands his workflow and has perfected his skills on the illustration side of the business.

I hope you can pick out the key’s to Paddy’s success and put in to practice in your work-flow.

If you are an app developer with a hit app or game in the top 100 in the App store, we’d love to hear from you. Please drop us a line anytime. If you have a request for any particular developer you’d like to hear from, please join the discussion in the forum below!

The post Owner of Wee Taps and Full-Time Indie Illustrator & Designer: A Top Designer Interview With Paddy Donnelly appeared first on Ray Wenderlich.

Introducing the Android Avalanche!

$
0
0

Our Android Tutorial Team has been amazingly busy over the past year:

  • Publicly, we’ve been busy creating more than 40 free Android tutorials for the site, and we’re now releasing a new Android tutorial every Wednesday.
  • But secretly, we’ve been cooking up some surprises, including new Android books, and a pile of new Android video courses and screencasts.

Watch out — it’s an avalanche of new tutorials! It’s…an Android Avalanche!

As part of the Android Avalanche, we’re announcing our lineup of new Android books and video courses — and we’ve wrapped them up in a time-limited bundle that you can get at a massive discount.

And best of all – all of these new books, courses, and screencasts are 100% Kotlin! As the second most loved language in the recent StackOverflow Dev survey, the tide is coming! :]

Here’s a quick overview of what’s in store:

New Android Books

To lead off the Android Avalanche, we are releasing two brand-new books on getting started with Android and Kotlin development.

1) The Android Apprentice

The Android Apprentice is our book for complete beginners to Android development. It’s ideal for someone with prior programming experience (like Swift or Java), to get quickly up-to-speed with Android development.

And even better — the book is written in Kotlin, the modern, first-class language for Android developers.

This book teaches you how to build four complete Android apps from scratch:

  • Timefighter: You’ll get started with Android development by creating a game with a simple goal: tap a button as fast as you can, within a set time limit.
  • CheckList: Make a simple TODO app with multiple lists. Along the way, learn about layout managers, activities, saving data, and notifications.
  • PlaceBook: Keep track of your favorite places with photos and maps. Along the way, learn about Google Play services, Room, Google Maps API, and working with photos.
  • PodPlay: You’ll round out the book by building a podcast manager with a built-in media player. You’ll cover Android networking, job scheduling, media browser, notifications, and media playback.

The Android Apprentice is 100% complete and is available today — and it’s on sale as part of our Android Avalanche Bundle.

Android Apprentice Authors

Of course, the Android Apprentice would be nothing without the efforts from the hard-working authors on this book:

Darryl Bayliss is a Software Engineer from Liverpool, currently focusing on Mobile Development. Away from programming he is usually reading, writing on his blog or playing some fantastical video game involving magic and dragons.

Tom Blankenship has been addicted to coding since he was a young teenager, writing his first programs on Atari home computers. He currently runs his own software development company focused on native iOS and Android app development. He enjoys playing tennis, guitar, and drums, and spending time with his wife and two children.

2) The Kotlin Apprentice

Heard of Kotlin, but haven’t yet started to learn the language? Or maybe you want to explore some more advanced aspects of the language? Our second book — the Kotlin Apprentice — is here to help you out!

The Kotlin Apprentice is a book geared toward complete beginners to Kotlin. It’s ideal for people with little to no prior programming experience, but it’s also excellent for people who have prior programming experience and are looking to get up-to-speed quickly with the Kotlin language.

The book focuses on the core Kotlin language itself — not building Android apps. If you’re brand-new to Kotlin, we recommend reading this book first, and then working through the Android Apprentice after that.

Here’s a sneak peek of what’s inside:

  • Coding Essentials and your IDE: We start you off right at the beginning so you can get up to speed with programming basics. Learn how to work with Intellij IDEA, which you will use throughout the rest of the book.
  • Nullability: Kotlin helps you avoid the “billion dollar mistake” by only allowing data to be null if you explicitly allow it.
  • Arrays, Lists, Maps, and Sets: Why have only one of a thing when you could have many? Learn about the Kotlin collection types — arrays, lists, maps, and sets — including what they’re good for, how to use them, and when to use each.
  • Lambdas: Put code into variables and pass code around to help avoid callback insanity!
  • Kotlin and Java Interoperability: Kotlin is designed to be 100% compatible with Java and the JVM. Seamlessly use Kotlin in your Java projects and call back and forth between the languages.
  • Kotlin Coroutines: Simplify your asynchronous programming using Kotlin coroutines, and discover the differences between coroutines and threads.
  • And much more!: We’ll take you through programming basics, object-oriented programming with classes, exceptions, generics, functional programming, and more!

The early access edition of the Kotlin Apprentice is available today and on sale as part of our Android Avalanche Bundle.

The full edition of the Kotlin Apprentice will be available a little later this year. You’ll get a free update to the full edition of the Kotlin Apprentice as part of your bundle purchase.

Kotlin Apprentice Authors

Here are the hard-working authors who have contributed to the Kotlin Apprentice:

Irina Galata is a software developer in Dnipro, Ukraine. She is passionate about Android, animations, public speeches, and Kotlin. You can find her on Medium and GitHub.

Joe Howard‘s path to software development began in the fields of computational physics and systems engineering. He has been a mobile software developer on iOS and Android since 2009. He now lives in Boston and is Android Team Lead for raywenderlich.com.

Richard Lucas is a developer by trade but he adds value anyway he can, code or otherwise. He’s interested in Android, blockchain, encrypted messaging, robo advisors, climate change, disaster recovery, and internet infrastructure.

Ellen Shapiro is an iOS developer for Bakken & Bæck‘s Amsterdam office who also occasionally writes Android apps. She is working in her spare time to help bring songwriting app Hum to life. She’s also developed several independent applications through her personal company, Designated Nerd Software. When she’s not writing code, she’s usually tweeting about it.

New Android Video Courses

Next in the Android Avalanche is a massive batch of new video courses for raywenderlich.com subscribers!

These courses are designed to be followed in order, with the goal of taking you from a complete Android beginner, all the way to a professional Android developer.

These courses are designed as a companion to the Android Apprentice and Kotlin Apprentice books. We recommend you work through the video courses first, and refer back to the books for review or additional information.

1) Your First Kotlin App

In this course by Brian Moakley, you’ll get started with Android & Kotlin development by creating your first app: a simple game called “Timefighter”. Through a series of hands-on exercises and challenges, you’ll learn:

  • How to build your first Android + Kotlin App
  • How to use Android Studio
  • How to run an Android app on emulator and device
  • How to design apps that look great

This course is available today and is 100% free for everyone!

2) Programming in Kotlin

In this course by Kevin Moore, you’ll take a deep dive into the Kotlin programming language itself.

Through a series of hands-on exercises and challenges, you’ll learn how to use Kotlin types, flow control, functions, classes, properties, lambdas, collections, nullables, methods, and much more.

This course is will be released tomorrow, March 20.

3) Your Second Kotlin Android App

In this course by Brian Moakley, you’ll continue your Android development journey by creating another app. Not just any app, but a TODO list app. You’ll build this app from the ground up and in the process you’ll do the following:

  • Learn about a recycler view, what they do, and how to incorporate it into your app
  • Save your todo lists by way of shared preferences and how to read them back again
  • Create multiple activities and learn how to pass data between them
  • Refactor your app into fragments and get it to work on a multiple screen sizes
  • Learn about Android Material Design and how to use it to improve your app

This course will be released this Wednesday, March 21.

4) Beginning Android Layouts

In this course by Joe Howard, you’ll learn how to use Android’s layout system to lay out the views in your app, regardless of devices size. Through a series of hands-on exercises and challenges, you’ll learn the following:

  • How view layout and the view hierarchy works in Android
  • How to use the basic layout types: RelativeLayout and LinearLayout
  • How to use the complex but powerful ConstraintLayout
  • How to use both the design editor and XML editor in Android Studio

This course will be released this Thursday, March 22.

5) Beginning RecyclerView

In this course by Joe Howard, you’ll learn how to use Android’s RecyclerView to efficiently display a list of items. Through a series of hands-on exercises and challenges, you’ll learn the following:

  • How to use bind model data to RecyclerViews
  • How to use the various RecyclerView layout managers: LinearLayoutManager, GridLayoutManager, and StaggeredGridLayoutManager
  • How to use item decorations for spacing and separators
  • How to use animation to affect the display of RecyclerView items

This course will be released this Friday, March 23.

6) Android Animations

In this course by Joe Howard, you’ll learn how add dynamic animations to your Android apps. Through a series of hands-on exercises and challenges, you’ll learn the following:

  • How to use the basic property and view animators on Android
  • How to use interpolators, animator sets, and animation listeners
  • How to work with scenes and transitions
  • How to work with animated vector drawables

This course will be released next Monday, March 26.

7) Saving Data on Android

In this course by Joe Howard, you’ll learn how persist data on your Android apps between app restarts. Through a series of hands-on exercises and challenges, you’ll learn the following:

  • How to use use SharedPreferences
  • How to read/write files to storage
  • How to save data using SQLite
  • How to use the new Room library (part of the Android Architecture Components) to save data

This course will be released next Tuesday, March 27.

8) Android Networking

In this course by Joe Howard, you’ll learn how to make calls to REST APIs to send and receive structured data. Through a series of hands-on exercises and challenges, you’ll learn the following:

  • How fundamental concepts of networking like HTTP, requests, and responses work
  • How to setup and make basic use of the Retrofit networking library
  • How to handle other networking tasks like authentication, posts, and updates
  • How to perform basic network monitoring using an interceptor or the Android Profiler

This course will be released next Wednesday, March 28.

How To Get the Courses

Like what you see?

This entire 8-course series, covering over 600 minutes of Android learning is already included in your raywenderlich.com subscription. And if you don’t have one already, you can pick one up as part of our Android Avalanche Bundle!

New Advanced Android Screencasts

Already an experienced Android developer? We’ve got something for you as well.

raywenderlich.com will be releasing regular screencasts on advanced Android topics.

Our screencasts are designed for experienced developers who want to quickly pick up new skills. You can check out a single screencast while enjoying your morning coffee and pick up something new that you may not have known before.

To start things off with a bang, we’ll release our first two screencasts next Thursday, March 29:

  • Getting Started with TensorFlow on Android: TensorFlow is the powerful open-source machine learning and deep learning library from Google. Learn how to use it in your Android apps.
  • Getting Started with Flutter: Learn how to use the Flutter beta UI framework from Google to develop cross-platforms apps for iOS and Android, using Android Studio and VS Code.

These new screencasts are included in your raywenderlich.com subscription. And remember, this is only the beginning!

Android Avalanche Bundle

To celebrate the launch of our new Android books, courses, and screencasts, we are offering a special bundle where you can get everything we’ve covered in this post — at a big discount!

Our new Android Avalanche Bundle includes:

  • Android Apprentice ($54.99 value): Gives you access to our new Android Apprentice book, which teaches you how to build four complete Android apps from scratch. PDF/ePub format.
  • Kotlin Apprentice ($54.99 value): Gives you access to our new Kotlin Apprentice book, which gives you a deep dive into the Kotlin programming language itself. PDF/ePub format.
  • A raywenderlich.com subscription ($19.99 value): Gives you access to all 8 of our new Android video courses, our 2 new Android screencasts, and access to any new courses and screencasts we release in the future.

The bundle price of $99.99 includes the first month of your subscription, which will continue at $19.99/month thereafter. You can cancel at any time and keep the books. This bundle gives you more than 20% off everything in the Android Avalanche!

The Android Avalanche bundle is only available for the next two weeks, so be sure to order your copy while you can.

Already a subscriber? Existing subscribers will enjoy a $20 discount on the bundle that will get you both books added to your collection. It’s our way of thanking subscribers for supporting what we do here at raywenderlich.com.

Android Avalanche Giveaway

As a final celebration, we’re going to give away 3 free Android Avalanche bundles to some lucky readers!

To enter the giveaway, simply comment on this post and answer the following question:

Why are you interested in our new Android books, courses, and screencasts?

We will select three winners at random who answer this question before next Friday, March 30.

Where To Go From Here?

For many years now, readers have been asking for “an Android version of raywenderlich.com”. Thanks to the hard work from our Android team over the last year, we’re happy to announce that this is now a reality!

To recap, here’s the schedule for our two-week Android Avalanche celebration:

  • March 19: The Android Apprentice, the Kotlin Apprentice, and Your First Kotlin App Video Course
  • March 20: Programming in Kotlin Video Course
  • March 21: Your Second Kotlin Android App Video Course
  • March 22: Beginning Android Layouts Video Course
  • March 23: Beginning RecyclerView Video Course
  • March 26: Android Animations Video Course
  • March 27: Saving Data on Android Video Course
  • March 28: Android Networking Video Course
  • March 29: Getting Started with TensorFlow on Android Screencast, and Getting Started with Flutter Screencast
  • March 30: Giveaway and Last Day for Discount!

If you want to learn Android and Kotlin development — or level up your existing skills – there’s no better way to learn than these new books, courses, and screencasts.

And this is only the beginning! We’re committed to creating more new books, courses, and screencasts on Android development, with the goal of covering Android and Kotlin in the same way that we’ve covered iOS and Swift over the years.

We truly appreciate your support in making this possible. We’re excited about this new chapter at raywenderlich.com. So order your copy of the Android Avalanche Bundle today before the deal is over!

The post Introducing the Android Avalanche! appeared first on Ray Wenderlich.

New Course: Programming in Kotlin

$
0
0

Programming in Kotlin

It’s day 2 of the Android Avalanche: an event where we’ll be releasing new Android and Kotlin books, courses, and screencasts every day!

Today, we are releasing a brand new course: Programming in Kotlin. If you’ve completed Your First Kotlin Android App, or are just interested in learning Kotlin, the new course is for you.

In this massive 74-video course by Kevin Moore, you’ll take a deep dive into the Kotlin programming language itself. Through a series of hands-on exercises and challenges, you’ll learn how to use Kotlin types, flow control, functions, classes, properties, lambdas, collections, nullables, methods, and much more.

Let’s take a look at what’s inside.

Part 1: Core Concepts

In part one, review the core concepts of Kotlin from Your First Kotlin Android App, and pick up a few more.

  1. Introduction: Find out what we’ll cover in this course, what you’ll learn in the first part, and why it’s important.
  2. Using IntelliJ: Install IntelliJ IDEA, then take a tour of the IDE and create your first project.
  3. Kotlin Basics: Review the Kotlin basics that were covered in Your First Kotlin Android App.
  4. Comments: Learn the various ways to add comments to your Kotlin code – a useful way to document your work or add notes for future reference.
  5. Pair and Triple: Learn about two classes, Pair and Triple, and when to use each.
  6. Challenge: Pair and Triple: Practice using Pairs & Triples on your own, through a hands-on challenge.
  7. Booleans: Review the Kotlin Boolean type and try it out for yourself.
  8. Challenge: Booleans: Practice using Booleans on your own, through a hands-on challenge.
  9. Scope: Learn what the concept of scope means in Kotlin, and how it applies to if statements.
  10. Conclusion: Let’s review where you are with your Kotlin core concepts, and discuss what’s next.

Part 2: Flow Control

In the second part, learn a few different ways to master flow control in Kotlin.

  1. Introduction:  Let’s review what you’ll be learning in this section, and why it’s important.
  2. While Loops:  Learn how to make Kotlin repeat your code multiple times with while loops, repeat while loops, and break statements.
  3. Challenge: While Loops:  Practice using while loops on your own, through a hands-on challenge.
  4. For Loops:  Learn how to use for loops in Kotlin, along with ranges, continue, and labeled statements.
  5. Challenge: For Loops:  Practice using for loops on your own, through a hands-on challenge.
  6. When Expressions:   Learn how to use when expressions in Kotlin, including some of its more powerful features.
  7. Challenge: When Expressions:  Practice using when expressions on your own, through a hands-on challenge.
  8. Conclusion:  Let’s review what you learned in this section, and discuss what’s next.

Part 3: Functions and Nullables

In part 3, you’ll learn about functions and one of the most important aspect of Kotlin: nullables.

  1. Introduction:  Let’s review what you’ll be learning in this section, and why it’s important.
  2. Introduction to Functions:  Write your own functions in Kotlin, and see for yourself how Kotlin makes them easy to use.
  3. Challenge: Introduction to Functions:   Practice writing functions on your own, through a hands-on challenge.
  4. More Functions:  Learn some more advanced features of functions, such as overloading, and functions as variables.
  5. Introduction to Nullables:  Learn about one of the most important aspects of Kotlin development – nullables – through a fun analogy.
  6. Challenge: Introduction to Nullables: Practice using Nullables on your own, through a hands-on challenge.
  7. More Nullables:  Learn how to unwrap Nullables, force unwrap Nullables, and use the let statement.
  8. Challenge: More Nullables:  Practice working with Nullables on your own, through a hands-on challenge.
  9. Conclusion:  Let’s review where you are with your Kotlin core concepts, and discuss what’s next.

Part 4: Collections

Try out different types of collections in Kotlin, and learn when to use each.

  1. Introduction:  Let’s review what you’ll be learning in this section, and why it’s important.
  2. Arrays:  Learn how to use arrays in Kotlin to store an ordered list of values.
  3. Challenge: Arrays:   Practice using arrays on your own, through a hands-on challenge.
  4. Lists:  Learn how to use Lists in Kotlin to store an ordered collection of data.
  5. Challenge: Lists:  Practice using Lists on your own, through a hands-on challenge.
  6. Maps:  Learn how to use Maps in Kotlin to store a mapped collection of data.
  7. Challenge: Maps:  Practice using Maps on your own, through a hands-on challenge.
  8. Which Collection to Use?:  Find out which collection you should use in a given situation.
  9. Mutable vs. Immutable:  Learn the difference between the two types of collections.
  10. Conclusion:  Let’s review what you learned in this part of the course, and find out what’s next.

Part 5: Lambdas

In part 5, learn how to use lambdas and generics.

  1. Introduction:  Let’s review what you’ll be learning in this section, and why it’s important.
  2. Higher-order vs. Lambdas:  Learn the difference between lambdas and Higher-order functions.
  3. Syntax:   Learn about the syntax needed to write lambdas.
  4. Challenge: Lambdas:  Practice using Lambdas, through a hands-on challenge.
  5. Generics:  Find out what generics are in regards to collections.
  6. Challenge: Generics:  Practice creating Generics on your own, through a hands-on challenge.
  7. Collection Methods:  Learn how to use lambdas with collection methods.
  8. Conclusion:  Let’s review everything you learned in this part of the course, and discuss what’s next.

Part 6: Classes

Learn about how to create your own classes and find out when you should subclass.

  1. Introduction:  Let’s review what you’ll be learning in this section, and why it’s important.
  2. Creation:  Create classes using both primary and secondary constructors.
  3. Initializers:   Learn how the init method is used in Kotlin.
  4. Challenge: Creation:  Practice creating classes and understanding when to use, through a hands-on challenge.
  5. Inheritance:  Learn about the concepts of inheritance, polymorphism, hierarchy checks, overrides, and super.
  6. When Should You Subclass?:  Learn when you should subclass, and when you shouldn’t.
  7. Data Classes:  Find out what data classes are and how to use them.
  8. Challenge: Data:  Practice creating your own data classes, through a hands-on challenge.
  9. Conclusion:  Let’s review everything you learned in this part of the course, and discuss what’s next.

Part 7: More on Classes

In part 7, dig deeper into classes in Kotlin and learn about singletons, interfaces, enums, and extensions.

  1. Introduction:  Let’s review what you’ll be learning in this section, and why it’s important.
  2. Open and Sealed Classes:  Learn to subclass a class and what the sealed keyword means.
  3. Singletons:  Learn how to create static classes.
  4. Challenge: Singletons:  Practice working with creating singleton classes and understanding when to use them, through a hands-on challenge.
  5. Companion:  Create static properties of classes using the companion keyword.
  6. Interfaces:  What’s the purpose of an interface? Find out in this video!
  7. Challenge: Interfaces:  Practice creating your own interface, through a hands-on challenge.
  8. Enums:  Learn what an enum is and how to use it.
  9. Challenge: Enums:  Practice creating your own Enums, through a hands-on challenge.
  10. Extensions:  Learn how to use Extensions to add abilities to existing classes.
  11. Conclusion:  Let’s review everything you learned in this part of the course, and discuss what’s next.

Part 8: Properties & Methods

In the final part of the course, master the use of properties and methods in Kotlin.

  1. Introduction: Let’s review what you’ll be learning in this section, and why it’s important.
  2. Getters/Setters: Learn about getters and setters, and why you don’t need to create them in most cases.
  3. Visibility: Discover the different method visibility modifiers and how they affect methods.
  4. This: Find out what `this` is and how to use it.
  5. LateInit: Find out how to initialize a property later with LateInit.
  6. Challenge: LateInit: Practice using LateInit in this hands-on challenge.
  7. Delegated Properties: Learn how delegated properties work.
  8. Challenge: Properties: Practice using properties, through a hands-on challenge.
  9. Conclusion: Let’s review everything you learned throughout the course, and find out where to go to learn more.

The Android Avalanche Bundle

If you like this course, from now until March 30th you can get it along with the rest of our new Android and Kotlin books, courses, and screencasts — at a big discount!

Our new Android Avalanche Bundle includes:

  • Android Apprentice ($54.99 value): Gives you access to our new Android Apprentice book, which teaches you how to build four complete Android apps from scratch. PDF/ePub format.
  • Kotlin Apprentice ($54.99 value): Gives you access to our new Kotlin Apprentice book, which gives you a deep dive into the Kotlin programming language itself. PDF/ePub format.
  • A raywenderlich.com subscription ($19.99 value): Gives you access to all 8 of our new Android video courses, our 2 new Android screencasts, and access to any new courses and screencasts we release in the future.

The bundle price of $99.99 includes the first month of your subscription, which will continue at $19.99/month thereafter. You can cancel at any time and keep the books. This bundle gives you more than 20% off everything in the Android Avalanche!

The Android Avalanche bundle is only available for the next two weeks, so be sure to order your copy while you can.

Already a subscriber? As a subscriber, you already have access to this new course as part of your subscription. You can also enjoy a $20 discount on the bundle that will get you both books added to your collection. It’s our way of thanking you for supporting what we do here at raywenderlich.com.

Where To Go From Here?

If you want to learn Android and Kotlin development — or level up your existing skills – there’s no better way to learn than these new books, courses, and screencasts.

And this is only the beginning! We’re committed to creating more new books, courses, and screencasts on Android development, with the goal of covering Android and Kotlin in the same way that we’ve covered iOS and Swift over the years.

We truly appreciate your support in making this possible. We’re excited about this new chapter at raywenderlich.com. So order your copy of the Android Avalanche Bundle today before the deal is over!

The post New Course: Programming in Kotlin appeared first on Ray Wenderlich.

New Course: Your Second Kotlin Android App

$
0
0

Your Second Kotlin Android App

It’s day 3 of the Android Avalanche: an event where we’ll be releasing new Android and Kotlin books, courses, and screencasts every day!

Today, we are releasing a brand new course: Your Second Kotlin Android App. After you’ve completed Your First Kotlin Android App and Programming in Kotlin, continue your Android development journey by creating another app. Not just any app, but a TODO list app.

You’ll build this app from the ground up and in this 39-video course by Brian Moakley. Take a look at what’s inside:

Part 1: Getting Started

In part one, learn about a recycler view, what they do, and how to incorporate it into your app.

  1. Introduction: A journey of a thousand android apps starts with the creation of your second one. Learn about the course objectives and what you will build.
  2. Creating a Project: This video will get you started on making your second app as well as explain some of the project creation features.
  3. Adding a Recycler View: When creating a lists, a good tool to use is RecyclerView. This video will get you started.
  4. Setting up a Recycler Adapter: Having a RecyclerView isn’t enough. You also need an adapter. Learn about adapters in this video.
  5. Challenge: Filling in the Blanks: With your adapter created, you just need to hook it up to the activity.
  6. Creating a View Holder: The adapter managers the data. The view holder handles the view. This video gives you an overview of the process.
  7. Challeng: Binding Data: With your RecyclerView in place, the only thing left to do is present the data which just happens to be your challenge.
  8. Conclusion: With your list setup, you’re just getting started. This video points you towards your next steps.

Part 2: Saving Data

In the second part, save your todo lists by way of shared preferences and how to read them back again.

  1. Introduction: Creating lists isn’t enough. You’ll ultimately need to save that data which is what this part covers.
  2. Adding a Dialog: To add items, you’ll need to create a dialog and thankfully, Android has a ton of them.
  3. Shared Preferences: Shared Preferences is a way that we save data. This video covers the basics of using it.
  4. Challenge: Instancing Your ListManager: You’ve created a ListManager class. You’re challenge is to create an instance of it.
  5. Hooking Up the Activity: Now that we have our shared preferences in place, it’s now time to hook them up with the main activity.
  6. Conclusion: With your data being saved, all you need to do is pass data between activities which is the topic of the next part.

Part 3: Communicating Between Activities

In part 3, create multiple activities and learn how to pass data between them.

  1. Introduction: Apps comes with a lot of different activities and in this part, you’ll learn how to pass data between them.
  2. Challenge: Creating Another Activity: Before you can pass data between activities, you’ll need to add a new activity.
  3. Intents: Intents are a fundamental part of working with Android.
  4. Parcels: Parcels are another way to pass data which is useful for packaging objects.
  5. Bringing Everything Together: With your preferences in place, all you need to do is integrate it with the rest of the app.
  6. Conclusion: This video reviews the topic covered in this part.

Part 4: Working with Fragments

In part 4, refactor your app into fragments and get it to work on a multiple screen sizes.

  1. Introduction: While your todo list is going on the phone, it’s looking terrible on tablet. You’ll fix this by way of fragments.
  2. Creating a Fragment: This video will walk you through the process of creating a new fragment.
  3. Integrating Fragments in Activities: This video will show you the process of replacing activity code with a fragment instead.
  4. Challenge: Setting Up a New Device: A great way to test your new layout is to create a new virtual device which is your challenge.
  5. Showing the Fragment: Now that you have the fragments created, all you need to do is use them.
  6. Challenge: Creating a New Fragment: Your challenge is to create a new fragment. Are you ready for it?
  7. Layouts for Larger Screens: Unfortunately, one layout doesn’t work for all devices. Thankfully, you can create others.
  8. Challenge: Setting up the RecyclerView: Now that you are exerienced with the RecyclerView, try creating one on your own.
  9. Completing the Detail List View: There’s a few items left to finish before your done.
  10. Adding List Items: You need a way to add todo items to your list and you’ll do this with your old friend, the floating action button.
  11. Return Data from Activities: Somtimes activities return data and in this video, you’ll learn how to do that.
  12. Conclusion: At last, you have a working app. What’s next? This video has you covered.

Part 5: Android Material Design

In the final part of the course, learn about Android Material Design and how to use it to improve your app.

  1. Introduction: Your app may be functional, but it doesn’t look good. This video lets you know why it’s important.
  2. Material Design: Thankfully, Android has materials to help you design your app.
  3. Primary and Secondary Colors: When working with apps, it’s useful to think in primary and secondary colors.
  4. Card Views: Cards are a visual tool to make your app pop. Learn about them here.
  5. Conclusion: The final video reviews what you accomplished and where to go next.

The Android Avalanche Bundle

If you like this course, from now until March 30th you can get it along with the rest of our new Android and Kotlin books, courses, and screencasts — at a big discount!

Our new Android Avalanche Bundle includes:

  • Android Apprentice ($54.99 value): Gives you access to our new Android Apprentice book, which teaches you how to build four complete Android apps from scratch. PDF/ePub format.
  • Kotlin Apprentice ($54.99 value): Gives you access to our new Kotlin Apprentice book, which gives you a deep dive into the Kotlin programming language itself. PDF/ePub format.
  • A raywenderlich.com subscription ($19.99 value): Gives you access to all 8 of our new Android video courses, our 2 new Android screencasts, and access to any new courses and screencasts we release in the future.

The bundle price of $99.99 includes the first month of your subscription, which will continue at $19.99/month thereafter. You can cancel at any time and keep the books. This bundle gives you more than 20% off everything in the Android Avalanche!

The Android Avalanche bundle is only available for the next two weeks, so be sure to order your copy while you can.

Already a subscriber? As a subscriber, you already have access to this new course as part of your subscription. You can also enjoy a $20 discount on the bundle that will get you both books added to your collection. It’s our way of thanking you for supporting what we do here at raywenderlich.com.

Where To Go From Here?

If you want to learn Android and Kotlin development — or level up your existing skills – there’s no better way to learn than these new books, courses, and screencasts.

And this is only the beginning! We’re committed to creating more new books, courses, and screencasts on Android development, with the goal of covering Android and Kotlin in the same way that we’ve covered iOS and Swift over the years.

We truly appreciate your support in making this possible. We’re excited about this new chapter at raywenderlich.com. So order your copy of the Android Avalanche Bundle today before the deal is over!

The post New Course: Your Second Kotlin Android App appeared first on Ray Wenderlich.

Flutter Navigation Tutorial

$
0
0

Flutter Navigation Tutorial

What’s better than an app with one screen? Why, an app with two screens, of course! :]

Navigation is a key part of the UX for any mobile application. Due to the limited screen real estate on mobile devices, users will constantly be navigating between different screens, for example, from a list to a detail screen, from a shopping cart to a checkout screen, from a menu into a form, and many other cases. Good navigation helps your users find their way around and get a sense of the breadth of your app.

The iOS navigation experience is often built-around a UINavigationController, which uses a stack-based approach to shifting between screens. On Android, the Activity stack is the central means to shift a user between different screens. Unique transitions between screens in these stacks can help give your app a unique feel.

Just like the native SDKs, cross-platform development frameworks must provide a means for your app to switch between screens. In most cases, you’ll want the navigation approach to be consistent with what the users of each platform have come to expect.

Flutter is a cross-platform development SDK from Google that allows you to quickly create apps that target both iOS and Android from a single code base. If you’re new to Flutter, please checkout our Getting Started with Flutter tutorial to see the basics of working with Flutter.

In this tutorial, you’ll see how Flutter implements navigation between the different screens of a cross-platform app, by learning about:

  • Routes and navigation
  • Popping off the stack
  • Returning a value from a route
  • Custom navigation transitions

Getting Started

You can download the starter project for this tutorial from the materials link at the top or bottom of the page.

This tutorial will be using VS Code with the Flutter extension installed. You can also use IntelliJ IDEA or Android Studio, or work with a text editor of your choice with Flutter at the command line.

Open the starter project in VS Code by choosing File > Open and finding the root folder of the starter project zip file:

Open starter project

You’ll be prompted by VS Code to fetch the packages needed for the project, so go ahead and do so:

Fetch packages

Once the project is open in VS Code, hit F5 to build and run the starter project. If VS Code prompts you to choose an environment to run the app in, choose “Dart & Flutter”:

Choose environment

Here is the project running in the iOS Simulator:

Starter on iOS

And here it is running on an Android emulator:

Starter on Android

The “slow mode” banner you see is due to the fact that you’re running a debug build of the app.

The starter app shows the list of members in a GitHub organization. In this tutorial, we’ll navigate from this first screen to a new screen for each member.

Second Screen

We first need to create a screen to navigate to for each member. Elements of a Flutter UI take the form of UI widgets, so we’ll create a member widget.

First, right-click on the lib folder in the project, choose New File, and create a new file named memberwidget.dart:

New File

Add import statements and a StatefulWidget subclass named MemberWidget to the new file:

import 'package:flutter/material.dart';

import 'member.dart';


class MemberWidget extends StatefulWidget {
  final Member member;

  MemberWidget(this.member)  {
    if (member == null) {
      throw new ArgumentError("member of MemberWidget cannot be null. "
          "Received: '$member'");
    }
  }

  @override
  createState() => new MemberState(member);
}

A MemberWidget uses a MemberState class for its state, and passes along a Member object to the MemberState. You’ve made sure that the member argument is not-null in the widget constructor.

Add the MemberState class above MemberWidget in the same file:

class MemberState extends State<MemberWidget> {
  final Member member;

  MemberState(this.member);
}

Here, you’ve given MemberState a Member property and a constructor.

Each widget must override the build() method, so add the override to MemberState now:

@override
Widget build(BuildContext context) {
  return new Scaffold (
    appBar: new AppBar(
      title: new Text(member.login),
    ),
    body: new Padding(
      padding: new EdgeInsets.all(16.0),
      child: new Image.network(member.avatarUrl)
    )
  );
}

You’re creating a Scaffold, a material design container, which holds an AppBar and a Padding widget with a child Image for the member avatar.

With the member screen all setup, you now have somewhere to navigate to! :]

Routes

Navigation in Flutter is centered upon the idea of routes.

Routes are similar in concept to the routes that would be used in a REST API, where each route is relative to some root. The widget created by the main() method in you app acts like the root.

One way to use routes is with the PageRoute class. Since you’re working with a Flutter MaterialApp, you’ll use the MaterialPageRoute subclass.

Add an import to the top of GHFlutterState to pull in the member widget:

import 'memberwidget.dart';

Next add a private method _pushMember() to GHFlutterState in the file ghflutterwidget.dart:

_pushMember(Member member) {
  Navigator.of(context).push(
    new MaterialPageRoute(
      builder: (context) => new MemberWidget(member)
    )
  );
}

You’re using Navigator to push a new MaterialPageRoute onto the stack, and the MaterialPageRoute is built using your new MemberWidget.

Now you need to call _pushMember() when a user taps on a row in the list of members. You can do so by updating the _buildRow() method in GHFlutterState and adding an onTap attribute to the ListTile:

Widget _buildRow(int i) {
  return new Padding(
    padding: const EdgeInsets.all(16.0),
    child: new ListTile(
      title: new Text("${_members[i].login}", style: _biggerFont),
      leading: new CircleAvatar(
          backgroundColor: Colors.green,
          backgroundImage: new NetworkImage(_members[i].avatarUrl)
      ),
      // Add onTap here:
      onTap: () { _pushMember(_members[i]); },
    )
  );
}

When a row is tapped, your new method _pushMember() is called with the member that was tapped.

Hit F5 to build and run the app. Tap a member row and you should see the member detail screen come up:

Member screen Android

And here’s the member screen running on iOS:

Member screen iOS

Notice that the back button on Android has the Android style and the back button on iOS has the iOS style, and also that the transition style when switching to the new screen matches the platform transition style.

Tapping the back button takes you back to the member list, but what if you want to manually trigger going back from your own button in the app?

Take me back

Popping the stack

Since navigation in the Flutter app is working like a stack, and you’ve pushed a new screen widget onto the stack, you’ll pop from the stack in order to go back.

Add an IconButton to MemberState by updating its build() override to add a Column widget in place of just the Image:

@override
Widget build(BuildContext context) {
  return new Scaffold (
    appBar: new AppBar(
      title: new Text(member.login),
    ),
    body: new Padding(
      padding: new EdgeInsets.all(16.0),
      // Add Column here:
      child: new Column(
        children: [
          new Image.network(member.avatarUrl),
          new IconButton(
            icon: new Icon(Icons.arrow_back, color: Colors.green, size: 48.0),
            onPressed: () { Navigator.pop(context); }
            ),
        ]),
    )
  );
}

You’ve added the Column in order to layout the Image and an IconButton vertically. For the IconButton, you’ve set its onPressed value to call Navigator and pop the stack.

Build and run the app using F5, and you’ll be able to go back to the member list by tapping your new back arrow:

Popping the stack

Returning a value

Routes can return values, similar to results obtained in Android using onActivityResult().

To see a simple example, add the following private async method to MemberState:

_showOKScreen(BuildContext context) async {
  // 1, 2
  bool value = await Navigator.of(context).push(new MaterialPageRoute<bool>(
    builder: (BuildContext context) {
      return new Padding(
        padding: const EdgeInsets.all(32.0),
        // 3
        child: new Column(
        children: [
          new GestureDetector(
            child: new Text('OK'),
            // 4, 5
            onTap: () { Navigator.of(context).pop(true); }
          ),
          new GestureDetector(
            child: new Text('NOT OK'),
            // 4, 5
            onTap: () { Navigator.of(context).pop(false); }
          )
        ])
      );
    }
  ));
  // 6
  var alert = new AlertDialog(
    content: new Text((value != null && value) ? "OK was pressed" : "NOT OK or BACK was pressed"),
    actions: <Widget>[
      new FlatButton(
        child: new Text('OK'),
        // 7
        onPressed: () { Navigator.of(context).pop(); }
        )
    ],
  );
  // 8
  showDialog(context: context, child: alert);
}

Here is what’s going on in this method:

  1. You push a new MaterialPageRoute onto the stack, this time with a type parameter of bool.
  2. You use await when pushing the new route, which waits until the route is popped.
  3. The route you push onto the stack has a Column that shows two text widgets with gesture detectors.
  4. Tapping on the text widgets causes calls to Navigator to pop the new route off the stack.
  5. In the calls to pop(), you pass a return value of true if the user tapped the “OK” text on the screen, and false if the user tapped “NOT OK”. If the user presses the back button instead, the value returned is null.
  6. You then create an AlertDialog to show the result returned from the route.
  7. Note that the AlertDialog itself must be popped off the stack.
  8. You call showDialog() to show the alert.

The primary points to note in the above are the bool type parameter in MaterialPageRoute<bool>, which you would replace with any other type you want coming back from the route, and the fact that you pass the result back in the call to pop, for example, Navigator.of(context).pop(true).

Update build() in MemberState to have a RaisedButton that calls _showOKScreen():

@override
Widget build(BuildContext context) {
  return new Scaffold (
    appBar: new AppBar(
      title: new Text(member.login),
    ),
    body: new Padding(
      padding: new EdgeInsets.all(16.0),
      child: new Column(
        children: [
          new Image.network(member.avatarUrl),
          new IconButton(
            icon: new Icon(Icons.arrow_back, color: Colors.green, size: 48.0),
            onPressed: () { Navigator.pop(context); }
            ),
          // Add RaisedButton here:
          new RaisedButton(
            child: new Text('PRESS ME'),
            onPressed: () { _showOKScreen(context); }
            )
        ]),
    )
  );
}

The RaisedButton you’ve added shows the new screen.

Hit F5 to build and run the app, tap the “PRESS ME” button, and then tap either “OK”, “NOT OK”, or the back button. You’ll get a result back from the new screen showing which of the results the user tapped:

Route result

Custom Transitions

In order to give the navigation of your app a unique feel, you can create a custom transition. You can either extends classes such as PageRoute, or use a class like PageRouteBuilder that defines custom routes with callbacks.

Replace _pushMember in GHFlutterState so that it pushes a new PageRouteBuilder onto the stack:

_pushMember(Member member) {
  // 1
  Navigator.of(context).push(new PageRouteBuilder(
    opaque: true,
    // 2
    transitionDuration: const Duration(milliseconds: 1000),
    // 3
    pageBuilder: (BuildContext context, _, __) {
      return new MemberWidget(member);
    },
    // 4
    transitionsBuilder: (_, Animation<double> animation, __, Widget child) {
      return new FadeTransition(
        opacity: animation,
        child: new RotationTransition(
          turns: new Tween<double>(begin: 0.0, end: 1.0).animate(animation),
          child: child,
        ),
      );
    }
  ));
}

Here you:

  1. Push a new PageRouteBuilder onto the stack.
  2. Specify the duration using transitionDuration.
  3. Create the MemberWidget screen using pageBuilder.
  4. Use the transitionsBuilder attribute to create fade and rotation transitions when showing the new route.

Hit F5 to build and run the app, and see your new transition in action:

Custom transition

Wow! That’s making me a little dizzy! :]

Where to go from here?

You can download the completed project using the download button at the top or bottom of this tutorial.

You can learn more about Flutter navigation by visiting:

As you’re reading the docs, check out in particular how to make named routes, which you call on Navigator using pushNamed().

Stay tuned for more Flutter tutorials and screencasts!

Feel free to share your feedback, findings or ask any questions in the comments below or in the forums. I hoped you enjoyed learning about navigation with Flutter!

The post Flutter Navigation Tutorial appeared first on Ray Wenderlich.

Viewing all 4395 articles
Browse latest View live


<script src="https://jsc.adskeeper.com/r/s/rssing.com.1596347.js" async> </script>