Quantcast
Channel: Kodeco | High quality programming tutorials: iOS, Android, Swift, Kotlin, Unity, and more
Viewing all 4373 articles
Browse latest View live

GameplayKit Tutorial: Entity-Component System, Agents, Goals, and Behaviors

$
0
0

Update 03/17/17: This tutorial has been updated for Xcode 8.2.1 and Swift 3. Original tutorial by Ray Wenderlich.

GameplayKit is an awesome framework introduced in iOS 9 that makes implementing many common tasks in your game much easier.

GameplayKit is a collection of tools that can help you with features like pathfinding, randomization, state machines, rule systems, and more.

In this GameplayKit tutorial, you’re going to focus on two parts of GameplayKit: its Entity-Component system, and Agents, Goals, and Behaviors.

These parts of GameplayKit help you organize your code in a different way that allows for more clean organization and code reuse, especially as your games become larger and more complex.

Let’s dive in!

Getting Started

In this GameplayKit tutorial, you will be working on a simple game called MonsterWars. Download the starter project, open it in Xcode, and build and run to check it out. You’ll see something like the following:

000_Starter

Right now, this game is just a shell with the UI elements added, but no gameplay. Here’s how the game will work:

  • You’ll get money every so often, which you can see in the upper left. You can use it to buy units by tapping the buttons at the bottom.
  • There are three enemy types: Quirk (fast and cheap), Zap (ranged attackers), and Munch (slow but has AOE chomp).
  • If your units destroy the enemy’s castle, you win!

Take a look at the code to see what’s there. Once you feel comfortable, read on to learn more about the main subject of this GameplayKit tutorial: its Entity-Component system.

What is an Entity-Component System?

Quite simply, an entity-component system is an architectural approach that enables your games to grow in size and complexity without increasing the interdependencies in your code.

This works by having 2 types of modular pieces:

  • Entities: An entity is a representation of an object in your game. The player, an enemy or a castle are good examples of entities. Since an entity is basically an object, you make this object perform interesting actions by applying components to it.
  • Components: A component contains the logic that performs a specific job on one entity, such as modifying its appearance or shooting a rocket. You make small components for each type of action your entities can do. For example, you might make a movement component, a health component, a melee attack component, and so on.

One of the best benefits of this system is that you can reuse components on as many entities as you want, allowing you to keep your code clean and organized.

Note: If you’re still itching for more on the theory side, check out this old tutorial Ray wrote several years ago where he rolled an entity-component system from scratch and compared it to a few other approaches.

Your First Component

To get started, let’s create a component to represent a sprite on the screen. In GameplayKit you create components by subclassing GKComponent.

To do this, select your MonsterWars group in the project navigator, right-click, select New Group, and name the group Components.

Then right-click the Components group, select New File.., select the iOS/Source/Swift File template, and click Next. Name the new file SpriteComponent and click Create.

At this point, your project navigator should look like this:

001_First_Component

Open SpriteComponent.swift and replace the contents with the following:

// 1
import SpriteKit
import GameplayKit
 
// 2
class SpriteComponent: GKComponent {
 
  // 3
  let node: SKSpriteNode
 
  // 4
  init(texture: SKTexture) {
    node = SKSpriteNode(texture: texture, color: .white, size: texture.size())
    super.init()
  }
 
  // 5
  required init?(coder aDecoder: NSCoder) {
    fatalError("init(coder:) has not been implemented")
  }
}

In this code you:

  1. Imported SpriteKit along with GameplayKit so you could access these frameworks.
  2. Created a component class named SpriteComponent by subclassing GKComponent.
  3. Declared a property named node to hold the sprite on this component.
  4. Implemented a basic initializer that creates a sprite node from a texture passed in and assigns it to the node property.
  5. Added this required method to achieve compliance with the GKComponent class. For now, don’t worry about the fact that it’s not being implemented.

Your First Entity

In GameplayKit, GKEntity is the class that represents an entity. You make entities do stuff by adding components to it, like the one you just created.

It’s often helpful to create a subclass of GKEntity for each type of object that you add to the game. In this game for example, there are five types of objects: castles, quirk monsters, zap monsters, munch monsters, and lasers.

Your GKEntity subclass should be very simple. Usually it’s just an initializer that adds the components you need for that type of object.

Let’s create an entity for the castles. To do this, right-click the MonsterWars group in the project navigator, click New Group and name the group Entities.

Then right-click the Entities group, select New File.., select the iOS/Source/Swift File template, and click Next. Name the new file Castle and click Create.

At this point, your project navigator should look like this:

002_First_Entity

Open Castle.swift and replace the contents with the following:

import SpriteKit
import GameplayKit
 
// 1
class Castle: GKEntity {
 
  init(imageName: String) {
    super.init()
 
    // 2
    let spriteComponent = SpriteComponent(texture: SKTexture(imageNamed: imageName))
    addComponent(spriteComponent)
  }
 
  required init?(coder aDecoder: NSCoder) {
    fatalError("init(coder:) has not been implemented")
  }
}

There are just two things to point out here:

  1. As I mentioned earlier, it’s often convenient to subclass GKEntity for each type of object in your game. The alternative is to create a base GKEntity and dynamically add the types of components you need; but often you want to have a “cookie cutter” for a particular type of object. That is what this is!
  2. At this point, you add just one component to the entity – the sprite component you created earlier.

Now that you’ve created a component and an entity, you’re almost ready to add it into the game.

The Entity Manager

In this section, you’re going to create a helper class to manage the entities you add to your game. It will keep a list of all the entities in the game, and have some helper methods for things like adding and removing entities.

Right-click your Entities group, select New File.., select the iOS/Source/Swift File template, and click Next. Name the new file EntityManager and click Create.

Open EntityManager.swift and replace the contents with the following:

import Foundation
import SpriteKit
import GameplayKit
 
class EntityManager {
 
  // 1
  var entities = Set<GKEntity>()
  let scene: SKScene
 
  // 2
  init(scene: SKScene) {
    self.scene = scene
  }
 
  // 3
  func add(_ entity: GKEntity) {
    entities.insert(entity)
 
    if let spriteNode = entity.component(ofType: SpriteComponent.self)?.node {
      scene.addChild(spriteNode)
    }
  }
 
  // 4
  func remove(_ entity: GKEntity) {
    if let spriteNode = entity.component(ofType: SpriteComponent.self)?.node {
      spriteNode.removeFromParent()
    }
 
    entities.remove(entity)
  }
}

Let’s review this section by section:

  1. This class will keep a reference to all entities in the game, along with the scene.
  2. This is a simple initializer that stores the scene in the scene property.
  3. This helper function handles adding entities to your game. It adds them to the list of entities, then checks to see if the entity has a SpriteComponent. If it does, it adds the sprite’s node to the scene.
  4. This helper function that you will call when you want to remove an entity from your game. This does the opposite of the add(_:) method; if the entity has a SpriteComponent, it removes the node from the scene, and it also removes the entity from the list of entities.

You’ll be adding more methods to this helper class in the future, but this is a good start for now. First let’s get something showing up on the screen!

Adding Your Castles

Open GameScene.swift and add this property to the bottom of your list of properties:

var entityManager: EntityManager!

This is to store an instance of the helper class you just created.

Next add this code to the bottom of didMove(to:):

// 1
entityManager = EntityManager(scene: self)
 
// 2
let humanCastle = Castle(imageName: "castle1_atk")
if let spriteComponent = humanCastle.component(ofType: SpriteComponent.self) {
  spriteComponent.node.position = CGPoint(x: spriteComponent.node.size.width/2, y: size.height/2)
}
entityManager.add(humanCastle)
 
// 3
let aiCastle = Castle(imageName: "castle2_atk")
if let spriteComponent = aiCastle.component(ofType: SpriteComponent.self) {
  spriteComponent.node.position = CGPoint(x: size.width - spriteComponent.node.size.width/2, y: size.height/2)
}
entityManager.add(aiCastle)

Let’s review this section by section:

  1. Creates an instance of the EntityManager helper class you created in the previous section.
  2. Creates an instance of the Castle entity you created earlier to represent the human player. After creating the castle it retrieves the sprite component and positions it on the left hand side of the screen. Finally, it adds it to the entity manager.
  3. Similar code to set up the AI player’s castle.

That’s it! Build and run and you’ll see your castles in the game:

003_Castles

Your Second Component

When you develop games with an entity-component system, all the data you need for your game objects must be stored in some kind of component.

One data point you’ll need to keep track of for this game is which team an object belongs to – team 1 or team 2. Since that information doesn’t belong on your sprite component, you might want to have an entity that doesn’t belong to either team. Let’s create a new component for that.

Right-click your Components group, select New File.., select the iOS/Source/Swift File template, and click Next. Name the new file TeamComponent and click Create.

Open TeamComponent.swift and replace the contents with the following:

import SpriteKit
import GameplayKit
 
// 1
enum Team: Int {
  case team1 = 1
  case team2 = 2
 
  static let allValues = [team1, team2]
 
  func oppositeTeam() -> Team {
    switch self {
    case .team1:
      return .team2
    case .team2:
      return .team1
    }
  }
}
 
// 2
class TeamComponent: GKComponent {
  let team: Team
 
  init(team: Team) {
    self.team = team
    super.init()
  }
 
  required init?(coder aDecoder: NSCoder) {
    fatalError("init(coder:) has not been implemented")
  }
}

This is a fairly simple file, so I’ll just point out two things:

  1. This is an enumeration to keep track of the two teams in this game – team 1 and team 2. It also has a helper method to return the opposite team, which will come in handy later.
  2. This is a very simple component that simply keeps track of the team for this entity.

Now that you have this new component, let’s update your castle entity to use it. Open Castle.swift and modify the initializer to take the team as a parameter:

init(imageName: String, team: Team) {

Then add this line to the bottom of init(imageName:team:):

addComponent(TeamComponent(team: team))

This adds your new component to the castle entity. Finally, open GameScene.swift and replace the line that initializes humanCastle with the following:

let humanCastle = Castle(imageName: "castle1_atk", team: .team1)

Similarly, replace the line that initializes aiCastle with the following:

let aiCastle = Castle(imageName: "castle2_atk", team: .team2)

Build and run the game. You shouldn’t notice any changes, but you have now successfully associated a new set of data to your entity which will come in handy later.

Teaming up is essential in a war

Your Third Component

Another piece of data you need to keep track of is each player’s current coins. In this game, since there’s a single castle on each side, you’ll think of the castle as the “commander” for each player. so the castle will be a good place to store this information.

Right-click your Components group, select New File.., select the iOS/Source/Swift File template, and click Next. Name the new file CastleComponent and click Create.

Open CastleComponent.swift and replace the contents with the following:

import SpriteKit
import GameplayKit
 
class CastleComponent: GKComponent {
 
  // 1
  var coins = 0
  var lastCoinDrop = TimeInterval(0)
 
  override init() {
    super.init()
  }
 
  required init?(coder aDecoder: NSCoder) {
    fatalError("init(coder:) has not been implemented")
  }
 
  // 2
  override func update(deltaTime seconds: TimeInterval) {
    super.update(deltaTime: seconds)
 
  // 3
    let coinDropInterval = TimeInterval(0.5)
    let coinsPerInterval = 10
    if (CACurrentMediaTime() - lastCoinDrop > coinDropInterval) {
      lastCoinDrop = CACurrentMediaTime()
      coins += coinsPerInterval
    }
  }
}

This component is a little different than the others, so let’s review this in more detail.

  1. These 2 properties store the number of coins in the castle and the last time coins were earned.
  2. SpriteKit calls update(deltaTime:) on each frame of the game. Note that SpriteKit does not call this method automatically; there’s a little bit of setup to get this to happen, which you’ll do shortly.
  3. This code spawns coins periodically.

Switch to Castle.swift and add this to the bottom of init(imageName:team:):

addComponent(CastleComponent())

Next, you need to add the code I mentioned earlier to get your updateWithDeltaTime(_:) method to be called. To do this, switch to EntityManager.swift and add this new property to the top of the class:

lazy var componentSystems: [GKComponentSystem] = {
  let castleSystem = GKComponentSystem(componentClass: CastleComponent.self)
  return [castleSystem]
}()

Think of GKComponentSystem as a class that stores a collection of components. Here, you create a GKComponentSystem to keep track of all of the CastleComponent instances in your game.

You then put the GKComponentSystem that stores components into an array. Right now it’s the only object in the array, but you’ll be adding more to this later.

Add this to the end of add(_:):

for componentSystem in componentSystems {
  componentSystem.addComponent(foundIn: entity)
}

Here whenever you add a new entity, you add it to each of the component systems in your array (right now, it only contains the castle component system). Don’t worry – if your entity does not contain a castle component, nothing will happen.

Add this line to the property declarations:

var toRemove = Set<GKEntity>()

Then add this to the end of remove(_:):

toRemove.insert(entity)

Note that instead of removing the entity directly from the component system, you add it to a toRemove set, so you can remove it later. This is going to make it easier in the next step to remove an entity while you are enumerating the objects in a component system, since Swift does not let you modify a collection while you are iterating through it.

Add this new method to the bottom of the class:

func update(_ deltaTime: CFTimeInterval) {
  // 1
  for componentSystem in componentSystems {
    componentSystem.update(deltaTime: deltaTime)
  }
 
  // 2
  for currentRemove in toRemove {
    for componentSystem in componentSystems {
      componentSystem.removeComponent(foundIn: currentRemove)
    }
  }
  toRemove.removeAll()
}

Let’s review this section by section:

  1. Here you loop through all the component systems in the array and call update(deltaTime:) on each one. This causes each component system to call update(deltaTime:) on each component in their system in turn.

    This actually demonstrates the whole purpose and benefit of using GKComponentSystem. The way this is set up, components are updated one system at a time. In games, it’s often convenient to have precise control over the ordering of the processing of each system (physics, rendering, etc).

  2. Here’s where you loop through anything in the toRemove array and remove those entities from the component systems.

There’s one last helper method to add to this file. Add this method to the bottom of the class:

func castle(for team: Team) -> GKEntity? {
  for entity in entities {
    if let teamComponent = entity.component(ofType: TeamComponent.self),
      let _ = entity.component(ofType: CastleComponent.self) {
      if teamComponent.team == team {
        return entity
      }
    }
  }
  return nil
}

Basically, this is a handy method to get the castle for a particular team. In here you loop through all of the entities in the game and check to see any entities that have both a TeamComponent and a CastleComponent – which should be the two castles in the game. You then check to see if the team matches the passed in parameter and return that.

Note: An alternative way of doing this is to just keep a reference to the castle entity when you make it. But the advantage of looking up things dynamically like this is that your game is more flexible. Although you probably don’t need the flexibility in this case, I wanted to show this to you because in many games this flexibility is quite handy. The main benefit of the entity-component system architecture is flexibility in the first place.

Let’s hook this up to the game scene now. Open GameScene.swift, scroll down to the bottom of the file and add this code to the bottom of the update(_:) method:

let deltaTime = currentTime - lastUpdateTimeInterval
lastUpdateTimeInterval = currentTime
 
entityManager.update(deltaTime)
 
if let human = entityManager.castle(for: .team1),
  let humanCastle = human.component(ofType: CastleComponent.self) {
  coin1Label.text = "\(humanCastle.coins)"
}
if let ai = entityManager.castle(for: .team2),
  let aiCastle = ai.component(ofType: CastleComponent.self) {
  coin2Label.text = "\(aiCastle.coins)"
}

Here you call the update(_:) method on the entity manager. Then you find the castle (and castle component) for each team, and update the labels with the current coin values for each castle.

Build and run, and see the money begin to roll in!

004_Money

Spawning The Monsters

This game is ready for some monsters! Let’s modify the game so you can spawn Quirk monsters.

Right-click your Entities group, select New File.., select the iOS/Source/Swift File template, and click Next. Name the new file Quirk and click Create.

Open Quirk.swift and replace the contents with the following:

import SpriteKit
import GameplayKit
 
class Quirk: GKEntity {
 
  init(team: Team) {
    super.init()
    let texture = SKTexture(imageNamed: "quirk\(team.rawValue)")
    let spriteComponent = SpriteComponent(texture: texture)
    addComponent(spriteComponent)
    addComponent(TeamComponent(team: team))
  }
 
  required init?(coder aDecoder: NSCoder) {
    fatalError("init(coder:) has not been implemented")
  }
}

This is very similar to how you set up the castle entity. Here you set the texture according to the team and add the sprite component to the entity. Additionally you also add a team component to complete all this entity needs.

Now it’s time to create an instance of the Quirk entity. Last time, you created the Castle entity directly in GameScene, but this time you’ll move the code to spawn a quirk monster into EntityManager.

To do this, switch to EntityManager.swift and add this method to the bottom of the class:

func spawnQuirk(team: Team) {
  // 1
  guard let teamEntity = castle(for: team),
    let teamCastleComponent = teamEntity.component(ofType: CastleComponent.self),
    let teamSpriteComponent = teamEntity.component(ofType: SpriteComponent.self) else {
      return
  }
 
  // 2
  if teamCastleComponent.coins < costQuirk {
    return
  }
  teamCastleComponent.coins -= costQuirk
  scene.run(SoundManager.sharedInstance.soundSpawn)
 
  // 3
  let monster = Quirk(team: team)
  if let spriteComponent = monster.component(ofType: SpriteComponent.self) {
    spriteComponent.node.position = CGPoint(x: teamSpriteComponent.node.position.x, y: CGFloat.random(min: scene.size.height * 0.25, max: scene.size.height * 0.75))
    spriteComponent.node.zPosition = 2
  }
  add(monster)
}

Let’s review this section by section:

  1. Monsters should be spawned near their team’s castle. To do this, you need the position of the castle’s sprite, so this is some code to look up that information in a dynamic way.
  2. This checks to see if there are enough coins to spawn the monster, and if so subtracts the appropriate coins and plays a sound.
  3. This is the code to create a Quirk entity and position it near the castle (at a random y-value).

Finally, switch to GameScene.swift and add this to the end of quirkPressed():

entityManager.spawnQuirk(team: .team1)

Build and run. You can now tap the Quirk button to spawn some monsters!

005_Quirks

Agents, Goals, and Behaviors

So far, the quirk monsters are just sitting right there doing nothing. This game needs movement!

Luckily, GameplayKit comes with a set of classes collectively known as “agents, goals, and behaviors” that makes moving objects in your game in complex ways super easy. Here’s how it works:

  • GKAgent2D is a subclass of GKComponent that handles moving objects in your game. You can set different properties on it like max speed, acceleration, and so on, and the GKBehavior to use.
  • GKBehavior is a class that contains a set of GKGoals, representing how you would like your objects to move.
  • GKGoal represents a movement goal you might have for your agents – for example to move toward another agent.

So basically, you configure these objects and add the GKAgent component to your class, and GameplayKit will move everything for you from there!

Note: There is one caveat: GKAgent2D doesn’t move your sprites directly, it just updates its own position appropriately. You need to write a bit of glue code to match up the sprite position with the GKAgent position.

Let’s start by creating the behavior and goals. Right-click your Components group, select New File.., select the iOS/Source/Swift File template, and click Next. Name the new file MoveBehavior and click Create.

Open MoveBehavior.swift and replace the contents with the following:

import GameplayKit
import SpriteKit
 
// 1
class MoveBehavior: GKBehavior {
 
  init(targetSpeed: Float, seek: GKAgent, avoid: [GKAgent]) {
    super.init()
    // 2
    if targetSpeed > 0 {
      // 3
      setWeight(0.1, for: GKGoal(toReachTargetSpeed: targetSpeed))
      // 4
      setWeight(0.5, for: GKGoal(toSeekAgent: seek))
      // 5
      setWeight(1.0, for: GKGoal(toAvoid: avoid, maxPredictionTime: 1.0))
    }
  }
}

There’s a lot of new stuff here, so let’s review this section by section:

  1. You create a GKBehavior subclass here so you can easily configure a set of movement goals.
  2. If the speed is less than 0, don’t set any goals as the agent should not move.
  3. To add a goal to your behavior, you use the setWeight(_:for:) method. This allows you to specify a goal, along with a weight of how important it is – larger weight values take priority. In this instance, you set a low priority goal for the agent to reach the target speed.
  4. Here you set a medium priority goal for the agent to move toward another agent. You will use this to make your monsters move toward the closest enemy.
  5. Here you set a high priority goal to avoid colliding with a group of other agents. You will use this to make your monsters stay away from their allies so they are nicely spread out.

Now that you’ve created your behavior and goals, you can set up your agent. Right-click your Components group, select New File.., select the iOS/Source/Swift File template, and click Next. Name the new file MoveComponent and click Create.

Open MoveComponent.swift and replace the contents with the following:

import SpriteKit
import GameplayKit
 
// 1
class MoveComponent: GKAgent2D, GKAgentDelegate {
 
  // 2
  let entityManager: EntityManager
 
  // 3
  init(maxSpeed: Float, maxAcceleration: Float, radius: Float, entityManager: EntityManager) {
    self.entityManager = entityManager
    super.init()
    delegate = self
    self.maxSpeed = maxSpeed
    self.maxAcceleration = maxAcceleration
    self.radius = radius
    print(self.mass)
    self.mass = 0.01
  }
 
  required init?(coder aDecoder: NSCoder) {
    fatalError("init(coder:) has not been implemented")
  }
 
  // 4
  func agentWillUpdate(_ agent: GKAgent) {
    guard let spriteComponent = entity?.component(ofType: SpriteComponent.self) else {
      return
    }
 
    position = float2(spriteComponent.node.position)
  }
 
  // 5
  func agentDidUpdate(_ agent: GKAgent) {
    guard let spriteComponent = entity?.component(ofType: SpriteComponent.self) else {
      return
    }
 
    spriteComponent.node.position = CGPoint(position)
  }
}

There’s lots of new stuff here as well, so let’s review this section by section:

  1. Remember that GKAgent2D is a subclass of GKComponent. You subclass it here so customize its functionality. Also, you implement GKAgentDelegate – this is how you’ll match up the position of the sprite with the agent’s position.
  2. You’ll need a reference to the entityManger so you can access the other entities in the game. For example, you need to know about your closest enemy (so you can seek to it) and your full list of allies (so you can spread apart from them).
  3. GKAgent2D has various properties like max speed, acceleration, and so on. Here you configure them based on passed in parameters. You also set this class as its own delegate, and make the mass very small so objects respond to direction changes more easily.
  4. Before the agent updates its position, you set the position of the agent to the sprite component’s position. This is so that agents will be positioned in the correct spot to start. Note there’s some funky conversions going on here – GameplayKit uses float2 instead of CGPoint, gah!
  5. Similarly, after the agent updates its position agentDidUpdate(_:) is called. You set the sprite’s position to match the agent’s position.

You still have a bit more to do in this file, but first you need to add some helper methods. Start by opening EntityManager.swift and add these new methods:

func entities(for team: Team) -> [GKEntity] {
  return entities.flatMap{ entity in
    if let teamComponent = entity.component(ofType: TeamComponent.self) {
      if teamComponent.team == team {
        return entity
      }
    }
    return nil
  }
}
 
func moveComponents(for team: Team) -> [MoveComponent] {
  let entitiesToMove = entities(for: team)
  var moveComponents = [MoveComponent]()
  for entity in entitiesToMove {
    if let moveComponent = entity.component(ofType: MoveComponent.self) {
      moveComponents.append(moveComponent)
    }
  }
  return moveComponents
}

entities(for:) returns all entities for a particular team, and moveComponents(for:) returns all move components for a particular team. You’ll need these shortly.

Switch back to MoveComponent.swift and add this new method:

func closestMoveComponent(for team: Team) -> GKAgent2D? {
 
  var closestMoveComponent: MoveComponent? = nil
  var closestDistance = CGFloat(0)
 
  let enemyMoveComponents = entityManager.moveComponents(for: team)
  for enemyMoveComponent in enemyMoveComponents {
    let distance = (CGPoint(enemyMoveComponent.position) - CGPoint(position)).length()
    if closestMoveComponent == nil || distance < closestDistance {
      closestMoveComponent = enemyMoveComponent
      closestDistance = distance
    }
  }
  return closestMoveComponent
 
}

This is some code to find the closest move component on a particular team from the current move component. You will use this to find the closest enemy now.

Add this new method to the bottom of the class:

override func update(deltaTime seconds: TimeInterval) {
  super.update(deltaTime: seconds)
 
  // 1
  guard let entity = entity,
    let teamComponent = entity.component(ofType: TeamComponent.self) else {
      return
  }
 
  // 2
  guard let enemyMoveComponent = closestMoveComponent(for: teamComponent.team.oppositeTeam()) else {
    return
  }
 
  // 3
  let alliedMoveComponents = entityManager.moveComponents(for: teamComponent.team)
 
  // 4
  behavior = MoveBehavior(targetSpeed: maxSpeed, seek: enemyMoveComponent, avoid: alliedMoveComponents)
}

This is the update loop that puts it all together.

  1. Here you find the team component for the current entity.
  2. Here you use the helper method you wrote to find the closest enemy.
  3. Here you use the helper method you wrote to find all your allies move components.
  4. Finally, you reset the behavior with the updated values.

Almost done; just a few cleanup items to do. Open EntityManager.swift and update the line that sets up the componentSystems property as follows:

lazy var componentSystems: [GKComponentSystem] = {
  let castleSystem = GKComponentSystem(componentClass: CastleComponent.self)
  let moveSystem = GKComponentSystem(componentClass: MoveComponent.self)
  return [castleSystem, moveSystem]
}()

Remember, this is necessary so that your update(_:) method gets called on your new MoveComponent.

Next open Quirk.swift and modify your initializer to take the entityManager as a parameter:

init(team: Team, entityManager: EntityManager) {

Then add this to the bottom of init(team:entityManager:):

addComponent(MoveComponent(maxSpeed: 150, maxAcceleration: 5, radius: Float(texture.size().width * 0.3), entityManager: entityManager))

This creates your move component with some values that work well for the quick Quirk monster.

You need a move component for the castle too – this way they can be one of the agents considered for the “closest possible enemy”. To do this, open Castle.swift and modify your initializer to take the entityManager as a parameter:

init(imageName: String, team: Team, entityManager: EntityManager) {

Then add this to the bottom of init(imageName:team:entityManager:):

addComponent(MoveComponent(maxSpeed: 0, maxAcceleration: 0, radius: Float(spriteComponent.node.size.width / 2), entityManager: entityManager))

Finally, move to EntityManager.swift and inside spawnQuirk(team:), modify the line that creates the Quirk instance as follows:

let monster = Quirk(team: team, entityManager: self)

Also open GameScene.swift and modify the line in didMove(to:) that creates the humanCastle:

let humanCastle = Castle(imageName: "castle1_atk", team: .team1, entityManager: entityManager)

And similarly for aiCastle:

let aiCastle = Castle(imageName: "castle2_atk", team: .team2, entityManager: entityManager)

Build and run, and enjoy your moving monsters:

006_MovingMonsters

Congratulations! At this point you have a good understanding of how to use the new Entity-Component system in GameplayKit, along with using Agents, Goals, and Behaviors for movement.

Where to Go From Here?

Here is the finished example project from this GameplayKit tutorial.

At this point, you can repeat the process described here to add more components to your game – for example a component to deal melee damage, a component to fire lasers, a component to display a health bar, etc.

I thought about extending the tutorial to show how to do all this, but this tutorial has gone on long enough. So instead, I created a project for the complete game that you can download and take a look at for reference.

Update: Christian Lysne has ported this game to tvOS – I thought I’d post it here in case it’s useful for anyone. Thanks Christian! :]

I hope you enjoyed this tutorial, and if you have any questions or comments, please join the forum discussion below!

The post GameplayKit Tutorial: Entity-Component System, Agents, Goals, and Behaviors appeared first on Ray Wenderlich.


Updated Course: Networking with URLSession

$
0
0

We’re happy to announce that our 16th new course since WWDC is now available: Networking with URLSession!

In this 13-part course for intermediate to advanced iOS developers, you’ll take a deep dive into adding networking into your iOS apps through URLSession.

You’ll start with the basics, like using URLSession to GET and POST data to a web server, how to process JSON, and how to download large amounts of data in the background.

Then you’ll move onto more advanced topics like cookies, authentication, App Transport Security, unit testing, and even how to properly architect network-based apps.

We previously had a 7-part course on Networking with NSURLSession, but this 13-part course represents a huge upgrade, with 6 new videos, and much more in-depth coverage of the topic. By the time you have done this course, you will truly understand all the ins-and-outs of networking in iOS.

In addition, this course is now fully up-to-date for iOS 10, Xcode 8, and Swift 3. Let’s take a look at what’s inside.

URLSession tutorial part 1

Part 1: Introduction. Find out what’s covered in our video course Networking with URLSession.

URLSession tutorial part 2

Part 2: HTTP 101. Learn some HTTP basics to make the most of URLSession, and discover the easy way to create URL objects from Strings.

URLSession Tutorial part 3

Part 3: URLSession. The URLSession API has many moving parts: learn about URLSessionConfigurations, URLSessionTasks and delegates, and how they fit together.

URLSession Tutorial Part 4

Part 4: URLSession Cookbook 1. Learn about REST and JSON, then create a URLSession data task that makes a GET request on a REST API, and parses the JSON URLResponse.

URLSession Tutorial part 5

Part 5: URLSession Cookbook 2. Learn about URLRequest and HTTP headers, then create a URLSessionDataTask to POST to a REST API. Also build an Alamofire-inspired PostRouter to create URLRequests.

URLSession Tutorial part 6

Part 6: Download & Upload Task. Learn about URLSessionDownloadTask and URLSessionUploadTask to save results to a file, or upload a data object or a file.

URLSession Tutorial part 7

Part 7: Background Sessions. Download and upload tasks can run in a background session. Find out how the system handles this, and learn some advice and tips for long-running tasks.

URLSession Tutorial part 8

Part 8: Authentication. Learn how to handle authentication and cookies.

URLSession Tutorial part 9

Part 9: ATS. Learn what your app needs to do, to support Apple’s requirement for App Transport Security.

URLSession Tutorial part 10

Part 10: OperationQueue. URLSession is an OperationQueue, and delegate and completion methods run on another OperationQueue: learn how to customize the delegate queue.

URLSession Tutorial part 11

Part 11: Architecture. MVC shouldn’t mean Massive View Controller: learn some ways to move networking code out of the view controller, and how to wrap a session task in an Operation.

URLSession Tutorial part 12

Part 12: Testing & Metrics. Writing unit tests is A Good Thing: learn how to test asynchronous network code. And find out how to access URLSessionTaskMetrics transaction data.

URLSession Tutorial part 13

Part 13: Conclusion. Review what you’ve learned in this video course, and get a TODO list for discussions with your back-end server team.

Where To Go From Here?

Want to check out the course? You can watch the introduction for free!

The rest of the course is for raywenderlich.com subscribers only. Here’s how you can get access:

  • If you are a raywenderlich.com subscriber: The entire course is complete and available today. You can check out the first part here.
  • If you are not a subscriber yet: What are you waiting for? Subscribe now to get access to our updated Networking with URLSession course, and our entire catalog of over 500 videos.

There’s much more in store for raywenderlich.com subscribers – if you’re curious, you can check out our full schedule of upcoming courses.

I hope you enjoy our new course, and stay tuned for many more new Swift 3 courses and updates to come!

The post Updated Course: Networking with URLSession appeared first on Ray Wenderlich.

macOS View Controllers Tutorial

$
0
0
macOS view controllers tutorial

Learn how to control the UI with this macOS View Controllers Tutorial!

When writing any code, it’s important to get clear separation of concerns — functionality should be split out into appropriate smaller classes. This helps keep code maintainable and easy to understand. Apple has designed the frameworks available on macOS around the Model-View-Controller design pattern, and as such has provided various controller objects that are responsible for managing the UI.

View controllers are responsible for hooking up the model layer to the view layer, and have an incredibly important role in the architecture of your macOS app.

In this macOS view controllers tutorial you’ll discover the wide range of functionality that is baked into vanilla view controllers, along with learning how you can create your own view controller subclasses to build up your app in an easy-to-understand manner. You’ll see how the life cycle methods allow you to hook into important events for the UI of your app, together with how view controllers compare with window controllers.

To follow this tutorial you’ll need the most recent version of macOS and Xcode installed on your mac. There’s no starter project — you’ll build a great app from scratch! You might like to read Gabriel Miro’s excellent tutorial on windows and window controllers before embarking upon this view controllers tutorial, but it’s not a requirement.

Enough introduction — let’s kick off with some theory!

Introducing View Controllers

A view controller is responsible for managing a view and its subviews. In macOS, view controllers are implemented as subclasses of NSViewController.

View controllers have been around for a while (Apple introduced them with OS X 10.5), but before OS X 10.10 they weren’t part of the responder chain. That means, for example, that if you had a button on a view controller’s view, the controller would not receive its events. After OS X 10.10, however, view controllers became very useful as building blocks for more complex user interfaces.

View controllers allow you to split the content of your window into logical units. The view controllers take care of those smaller units, while the window controller handles window-specific tasks like resizing or closing the window. This makes your code way easier to organize.

Another benefit is that view controllers are easy to reuse in other applications. If a File Browser with a hierarchical view on the left is controlled by a single view controller, you can use it in another application that needs a similar view. That’s time and energy saved, which you can now devote to drinking beer!

Window Controller or View Controller?

You may be wondering when to use only a window controller, and when to implement view controllers.

Prior to OS X 10.10 Yosemite, NSViewController was not a very useful class. It did not provide any of the view controller functionality you could expect — for instance, that found in UIViewController.

With the changes introduced since, like the view life cycle and the inclusion of the view controllers in the responder chain to receive events from its view, Apple is promoting the Model View Controller (MVC) pattern in the same way it’s currently doing with iOS Development. You should use view controllers to handle all the functionality of your views and subviews and the user interaction. Use window controllers to implement the functionality associated to the application windows, like setting up the root view controller, resizing, repositioning, setting the title, etc.

This approach will help in building a complex user interface by dividing the different parts of the UI into several view controllers and using them like building blocks to form the complete user interface.

View Controllers in Action

In this tutorial, you’ll write an application called RWStore that lets you select different books from raywenderlich.com store. Let’s get started!

Open Xcode and choose to create a new Xcode project, and select macOS/Application/Cocoa Application from the templates menu. Click Next.

Name your project RWStore. On the options screen, make sure that Swift is selected as Language and the Use Storyboards checkbox is checked. You don’t need Unit and UI Tests, so uncheck the corresponding checkboxes. Click Next and save your project.

Download the project resources. The zip file contains images for the books and a Products.plist file containing an array of dictionaries with the information for a product, like the name, description, and price. You will also find a source code file named Product.swift. This file contains the Product class, that reads the product information from the plist file. You’re going to add these to RWStore.

Select the Assets.xcassets folder in the Project Navigator and drop the downloaded images into the column containing the app icon.

Drag and drop Products.plist and Product.swift into the Project Navigator on the left. Make sure that Copy items if needed is checked.

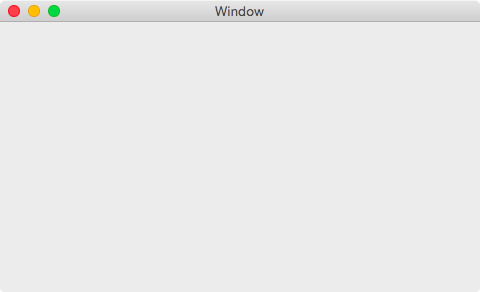
Build and run the app. You should see the main window of your application.

window-empty

It’s empty now, but don’t worry — this is just the starting point.

Creating the User Interface

Open Main.storyboard, select View Controller Scene, and drag a pop-up button into the view. You’ll use this pop-up button to display the list of products.

add-popup

Set its position using auto layout. The pop-up button should occupy the full width of the view and stay pinned to the top, so with the pop-up selected, click the Add New Constraints button located in the bottom bar.

In the pop-up that appears, select the trailing constraint and set its value to Use Standard Value. Repeat for the top and leading constraints and click Add 3 Constraints.

To complete the UI, add a view to show the product details. Select a container view and drag it below the pop-up button.

add-container

A container view is a placeholder for another view and comes with its own View Controller.

Now we’ll set up the auto layout constraints for this view. Select the container view and click on the Add New Constraints button. Add top, bottom, trailing, and leading constraints with a value of 0. Click the Add 4 Constraints button.

Select the view of your view controller and click the Update Frames button at the left of row of constraints buttons. Your view should look like this:

FinishedVC

Now you’ll create an action that will be called when the button selection changes. Open the Assistant Editor (you can also use the keyboard shortcut Command-Option-Return) and make sure that ViewController.swift is open. Control-drag from the pop-up button into ViewController.swift and add an Action Connection. In the pop-up view, make sure the connection is an Action, the name is valueChanged, and the type is NSPopUpButton.

On the canvas, there is a new view controller connected to the container view with an embed segue. Your app will use a custom view controller, so you can delete the auto-generated one: select the view controller associated with the container view and press delete.

delete-viewcontroller

Tab View Controllers

Now we’ll add the view controller used to display the product info: a Tab View Controller. A Tab View Controller is a view controller subclass (NSTabViewController); its view contains a tab view with two or more items and a container view. Behind every tab is another view controller whose content is used to fill the container view. Every time a new tab is selected, the Tab View Controller replaces the content with the view of the associated view controller.

Select a Tab View Controller and drag it on on the canvas.

drag-tabcontroller

The tab controller is now on the storyboard, but it’s not used yet. Connect it to the container view using an embed segue; control-drag from the container view to the Tab View Controller.

control-drag-tabview

Select embed in the menu that pops up.
Embed

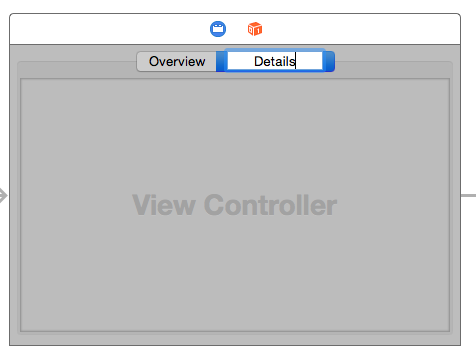
With this change, when the app runs the area of the container view is replaced with the view of the Tab View Controller. Double-click on the left tab of the Tab View and rename it Overview. Repeat to rename the right tab Details.

rename-tabs

Build and run the app.

Now the tab view controller is shown, and you can select between the two view controllers using the tabs. This isn’t noticeable yet because the two views are exactly the same, but internally the tab view controller is replacing them when you select a tab.

Overview View Controller

Next up you need to create the view controller for the Overview tab.

Go to File/New/File…, choose the macOS/Source/Cocoa Class, and click Next. Name the class OverviewController, make it a subclass of NSViewController, and make sure Also Create XIB for user interface is not selected. Click Next and save.

add-overview

Return to Main.storyboard and select Overview Scene. Click the blue circle on the view and change the class to OverviewController in the Identity Inspector on the right.

OverviewVC

Drag three labels onto the OverviewController’s view. Place the labels on the top left side of the view, one below each other. Add an image view on the top right corner of the view.

Note: By default, the image view has no borders and can be a bit difficult to find in the view. To help during the layout process, you can set an image. With the image view selected, open the Attributes Inspector and select 2d_games in the Image field. This image will be replaced in runtime with the proper product image in the tutorial code

Select the top label. In the Attributes Inspector, change the font to System Bold and the size to 19. You will need to resize the label now to see all the text.

The view should now look like this:

It’s time to use the superpowers of auto layout to make this view look great.

Select the image view and click the Add New Constraints button on the bottom. Add constraints for top and trailing with the standard value, and constraints for width and height with a value of 180.

Select the top label and add bottom, top, leading, and trailing constraints using the standard value.

Select the label below and add constraints for trailing and leading using the standard value.

Widen the last label so it goes under the image, then add constraints for leading, trailing and bottom, using the standard value. For the top constraint, make sure that the image view is selected (so that the top is aligned to the image view), and use the standard value.

Select the view and click on the Update Frames button in the bottom bar. Your view should look like this:

After all your hard work on the interface, it’s finally time to see the result, so build and run.

Click on the tabs and see how the tab view controller shows the appropriate view controller. It works right out of the box and without a single line of code!

Add Some Code

It’s time to get your hands dirty adding some code to show the products details in the view. In order to refer to the labels and image view from code you need to add an IBOutlet for each of them.

First, open the Assistant Editor and make sure OverviewViewController.swift is selected. Control-drag from the top label into OverviewController.swift and add an outlet named titleLabel. Ensure the type is NSTextField.

Repeat the process with the other two labels and the image view to create the rest of the outlets with the following names:

  1. priceLabel for the label in the middle.
  2. descriptionLabel for the bottom label.
  3. productImageView for the image view.

Like most UI elements, labels and image views are built of multiple subviews, so make sure that you have the correct view selected. You can see this when you look at the class for the outlet: for the image view it must be NSImageView, not NSImageCell. For the labels, it must be NSTextField, not NSTextFieldCell.

To show the product information in the overview tab, open OverviewController.swift and add the following code inside the class implementation:

//1
let numberFormatter = NumberFormatter()
//2
var selectedProduct: Product? {
  didSet {
    updateUI()
  }
}

Taking this code bit-by-bit:

  1. numberFormatter is an NumberFormatter object used to show the value of the price, formatted as currency.
  2. selectedProduct holds the currently selected product. Every time the value changes, didSet is executed, and with it updateUI.

Now add the updateUI method to OverviewController.swift.

private func updateUI() {
  //1
  if isViewLoaded {
    //2
    if let product = selectedProduct {
      productImageView.image = product.image
      titleLabel.stringValue = product.title
      priceLabel.stringValue = numberFormatter.string(from: product.price) ?? "n/a"
      descriptionLabel.stringValue = product.descriptionText
    }
  }
}
  1. Checks to see if the view is loaded. isViewLoaded is a property of NSViewController, and it’s true if the view is loaded into memory. If the view is loaded, it’s safe to access all view-related properties, like the labels.
  2. Unwraps selectedProduct to see if there is a product. After that, the labels and image are updated to show the appropriate values.

This method is already called when the product changes, but also needs to be called as the view is ready to be displayed.

View Controller Life Cycle

Since view controllers are responsible for managing views, they expose methods that allow you to hook into events associated with the views. For example the point at which the views have loaded from the storyboard, or when the views are about to appear on the screen. This collection of event-based methods are known as the view controller life cycle.

The life cycle of a view controller can be divided into three major parts: its creation, its lifetime, and finally its termination. Each part has methods you can override to do additional work.

Creation

  1. viewDidLoad is called once the view is fully loaded and can be used to do one-time initializations like the configuration of a number formatter, registering for notifications, or calls to API that only need to be done once.
  2. viewWillAppear is called every time the view is about to appear on screen. In our application, it is called every time you select the Overview tab. This is a good point to update your UI or to refresh your data model.
  3. viewDidAppear is called after the view appears on screen. Here you can start some fancy animations.

Lifetime

Once a view controller has been created, it then enters a period during which it it handles user interactions. It has three methods specific to this phase of its life:

  1. updateViewConstraints is called every time the layout changes, like when the window is resized.
  2. viewWillLayout is called before the layout method of a view controller’s view is called. For example, you can use this method to adjust constraints.
  3. viewDidLayout is called after layout is called.

Termination

These are the counterpart methods to creation:

  1. viewWillDisappear is called before the view disappears. Here you can stop your fancy animations you started in viewDidAppear.
  2. viewDidDisappear is called after the view is no longer on the screen. Here you can discard everything you no longer need. For example, you could invalidate a timer you used to upate your data model on a periodic time base.

In all these methods, you should call the super implementation at some point.

Life cycle in practice

Now that you know the most important things about a view controller’s life cycle, it’s time for a short test!

Question: Every time OverviewController’s view appears, you want to update the UI to take into account that a user selected a product when the Details tab was selected. Which method would be a good fit?

Solution Inside SelectShow>

Open OverviewController.swift and add this code inside the class implementation:

override func viewWillAppear() {
  super.viewWillAppear()
  updateUI()
}

This overrides the viewWillAppear to update the user interface before the view becomes visible.

The number formatter currently uses default values, which doesn’t fit your needs. You’ll configure it to format numbers as currency values; since you only need to do this once, a good place is the method viewDidLoad.

In OverviewController add this code inside viewDidLoad:

numberFormatter.numberStyle = .currency

For the next step, the main view controller needs to react on product selection and then inform the OverviewController about this change. The best place for this is in the ViewController class, because this controller owns the pop-up button. Open ViewController.swift and add these properties inside the ViewController class implementation:

private var products = [Product]()
var selectedProduct: Product?

The first property, products, is an array used to keep a reference to all the products. The second, selectedProduct, holds the product selected in the pop-up button.

Find viewDidLoad and add the following code inside:

if let filePath = Bundle.main.path(forResource: "Products", ofType: "plist") {
  products = Product.productsList(filePath)
}

This loads the array of products from the plist file using the Product class added at the beginning of the tutorial, and keeps it in the products property. Now you can use this array to populate the pop-up button.

Open Main.storyboard, select View Controller Scene, and switch to the Assistant Editor. Make sure ViewController.swift is selected, and Control-drag from the pop-up button to ViewController.swift to create an outlet named productsButton. Make sure the type is NSPopUpButton.

Return to ViewController.swift and add the following code to the end of viewDidLoad :

//1
productsButton.removeAllItems()
//2
for product in products {
  productsButton.addItem(withTitle: product.title)
}
//3
selectedProduct = products[0]
productsButton.selectItem(at: 0)

This piece of code does the following:

  1. It removes all items in the pop-up button, getting rid of the Item1 and Item2 entries.
  2. It adds an item for every product, showing its title.
  3. It selects the first product and the first item of the pop-up button. This makes sure that everything is consistent.

The final piece in this puzzle is reacting to the pop-up button selection changes. Find valueChanged and add the following lines:

if let bookTitle = sender.selectedItem?.title,
  let index = products.index(where: {$0.title == bookTitle}) {
  selectedProduct = products[index]
}

This code tries to get the selected book title and searches in the products for the index of the title. With this index, it sets selectedProduct to the correct product.

Now you only need to inform OverviewController when the selected product changes. For this you need a reference to the OverviewController. You can get a reference within code, but first you have to add another property to ViewController.swift to hold that reference. Add the following code inside the ViewController implementation:

private var overviewViewController: OverviewController?

You can get the instance of OverviewController inside prepare(for:sender:), which is called by the system when the view controllers are embedded in the container view. Add the following method to the ViewController implementation:

override func prepare(for segue: NSStoryboardSegue, sender: Any?) {
  guard let tabViewController = segue.destinationController
    as? NSTabViewController else { return }
 
  for controller in tabViewController.childViewControllers {
 
    if let controller = controller as? OverviewController {
      overviewViewController = controller
      overviewViewController?.selectedProduct = selectedProduct
    }
    // More later
  }
}

This code does the following:

  1. Gets a reference to the Tab View controller if possible.
  2. Iterates over all its child view controllers.
  3. Checks if the current child view controller is an instance of OverviewController, and if it is, sets its selectedProduct property.

Now add the following line in the method valueChanged, inside the if let block.

overviewViewController?.selectedProduct = selectedProduct

Build and run to see how the UI updates when you select a different product.

Detail View Controller

Now you will create a view controller class for the Details tab.

Go to File/New/File…, choose macOS/Source/Cocoa Class, and click Next. Name the class DetailViewController, make it a subclass of NSViewController, and make sure Also Create XIB for user interface is not selected. Click Next and save.

create-detailviewcontroller

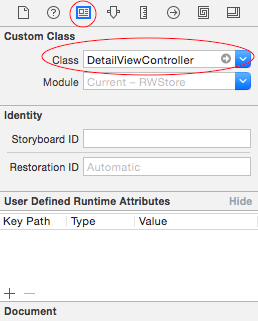
Open Main.storyboard and select Details Scene. In the Identity Inspector change the class to DetailViewController.

detail-vcname

Add an image view to the detail view. Select it and click on the Add New Constraints button to create its constraints. Set width and height constraints to a value of 180, and a top constraint to the standard value. As you did with the OverviewController, give it an image to make it easier to see.

Click on the Align button in the bottom bar and add a constraint to center the view Horizontally in the Container.

Add a label below the image view. Change the font to bold and the size to 19, then click on the Add New Constraints button to add constraints for top, leading, and trailing, using the standard values.

Add another label below the previous one. Select it, and click on the Add New Constraints button first to add constraints for top, leading and trailing, using standard values.

Make the view taller, then drag a Box under the last label. Select it and add constraints for top, leading, trailing and bottom, using standard values.

Open the Attributes Inspector and change the box font to System Bold and the size to 14. Change the title to “Who is this Book For?”.

An NSBox is a nice way to group related UI elements and to them a name you can see in Xcode’s Document Outline.

To complete the UI, drag a label inside the content area of the NSBox. Select the label and click on the Add New Constraints button to add constraints for top, leading, trailing, and bottom, all using the standard value.

After updating the frames, the UI should look like this:

To create the outlets for those controls, open the Assistant Editor and make sure that DetailViewController.swift is open. Add four IBOutlets, giving them the following names:

  1. productImageView for the NSImageView.
  2. titleLabel for the label with the bold font.
  3. descriptionLabel for the label below.
  4. audienceLabel for the label in the NSBox.

With the outlets in place, add the implementation to show the product detail. Add the following code to DetailViewController class implementation:

// 1
var selectedProduct: Product? {
  didSet {
    updateUI()
  }
}
// 2
override func viewWillAppear() {
  super.viewWillAppear()
  updateUI()
}
// 3
private func updateUI() {
  if isViewLoaded {
    if let product = selectedProduct {
      productImageView.image = product.image
      titleLabel.stringValue = product.title
      descriptionLabel.stringValue = product.descriptionText
      audienceLabel.stringValue = product.audience
    }
  }
}

You’re probably familiar with this code already, because it’s very similar to the Overview view controller implementation. This code:

  1. Defines a selectedProduct property and updates the UI whenever it changes.
  2. Forces a UI update whenever the view appears (when the detail view tab is selected).
  3. Sets the product information (using updateUI) in the labels and image view using the appropriate outlets.

When the product selection changes, you need to change the selected product in the detail view controller so that it updates the UI. Open ViewController.swift and add a property to hold a reference to the the detail view controller. Just below the overviewViewController property, add the following:

private var detailViewController: DetailViewController?

Find valueChanged and add the following inside:

detailViewController?.selectedProduct = selectedProduct

This updates the selected product property of the view controller when the pop-up selection changes.

The last change is inside prepare(for:sender:). Find the comment // More later and replace with the following:

else if let controller = controller as? DetailViewController {
  detailViewController = controller
  detailViewController?.selectedProduct = selectedProduct
}

This updates the selectedProduct when the detail view is embedded.

Build and run, and enjoy your finished application!

Where to Go From Here

You can download the final project here.

In this macOS view controller tutorial you’ve learned the following:

  • What a view controller is and how it compares to a window controller.
  • How to create a custom view controller subclass.
  • How to connect elements in your view to a view controller.
  • How to manipulate the view from the view controller.
  • The lifecycle of a view controller, and how to hook into the different events.

In addition to the functionality you’ve added to your custom view controller subclasses, there are many built-in subclasses provided for you. To see what built-in view controllers are available, take a look at the documentation.

If you’ve not already read it, you should take a look at Gabriel Miro’s excellent tutorial on windows and window controllers.

View controllers are one of the most powerful and useful aspects of architecting an macOS app, and there’s plenty more to learn. However, you’re now equipped with the knowledge to go out there and start playing around building apps — which you should do now!

If you have any questions or comments, please join the forum discussion below.

The post macOS View Controllers Tutorial appeared first on Ray Wenderlich.

Getting Started with PromiseKit

CallKit Tutorial for iOS

$
0
0

You’re in big trouble now!

Life on iOS wasn’t always perfect for VoIP app developers. In particular, delivering notifications was tough. With your app in the background, your only option was a regular notification, which is easy to miss. Compare it with the rich, built-in call UI, and suddenly your app won’t feel so integrated.

Luckily, Apple introduced CallKit in iOS 10 to change all that!

In this tutorial you’ll get a glimpse of CallKit’s power by building an app which:

  • Uses system services to report incoming and outgoing calls.
  • Manages a call directory to identify, or block incoming calls.

Note: CallKit features won’t work in the simulator. In order to follow along with this tutorial, you’ll need an iPhone with iOS 10.2 installed.

Getting Started

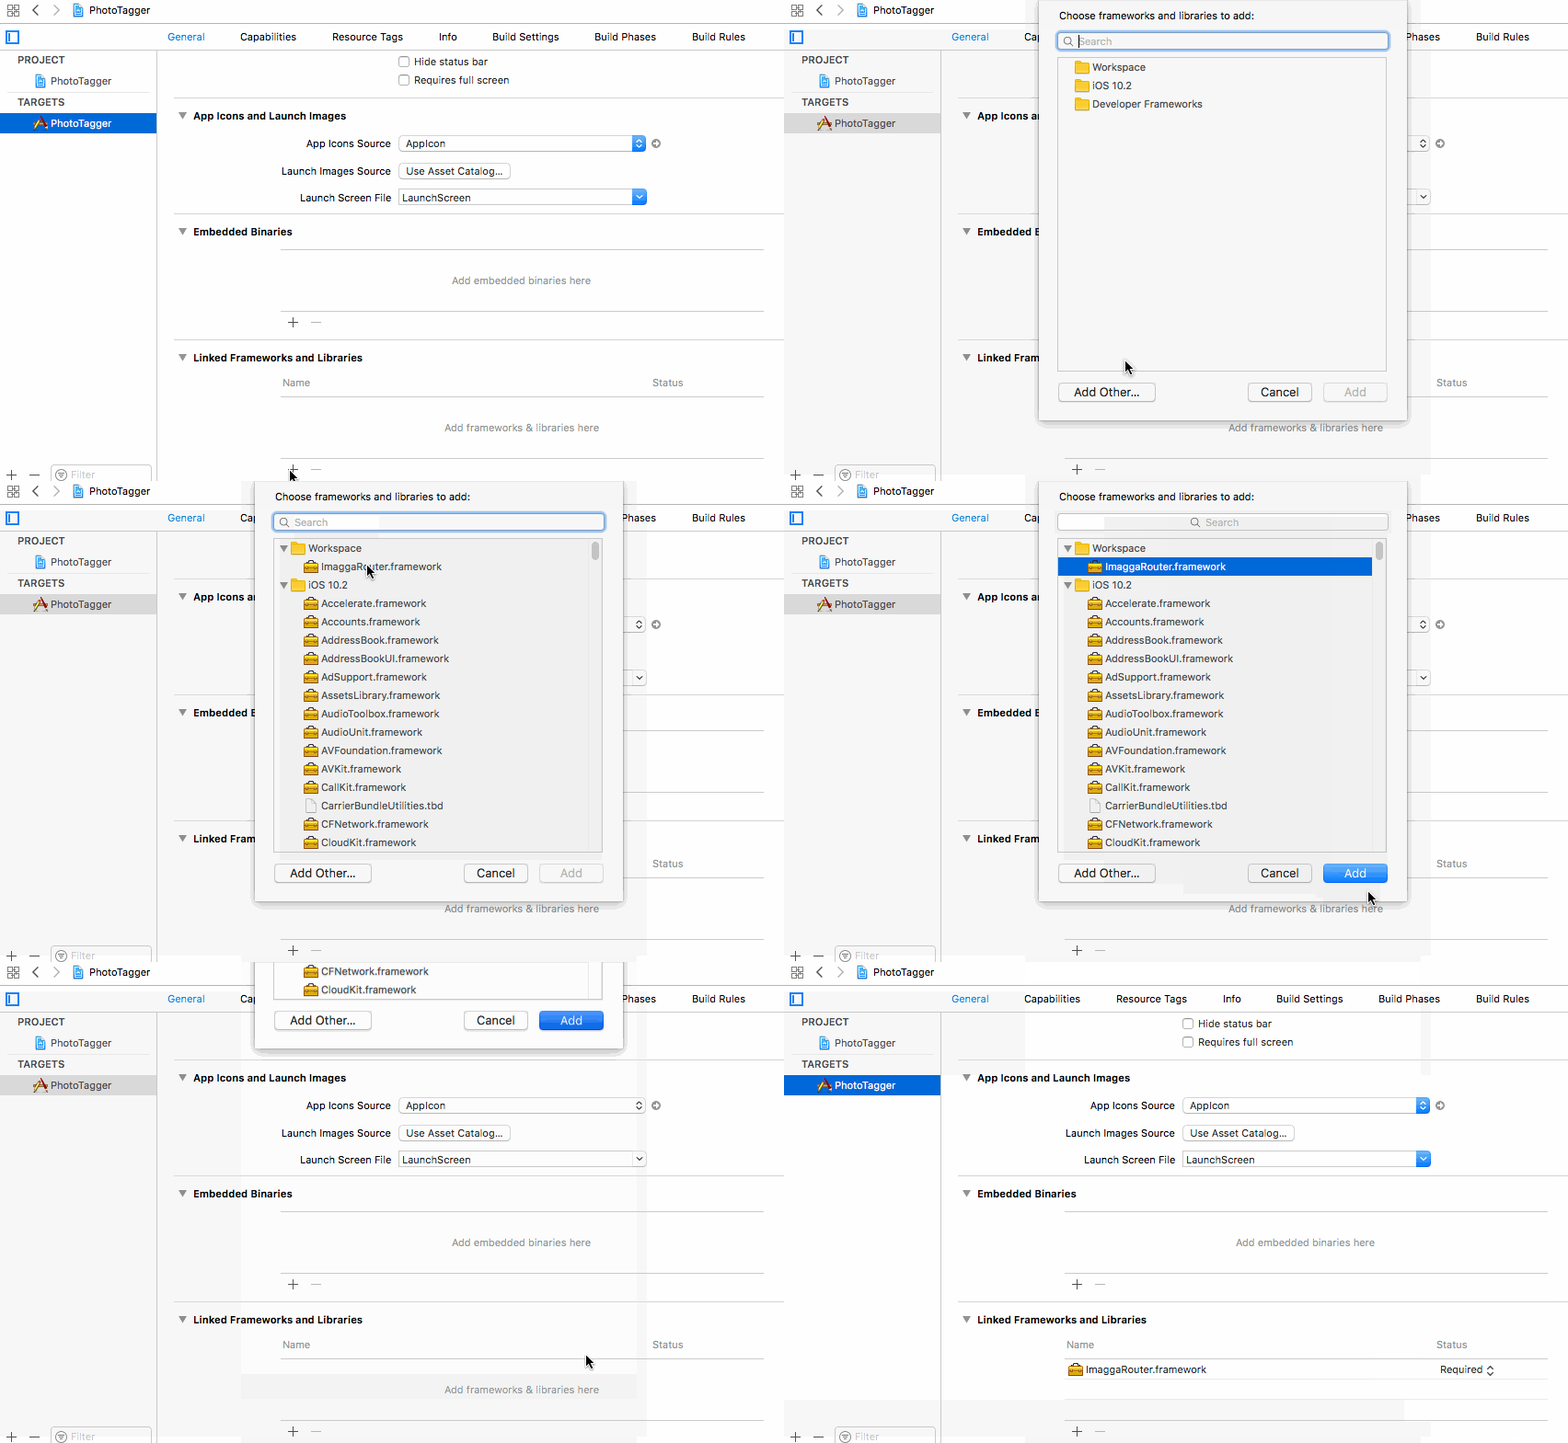
Download the starter project for this tutorial, and unzip it. In order to debug the project on your device, you’ll need to set up code signing. Open the project file in Xcode, and select Hotline in the project navigator.

You’ll start by changing the bundle identifier. With the project selected, go to the General tab, and find the Identity section. Change the bundle identifier to something unique:

Changing the bundle identifier

Next, look for the Signing section. Select your preferred development team (in my case, it’s my personal team) in the dropdown next to Team. Also make sure, that “Automatically manage signing” is checked. This will allow Xcode to automatically create the provisioning profile for the app.

Setting up code signing

To test your setup, build and run the app on your iPhone.

First run

This app does NOTHING!

This app does NOTHING!

Currently the app won’t do much, but you’ll notice that there are already quite a few source files in the starter project. They are mostly responsible for setting up the UI, and handling user interactions, but there are two main classes which are worth a look before moving on:

  • Call represents a phone call. The class exposes properties for identifying calls (such as its UUID, or handle), and also lifecycle callbacks indicating when the user starts, answers or ends a call.
  • CallManager currently maintains the list of ongoing calls in the app, and has methods for adding or removing calls. You will expand this class further throughout the tutorial.

What is CallKit?

CallKit is a new framework that aims to improve the VoIP experience by allowing apps to integrate tightly with the native Phone UI. By adopting CallKit, your app will be able to:

  • Use the native incoming call screen in both the locked and unlocked states.
  • Start calls from the native Phone app’s Contacts, Favorites and Recents screens.
  • Interplay with other calls in the system.

In this section, you’ll get more familiar with the CallKit architecture. The diagram below shows all the key players:

arch00

When working with CallKit, there are two primary classes you’ll interact with: CXProvider, and CXCallController. Time to dive in!

CXProvider

Your app will use CXProvider to report any out-of-band notifications to the system. These are usually external events, such as an incoming call.

Whenever such an event occurs, CXProvider will create a call update to notify the system. What’s a call update, you ask? Call updates encapsulate new, or changed call-related information. They are represented by the CXCallUpdate class, which exposes properties such as the caller’s name, or whether it’s an audio-only, or a video call.

In turn, whenever the system wants to notify the app of any events, it does so in the form of CXAction instances. CXAction is an abstract class, which represents telephony actions. For each action, CallKit provides a different concrete implementation of CXAction. For instance, initiating an outgoing call is represented by CXStartCallAction, while CXAnswerCallAction is used for answering an incoming call. Actions are identified by a unique UUID, and can either fail, or fulfill.

Apps can communicate with CXProvider through the CXProviderDelegate protocol, which defines methods for provider lifecycle events, and incoming actions.

CXCallController

The app will use CXCallController to let the system know about any user-initiated requests, such as a “Start call” action. This is the key difference between the CXProvider and the CXCallController: while the provider’s job is to report to the system, the call controller makes requests from the system on behalf of the user.

The call controller uses transactions to make these requests. Transactions, represented by CXTransaction contain one or more CXAction instances. The call controller sends transactions to the system, and if everything is in order, the system will respond with the appropriate action to the provider.

That sure was a lot of information, but how does this work in practice?

Incoming Calls

The diagram below shows a high-level overview of an incoming call flow:

incoming

  1. Whenever there’s an incoming call, the app will construct a CXCallUpdate and use the provider to send it to the system.
  2. At this point the system will publish this as an incoming call to all of its services.
  3. When the user answers the call, the system will send a CXAnswerCallAction instance to the provider.
  4. The app can answer the call by implementing the appropriate CXProviderDelegate method.

The first step will be creating the delegate for the provider.

Head back to Xcode, and with the App group highlighted in the project navigator, go to File\New\File…, and choose iOS\Source\Swift File. Set the name to ProviderDelegate, and click Create.

Add the following code to the file:

import AVFoundation
import CallKit
 
class ProviderDelegate: NSObject {
  // 1.
  fileprivate let callManager: CallManager
  fileprivate let provider: CXProvider
 
  init(callManager: CallManager) {
    self.callManager = callManager
    // 2.
    provider = CXProvider(configuration: type(of: self).providerConfiguration)
 
    super.init()
    // 3.
    provider.setDelegate(self, queue: nil)
  }
 
  // 4.
  static var providerConfiguration: CXProviderConfiguration {
    let providerConfiguration = CXProviderConfiguration(localizedName: "Hotline")
 
    providerConfiguration.supportsVideo = true
    providerConfiguration.maximumCallsPerCallGroup = 1
    providerConfiguration.supportedHandleTypes = [.phoneNumber]
 
    return providerConfiguration
  }
}

This is what’s happening:

  1. The provider delegate will interact with both the provider and the call controller, so you’ll store references to both. The properties are marked fileprivate, so that you’ll be able to reach them from extensions in the same file.
  2. You’ll initialize the provider with the appropriate CXProviderConfiguration, stored as a static variable below. A provider configuration specifies the behavior and capabilities of the calls.
  3. To respond to events coming from the provider, you’ll set its delegate. This line will cause a build error, as ProviderDelegate doesn’t conform to CXProviderDelegate yet.
  4. In the case of Hotline, the provider configuration will allow video calls, phone number handles, and restrict the number of call groups to one. For further customization, refer to the CallKit documentation.

Just below the configuration, add the following helper method:

func reportIncomingCall(uuid: UUID, handle: String, hasVideo: Bool = false, completion: ((NSError?) -> Void)?) {
  // 1.
  let update = CXCallUpdate()
  update.remoteHandle = CXHandle(type: .phoneNumber, value: handle)
  update.hasVideo = hasVideo
 
  // 2.
  provider.reportNewIncomingCall(with: uuid, update: update) { error in
    if error == nil {
      // 3.
      let call = Call(uuid: uuid, handle: handle)
      self.callManager.add(call: call)
    }
 
    // 4.
    completion?(error as? NSError)
  }
}

This helper method will allow the app to call the CXProvider API to report an incoming call. Here’s what’s going on:

  1. You prepare a call update for the system, which will contain all the relevant call metadata.
  2. Invoking reportIncomingCall(with:update:completion) on the provider will notify the system of the incoming call.
  3. The completion handler will be called once the system processes the call. If there were no errors, you create a Call instance, and add it to the list of calls via the CallManager.
  4. Invoke the completion handler, if it’s not nil.

This method can be invoked by other classes in the app in order to simulate incoming calls.

The next step is to ensure protocol conformance. Still in ProviderDelegate.swift, declare a new extension to conform to CXProviderDelegate:

extension ProviderDelegate: CXProviderDelegate {
 
  func providerDidReset(_ provider: CXProvider) {
    stopAudio()
 
    for call in callManager.calls {
      call.end()
    }
 
    callManager.removeAllCalls()
  }
}

CXProviderDelegate specifies only one required method, providerDidReset(_:). The provider invokes this method when it’s reset, giving your app the opportunity to clean up any ongoing calls, and revert to a clean state. In this implementation you’ll terminate the ongoing audio session and dispose of any active calls.

Now that ProviderDelegate offers a way to report incoming calls, it’s time to use it!

With the App group highlighted in the project navigator, open AppDelegate.swift for editing. You’ll start by adding a new property to the class:

lazy var providerDelegate: ProviderDelegate = ProviderDelegate(callManager: self.callManager)

The provider delegate is ready to be used! Add the following method to AppDelegate:

func displayIncomingCall(uuid: UUID, handle: String, hasVideo: Bool = false, completion: ((NSError?) -> Void)?) {
  providerDelegate.reportIncomingCall(uuid: uuid, handle: handle, hasVideo: hasVideo, completion: completion)
}

This method will let other classes access the provider delegate’s helper method.

The final piece of the puzzle is hooking up this call to the user interface. Expand the UI/View Controllers group in the project navigator, and open CallsViewController.swift, which is the controller for the main screen of the app. Find the empty implementation of unwindSegueForNewCall(_:), and replace it with the following code:

@IBAction private func unwindForNewCall(_ segue: UIStoryboardSegue) {
  // 1.
  let newCallController = segue.source as! NewCallViewController
  guard let handle = newCallController.handle else { return }
  let videoEnabled = newCallController.videoEnabled
 
  // 2.
  let backgroundTaskIdentifier = UIApplication.shared.beginBackgroundTask(expirationHandler: nil)
  DispatchQueue.main.asyncAfter(wallDeadline: DispatchWallTime.now() + 1.5) {
    AppDelegate.shared.displayIncomingCall(uuid: UUID(), handle: handle, hasVideo: videoEnabled) { _ in
      UIApplication.shared.endBackgroundTask(backgroundTaskIdentifier)
    }
  }
}

The snippet does the following:

  1. You’ll extract the properties of the call from NewCallViewController, which is the source of this unwind segue.
  2. The user can suspend the app before the action completes, so it should use a background task.

Now that everything is hooked up, build and run the application, and do the following:

  1. Tap the plus button in the right-hand corner.
  2. Enter any number, make sure “Incoming” is selected in the segmented control, and tap Done.
  3. Lock the screen. This step is important, since it’s the only way to access the rich, native in-call UI.

Within a few seconds, you’ll be presented with the native incoming call UI:

It’s working!

It’s working!

However, as soon as you answer the call, you’ll notice that the UI remains stuck in the following state:

Or is it?

Or is it?

This is because you still have to implement the piece responsible for answering the call. Go back to Xcode, return to ProviderDelegate.swift, and add the following code to the class extension:

func provider(_ provider: CXProvider, perform action: CXAnswerCallAction) {
  // 1.
  guard let call = callManager.callWithUUID(uuid: action.callUUID) else {
    action.fail()
    return
  }
 
  // 2.
  configureAudioSession()
  // 3.
  call.answer()
  // 4.
  action.fulfill()
}
 
// 5.
func provider(_ provider: CXProvider, didActivate audioSession: AVAudioSession) {
  startAudio()
}

Here is the step-by-step breakdown:

  1. You’ll start by getting a reference from the call manager, corresponding to the UUID of the call to answer.
  2. It is the app’s responsibility to configure the audio session for the call. The system will take care of activating the session at an elevated priority.
  3. By invoking answer(), you’ll indicate that the call is now active.
  4. When processing an action, it’s important to either fail or fulfill it. If there were no errors during the process, you can call fulfill() to indicate success.
  5. Once the system activates the provider’s audio session, the delegate is notified. This is your chance to begin processing the call’s audio.

Build and run the app, and start an incoming call again. When you answer the call, the system will successfully transition into an ongoing call state.

That’s more like it!

That’s more like it!

If you unlock your phone, you’ll notice that both iOS and the app now reflect the correct ongoing call state.

The ongoing call shown on the home screen, and the main screen of Hotline

The ongoing call shown on the home screen, and the main screen of Hotline

Ending the Call

Answering a call reveals a new problem: there’s currently no way to end a call. The app will support two ways of ending calls: from the native in-call screen, and from within the app.

The diagram below shows what’s going on in both cases:

endcall

Notice the difference between the first step: when the user ends the call from the in-call screen (1a), the system will automatically send a CXEndCallAction to the provider. However, if you want to end a call using Hotline (1b), it’s your job to wrap the action into a transaction, and request it from the system. Once the system processes the request, it will send the CXEndCallAction back to the provider.

No matter which way you want to support ending calls, your app has to implement the necessary CXProviderDelegate method for it to work. Open ProviderDelegate.swift, and add the following implementation to the class extension:

func provider(_ provider: CXProvider, perform action: CXEndCallAction) {
  // 1.
  guard let call = callManager.callWithUUID(uuid: action.callUUID) else {
    action.fail()
    return
  }
 
  // 2.
  stopAudio()
  // 3.
  call.end()
  // 4.
  action.fulfill()
  // 5.
  callManager.remove(call: call)
}

Not that difficult! Here’s what’s going on:

  1. You start by getting a reference to the call from the call manager.
  2. As the call is about to end, it’s time to stop processing the call’s audio.
  3. Invoking end() changes the status of the call, allowing other classes to react to the new state.
  4. At this point, you will mark the action as fulfilled.
  5. Since you no longer need the call, the call manager can dispose of it.

This takes care of the in-call UI. In order to end calls from the app, you’ll need to extend CallManager. With the Call Management group expanded in the project navigator open CallManager.swift.

The call manager will communicate with CXCallController, so it will need a reference to an instance. Add the following property to the CallManager class:

private let callController = CXCallController()

Now add the following methods to the class:

func end(call: Call) {
  // 1.
  let endCallAction = CXEndCallAction(call: call.uuid)
  // 2.
  let transaction = CXTransaction(action: endCallAction)
 
  requestTransaction(transaction)
}
 
// 3.
private func requestTransaction(_ transaction: CXTransaction) {
  callController.request(transaction) { error in
    if let error = error {
      print("Error requesting transaction: \(error)")
    } else {
      print("Requested transaction successfully")
    }
  }
}

Here’s what’s happening:

  1. You’ll start by creating an “End call” action. You’ll pass in the call’s UUID to the initializer, so it can be identified later.
  2. The next step is to wrap the action into a transaction, so you can send it to the system.
  3. Finally, you’ll invoke request(_:completion:) from the call controller. The system will request the provider to perform this transaction, which will in turn invoke the delegate method you just implemented.

The final step is to hook the action up to the user interface. Open CallsViewController.swift, and write the following call just below the tableView(_:cellForRowAt:) implementation:

override func tableView(_ tableView: UITableView, commit editingStyle: UITableViewCellEditingStyle, forRowAt indexPath: IndexPath) {
  let call = callManager.calls[indexPath.row]
  callManager.end(call: call)
}

When the user invokes swipe-to-delete on a row, the app will ask CallManager to end the corresponding call.

Build and run the project on your device, and perform the following steps:

  1. Tap the plus button in the right-hand corner.
  2. Enter any number, make sure “Incoming” is selected in the segmented control, and tap Done.
  3. Within a few seconds, you’ll get an incoming call. Once you answer, you should see it listed as active on the UI.
  4. Swipe left on the row representing the active call, and tap End.

At this point, your call will end. Neither the lock/home screens, nor the app will report any ongoing calls.

Hanging up now!

Hanging up now!

Other Provider Actions

If you look at the documentation page of CXProviderDelegate, you’ll notice that there are many more actions that the provider can perform, including muting, and grouping, or setting calls on hold. The latter sounds like a good feature for Hotline, so you’ll implement it now.

Whenever the user wants to set the held status of a call, the app will send an instance of CXSetHeldCallAction to the provider. It’s your job to implement the related delegate method. Open ProviderDelegate.swift, and add the following implementation to the class extension:

func provider(_ provider: CXProvider, perform action: CXSetHeldCallAction) {
  guard let call = callManager.callWithUUID(uuid: action.callUUID) else {
    action.fail()
    return
  }
 
  // 1.
  call.state = action.isOnHold ? .held : .active
 
  // 2.
  if call.state == .held {
    stopAudio()
  } else {
    startAudio()
  }
 
  // 3.
  action.fulfill()
}

This is fairly simple:

  1. After getting the reference to the call, you’ll update its status according to the isOnHold property of the action.
  2. Depending on the new status, you’ll want to start, or stop processing the call’s audio.
  3. At this point, you can mark the action fulfilled.

Since this is also a user-initiated action, you’ll need to expand the CallManager class as well. Open CallManager.swift, and add the following implementation just below end(call:):

func setHeld(call: Call, onHold: Bool) {
  let setHeldCallAction = CXSetHeldCallAction(call: call.uuid, onHold: onHold)
  let transaction = CXTransaction()
  transaction.addAction(setHeldCallAction)
 
  requestTransaction(transaction)
}

The code is very similar to the end(call:) method, in fact, the only difference between the two is that this one will wrap an instance of CXSetHeldCallAction into the transaction. The action will contain the call’s UUID, and the held status.

Now it’s time to hook this action up to the UI. Open CallsViewController.swift, and find the class extension marked with UITableViewDelegate at the end of the file. Add the following implementation to the class extension, just below tableView(_:titleForDeleteConfirmationButtonForRowAt:):

override func tableView(_ tableView: UITableView, didSelectRowAt indexPath: IndexPath) {
  let call = callManager.calls[indexPath.row]
  call.state = call.state == .held ? .active : .held
  callManager?.setHeld(call: call, onHold: call.state == .held)
 
  tableView.reloadData()
}

Whenever the user taps a row, the code above will update the held status of the corresponding call.

Build and run the application, and start a new incoming call. If you tap the call’s cell, you’ll notice that the status label will change from “Active” to “On Hold”.

IMG_6741

Handling Outgoing Calls

The final user-initiated action you’ll implement will be making outgoing calls. Open ProviderDelegate.swift and add the following implementation to the CXProviderDelegate class extension:

func provider(_ provider: CXProvider, perform action: CXStartCallAction) {
  let call = Call(uuid: action.callUUID, outgoing: true, handle: action.handle.value)
  // 1.
  configureAudioSession()
  // 2.
  call.connectedStateChanged = { [weak self, weak call] in
    guard let strongSelf = self, let call = call else { return }
 
    if call.connectedState == .pending {
      strongSelf.provider.reportOutgoingCall(with: call.uuid, startedConnectingAt: nil)
    } else if call.connectedState == .complete {
      strongSelf.provider.reportOutgoingCall(with: call.uuid, connectedAt: nil)
    }
  }
  // 3.
  call.start { [weak self, weak call] success in
    guard let strongSelf = self, let call = call else { return }
 
    if success {
      action.fulfill()
      strongSelf.callManager.add(call: call)
    } else {
      action.fail()
    }
  }
}

The provider will invoke this delegate method when an outgoing call request is made:

  1. After creating a Call with the call’s UUID from the call manager, you’ll have to configure the app’s audio session. Just as with incoming calls, your responsibility at this point is only configuration. The actual processing will start later, when the provider(_:didActivate) delegate method is invoked.
  2. The delegate will monitor the call’s lifecycle. It will initially report that the outgoing call has started connecting. When the call is finally connected, the provider delegate will report that as well.
  3. Calling start() on the call will trigger its lifecycle changes. Upon a successful connection, the call can be marked as fulfilled.

Now that the provider delegate is ready to handle outgoing calls, it’s time to teach the app how to make one. :] Open CallManager.swift, and add the following method to the class:

func startCall(handle: String, videoEnabled: Bool) {
  // 1
  let handle = CXHandle(type: .phoneNumber, value: handle)
  // 2
  let startCallAction = CXStartCallAction(call: UUID(), handle: handle)
  // 3
  startCallAction.isVideo = videoEnabled
  let transaction = CXTransaction(action: startCallAction)
 
  requestTransaction(transaction)
}

This method will wrap a “Start call” action into a CXTransaction, and request it from the system.

  1. A handle, represented by CXHandle can specify the handle type, and its value. Hotline supports phone number handles, so you’ll use it here as well.
  2. A CXStartCallAction will receive a unique UUID, and a handle as input.
  3. You can specify whether the call is audio-only, or a video call by setting the isVideo property of the action.

It’s time to hook up the new action to the UI. Open CallsViewController.swift, and replace the previous implementation of unwindForNewCall(_:) to match the following:

@IBAction private func unwindForNewCall(_ segue: UIStoryboardSegue) {
  let newCallController = segue.source as! NewCallViewController
  guard let handle = newCallController.handle else { return }
  let incoming = newCallController.incoming
  let videoEnabled = newCallController.videoEnabled
 
  if incoming {
    let backgroundTaskIdentifier = UIApplication.shared.beginBackgroundTask(expirationHandler: nil)
    DispatchQueue.main.asyncAfter(wallDeadline: DispatchWallTime.now() + 1.5) {
      AppDelegate.shared.displayIncomingCall(uuid: UUID(), handle: handle, hasVideo: videoEnabled) { _ in
        UIApplication.shared.endBackgroundTask(backgroundTaskIdentifier)
      }
    }
  } else {
    callManager.startCall(handle: handle, videoEnabled: videoEnabled)
  }
}

There’s one subtle change in the code: whenever incoming is false, the view controller will ask the call manager to start an outgoing call.

That’s all you’ll need to make calls. It’s time to start testing! Build and run the app on your device. Tap the plus button in the right-hand corner to start a new call, but this time make sure that you select “Outgoing” from the segmented control.

Outgoing

At this point you should see the new call appear in your list. You’ll also see different status labels based on the current stage of the call:

calling2

I can make calls now?!

I can make calls now?!

Managing Multiple Calls

It’s easy to imagine a scenario where a Hotline user would receive multiple calls. You can simulate this by first placing an outgoing call, then an incoming call and pressing the Home button before the incoming call comes in. At this point, the app presents the user with the following screen:

IMG_6753

The system will let the user decide how to resolve the issue. Based on the choice, it will wrap up multiple actions into a CXTransaction. For example if the user chooses to end the ongoing call, and answer the new one, the system will create a CXEndCallAction for the former and a CXStartCallAction for the latter. Both actions will be wrapped into a transaction and sent to the provider, which will process them individually. So if your app already knows how to fulfill the individual requests, there’s no further action required!

Implementing features without additional code!

Implementing features without additional code!

You can test it by resolving the scenario above; the list of calls will reflect your choice. The app will only process one audio session at a time. If you choose to resume a call, the other will be put on hold automatically.

multicall

Creating a Call Directory Extension

The directory extension is a new extension point offered by CallKit. It allows your VoIP app to:

  • Add phone numbers to the system’s block list.
  • Identify incoming calls by their phone number or other uniquely identifying information, such as email address.

Whenever the system receives a call, it will check the address book for a match; if it doesn’t find one, it can also check in app-specific directory extensions. Why not add a directory extension to Hotline?

Back in Xcode, go to File\New\Target… and choose Call Directory Extension. Name it HotlineDirectory, and click Finish. Xcode will automatically create a new file, CallDirectoryHandler.swift. Locate it in the project navigator, and check what’s inside.

The first method you’ll find is beginRequest(with:). This method will be invoked when your extension is initialized. In case of any errors, the extension will tell the host app to cancel the extension request by invoking cancelRequest(withError:). It relies on two other methods to build the app-specific directory.

addBlockingPhoneNumber(to:) will collect all the phone numbers, which should be blocked. Replace its implementation with the following:

private func addBlockingPhoneNumbers(to context: CXCallDirectoryExtensionContext) throws {
  let phoneNumbers: [CXCallDirectoryPhoneNumber] = [ 1234 ]
  for phoneNumber in phoneNumbers {
    context.addBlockingEntry(withNextSequentialPhoneNumber: phoneNumber)
  }
}

Invoking addBlockingEntry(withNextSequentialPhoneNumber:) with a given phone number will add it to the block list. When a number is blocked, the system telephony provider will not display any calls from that number.

Now take a look at addIdentificationPhoneNumbers(to:). Replace the method body with the code below:

private func addIdentificationPhoneNumbers(to context: CXCallDirectoryExtensionContext) throws {
  let phoneNumbers: [CXCallDirectoryPhoneNumber] = [ 1111 ]
  let labels = [ "RW Tutorial Team" ]
 
  for (phoneNumber, label) in zip(phoneNumbers, labels) {
    context.addIdentificationEntry(withNextSequentialPhoneNumber: phoneNumber, label: label)
  }
}

Invoking addIdentificationEntry(withNextSequentialPhoneNumber:label:) with a specified phone number and label will create a new identification entry. Whenever the system receives a call from this number, the call UI will display the matching label to the user.

It’s time to test your new extension. Build and run the Hotline scheme on your device. At this point your extension may not yet be active. To enable it, do the following steps:

  1. Go to the Settings app
  2. Select Phone
  3. Select Call Blocking & Identification
  4. Enable Hotline
Note: If you’re having trouble getting the system to recognize or use your extension, try killing the app and relaunching it. Sometimes iOS needs a little extra help to use your extension.

Allowing the extension

Testing a blocked call is easy: just launch Hotline, and simulate an incoming call from the number 1234. You’ll notice that the system doesn’t report anything. In fact, if you put a breakpoint in the implementation of reportIncomingCall(uuid:handle:hasVideo:completion:) in ProviderDelegate, you’ll notice that reportNewIncomingCall(withupdate:completion:) will even report an error.

To test identifying calls, launch Hotline again, and simulate a new call; but this time, enter the number 1111. You’ll be presented with the following call UI:

FYI: that’s not a real number :]

FYI: that’s not a real number :]

This app is awesome!

This app is awesome!

Congratulations! You’ve created an app which leverages CallKit to provide a first-party VoIP experience! :]

Where to Go From Here?

You can download the completed project for this tutorial here.

If you wish to learn more about CallKit, check out Session 230 from WWDC 2016.

I hope you enjoyed this CallKit tutorial. If you have any questions or comments, please join the forum discussion below!

The post CallKit Tutorial for iOS appeared first on Ray Wenderlich.

Screencast: Server Side Swift with Perfect: Templating with Mustache

Full-Time Indie iOS Dev and Music Enthusiast: A Top Dev Interview With Alex Andrews

$
0
0

Founder of Ten Kettles, Alex Andrews

Welcome to another installment of our Top App Dev Interview series!

Each interview in this series focuses on a successful mobile app or developer and the path they took to get where they are today. Today’s special guest is Alex Andrews.

Alex is a full-time indie iOS developer, Swift lover and motivated musician. He is well known for running his own company Ten Kettles, producing high quality apps for enthusiast musician’s alike.

When Alex is not running Ten Kettles, he creates various tools to help with his job and explores his own Scrum variation.

Full-time indie

Most developers struggle to make the leap from paid project work to fully indie developer. Can you explain how you made this leap?

Before I jumped into Ten Kettles full-time in 2014, I worked as a research engineer in a few different labs around Toronto (lots of signal processing and data analysis work) while spending a lot of time making and performing music. I loved it and worked on some very cool projects with people I’m proud to know, but I felt like something was missing.

Alex’s typical workspace

I’d started a company back when I was 18, and I had just loved the experience so much that I knew I’d return to it one day. I think I just needed to wait for the right time—a time when I had enough experience under my belt to know what it was I wanted to build specifically (i.e., apps!), and to have the skills to get started.

What pushed it over the edge for me was that I’d been working in what would have been my dream “real job” for two years, but it was just feeling less “right” as time went on. I couldn’t stop thinking about going out on my own and began learning iOS development in my spare time.

Not to say it wasn’t a struggle. It took some time to get off the ground (i.e., stable paycheques), and it was a pretty big financial and emotional challenge in the meantime. Living in Toronto isn’t cheap either! But I think I just really believed in Ten Kettles and what I was doing… so I just had to keep at it.

What benefits do you get working as an indie?

I think it just fits my personality. I love building things, learning from users’ feedback, iterating products, making big plans and chipping away at them week-by-week… there’s actually a lot in common with writing music and playing in a band.

And though it’s mostly solo work with Ten Kettles, doing the occasional consulting project or collaboration (e.g., working with our designer) has been fantastic for pushing me outside of my comfort zone and has taught me loads.

All your products at Ten Kettles revolve around music. For example, your latest product Waay helps musicians songwriting. How did that focus on music-related apps come about?

When I started Ten Kettles, I didn’t know what type of apps the company was going to build beyond the first one or two. My background at the time involved lots of signal processing/data analysis, audio/music apps, and teaching. So, I just kept picking the ideas that most inspired me, and over the first year or two that ended up being music education, which actually pulls in all that stuff.

Waay an app produced by Ten Kettles

I used to teach quite a bit of guitar and music theory, and a big part of my approach was putting together custom courses for my students based on their interests (e.g., songwriting, learning cover songs, or developing solo technique). It turned out to be pretty effective, and an app seemed a perfect way to bring that approach to anyone with an iPad or iPhone. hearEQ was similar: I was helping to train my band’s soundperson and wanted a tool that could let her practise ear-training on any track she wanted.

So, app ideas tend to pop out of personal experiences like that for the most part, and I’ll add the potentially good ones into a master text file. There are a lot of terrible ideas on that list too, but I think that’s OK. Quantity over quality when it comes to brainstorming, maybe?

A lot of indie developers have more ideas for apps than they have time to build. How do you choose which of your many ideas to build to completion?

Picking ideas from that list to actually build, and have them be successful, is tricky. I’m still getting the hang of it. But there are definitely a few solid points I’d recommend to people when deciding on an app to start building:

  • Pick something you can get—and stay—excited about, even on the dull or frustrating days. The apps I’ve been most happy building were ones that I couldn’t stop thinking about until I got started.
  • Pick an idea you can feel a little more qualified to work on than most other people. It helps to bring a unique perspective, skill set, or approach to an app idea—especially if the market’s a bit crowded.
  • Don’t think (just) like a programmer, think like a product maker. Will people actually want to use the thing you’re making? Will they be excited about it? Can you name a few people who will definitely use it? This is where some market research can probably help.
  • Think of an app like an ongoing conversation. Creating an app and then shipping it is kind of like thinking of an idea and then telling it to a friend. You’re starting a conversation. Listening to a friend’s feedback on your idea—or your users’ feedback on your app—is maybe the best way to make it better. So, the fourth point is to get your app into other people’s hands for feedback ASAP, even if it’s a little rough around the edges at first. And then listen! It’ll make your app waay better. (I learned this one the hard way.)

Alex, what does a typical day look like?

I tweak this every once in a while, but here’s a normal day:

  • 5:15–8:15AM: Meditate, walk dogs, exercise or practise music (alternate), tech learning (programming katas, side projects, reading), family breakfast.
  • 8:15–12:00: Work, taking short breaks every hour.
  • 12:00-1:00 Lunch
  • 1:00-6:00PM: Work, taking short breaks every hour.

Ideally, I’d aim for about 7 hours of sleep with about half an hour of reading and a little day-planning first. So, for most weeknights, that’s about 10:15 PM by the time we actually turn the light off.

That schedule is for a normal Monday–Friday, though on Friday I’ll usually sleep in an hour which opens up Thursday evening a little more. :]

When it comes to non-work hours, they are pretty much strictly non-work. I might play around with a framework, work through a raywenderlich.com tutorial, do a side-project, or read some tech books (just finished up Working Effectively With Legacy Code), but nothing that is too immersive or stressful. Work’s for the workday.

I split the workday into one hour chunks that include a short break, kind of like a long Pomodoro. I’ve been doing this for maybe a decade and despite trying a few variants over the years, this split works great for me. The work part (45–50 minutes) is all work: no texting, tweeting, email (unless it’s a specific work task), or anything like that. Just work. And then the break (10–15 minutes) is the opposite. No rules. Maybe I’ll hop onto Twitter, have a snack, go for a short walk, wrestle with my dogs, whatever.

Alex will often take time-out

Needless to say, I use my stopwatch and iPhone timer quite a lot (though inexplicably, Siri still only understands “Set a timer for 45 minutes” about half the time…) Besides keeping me focussed, this approach has been great for doing those occasional tasks I really cannot get excited about (taxes!)… because I’m only ever 45 minutes away from a break. :]

So many developers are talking about the “indiepocalypse” as there are very little indie devs out there now. What’s your take on this?

Alex is never too far from a musical instrument

I don’t know… when playing in bands, I’d hear other musicians say lots of stuff like “there’s nowhere good to play,” “there’s just no scene here,” or “it’s so hard for musicians.” That kind of thing. And I was always that annoying guy who’d be wondering “Well, what about venue X? What have you done for promo? Why are you booking shows on Monday at 1 a.m.? Who are you booking with?”

So, yeah, there are challenges to being indie anything but I find focusing on that stuff too much can be unhealthy. There’s often a workaround if you look for it. Or maybe there’s not, and I should be paying more attention! ‍

I mean, my business model involves doing consulting work a few months a year and maybe market forces will make that a month or two longer one year. But, to be honest, I’m still blown away that we have these tools and ecosystem that allow us to come up with an idea, put it together with these free/cheap tools, and then upload it to a store and have users emailing us with their experiences within a week or two. Plus the fantastic iOS dev community.

It’s all amazing, and I feel lucky to be making it work now, regardless of what’s to come. Who knows if I’ll be an indie dev in 10 years time, but I know that it’s pretty awesome for now.

What advice would you give to developers wanting to be an indie developer?

If you want to be an indie dev that makes your own products, I’d start by asking yourself if you want to start a business. Because at least in my experience, that’s really what you’re doing. That means marketing, design, assessing products, killing products sometimes, some days without any coding.

Did I mention lawyers and accountants? Because if your preference is a stable income and mostly coding, plus having a team to fall back on (and support), I think a standard coding job is probably a better fit!

Being an indie product developer is hard. There’s lots of pressure, you bear sole responsibility for every mistake. Plus, at least in my experience, it can take a while to get profitable.

But the flipside is pretty fantastic: you get to dream up ideas, make them into reality, share them with the world, and earn at least a good chunk of your living that way. You’re always learning new things and putting them to use. And not little things either, big stuff: new programming languages, how to market products, new design approaches, better communication skills, video editing, color theory, Canadian tax code (OK, maybe not always that exciting…).

There’s a middle ground too: if you want coding and independence, there’s always the freelancer route. It can be a much smarter earning opportunity, and you get many of the same perks.

I found the articles on raywenderlich.com on this really helpful when I started integrating some consulting into Ten Kettles (I do about 75% of my own product work and 25% client work). Asking advice from people in your community is always a great call too: before Instagram scooped up Toronto’s (and raywenderlich.com’s) Greg Heo, I took him out for a beer to pick his brain on client work, and I definitely learned a lot.

Running TenKettles

Tell me about Ten Kettles. Where did the name come from?

I’d started a band the year before and we needed a name. I came up with the idea “Ten Kettles” but it didn’t make it past the chopping block. The name stuck with me though and I thought it worked even better for a company name.

The kettle imagery itself came from a few sources. My background is British (first one born in Canada), so obviously there’s the tea element. But also the land that Toronto sits on was “purchased” (I use that term very loosely) from the Mississaugas of the New Credit a couple hundred years ago. The deal involved a couple dozen brass kettles, which stuck with me for some reason.

So, I think between the family and city history, I just liked the linkage to something bigger. It’s kind of a reminder to myself to stay aware of that bigger responsibility too. I guess the name reminds me to always try to do the right thing.

Do you have any working partnerships?

I work with a fantastic designer on most of my icons, website design, and the design of our upcoming app for drummers, BeatMirror. His name is Joel Derksen and he’s great! The icon he made for Ten Kettles actually just won a big logo design competition, so we’re super pleased.

I’d really like to build a relationship with a great Android developer, but haven’t quite decided about the Android route yet. I also talk through company decisions big and small with my wife Alicia; being able to bounce ideas around with someone so smart and thoughtful is definitely a huge asset. Very lucky!

How do you prioritize the work at Ten Kettles? For example, when do you work on hearEQ and Waay and then move on to a different product?

I like working linearly—one thing at a time—and in relatively small chunks (usually two weeks for a deliverable). In terms of which task I choose to work on, I look at a bunch of factors:

  • Am I confident users will want it? Maybe I need to gather more info first (e.g., customer surveys)
  • Is it urgent? (e.g., stripping out Parse before it disappeared)
  • Will it make money? (e.g., I’d genuinely love to spend two weeks tweaking animations or improving test coverage, but that might not be the most profitable use of my time)
  • Will it actually take two weeks? Or should I break it up into smaller parts…
  • Is it newsworthy? If an update can get some good press, that’s a huge deal!
  • Am I excited about it? This isn’t always that important (my dev-self doesn’t always love my CEO-self’s decisions), but it helps to break a tie.

So, I order (and endlessly reorder) potential projects based on these things, and then every two weeks I pick what’s on the top of the list to do. I generally avoid changing course until two weeks later, then it’s onto the next thing.

What tools do you use to help with the planning of product work?

At first, I was going to give a list of software tools, but to be honest I think the biggest tool is a regular biweekly schedule. Every two weeks I take a day or half-day to work through potential project ideas—like adding a feature to hearEQ or building out a new app—prioritize them like I’d mentioned before, and then plan the next leg of work.

I think taking a day away from code to do this stuff is probably the most powerful thing, and helps me to take off my dev hat for a day. But, in terms of physical or software tools, I’d say Sublime Text, Pages, OneNote, and lots and lots of post-it notes!

Alex’s variant on scrum

At Ten Kettles, you must have to deal with the admin work, planning, development, design, testing etc.. how do you manage the wearing of multiple hats?

The New York Times’ VR app.

Last year I freelanced on two projects with a fantastic studio in Toronto called Secret Location. I was working on virtual reality apps there, including rebuilding the New York Times’ VR app from scratch in Swift (I loved working with their designs! Beautiful fonts.).

But unexpectedly, I think my biggest takeaway wasn’t technical but was a new project management technique. They used Scrum, which I hadn’t really used much as a solo developer beforehand. I got really into it and read a bunch of Scrum books while I was there to learn as much as I could.

But Scrum’s really meant for 5–9 person teams, and in my product work, I’m usually just the 1. I kept thinking how I could adapt this to my work, so as soon as the project was done, I flew off to Montreal (one of my favorite cities) for a few days to shut myself off from the world and try to come up with a 1-person variant. A few days later, it started to come together and I’ve been working with my “ScrumOfOne” variant ever since.

Though I’ve been quite happy with how “ScrumOfOne” is turning out, the most important element is really the core Scrum philosophy, more so than any tweaks I’ve made to the day-to-day methods. For anyone interested in learning more about that, the book I started with and would definitely recommend is “Scrum“. There are many books out there, but I did find this one laid out the philosophy and key methods in a pretty motivating way.

So, to (eventually!) answer the question, I use scrum techniques to keep organized. That means a super-quick turnaround from idea to development to getting it out to users. I try to get everything out of the way of this goal. Admin stuff usually gets done in my first hour of the day, before I jump into code. I usually work directly with a designer, so I don’t do too much design myself anymore. And then I pull the planning out to a full or half day every second Friday. That leaves me lots of time to build products uninterrupted.

Love for tech

What do you think the future is for Swift?

I really enjoy using Swift, and compared to the other languages I’ve worked with it’s definitely my personal favorite. Especially seeing the broader Swift community in action over the past couple years, there’s no doubt there’s real momentum—and every new Swift release is better and better.

Also, listening to Chris Lattner discuss Swift’s place at Apple on a recent Accidental Tech podcast, it definitely doesn’t sound like the language is going anywhere but forward. So, I think it’ll just keep getting more refined and more popular—and that popularity is pretty well deserved.

I can see you love to play around with new technologies like building tools with Python, how do you find the time to keep learning new things alongside working on projects?

For the most part, I don’t do “work work” in the evenings or weekends, but I find that sometimes I really want to code something up in my spare time. That tension seems to create a good environment for side projects, as they feel like hobbies then and don’t burn me out too much.

I have a couple friends who are really into building their own tools too, and I find that pretty motivating. For example, a friend of mine is slowly moving his entire life into Terminal and he’ll share all his vim adventures, Terminal-based email clients and whatnot with me, and that’s really interesting and it motivates me to double-down on my own little projects (e.g., custom Sublime markdown syntax, binding framework, etc.). So, a big +1 for the community.

A key motivator, Adrian Kosmaczewski

Also, reading this article last year got me keen to read a whole lot more books, and that’s been really rewarding. I find that the more I read, the more I want to. Thanks, Adrian Kosmaczewski, for the motivation!

Making your own tools, can you share a good example when you made a great tool and what benefits it gave you?

Yes, I’d love to! A recent one is a little Terminal app called “Workflows.”

Every time I do one of those “once in a while” tasks, say localizing an app, troubleshooting a git push error, or simulating a coordinate tap in UI Testing, I write up a quick text file describing how I did it. Maybe it’s just me, but I forget some of this stuff literally seconds after I do it… so, being able to load up these text files when needed saves me a lot of time.

Needless to say, I have one folder on my computer with many, many of these text files and finding the right one was becoming a bit of a hassle. So last summer I was looking to practise some Python and TDD, and I put together “Workflows” to search through these workflow documents and print any matches directly to the console. So, I type something like “wf -w git push error” then the matching doc pops up. It’s super simple but very handy.

Where To Go From Here?

And that concludes our Top App Dev Interview with Alex Andrews. Huge thanks to Alex for sharing his indie life, his love for Swift and finally running a successful company Ten Kettles.

We hope you enjoyed this inspiring interview and if you’re thinking of starting your own company or eager to make the leap to become freelance to take Alex’s advice to heart.

Also, if anyone wants to say hi on Twitter, @leakywellington (or @tenkettles) and if they want to find out more about Ten Kettles’ apps, the best place is tenkettles.com!

If you are an app developer with a hit app or game in the top 100 in the App store, we’d love to hear from you. Please drop us a line anytime. If you have a request for any particular developer you’d like to hear from, please post your suggestion below!

The post Full-Time Indie iOS Dev and Music Enthusiast: A Top Dev Interview With Alex Andrews appeared first on Ray Wenderlich.

Swift Algorithm Club: March 2017 Digest

$
0
0

SwiftAlgClub-Sept-Digest-feature

The Swift Algorithm Club is a popular open source project to implement popular algorithms and data structures in Swift, with over 11,000 stars on GitHub.

We periodically give status updates with how things are going with the project. This month’s update contains four big pieces of news:

  • New Contribution: Swift QuadTree
  • Swift 3 Migration Complete!
  • New Co-Maintainer
  • Swift Algorithm Club Workshop at RWDevCon!

Let’s dive in.

New Contribution: Swift QuadTree

In addition to a few dozen great fixes and minor updates from our community, we also have a new writeup by Timur Galimov: a Swift QuadTree.

Consider the following problem: your need to store a number of points (each point is a pair of X and Y coordinates) and then you need to answer which points lie in a certain rectangular region. A naive solution would be to store the points inside an array and then iterate over the points and check each one individually. This solution runs in O(n) though!

You can check out the full implementation and discussion here:

Swift 3 Migration Complete!

Over the past few months, we’ve been working hard to convert all 100+ data structures and algorithms in our repository to Swift 3.

Good news – I’m happy to announce that we’ve now finally finished, and now the repository is fully converted to Swift 3!

This represents a collaborative effort of over 100 algorithmic contributors, and I’m incredibly grateful to everyone who helped make this happen. Congratulations, all! :D

New Co-Maintainer

Next, I’m happy to announce that Ross O’Brien is joining the SAC team. Ross will be helping us with GitHub code reviews and join the monthly write-ups for the various data structures and algorithms.

You’ll be seeing Ross around on the repository and helping everyone with their issues and pull requests. Please help me give a warm welcome to Ross! :]

Swift Algorithm Club Workshop at RWDevCon!

Ever wanted to learn about Swift Algorithms in person? Well, now’s your chance!

I am happy to announce that Vincent and I will be running an official Swift Algorithm Club workshop next week, at RWDevCon 2017.

This workshop be like a fun collaborative technical interview, where you’ll pair up with others and tackle questions together.

Each question starts off with a quick < 5 minute introduction on the data structure, and then followed by a 10-20 minute pair programming. After each question, we’ll present our official solution. The theme of the questions is indirect enums. This is a relatively unused Swift language feature that traditional data structures can adopt for some interesting implementations. Our goal is to go through 3 questions.

We hope to see some of you at the workshop at RWDevCon 2017! :]

Where To Go From Here?

The Swift Algorithm Club is always looking for new members. Whether you’re here to learn or here to contribute, we’re happy to have you around.

To learn more about the Swift Algorithm Club, check out our introductory article. We hope to see you at the club! :]

The post Swift Algorithm Club: March 2017 Digest appeared first on Ray Wenderlich.


Screencast: Beginning C# with Unity Part 26: Abstract Classes

Today Extension Tutorial: Getting Started

$
0
0

Update Note:This tutorial has been updated to iOS 10 and Swift 3 by Michael Katz. The original tutorial was written by Chris Wagner.

iOS 8 introduced App Extensions: a way for you to share your app’s functionality with other apps or the OS itself.

One of these types of extensions is a Today Extension, also known as a Widget. These allow you to present information in the Notification Center and Lock Screen, and are a great way to provide immediate and up-to-date information that the user is interested in. Today Extensions can also appear on the Search screen, and on the quick action menu on the Home screen when using 3D Touch.

In this tutorial, you’ll write an interactive Today Extension that renders the current and recent market prices of a Bitcoin based on the United States Dollar.

Never has it been so easy to deliver valuable information so quickly to your users. Let’s get started!

Introducing Bitcoin

If you’re not familiar with Bitcoin, the short explanation is that it’s a digital cryptocurrency that’s still in its infancy. Aside from using it for peer-to-peer exchanges and purchases, Bitcoin trading allows the user to exchange it for a number of other cryptocurrencies like Dogecoin and Litecoin, and flat currency such as the US Dollar and the Euro.

As a relatively new currency, its market value fluctuates by the minute; there have been huge peaks and troughs in its short lifetime. Thus, it’s a perfect candidate for a Today Extension since investors will want up-to-the-second price quotes!

Introducing Crypticker

Since you’re writing a today extension, you’ll first need a host app to extend; meet Crypticker.

Crypticker is a simple app that displays the current Bitcoin price, the difference between yesterdays price and the current price, as well as a price history chart. The chart includes 30 days of history; tapping or swiping your finger on the chart reveals the exact price for a specific day in the past.

The extension will contain all of these features. Note that the swipe gesture often triggers sliding between the Today and Notifications sections within Notification Center, so it doesn’t really provide the best or most reliable user experience, but a single tap works quite well.

Getting Started

Download the Crypticker starter project to get started. The project contains the entire Crypticker app as described above, but please note that this tutorial will not focus on the development of the container app.

Build and run the project to see what you’re starting with:

Crypticker App

The app looks very similar to the screenshot above; the data displayed will, of course, depend on how the Bitcoin market looks right now. Touching the chart near the bottom of the view will draw a line and display the price for the relevant day.

BTC widget

For the unfamiliar, BTC is shorthand for Bitcoin; much like USD stands for United States Dollar. The Today Extension will render a scaled down version of Crypticker’s primary view.

Theoretically, the Crypticker app has the ability to show pricing for multiple Cryptocurrencies, but your today extension is specific to BTC. Therefore, its name shall be BTC Widget.

Note: Today Extensions, by nature, have just one simple purpose. If you wanted to provide information for another cryptocurrency, like Dogecoin, it would be best to package a second widget with the app or design your UI appropriately, perhaps like the Stocks widget.

By the end of the tutorial, your Today Extension will look something like this:

CryptickerExtension

Add a Today Extension target

Extensions are packaged as a separate binary from their host app. So you’ll need to add a Today Extension target to the Crypticker project.

In Xcode’s Project Navigator, select the Crypticker project and add a new target by selecting Editor\Add Target… When the template picker appears, choose iOS\ Application Extension, and then Today Extension. Click Next.

Add Today Extension Target

Set the Product Name to BTC Widget, and verify that the language is Swift, the project is Crypticker and Embed in Application is also Crypticker. Click Finish.

Name new target

When prompted, activate the BTC Widget scheme. As the text indicates, another Xcode scheme will be created for you.

Congratulations! BTC Widget will now appear in your list of targets.

add target

Make sure you select BTC Widget, then the General tab, and then press the + button under Linked Frameworks and Libraries.

Link Framework

Select CryptoCurrencyKit.framework and click Add.

CryptoCurrencyKit is a custom framework used by the Crypticker app to retrieve currency prices from the web and display them in a beautiful chart. Luckily for you, the incredibly kind and thoughtful developer behind Crypticker modularized the code into a framework, so that it can be shared between multiple targets. :]

In order to share code between a host app and its extensions you must use a custom framework. If you don’t, you’ll find yourself duplicating a lot of code and violating an important rule of software engineering: DRY – or, Don’t Repeat Yourself. I’ll say it again: “Don’t repeat yourself”.

This tutorial won’t go into much detail on frameworks themselves, as there’s enough information on them to fill their own tutorial. And wouldn’t you know we’ve done exactly that? ;] If you’d like to know more about creating and managing your own custom frameworks, check out this tutorial.

At this point, you’re ready to begin implementing the extension.

Notice there’s now a group in the Project navigator named after your new target, BTC Widget. This is where the Today Extension’s code is grouped, by default.

Expand the group and you’ll see there is a view controller, a storyboard file and an Info.plist file. Its target configuration also tells it to load its interface from MainInterface.storyboard, which contains a single view controller with the class set to TodayViewController.swift.

BTC Widget List of Files

You’ll notice some files you might expect to see are missing from the Today Extension template; like an app delegate for instance. Remember that today extensions run inside another host app, so they don’t go through the traditional app lifecycle.

In essence, the lifecycle of the today extension is mapped to the lifecycle of the TodayViewController. For example, TodayViewController‘s viewDidLoad method is called when the widget is launched, just like application(_:didFinishLaunchingWithOptions:) is called when the main app launches.

Open MainInterface.storyboard. You’ll see a clear view with a light Hello World label.

Make sure the BTC Widget scheme is selected in Xcode’s toolbar and build and run. This will launch the iOS Simulator and open the Notification Center, which in turn launches your widget. Notification Center is effectively the host app for Today Extensions. This also causes Xcode to attach its debugger to the widget’s process.

Default Widget

Behold your widget. Cool, right? Whilst this is super-exciting stuff, the widget clearly needs a little work. It’s time to make it do some interesting things!

Note: The name of the widget may be ‘CRYPTICKER’ – once you’ve run the host app the widget uses that name instead.

Build the Interface

Open MainInterface.storyboard and delete the label. Set the view to 110pts tall and 320pts wide in the Size Inspector. This is the default iPhone widget size.

Drag two Labels and a View from the Object Library onto the view controllers view.

  • Position one of the labels in the top left corner, and in the Attributes Inspector set its Text to $592.12 and its Color to Red: 33, Green: 73 and Blue: 108. Set the Font to System 36.0. This label will display the current market price. You want to make it nice and big so it’s easily legible in a quick glance.
  • Position the other label at the same height right of the one you’ve just set up, but against the right margin. In the Attributes Inspector set its Text to +1.23 and its Font to System 36.0. This displays the difference between yesterdays price and the current price.
  • Finally, position an empty view below the two labels, stretch it so it’s bottom and side edges are touching the containing view. In the Attributes Inspector set its Background to Clear Color, and in the Identity Inspector set its Class to JBLineChartView.

Note: There is a class named JBLineChartDotView that Xcode may suggest when typing, verify that you chose JBLineChartView.

The view and Document Outline should now look something like this:

Views placed

Don’t worry about laying things out exactly as shown, as you’ll soon be adding Auto Layout constraints to properly define the layout.

Now open TodayViewController.swift in the editor. Add this at the top of the file:

import CryptoCurrencyKit

This imports the CryptoCurrencyKit framework.

Next, update the class declaration, like this:

class TodayViewController: CurrencyDataViewController, NCWidgetProviding {

Making the TodayViewController a subclass of CurrencyDataViewController.

CurrencyDataViewController is included in CryptoCurrencyKit and is also used by the primary view within Crypticker. Since the widget and app will be displaying similar information through a UIViewController, it makes sense to put reusable components in a superclass and then sub-class that as requirements vary.

NCWidgetProviding is a protocol specific to widgets; there are two methods from the protocol that you’ll be implementing later on.

Since TodayViewController subclasses CurrencyDataViewController, it inherits outlets for the price label, price change label and line chart view. You now need to wire these up.

Open MainInterface.storyboard again.

In the Document Outline, ctrl+drag from Today View Controller to the price label (the one with its text set to $592.12). Select priceLabel from the popup to create the connection. Repeat for the other label, selecting priceChangeLabel from the popup. Finally, do the same for the Line Chart View, selecting lineChartView from the popup.

Wiring things up

Auto Layout

For your widget to be adaptive, you’ll need to set up Auto Layout constraints. The general idea is that views are designed with a single layout that can work on a variety of screen sizes. The view is considered adaptive when it can adapt to unknown future device metrics. This will be useful later when adding size expansion to the widget.

Select the Price Label label and then select Editor\Size to Fit Content. If the Size to Fit Content option is disabled in the menu, deselect the label, and then reselect it and try again; sometimes Xcode can be a little temperamental.

Next, using the Add New Constraints button at the bottom of the storyboard canvas, pin the Top and Leading space to 0 and 0 respectively. Make sure that Constrain to margins is turned on. Then click Add 2 Constraints.

Auto Layout 1

Select the Price Change Label label and again select Editor\Size to Fit Content. Then, using the Add New Constraints button, pin the Top and Trailing space both to 0.

Auto Layout 2

Finally, select the Line Chart View. Using the Add New Constraints button, pin its Leading and Trailing space to 0 and its Top and Bottom space to 8. Make sure that Constrain to margins is still turned on. Click Add 4 Constraints.

Auto Layout 3

From the Document Outline select the view containing the labels and Line Chart View, then choose Editor\Resolve Auto Layout Issues\All Views in Today View Controller\Update Frames. This will fix any Auto Layout warnings in the canvas by updating the frames of the views to match their constraints. If Update Frames is not enabled then you laid everything out perfect and it is unnecessary to run.

Auto Layout 4

Implementing TodayViewController.swift

Now the interface is in place and everything is wired up, open up TodayViewController.swift again.

You’ll notice you’re working with a bog-standard UIViewController subclass. Comforting, right? Although later you’ll encounter a new method called widgetPerformUpdate from the NCWidgetProviding protocol. You’ll learn more about that later.

This view controller is responsible for displaying the current price, price difference, and showing the price history in a line chart.

Now replace the boilerplate viewDidLoad method with the following implementation:

override func viewDidLoad() {
  super.viewDidLoad()
  lineChartView.delegate = self
  lineChartView.dataSource = self
 
  priceLabel.text = "--"
  priceChangeLabel.text = "--"
}

This method simply sets self as the data source and delegate for the line chart view, and sets some placeholder text on the two labels.

Now add the following method:

override func viewDidAppear(_ animated: Bool) {
  super.viewDidAppear(animated)
 
  fetchPrices { error in
    if error == nil {
      self.updatePriceLabel()
      self.updatePriceChangeLabel()
      self.updatePriceHistoryLineChart()
    }
  }
}

fetchPrices is defined in CurrencyDataViewController, and is an asynchronous call that takes a completion block. The method makes a request to the web-service mentioned at the beginning of the tutorial to obtain Bitcoin price information.

The method’s completion block updates both labels and the line chart. The update methods are defined for you in the super-class. They simply take the values retrieved by fetchPrices and format them appropriately for display.

Now it’s time to see what you have so far. Select the BTC Widget scheme. Build and run.

  • If Notification Center doesn’t appear, swipe down from the top of the screen to activate it.
  • If the widget doesn’t appear in Notification Center, you’ll need to add it via the Edit menu. Towards the bottom of the Today’s view content you will see an Edit button. Tap the button to reveal a menu of all Today Extensions that are installed on the system. Here you can enable, disable and re-order them as desired. Enable BTC Widget if it isn’t already.

BTC Widget Almost

Cool! Your widget now displays real-time Bitcoin pricing right in Notification Center. But you may have noticed a problem: the line chart looks pretty squished.

BTC-YUNO

Fortunately, Notification Center supports expandable widgets that can show more information.

At the bottom of viewDidLoad add the following:

extensionContext?.widgetLargestAvailableDisplayMode = .expanded

This tells the extension context that this widget supports an extended display. This will cause a “Show More” or “Show Less” button to automatically appear on the widget’s title bar.

Note: The main UIViewController of a today extension will have access to its extensionContext, which acts like UIApplication.shared, but for extensions. This provides functions for opening external URLs, and keys to listen for lifetime event notifications.

Next, add the following method:

func widgetActiveDisplayModeDidChange(_ activeDisplayMode: NCWidgetDisplayMode, withMaximumSize maxSize: CGSize) {
  let expanded = activeDisplayMode == .expanded
  preferredContentSize = expanded ? CGSize(width: maxSize.width, height: 200) : maxSize
}

widgetActiveDisplayModeDidChange is an optional NCWidgetProviding method. It is called in response to the user tapping the “Show More” or “Show Less” buttons. Setting the preferredContentSize will change the widget’s height, which in turn updates the chart’s height, giving it more room to breathe.maxSize is the maximum size allowed for the widget, given its display mode. For the .compact mode, the maximum size is also the minimum size, but for .expanded it could be much larger.

After updating the preferred size, you must reload the chart’s data so that it redraws based on the new layout.

You’ll do this in viewDidLayoutSubviews. Add the following to TodayViewController:

override func viewDidLayoutSubviews() {
  super.viewDidLayoutSubviews()
  updatePriceHistoryLineChart()
}

Make sure the BTC Widget scheme is selected. Build and run.

On the left, you’ll see how the widget appears when the widget is collapsed. On the right, you’ll see how it appears when expanded. Not too shabby!

Widget Expansion

Spruce up the UI

This looks OK, but it can still benefit from some visual tweaking. Since iOS places the widget on a blurred background, they are practically (and literally) begging for the ‘vibrancy’ effect.

Adding Vibrancy

Open MainInterface.storyboard again.

Drag a Visual Effect View with Blur from the object browser into the main view.

Drag the Line Chart View from the main view into the effect view’s subview. Click the Add New Constraints button and pin all four edges to the parent view with 0 padding. Make sure “Constrain to margins” is not selected. Then click Add 4 Constraints.

Update Line Chart View

Next, select the Visual Effect View and recreate the line chart’s previous constraints:

  1. Ctrl+drag from the effect view to the main view to bring up the constraint popup. Hold shift and select Leading Space to Container Margin, Trailing Space to Container Margin, and Vertical Spacing to Bottom Layout Guide. Then click Add Contraints.
    Effect View Constraints 1
  2. Ctrl+drag from the effect view to the Price Label and select Vertical Spacing.
    Effect View Constraints 2
  3. In the Size Inspector, change the Trailing and Leading Space constants to 0, and the Top Space and Bottom Space constants to 8.
    Effect View Constraints 3
  4. From the menu bar, choose Editor\Resolve Auto Layout Issues\All Views in Today View Controller\Update Frames.

Finally, in the Attributes Inspector check the Vibrancy box in the Visual Effect View section. This will cause the view to change from a dark color to a clear color.

Wire up the new view

Now open the Assistant Editor. Make sure TodayViewController.swift is the active file on the right.

Ctrl+drag from Visual Effects View in the storyboard editor to the top of the TodayViewController class. In the popup dialog make sure Connection is set to Outlet, Type is set to UIVisualEffectView, and enter vibrancyView for the Name. Click Connect.

Create vibrancyView Outlet

Then add the following line to the bottom of viewDidLoad:

vibrancyView.effect = UIVibrancyEffect.widgetPrimary()

This sets the vibrancy effect to the system-defined one for today extensions, ensuring that the coloring will be appropriate on screen.

Add the following to TodayViewController:

override func lineChartView(_ lineChartView: JBLineChartView!, colorForLineAtLineIndex lineIndex: UInt) -> UIColor! {
  return lineChartView.tintColor
}

The vibrancy effect sets the tintColor of anything in the contentView on a visual effect view. This is how labels and template images are automatically drawn with a vibrancy effect. For a custom view like JBLineChartView, the effect has to be applied manually. The lineChartView(_:colorForLineAtLineIndex:) delegate method is the place to do that here.

Build and run again.

Widget with Vibrancy

Very nice! Just a tweak to the line width and this could be downright beautiful.

At the top of TodayViewController add the following:

var lineWidth: CGFloat = 2.0

This variable will be used to control the line width.

Add this method:

private func toggleLineChart() {
  let expanded = extensionContext!.widgetActiveDisplayMode == .expanded
  if expanded {
    lineWidth = 4.0
  } else {
    lineWidth = 2.0
  }
}

This uses widgetActiveDisplayMode to determine if the widget is expanded or collapsed and sets the line width for the chart accordingly.

override func lineChartView(_ lineChartView: JBLineChartView!, widthForLineAtLineIndex lineIndex: UInt) -> CGFloat {
  return lineWidth
}

This delegate method returns lineWidth for the chart drawing routine’s use.

Finally, add the following to the bottom of widgetActiveDisplayModeDidChange:

toggleLineChart()

This calls your new method to propagate the line width.

Build and run again. This time, the line width will change along with the size change. How snazzy!

Widget With Line Width

To really see the vibrancy effect pop, set a colorful background. This can be done on the simulator by:

  1. Open the Photos app.
  2. Select an image.
  3. Tap the share icon.
  4. Select Use as Wallpaper from the bottom row.
  5. Tap Set and then Set Both.
  6. Build and run, again.

Vibrancy With Image

Make it Interactive

Widgets can be more than simple data displays, by supporting user interaction. The Crypticker app already supports tapping a position on the chart to display the price at that location. You can add that functionality to the widget when it’s expanded.

Go back to MainInterface.storyboard once again.

Drag a another Visual Effect View with Blur from the object browser into the main view.

In the Attributes Inspector check Vibrancy. This will cause the view to change from a dark color to a clear color.

In the Document Outline ctrl+drag from the new Visual Effect View to the previous Vibrancy View. Hold down Shift and select Top, Bottom, Leading, and Trailing. Click Add Constraints. This will place this new view in the same spot and size as the chart view.

Second Effect View

Next, drag a Label into the subview of the Visual Effect View. Pin this label to the top and center of its parent view by ctrl+dragging from the label into the parent view and selecting Top Space to Visual Effect View and Center Horizontally in Visual Effect View.

Second Label Constraints

Change the label’s text to be empty.

Select Editor\Resolve Auto Layout Issues\All Views in Today View Controller\Update Frames to rearrange the views. The label should now be invisible on the storyboard, but don’t worry… it’s still there :]

Aligned Label

In the Document Outline, ctrl+drag from the Today View Controller to the new label, and set its outlet to priceOnDayLabel.

Now the new label is almost wired up.

Open the Assistant Editor once again, and create an outlet for the new visual effects view in TodayViewController. Call it priceSelectionVibrancyView.

Connect Second Vibrancy View to Outlet

In viewDidLoad add this line to set the vibrancy effect:

priceSelectionVibrancyView.effect = UIVibrancyEffect.widgetSecondary()

The widgetSecondary vibrancy is a slightly different effect to be used for data that is ancillary to the main data. For this widget, the price at an earlier date on the graph certainly meets that criteria.

Note: Each UIVisualEffectView view can only have one type of vibrancy effect. Two different effects views are needed here to support both types of vibrancy.

Next, update toggleLineChart as follows:

private func toggleLineChart() {
  let expanded = extensionContext!.widgetActiveDisplayMode == .expanded
  if expanded {
    lineWidth = 4.0
    priceOnDayLabel.isHidden = false
  } else {
    lineWidth = 2.0
    priceOnDayLabel.isHidden = true
  }
  priceOnDayLabel.text = ""
}

In addition to changing the chart line width, this now hides or shows the label.

Now add these delegate methods:

func lineChartView(_ lineChartView: JBLineChartView!, didSelectLineAtIndex lineIndex: UInt, horizontalIndex: UInt) {
  if let prices = prices {
    let price = prices[Int(horizontalIndex)]
    updatePriceOnDayLabel(price)
  }
}
 
func didUnselectLineInLineChartView(_ lineChartView: JBLineChartView!) {
  priceOnDayLabel.text = ""
}

These simply update the label’s text when the user taps on the line chart.

Build and run. Expand the widget and tap on a point in the graph. You will see the price displayed, and at a slightly lighter color than the graph line.

Widget With Price On Day

Note: If you’re testing on the Simulator a quick ‘tap’ may not be enough to trigger displaying the label – so try a holding the mouse button down a little longer to make it appear.

Show Up On The Home Screen

By default, if there is only one widget in an application, it will show up automatically in the shortcut menu when using 3D Touch on the app’s icon on the home screen. The widget that shows up there can also be explicitly set if you want to choose which one will appear.

Open Info.plist under Supporting Files for Crypticker.

Use Editor\Add Item to add a new row. Choose Home Screen Widget from the drop down (or UIApplicationShortcutWidget if showing raw keys). In the Value column enter the widget’s Bundle Identifier. The Bundle Identifier for the widget can be found on the General tab of the target info pane.

Info plist item

Build and run the app. Press the Home button (Cmd+Shift+H in the Simulator), and then 3D Touch the app icon. The widget should now appear.

Home Screen Widget

Note: You may not be able to test this on the Simulator unless you have a Mac with a force-touch trackpad.

Wow. You get additional shortcut menu functionality for free! Even though only the collapsed size is available, you can’t beat the price.

Keep the Widget Up To Date

Your last order of business is to add support to your widget to update its view when it’s off-screen, by allowing the system to create a snapshot. The system does this periodically to help your widget stay up to date.

Replace the existing implementation of widgetPerformUpdate with the following code:

func widgetPerformUpdate(completionHandler: (@escaping (NCUpdateResult) -> Void)) {
  fetchPrices { error in
    if error == nil {
      self.updatePriceLabel()
      self.updatePriceChangeLabel()
      self.updatePriceHistoryLineChart()
      completionHandler(.newData)
    } else {
      completionHandler(.failed)
    }
  }
}

This method does the following:

  • Fetch the current price data from the web service by calling fetchPrices.
  • If there’s no error the interface is updated.
  • Finally – and as required by the NCWidgetProviding protocol – the function calls the system-provided completion block with the .newData enumeration.
  • In the event of an error, the completion block is called with the .failed enumeration. This informs the system that no new data is available and the existing snapshot should be used.

And that wraps up your Today Extension! You can download the final project here.

Where To Go From Here?

Download the final project here.

As an enterprising developer, you might want to take another look at your existing apps and think about how you can update them with Today Extensions. Take it a step further and dream up new app ideas that exploit the possibilities of Today Extensions.

If you’d like to learn more about creating other types of extensions, check out our iOS 8 App Extensions Tech Talk Video where you can learn about Photo Editing Extensions, Share Extensions, Action Extensions, and more!

We can’t wait to see what you come up with, and hope to have your Today Extensions at the top of our Notification Centers soon! We hope you enjoyed this tutorial, and if you have any questions or comments, please join the forum discussion below!

The post Today Extension Tutorial: Getting Started appeared first on Ray Wenderlich.
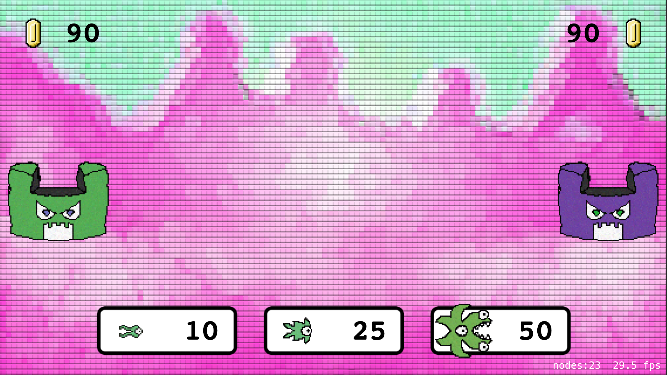
RWDevCon 2017 Vault – Pre-Order Now!

$
0
0

This week begins our annual tutorial conference, RWDevCon 2017 – sold out for the third year straight.

If you weren’t able to get a ticket, I have some good news. You can attend virtually thanks to the RWDevCon 2017 Vault, and preorders are open today – with a 50% off pre-order discount!

The purpose of the RWDevCon 2017 Vault is to let you experience the amazing tutorials and workshops that make up RWDevCon, even if you aren’t able to make it in person. This year, we have two separate options for pre-order:

  • The RWDevCon 2017 Tutorial Series: Contains the 400+ page conference book PDF, a 500+ MB zip of all conference materials, and videos for all 24 tutorials at the conference.
  • The RWDevCon 2017 Workshop Series: Contains all materials and videos for the two day-long pre-conference workshops, on Advanced Debugging & Reverse Engineering and App Architecture.

Can’t decide between the two? Good news – you can get the bundle and save!

Read on to learn more about the RWDevCon 2017 Vault, when it will be available, and how you can take advantage of the pre-order discount!

What’s in the RWDevCon 2017 Vault?

As I mentioned, the RWDevCon 2017 Vault has two parts: the Workshop Series and the Tutorial Series. Here’s what’s inside each of those:

RWDevCon 2017 Vault – Workshops

Experience our exclusive, in-depth Advanced Workshops from our annual conference, RWDevCon, in video format:

  • Advanced App Architecture: Thoughtful design of the boundaries between your apps subsystems is the foundation of a stable codebase. In this workshop, you’ll learn how to create a well designed boundary between subsystems, dependency injection, use case driven development, creating injectable subsystems, and using state management to result in a clean architecture for your apps.
  • Advanced Debugging & Reverse Engineering: Learn to wield the power of LLDB and other debugging tools and dig deep into code. Create powerful, custom debugging scripts to quickly hunt down any item that piques your interest. Not only will you learn to find bugs faster, but you’ll also learn how other developers have solved problems similar to yours. At the end of this workshop, you’ll have the tools and knowledge to answer even the most obscure question about your code — or someone else’s.

Learn at your own pace with the complete video coverage of both workshops. Work along with the instructor and learn as you go, with the complete project code and included workbook.

Get up close and personal with video content from the full-day RWDevCon 2017 Workshop series.

What’s Included in the RWDevCon 2017 Workshop Vault?

  • Full access to workshop videos: Get access to both full videos of Workshop One, Advanced App Architecture, and Workshop Two, Advanced Apple Debugging & Reverse Engineering.
  • Entire collection of sample projects: You’ll get the complete package of sample project code from all the workshops — and you’re free to reuse all code in your own apps.
  • Complete workshop workbook: A perfect companion to the workshop videos, the workbook helps you stay on track with important details about each of the workshops.

RWDevcon 2017 Vault – Tutorials

Experience all 24 tutorial sessions from the conference in video form, including tutorials:

  1. Advanced Core Data: Core Data has many advanced features which can make development of complex apps easier while increasing performance. You’ll learn how to take advantage of some of the advanced features of Core Data such as background fetching and child contexts.
  2. Advanced Auto Layout: Learn how you can use some of Auto Layout’s more advanced features to your advantage while designing complex, dynamic views.
  3. Machine Learning on iOS: Machine Learning. Convolutional Neural Networks. Deep Learning Neural Networks. What is all the hype about? What are these technologies, what are they good for, and can we use them for anything useful right now? This session requires no background in any of these areas, and will introduce you to machine learning on iOS with a worked example.
  4. iOS Concurrency: Learn how to add concurrency to your apps with GCD & Operations. Keep your app’s UI responsive to give your users a great user experience, and learn how to avoid common concurrency problems, like race condition and deadlock.
  5. Reconstructing Popular iOS Animations: In this session, you’ll examine two high profile apps with gorgeous fluid, tactile interfaces and reconstruct them yourself.
  6. Mastering Git: In this session you’ll learn some of Git’s more advanced topics, such as rebasing, hooks and history mutation. You’ll also gain a better understanding of how Git works under the covers and gain some experience with realistic day-to-day scenarios.
  7. Learn how to truly use Git the way it was designed to be used!

  8. Building Reusable Frameworks: Using shared code from the community has become a major benefit for developers. Why not pay it back and share the awesome things you’ve written with the world? In this session, you’ll learn how to create a framework from your code that’s compatible with all three of the main dependency manager players: Cocoapods, Carthage, and the Swift Package Manager.
  9. Swift Memory Management: While the design of Swift and the compiler relieve you from much of the drudgery associated with reference counting, it’s critical that you understand what the system is doing for you, so that you can create higher performance, bug free apps. Learn how to think about objects and closures and how to use the latest Xcode tools to analyze and debug your code.
  10. Cross-Platform React Native: React Native is a framework for building native apps with React. It’s been used by many developers who are drawn to it’s learn once, write anywhere paradigm and fast development cycle. In this session you’ll learn how to create a cross-platform (iOS and Android) app, learning how to create an app from scratch and how to integrate React Native into an existing native app.
  11. Fastlane: Fastlane is a suite of tools to help automate building and release iOS (and Android!) apps. From creating screenshots to handling provisioning to submitting your application, Fastlane can help with it all. In this session, you’ll learn how to use these tools to help automate the mundane tasks you dread doing in iTunes Connect.
  12. RxSwift in Practice: RxSwift, and its companion framework RxCocoa, allow you to create reactive apps for iOS and macOS. Your first look at Rx code might be intimidating without a proper introduction, but in this session you will start in Playgrounds, learn the core concepts, and then move on to building a real iOS application in Xcode. Just beware – you might like programming with RxSwift too much!
  13. How to Make a Platformer Game in Unity: Unity is used by thousands of indie development studios, hobbyist game developers, and even AAA game studios. In this session you’ll power through creating a platformer game like Super Meat Boy, and learn firsthand how easy it is to be productive with this powerful and versatile multi-platform game engine.
  14. iMessage Apps: The Messages framework in iOS 10 allows developers to extend their apps to iMessages to further their app’s reach. In this session, you’ll learn how to extend an existing app by adding a Messages extension.
  15. Learn to create your own iMessage apps!

  16. Practical Unit Testing I: Unit tests allow you to develop without fear and ship with confidence. They can even serve as documentation for your code and make everything easier to understand. But you already know this, don’t you? In this session you will explore ways to add at least one more unit test to your app.
  17. Server Side Swift with Perfect: Perfect is an open source server side Swift framework that allows you to create web apps, or web APIs, purely in Swift. In this session, you’ll learn how to create your first web app in Swift from scratch, including templating, persistence, and authentication.
  18. Swift Playgrounds in Depth: Swift playgrounds have come a long way since their initial release in 2014 alongside the Swift language. This session covers a broad range of topics, a few of which are interactive playgrounds, how to use external frameworks, prototyping animations and much more. Along the way you’ll also learn a few practical tips and tricks to take your playground-fu to the next level.
  19. Practical Unit Testing II: Continuous Integration (CI) is the art of automatically translating your code into a build that can be easily accessed by project stakeholders. In the first half of this session, you’ll work through different aspects of CI setup design, followed by a review of fundamentals that can be applied to any CI solution. In the second half, you’ll look at a demo CI setup for the project created in Practical Unit Testing I.
  20. Cocoa Bindings: In this session, you’ll cover the basic of bindings, how to set them up in Interface Builder, some common debugging pitfalls, and some binding related tools, such as value transformers and number formatters.
  21. Engaging On-Boarding: Users abandon apps when they can’t figure out how to use it fast enough. To lower the abandonment rate for your app, create an on-boarding experience that keeps the user engaged, informed and delighted the first time they open your app. In this session, you’ll look at the pros and cons on on-boarding, when to use it, and best practices. Finally, you will brainstorm and implement your own on-boarding experience!
  22. Learn what makes for engaging and interesting on-boarding in your apps.

  23. Advanced iOS Design Patterns: In this talk, you’ll learn some design patterns for solving common iOS development problems, including: authentication and auto re-login; networking and domain model management; and data persistence and cache management.
  24. Android for iOS Developers: It seems almost everything is cross-platform these days. Learn how to make a simple, professional Android app using Material Design, Realm, and Retrofit 2.
  25. Accessibility & Internationalization: Does your app speak Swahili? Or cater to the color blind? No? Then this session’s for you! Learn how to reach exciting new audiences by taking full advantage of the fantastic Internationalisation and Accessibility support provided by Apple’s iOS frameworks.
  26. Swift Error Handling: The best apps delight their users by remaining responsive and stable in the face of errors. In this session, you’ll learn how to write code that responds to and recovers from errors, and even anticipates them.
  27. Game AI with GameplayKit: GameplayKit is an independent Apple framework that game developers may use to help them create better games, with less effort. In this session, you’ll learn how to use GameplayKit to add artificial intelligence (AI) to your games.

Learn at your own pace with the complete video coverage of all tutorial sessions. Work along with the instructor and learn as you go, with the complete project code and included workbook.

24+ hours of video tutorial content from RwDevCon 2017!

What’s Included in the RWDevCon 2017 Tutorial Vault?

  • 24+ hours of hands-on tutorial videos: Full access to the full videos of the tutorial sessions that cover RxSwift, Auto Layout, React Native, Unity, Fastlane, Android, Git, design patterns, unit testing, concurrency, building reusable frameworks — and much, much more!
  • 500+ MB of sample projects: You’ll get the complete package of sample project code from all the tutorial sessions — and you’re free to reuse all code in your own apps.
  • 500+ page conference workbook: Stay on track with detailed, step-by-step instructions for each tutorial session — a perfect companion for following along with the session videos.

When Will the RWDevCon 2017 Vault Be Released?

RWDevCon 2017 runs from March 31 to April 1, 2017. We’ll be videotaping the workshops and tutorials, and it should take a few weeks to get everything edited and pulled together for your viewing pleasure. Stay tuned for an announcement in the coming weeks.

Where to Go From Here?

Pre-orders for the RWDevCon 2017 Vault are open, at an incredible discount:

  • RWDevCon 2017 Vault – Workshops: $149.99 now only $74.99 — that’s a 50% discount! Get it here.
  • RWDevCon 2017 Vault – Tutorials: $149.99 now only $74.99 — that’s a 50% discount! Get it here.

Pre-order the Workshop Series and the Tutorial Series, and you’ll save even more:

  • RWDevCon 2017 Vault Bundle: $199.99 now only $99.99 — that’s a steal! Get the bundle here.
  • All RWDevCon 2017 attendees get free access to the Vault as part of their conference package. But if you weren’t lucky enough to snag a ticket, you can still get the RWDevCon 2017 experience, in the comfort of your home or office. But remember — this discount won’t last for long.

    We’re excited about RWDevCon 2017 — and if we don’t see you there, we hope you’ll join us in spirit through the RWDevCon 2017 Vault!

    The post RWDevCon 2017 Vault – Pre-Order Now! appeared first on Ray Wenderlich.

    What’s New in Swift 3.1?

    $
    0
    0


    Great news: Xcode 8.3 and Swift 3.1 is now out of beta! This release contains some long-awaited Swift Package Manager features and improvements to the language itself.

    If you haven’t been following the Swift Evolution Process closely, keep reading – this article is for you!

    In this article, I’ll highlight the most significant changes in Swift 3.1 which will have a major impact on your code. Let’s dive in! :]

    Getting Started

    Swift 3.1 is source-compatible with Swift 3.0, so the new features won’t break your code if you’ve already migrated your project to Swift 3.0 using Edit\Convert\To Current Swift Syntax… in Xcode. However, Apple has dropped support for Swift 2.3 in Xcode 8.3. So if you haven’t migrated from Swift 2.3 yet, now is the time to do so!

    In the sections below, you’ll see linked tags such as [SE-0001]. These are Swift Evolution proposal numbers. I’ve included the link to each proposal so you can discover the full details of each particular change. I recommend you try out the features we discuss in a playground, so you have a better understanding of everything that changes.

    So, fire up Xcode, select File\New\Playground…. Choose iOS as the platform, call it whatever you want, and save it wherever you want. While you’re reading this article, try out each feature in this playground.

    Note: If you need a short and sweet review of the Swift 3.0 highlights, check out our article on What’s New in Swift 3.

    Language Improvements

    First, let’s take a look at the language improvements in this release, including failable initializers for numeric types, new sequence functions, and more.

    Failable Numeric Conversion Initializers

    Swift 3.1 implements failable initializers for all numeric types (Int, Int8, Int16, Int32, Int64, UInt, UInt8, UInt16, UInt32, UInt64, Float, Float80, Double) which either complete successfully without loss of information or simply return nil [SE-0080].

    This feature is useful, for example, when dealing with loosely typed data conversions from external sources in a safe and recoverable manner. For example, this is how you might process a JSON array of students:

    class Student {
      let name: String
      let grade: Int
     
      init?(json: [String: Any]) {
        guard let name = json["name"] as? String,
              let gradeString = json["grade"] as? String,
              let gradeDouble = Double(gradeString),
              let grade = Int(exactly: gradeDouble)  // <-- 3.1 feature here
        else {
            return nil
        }
        self.name = name
        self.grade = grade
      }
    }
     
    func makeStudents(with data: Data) -> [Student] {
      guard let json = try? JSONSerialization.jsonObject(with: data, options: .allowFragments),
            let jsonArray = json as? [[String: Any]] else {
        return []
      }
      return jsonArray.flatMap(Student.init)
    }
     
    let rawStudents = "[{\"name\":\"Ray\", \"grade\":\"5.0\"}, {\"name\":\"Matt\", \"grade\":\"6\"},
                        {\"name\":\"Chris\", \"grade\":\"6.33\"}, {\"name\":\"Cosmin\", \"grade\":\"7\"},
                        {\"name\":\"Steven\", \"grade\":\"7.5\"}]"
    let data = rawStudents.data(using: .utf8)!
    let students = makeStudents(with: data)
    dump(students) // [(name: "Ray", grade: 5), (name: "Matt", grade: 6), (name: "Cosmin", grade: 7)]

    You use a failable initializer to convert the grade property from Double to Int inside the Student class designated failable initializer like so:

    let grade = Int(exactly: gradeDouble)

    If gradeDouble is a fractional value, such as 6.33, it will fail. If it can be represented exactly with an Int, such as 6.0, it will succeed.

    Note: An alternative design used throwing initializers instead of failable ones. The community chose failable ones to be a better, more ergonomic design.

    New Sequence Functions

    Swift 3.1 adds two new functions for data filtering to the standard library’s Sequence protocol: prefix(while:) and drop(while:) [SE-0045].

    Consider the Fibonacci infinite sequence:

    let fibonacci = sequence(state: (0, 1)) {
      (state: inout (Int, Int)) -> Int? in
      defer {state = (state.1, state.0 + state.1)}
      return state.0
    }

    In Swift 3.0 you simply specified the iteration count to iterate through the fibonacci sequence:

    // Swift 3.0
    for number in fibonacci.prefix(10) {
      print(number)  // 0 1 1 2 3 5 8 13 21 34
    }

    Swift 3.1 lets you use prefix(while:) and drop(while:) with a condition to get all elements of the sequence between two given values, like so:

    // Swift 3.1
    let interval = fibonacci.prefix(while: {$0 < 1000}).drop(while: {$0 < 100})
    for element in interval {
      print(element) // 144 233 377 610 987
    }

    prefix(while:) returns the longest subsequence which satisfies a certain predicate. It starts at the beginning of the sequence and stops at the first element for which the given closure returns false.

    drop(while:) does the opposite: It returns the subsequence that begins with the first element for which the given closure returns false and finishes at the end of the sequence.

    Note: You may use trailing closure syntax in this case:
    let interval = fibonacci.prefix{$0 < 1000}.drop{$0 < 100}

    Concrete Constrained Extensions

    Swift 3.1 lets you extend a generic type with a concrete type constraint. Previously, you couldn’t extend a type like this because the constraint had to be a protocol. Let’s see an example.

    For example, Ruby on Rails provides a very useful isBlank method for checking for user input. Here is how you would implement it in Swift 3.0 as a computed property on the String data type extension:

    // Swift 3.0
    extension String {
      var isBlank: Bool {
        return trimmingCharacters(in: .whitespaces).isEmpty
      }
    }
     
    let abc = " "
    let def = "x"
     
    abc.isBlank // true
    def.isBlank // false

    If you want the isBlank computed property to work with optional strings as well, you would do the following in Swift 3.0:

    // Swift 3.0
    protocol StringProvider {
      var string: String {get}
    }
     
    extension String: StringProvider {
      var string: String {
        return self
      }
    }
     
    extension Optional where Wrapped: StringProvider {
      var isBlank: Bool {
        return self?.string.isBlank ?? true
      }
    }
     
    let foo: String? = nil
    let bar: String? = "  "
    let baz: String? = "x"
     
    foo.isBlank // true
    bar.isBlank // true
    baz.isBlank // false

    This creates a StringProvider protocol for String to adopt. Which in turn you use to extend Optional when the wrapped type is a StringProvider, to add the isBlank method.

    Swift 3.1 lets you extend a concrete type instead of a protocol like this:

    // Swift 3.1
    extension Optional where Wrapped == String {
      var isBlank: Bool {
        return self?.isBlank ?? true
      }
    }

    This provides the same functionality as before, in much fewer lines of code!

    Nested Generics

    Swift 3.1 allows you to mix nested types with generics. As an exercise, consider this (not too crazy) example. Whenever a certain team lead at raywenderlich.com wants to publish a post on the blog, he assigns a team of dedicated developers to work on it so that it meets the website’s high quality standards:

    class Team<T> {
      enum TeamType {
        case swift
        case iOS
        case macOS
      }
     
      class BlogPost<T> {
        enum BlogPostType {
          case tutorial
          case article
        }
     
        let title: T
        let type: BlogPostType
        let category: TeamType
        let publishDate: Date
     
        init(title: T, type: BlogPostType, category: TeamType, publishDate: Date) {
          self.title = title
          self.type = type
          self.category = category
          self.publishDate = publishDate
        }
      }
     
      let type: TeamType
      let author: T
      let teamLead: T
      let blogPost: BlogPost<T>
     
      init(type: TeamType, author: T, teamLead: T, blogPost: BlogPost<T>) {
        self.type = type
        self.author = author
        self.teamLead = teamLead
        self.blogPost = blogPost
      }
    }

    You nest the BlogPost inner class within its corresponding Team outer class and make both classes generic. This is how the teams look for the tutorials and articles I’ve published on the website so far:

    Team(type: .swift, author: "Cosmin Pupăză", teamLead: "Ray Fix",
         blogPost: Team.BlogPost(title: "Pattern Matching", type: .tutorial,
         category: .swift, publishDate: Date()))
     
    Team(type: .swift, author: "Cosmin Pupăză", teamLead: "Ray Fix",
         blogPost: Team.BlogPost(title: "What's New in Swift 3.1?", type: .article,
         category: .swift, publishDate: Date()))

    But actually, in this case you can simplify that code a bit more. If the nested inner type uses the generic outer one, it inherits the parent’s type by default. Therefore you don’t have to declare it, like so:

    class Team<T> {
      // original code 
     
      class BlogPost {
        // original code
      }
     
      // original code 
      let blogPost: BlogPost
     
      init(type: TeamType, author: T, teamLead: T, blogPost: BlogPost) {
        // original code   
      }
    }
    Note: If you want to learn more about generics in Swift, read our recently updated tutorial on getting started with Swift generics.

    Availability by Swift Version

    You may check for a specific Swift version with the #if swift(>= N) static construct like this:

    // Swift 3.0
    #if swift(>=3.1)
      func intVersion(number: Double) -> Int? {
        return Int(exactly: number)
      }
    #elseif swift(>=3.0)
      func intVersion(number: Double) -> Int {
        return Int(number)
      }
    #endif

    However, this approach has one major drawback when used in something like the Swift standard library. It requires compiling the standard library for each and every supported old language version. That’s because when you run the Swift compiler in backwards compatibility mode, to say you want Swift 3.0 behaviour for example, it would need to use a version of the standard library compiled for that specific compatibility version. If you used one compiled with in version 3.1 mode, you simply wouldn’t have the right code there.

    So, Swift 3.1 extends the @available attribute to support specifying Swift version numbers in addition to its existing platform versions [SE-0141]:

    // Swift 3.1
     
    @available(swift 3.1)
    func intVersion(number: Double) -> Int? {
      return Int(exactly: number)
    }
     
    @available(swift, introduced: 3.0, obsoleted: 3.1)
    func intVersion(number: Double) -> Int {
      return Int(number)
    }

    This new feature gives the same behaviour in terms of which intVersion method is available under which Swift version. However it allows libraries like the standard library to be compiled only once. The compiler then simply picks the features that are available for the given compatibility version selected.

    Note: If you want to learn more about the availability attributes in Swift, check out our tutorial on availability attributes in Swift.

    Convert Non-Escaping Closures to Escaping Ones

    Closure arguments to functions were made non-escaping by default in Swift 3.0 [SE-0103]. However, part of that proposal was not implemented at the time. In Swift 3.1, you can convert non-escaping closures to escaping ones temporarily by using the new withoutActuallyEscaping() helper function.

    Why would you ever want to do this? It’s probably not often but consider the example from the proposal.

    func perform(_ f: () -> Void, simultaneouslyWith g: () -> Void,
                 on queue: DispatchQueue) {
      withoutActuallyEscaping(f) { escapableF in     // 1
        withoutActuallyEscaping(g) { escapableG in
          queue.async(execute: escapableF)           // 2
          queue.async(execute: escapableG)
     
          queue.sync(flags: .barrier) {}             // 3
        }                                            // 4
      }
    }

    This function runs two closures simultaneously and then returns after both are done.

    1. f and g come in as non-escaping and are converted to escapableF and escapableG.
    2. async(execute:) calls require escaping closures. Fortunately you have those because of the previous step.
    3. By running sync(flags: .barrier), you ensure that the async(execute:) methods are completely done and the closures won’t be called later on.
    4. Scope limits the use of escapableF and escapableG.

    If you squirrel either temporary escaping closures away (i.e. actually escaped them) it would be a bug. Future versions of the Standard Library may be able to detect this and trap if you tried to call them.

    Swift Package Manager Updates

    Ah, the long-awaited updates to the Swift Package Manager have arrived!

    Editable Packages

    Swift 3.1 adds the concept of editable packages to the Swift Package Manager [SE-0082].

    The swift package edit command takes an existing package and converts it to an editable one. The editable package replaces all of the canonical package’s occurrences in the dependency graph. Use the --end-edit command to revert the package manager back to the canonical resolved package.

    Version Pinning

    Swift 3.1 adds the concept of version pinning package dependencies to specific versions to the Swift Package Manager [SE-0145]. The pin command pins one or all dependencies like this:

    $ swift package pin --all      // pins all the dependencies
    $ swift package pin Foo        // pins Foo at current resolved version
    $ swift package pin Foo --version 1.2.3  // pins Foo at 1.2.3

    Use the unpin command to revert to the previous package version:

    $ swift package unpin —all
    $ swift package unpin Foo

    The package manager stores the active version pin information for each package in Package.pins. If the file doesn’t exist, the package manager creates it automatically based on the requirements specified in the package manifest, as part of the automatic pinning process.

    Other Bits

    The swift package reset command resets a package back to a clean state, with no dependencies checked out or build artifacts present.

    As well, the swift test --parallel command executes tests in parallel.

    Miscellaneous Bits and Pieces

    There’s a few other tidbits in Swift 3.1 that don’t quite fit anywhere else:

    Multiple-Return Functions

    C functions which return twice such as vfork and setjmp don’t work anymore. They change the program’s control flow in interesting ways. So the Swift community has decided that using them should be banned and now results in a compile-time error.

    Disable Auto-Linking

    The Swift Package Manager disables the auto-linking feature of module maps for C language targets:

    // Swift 3.0
    module MyCLib {
        header “foo.h"
        link “MyCLib"
        export *
    }
     
    // Swift 3.1
    module MyCLib {
        header “foo.h”
        export *
    }

    Where to Go From Here?

    Swift 3.1 polishes up some Swift 3.0 features in preparation for more serious changes that will be bundled in Swift 4.0 later on this year. These include huge improvements to generics, regular expressions, a more ergonomic string design and more.

    If you’re feeling adventurous, then head over and look at the Swift standard library diffs or look at the official Swift CHANGELOG where you can read more information about all of the changes. Or you can use this to keep an eye out for what’s coming in Swift 4.0!

    And if you’re really curious about what changes are coming in Swift 4 and beyond, then head over to the Swift Evolution proposals where you can see what things are being proposed right now. If you’re really keen then why not give feedback on one of the current proposals under review or even pitch a proposal yourself ;].

    What do you like or dislike about Swift 3.1 so far? Let us know in the forum discussion below!

    The post What’s New in Swift 3.1? appeared first on Ray Wenderlich.

    Updated Course: Scroll View School

    $
    0
    0

    We’ve been releasing all sorts of Swift 3 goodies over the past few months, from our beginner courses to get you started in Swift and iOS, to our screencasts on more advanced topics, to our advanced courses on things like unit testing, custom controls and much more!

    Today we’re happy to announce another course: Scroll View School, which has been updated for Swift 3 & iOS 10!

    In this 18-part course, you’ll learn all about scroll views including basics like zooming, centering and using Auto Layout in your scroll views, all the way up to scroll view features that will make your app shine, like content insets, paging, pull to refresh, slide-out sidebars and more.

    Let’s take a look at what’s inside this course:

    Video 1: Introduction. In the first video of this series, you’ll find out what’s covered in our Swift Scroll View School video tutorial series.

    Video 2: Frame and Bounds. Next up, you’ll learn about frame and bounds so you can gain an understanding of how scroll views work.

    Video 3: Scrolling. Now that you have the basics covered off, you’ll get started with your first scroll view!

    Video 4: Zooming. In this video tutorial, you’ll learn how to zoom content within a scroll view.

    Video 5: Centering. Make your cell content look neat and tidy as you learn how to center your content within a scroll view.

    Video 6: Auto Layout I. In this video, you’ll learn how to use storyboards and Auto Layout to set up some simple controls inside a scroll view.

    Video 7: Auto Layout II. Moving on from Part I, you’ll learn how to work with stack views and text views inside of a scroll view.

    Video 8: Embedding Layouts. Next, you’ll cover the process of taking a layout with existing constraints and embed it in a scroll view — without losing those constraints.

    Video 9: Nested Scroll Views. In this video tutorial, you’ll learn how to nest scroll views inside another scroll view.

    Video 10: Content Insets. Learn how to use content insets to better display your content in scroll views.

    Video 11: Keyboard Insets. In this video, you’ll learn how to use content insets to make room for the software k,

    Video 12: Paging Scroll Views I.Move on to paging scroll views, where you’ll learn how to center a page when the user stops scrolling.

    Video 13: Paging Scroll Views II. Carry on from Part I and go more in-depth with paging scroll views, including how to add a gap between your pages for a nice margin and how to add a page control.

    Video 14: Slide Out Sidebar I. Add even more polish to your app as you learn how to build a slide-out sidebar navigation menu using scroll views.

    Video 15: Slide Out Sidebar II. Finish off your slide-out sidebar and implement a second sidebar on the right hand side and a menu toggle button.

    Video 16: Pull To Refresh I. Learn about this UI staple gesture as you build a custom pull-to-refresh control.

    Video 17: Pull To Refresh II. Continue learning about custom pull to refresh controls with scroll views, and add a parallax effect to the refresh view.

    Video 18: Pull To Refresh III. In this final video, you’ll continue learning about pull to refresh controls and simulate a refresh action, and then make the view disappear.

    Where To Go From Here?

    Want to check out the course? You can watch the introduction for free!

    The rest of the course is for raywenderlich.com subscribers only. Here’s how you can get access:

    • If you are a raywenderlich.com subscriber: The entire course is complete and available today. You can check out the first part here.
    • If you are not a subscriber yet: What are you waiting for? Subscribe now to get access to our updated Scroll View School course and our entire catalog of over 500 videos.

    We hope you enjoy, and stay tuned for more new Swift 3 courses and updates to come! :]

    The post Updated Course: Scroll View School appeared first on Ray Wenderlich.

    An Introduction to Functional Programming in Swift

    $
    0
    0

    Functional Programming in Swift

    Swift’s grand entrance to the programming world at WWDC in 2014 was much more than just an introduction of a new language. It brought a number of new approaches to software development for the iOS and macOS platforms.

    This tutorial focuses on just one of these methodologies — Functional Programming or FP for short — and you’ll get an introduction to a broad range of functional ideas and techniques used in FP.

    Update Note: This tutorial has been updated to Swift 3 by Niv Yahel. The original tutorial was written by Joe Howard.

    Getting Started

    Create a new playground in Xcode so you can follow along with the tutorial. Keep in mind that this tutorial will cover FP at a high level, so thinking about the concepts through the filter of a real world situation will be helpful. In this case, imagine you’re building an app for an amusement park, and that the park’s ride data is provided by an API on a remote server.

    Start by adding the following to your playground:

    enum RideCategory: String {
      case family
      case kids
      case thrill
      case scary
      case relaxing
      case water
    }
     
    typealias Minutes = Double
    struct Ride {
      let name: String
      let categories: Set<RideCategory>
      let waitTime: Minutes
    }

    Now you’re probably thinking about loop-de-loops and the thrill of pulling multiple G’s on a wild ride, but trust me, there’s no ride quite like making the shift to FP! :]

    Functional Programming Concepts

    In this section, you’ll get an introduction to a number of key concepts in FP. Many treatises that discuss FP single out immutable state and lack of side effects as the most important aspects of FP, so why not start there?

    Immutability and Side Effects

    No matter what programming language you learned first, it’s likely that one of the initial concepts you learned was that a variable represents data. If you step back for a moment to think about the idea, variables can seem quite odd.

    Add the following seemingly reasonable and common lines of code to your playground:

    var x = 3
    // other stuff...
    x = 4

    As a developer that’s trained in imperative programming, you wouldn’t give this a second thought. But how exactly could a quantity be equal to 3 and then later be 4?!

    The term variable implies a quantity that varies. Thinking of the quantity x from a mathematical perspective, you’ve essentially introduced time as a key parameter in how your software behaves. By changing the variable, you create mutable state.

    By itself or in a relatively simple system, mutable state is not terribly problematic. However, when connecting many objects together, such as in a large object-oriented system, mutable state can produce many headaches.

    For instance, when two or more threads access the same variable concurrently, they may modify or access it out of order, leading to unexpected behavior. This includes race conditions, dead locks and many other problems.

    Imagine if you could write code where state never mutated. A whole slew of issues that occur in concurrent systems would simply vanish — poof! You can do this by creating immutable state, so data is not allowed to change over the course of a program.

    The key benefit of using immutable data is that units of code that use it would be free of side effects, meaning the functions in your code wouldn’t alter elements outside of themselves and no spooky effects would appear when function calls occur.

    Let’s see what happens when you make the primary data you’ll work with in this tutorial an immutable Swift constant. Add the following array to your playground:

    let parkRides = [
      Ride(name: "Raging Rapids", categories: [.family, .thrill, .water], waitTime: 45.0),
      Ride(name: "Crazy Funhouse", categories: [.family], waitTime: 10.0),
      Ride(name: "Spinning Tea Cups", categories: [.kids], waitTime: 15.0),
      Ride(name: "Spooky Hollow", categories: [.scary], waitTime: 30.0),
      Ride(name: "Thunder Coaster", categories: [.family, .thrill], waitTime: 60.0),
      Ride(name: "Grand Carousel", categories: [.family, .kids], waitTime: 15.0),
      Ride(name: "Bumper Boats", categories: [.family, .water], waitTime: 25.0),
      Ride(name: "Mountain Railroad", categories: [.family, .relaxing], waitTime: 0.0)
    ]

    Since you declare parkRides with let instead of var, both the array and its contents are immutable. Trying to modify one of the items in the array, via the following:

    parkRides[0] = Ride(name: "Functional Programming", categories: [.thrill], waitTime: 5.0)

    …produces a compiler error. Go ahead and try to change those rides! No way, buster. :]

    Modularity

    You’ve reached the part where you’ll add your first function, and you’ll need to use some NSString methods on a Swift String, so import the Foundation framework by putting this at the very top of your playground:

    import Foundation

    Suppose you need an alphabetical list of all the rides’ names. You are going to start out doing this imperatively. Add the following function to the bottom of the playground:

    func sortedNames(of rides: [Ride]) -> [String] {
      var sortedRides = rides
      var key: Ride
     
      // 1
      for i in (0..<sortedRides.count) {
        key = sortedRides[i]
     
        // 2
        for j in stride(from: i, to: -1, by: -1) {
          if key.name.localizedCompare(sortedRides[j].name) == .orderedAscending {
            sortedRides.remove(at: j + 1)
            sortedRides.insert(key, at: j)
          }
        }
      }
     
     
      // 3
      var sortedNames = [String]()
      for ride in sortedRides {
        sortedNames.append(ride.name)
      }
     
      return sortedNames
    }

    Here you’re doing the following:

    1. Looping over all the rides passed into the function
    2. Performing an insertion sort
    3. Gathering the names of the sorted rides

    From the perspective of a caller to sortedNames, it provides a list of rides, and then outputs the list of sorted names. Nothing outside of sortedNames has been affected. To prove this, first print out the output of a call to sorted names:

    print(sortedNames(of: parkRides))

    Now gather the names of the list of rides that were passed as a parameter and print them:

    var originalNames = [String]()
    for ride in parkRides {
      originalNames.append(ride.name)
    }
     
    print(originalNames)

    In the results area and console, you’ll see that sorting rides inside of sortedNames didn’t affect the list that was passed in. The modular function you’ve created could be considered quasi-functional with all that imperative code. The logic of sorting rides by name has been captured in a single, testable, modular and reusable function.

    Still, the imperative code made for a pretty long and unwieldy function. Wouldn’t it be nice if there were techniques to simplify the code within a function like sortedNames even further?

    First-Class and Higher-Order Functions

    In FP languages functions are first-class citizens, meaning that functions are treated just like other objects, and can be assigned to variables.

    Because of this, functions can also accept other functions as parameters, or return other functions. Functions that accept or return other functions are called higher order functions.

    In this section, you’ll work with some of the most common higher-order functions in FP languages, namely filter, map and reduce.

    Filter

    In Swift, filter(_:) is a method on Collection types, such as Swift arrays. It accepts another function a parameter. This other function accepts as input a single value from the array, and returns a Bool.

    filter(_:) applies the input function to each element of the calling array and returns another array that has only the array elements for which the parameter function returns true.

    Think back to your list of actions that sortedNames performed:

    1. Looping over all the rides passed into the function
    2. Performing an insertion sort
    3. Gathering the names of the sorted rides

    Think about this declaratively rather than imperatively.

    Start by commenting out sortedNames and the subsequent code because you are going to write this much more efficiently. At the bottom of the playground create a function in which a Ride object will be used as an input parameter to the function.

    func waitTimeIsShort(ride: Ride) -> Bool {
      return ride.waitTime < 15.0
    }

    waitTimeIsShort accepts a Ride and returns true if the ride’s wait time is less than 15 minutes; otherwise it returns false.

    Call filter on your park rides and pass in the new function you just created:

    var shortWaitTimeRides = parkRides.filter(waitTimeIsShort)
    print(shortWaitTimeRides)

    In the playground output, you’ll only see Crazy Funhouse and Mountain Railroad in the call to filter‘s output, which is correct.

    Since Swift functions are simply named closures, you can produce the same result by passing a trailing closure to filter and using closure-syntax:

    shortWaitTimeRides = parkRides.filter { $0.waitTime < 15.0 }
    print(shortWaitTimeRides)

    Here, filter is taking each ride in the parkRides array (represented by $0), looking at its waitTime property, and gauging if it is less than 15.0. You are being declarative and telling the program what you want it to do, instead of how it should be done. This can look rather cryptic the first few times you work with it.

    CustomStringConvertible Detour

    Before proceeding to learning about the map(_:) method, you’ll do something to make the print output a bit easier to read.

    When printing a Ride object, by default you get the following string representation:

    Ride(name: "Mountain Railroad", categories: Set([RideCategory.family, RideCategory.relaxing]), waitTime: 0.0)

    You can make this a bit easier to read by implementing CustomStringConvertible on Ride and providing your own string description of a Ride object.

    Right below where the Ride struct is defined, add the following implementation of CustomStringConvertible for RideCategory and Ride:

    extension RideCategory: CustomStringConvertible {
      var description: String {
         return rawValue
      }
    }
     
    extension Ride: CustomStringConvertible {
      var description: String {
        return "⚡️Ride(name: \"\(name)\", waitTime: \(waitTime), categories: \(categories))"
      }
    }

    Now for each ride object you’ll see a string that looks like this:

    ⚡️Ride(name: "Mountain Railroad", waitTime: 0.0, categories: [family, relaxing])

    Still may not be the easiest thing to read, but it does make it a bit nicer than before!

    Map

    The Collection method map(_:) also accepts a single function as a parameter, and in turn, it produces an array of the same length after being applied to each element of the collection. The return type of the mapped function does not have to be the same type as the collection elements.

    Apply map to the elements of your parkRides array to get a list of all the ride names as strings:

    let rideNames = parkRides.map { $0.name }
    print(rideNames)

    You can also sort and print the ride names as shown below, when you use the non-mutating sorted(by:) method on the Collection type to perform the sorting:

    print(rideNames.sorted(by: <))

    sortedNames can now just be two lines thanks to map(_:), sorted(by:)!

    Re-implement sortedNames with the following code:

    func sortedNames(of rides: [Ride]) -> [String] {
      let rideNames = parkRides.map { $0.name }
      return rideNames.sorted(by: <)
    }
     
    print(sortedNames(of: parkRides))

    Reduce

    The Collection method reduce(_:_:) takes two parameters. The first is a starting value of a generic type Element, and the second is a function that combines a value of type Element with an element in the collection to produce another value of type Element.

    The input function applies to each element of the calling collection, one-by-one, until it reaches the end of the collection and produces a final accumulated value of type Element.

    Suppose you want to know the total wait time of all the rides in your park.

    Pass in a starting value of 0.0 into reduce and use trailing-closure syntax to add in the contribution of each ride to the accumulating total.

    let totalWaitTime = parkRides.reduce(0.0) { (total, ride) in total + ride.waitTime }
    print(totalWaitTime)

    In this example, the first two iterations look like the following:

    Iteration  initial   ride.waitTime       resulting total
        1          0.0            45.0     0.0 + 45.0 = 45.0
        2         45.0            10.0    45.0 + 10.0 = 55.0

    As you can see, the resulting total carries over as the initial value for the following iteration. This continues until reduce iterates through every Ride in parkRides. This allows you to get the total with just one line of code!

    Partial Functions

    One of the more advanced techniques in FP is using partial functions. This concept allows you to encapsulate one function within another, which allows you to define a part of a function while passing another component of it as a parameter.

    func filter(for category: RideCategory) -> ([Ride]) -> [Ride] {
      return { (rides: [Ride]) in
        rides.filter { $0.categories.contains(category) }
      }
    }

    Here, filter(for:) accepts a RideCategory as its parameter and returns a function that filters a [Ride] based on the provided category. Use it to create a filter for kid rides, like so:

    let kidRideFilter = filter(for: .kids)
    print(kidRideFilter(parkRides))

    Pure Functions

    One of the primary concepts in FP that leads to the ability to reason consistently about program structure, as well as confidently test program results, is the idea of a pure function.

    A function can be considered pure if it meets two criteria:

    • The function always produces the same output when given the same input, e.g., the output only depends on its input.
    • The function creates zero side effects outside of it.

    A pure function’s existence is closely tied to the usage of immutable state.

    Add the following pure function to your playground:

    func ridesWithWaitTimeUnder(_ waitTime: Minutes, from rides: [Ride]) -> [Ride] {
      return rides.filter { $0.waitTime < waitTime }
    }

    ridesWithWaitTimeUnder(:from:) is a pure function because its output is always the same when given the same wait time and the same list of rides.

    With a pure function, it’s easy to write a good unit test against the function. To simulate a unit test, add the following assertion to your playground:

    var shortWaitRides = ridesWithWaitTimeUnder(15, from: parkRides)
    assert(shortWaitRides.count == 2, "Count of short wait rides should be 2")
    print(shortWaitRides)

    Referential Transparency

    Pure functions are closely related to the concept of referential transparency. An element of a program is referentially transparent if you can replace it with its definition and always produce the same result. It makes for predictable code and allows the compiler to perform optimizations. Pure functions satisfy this condition.

    Verify that the pure function ridesWithWaitTimeUnder is referentially transparent by replacing its use with its function body:

    shortWaitRides = parkRides.filter { $0.waitTime < 15 }
    assert(shortWaitRides.count == 2, "Count of short wait rides should be 2")
    print(shortWaitRides)

    Recursion

    The final concept to discuss is recursion, which occurs whenever a function calls itself as part of its function body. In functional languages, recursion effectively replaces the looping constructs that are used in imperative languages.

    When the function’s input leads to the function being called again, this is considered a recursive case. In order to avoid an infinite stack of function calls, recursive functions need a base case to end them.

    Let’s add a recursive sorting function for your rides. First make Ride conform to Comparable using the following extension:

    extension Ride: Comparable {
      static func <(lhs: Ride, rhs: Ride) -> Bool {
        return lhs.waitTime < rhs.waitTime
      }
     
      static func ==(lhs: Ride, rhs: Ride) -> Bool {
        return lhs.name == rhs.name
      }
    }

    You consider one ride less than another ride if the wait time is less, and you consider them equal if the rides have the same name.

    Now, extend Array to include a quickSorted method:

    extension Array where Element: Comparable {
      func quickSorted() -> [Element] {
        if self.count > 1 {
          let (pivot, remaining) = (self[0], dropFirst())
          let lhs = remaining.filter { $0 <= pivot }
          let rhs = remaining.filter { $0 > pivot }
          return lhs.quickSorted() as [Element] + [pivot] + rhs.quickSorted()
        }
        return self
      }
    }

    This algorithm first picks a a pivot element. Then the collection is divided into two parts; one part holding all the elements that are less than or equal to the pivot, the other holding the remaining elements greater than the pivot. Recursion is then used to sort the two parts. Note that by using recursion, there is no need for a mutable state.

    Verify your function works as follows:

    print(parkRides.quickSorted())
    print(parkRides)

    The second line confirms that quickSorted didn’t modify the array that was passed in.

    One thing to keep in mind is that recursive functions do have some additional memory (stack) usage and runtime overhead, however they are often significantly more elegant than their messier imperative counterparts, and this shouldn’t be an issue with smaller data sets.

    Imperative vs. Declarative Code Style

    By considering the following problem, you can combine much of what you’ve learned here on FP and get a clear demonstration of some of the benefits of functional programming.

    Consider the following situation:

    A family with young kids wants to go on as many rides as possible between frequent bathroom breaks, so they need to find which kid-friendly rides have the shortest lines. Help them out by finding all family rides with wait times less than 20 minutes and sort them by wait time (ascending).

    Imperative Approach

    For the moment, ignore all you’ve learned about FP so far and think about how you would solve this problem with an imperative algorithm. Your solution will likely be similar to:

    var ridesOfInterest: [Ride] = []
    for ride in parkRides where ride.waitTime < 20 {
      for category in ride.categories where category == .family {
        ridesOfInterest.append(ride)
        break
      }
    }
     
    var sortedRidesOfInterest = ridesOfInterest.quickSorted()
    print(sortedRidesOfInterest)

    You should see that Mountain Railroad, Crazy Funhouse and Grand Carousel are the best bets, and they’re listed in order of increasing wait time.

    As written, the imperative code is fine, but a quick glance does not give a clear, immediate idea of what it’s doing. You have to pause to look at the algorithm in detail to grasp it. No big deal you say? What if you’re coming back to do some maintenance, debugging or you’re handing it off to a new developer? As they say on the Internet, “You’re doing it wrong!”

    Functional Approach

    FP can do better. Add the following one-liner to your playground:

    sortedRidesOfInterest = parkRides.filter { $0.categories.contains(.family) && $0.waitTime < 20 }.sorted(by: <)

    Verify that this single line produces the same output as the imperative code by adding:

    print(sortedRidesOfInterest)

    There you have it! In one line, you’ve told Swift what to calculate; you want to filter your parkRides to .family rides with wait times less than 20 minutes and then sort them. That precisely – and elegantly – solves the problem stated above.

    The resulting code is declarative, meaning it is self-explaining and reads like the problem statement it solves. This is different from imperative code, which reads like the steps the computer has to take to solve the problem statement.

    The When and Why of Functional Programming

    Swift is not a purely functional language but it does combine multiple programming paradigms to give you flexibility for application development.

    A great place to start working with FP techniques is in your Model layer, your ViewModel layer, and anywhere your application’s business logic appears.

    For user interfaces, the places to use FP techniques is a little less clear. FRP (Functional Reactive Programming) is an example of an approach to FP for UI development. For example, Reactive Cocoa is an FRP library for iOS and macOS programming.

    By taking a functional, declarative approach, your code can be more concise and clear. As well, your code will be easier to test when isolated into modular functions that are free from side effects.

    Finally, as multi-processing cores become the norm for both CPUs and GPUs, minimizing side effects and issues from concurrency will become increasingly important, and FP will one of the most important ways to achieve smooth performance!

    Where to Go From Here?

    You can download the complete playground with all the code in this tutorial
    here.

    While you’ve reviewed many of the important concepts of FP in this tutorial, you’ve only scratched the surface of what FP is and what it can do. Once you have some experience with these basic FP ideas, take the plunge into the heart of FP:

    • Monads, Endofunctors, Category Theory
    • Programming languages where FP is the focus, such as Haskell and Clojure

    You’ll get great insights into various aspects of Swift by studying both of the above. You might be able to do things you never dreamed possible with your new-found knowledge.

    Also, I highly recommended checking out:

    If you have any questions or comments on this tutorial, come join the discussion below!

    The post An Introduction to Functional Programming in Swift appeared first on Ray Wenderlich.

    Readers’ App Reviews – March 2017

    $
    0
    0

    I don’t know about you but I’m eagerly counting the days to WWDC. Fingers crossed we get some amazing new APIs this year & maybe they’ll even blow our minds with a new Mac Pro.

    While we wait, I’ve got some new apps from your fellow readers I’d love to share with you.

    This month I want to share:

    • An app that sends messages in a real bottle
    • A game that will have you laughing over the seven seas
    • An app that makes picking a cat as easy as online dating
    • And of course, much more!

    Keep reading to see the latest apps released by raywenderlich.com readers like you.

    Tidings


    Have you ever wanted to send a message the old fashioned way but were worried it might not make it?

    I’m talking of course about a message in a bottle. Its normally such a hassle. You have to find a bottle and drink whatever is in it. Write out your message on a tiny scrap of paper and squeeze it into the bottle. Then you’ve got to find the good sand and the perfect shell. The whole thing can be exhausting.

    Good news, Tidings is here to help! Tidings lets you prepare your perfect message right on your iPhone. Then they’ll pack it up just right. They use hand crafted bottles, perfect white sand, and a handpicked seashell to set it off. Then they carefully package it and ship it to your intended recipient. Best of all, this is all a mere thumb print away thanks to seamless Apple Pay support.

    Nelly Cootalot: The Fowl Fleet


    We all play games to be entertained, but its not often we play one as entertaining as Nelly Cootalot: The Fowl Fleet.

    This hilarious adventure game follows the pirate heroine through a perilous and laugh inducing adventure. She takes on the evil Baron Widebeard. But its the cast and events along the way that will make your day. Throughout your mission you’ll complete puzzles and fall in love the characters.

    Nelly Cootalot: The Fowl Fleet features full voiceovers in both English and German. A great script thats sure to charm and delight you “whether you are 9, 19 or 90. (But ONLY those ages.),” as said by the authors themselves. Beautiful art and animations that look great on an iPhone, iPad, or even Mac. There are more than 45 unique characters in 35 locations.

    If you need a fun game to pick up, this one is well worth a try.

    ElCrab


    Imagine you’re a crab. Now imagine you and a crab buddy found a treasure map. Whats the first logical thing you’d do? That’s right, dig so deep you pop out of the earth on the other side!

    Thats exactly what happened to ElCrab. Now one of you is on one side of the planet while the other is on the other side. Naturally the rest of the animal kingdom is very upset with you both for leaving a hole in the planet and they’re trying to hunt you down. Your job is to help both crabs evade them as long as you can.

    As you evade your captors, collect coins and extra lives. You can use the coins to buy powerups to give you a little extra help or gems to give you a second chance at getting away. See how your stack up on the GameCenter leaderboards against friends and the world.

    Feline Finder


    Feline Finder is an app with a purpose. Feline Finder helps you find cats at nearby shelters to adopt. Their goal is to get more cats adopted while making sure those new adoptions are built one more than just a cute face.

    Feline Finder lets you answer a few questions about the cat you might like. It ask things such as how much energy do you want your cat to have, how playful of a cat do you want, how independent of a cat you’d like, and if the cat will be inside or outside most of the time. It uses these answers to suggest breeds that might better fit the type of cat you’re looking for.

    You can also skip the questions and go straight to breed library. There is information on almost every breed including histories, temperaments, pop culture references, and more. Each breed also has statistics on various traits like grooming needs, attitude toward children or other pets, energy level, and much more.

    After you’ve picked out the perfect breed either from the library or the suggestion quiz, you can find cats of that breed currently up for adoption nearby. If you’re looking for a new cat, download this app and consider adopting your new friend.

    Retromines


    Retromines is exactly what you think it is: Minesweeper right on your iPhone!

    We’ve all spent far too long playing Minesweeper when we should have been working on something else. I personally spent too long playing Retromines when I should have been writing these reviews. ;]

    Retromines is a beautiful tribute to the classic Minesweeper. It recreates the entire pixelated experience down to the hilarious Windows 95 style box. The controls are pretty simple. Tapping clears a block. Long press to mark a bomb. Tap a marking once to change to unknown. Tap it again to clear the marking.

    Give yourself a little break today and enjoy some nostalgia, I did. :]

    FSM | football betting predictions and live scores


    The FSM app is tailer made for avid football fans.

    FSM app starts with realtime news from various football organizations and historical leaderboards dating back to 1994. But it builds on that with current team information like health and fitness, statistics, analysis, and forecasts. Using various algorithms FSM will predict match outcomes between individual teams based on their fitness, season stats, and previous games.

    You can also check bet values and results. You’ll get tips on making the right bets from football gurus. You can even chat with other GSM users. FSM is a must download app for avid football fans.

    Oslo


    Oslo is a beautiful native client for the popular website Unsplash.

    Unsplash provides tons of beautiful high resolution photos with a do whatever you want license. Its great for backgrounds, inspiration, or even commercial work like book covers and stock art.

    Oslo takes the wonderful Unsplash photos and packages them into a great native app perfect for flipping through on the go. The photos look fantastic on the iPhone’s amazing screen. You can login with an Unsplash account to favorite the ones you like the most.

    Oslo also makes it easy to download photos to your phone for wallpapers or other users. And you can easily share them to other services and apps as well. You can also easily check Unsplash stats like downloads and likes. Oslo will even show you camera information for each shot like exposure, aperture, camera model, and more.

    If you enjoy Unsplash, download Oslo for a great native experience.

    Balloonimal Stickers


    Sometimes you need a little whimsy in your life. This time, its Balloonimals!

    Balloonimal stickers is a fun set of iMessage stickers featuring over 70 ballon animals. There are elephants, butterflies, swans, and more. Each in a variety of colors.

    Spend the $1 and add a little fanfare to your iMessage conversations this week. You’ll no doubt be happy you did. :]

    MakeIcons


    One part of building iOS apps that is never fun is making all those icons for the home screen. I know each one is important but once you’ve put all the work into your app, needing 20 icon sizes just feels like punishment.

    Enter MakeIcons, a Mac app that can take your fullsize icon and generate all the sizes necessary with the proper names to make Xcode happy.

    MakeIcons just takes your fullsize app icon and will generate every other necessary size in one click. It handles iOS, watchOS, and MacOS including 1x, 2x, and 3x copies. You can also do custom sizes if necessary. Great for websites and promotional materials or future Apple sizes that pop up without waiting for MakeIcons to update. It will even help you size our Tabbar icons at proper sizes based on Apple documentation.

    Where To Go From Here?

    Each month, I really enjoy seeing what our community of readers comes up with. The apps you build are the reason we keep writing tutorials. Make sure you tell me about your next one, submit here.

    If you saw an app your liked, hop to the App Store and leave a review! A good review always makes a dev’s day. And make sure you tell them you’re from raywenderlich.com; this is a community of makers.

    If you’ve never made an app, this is the month! Check out our free tutorials to become an iOS star. What are you waiting for – I want to see your app next month.

    The post Readers’ App Reviews – March 2017 appeared first on Ray Wenderlich.


    Is Swift Ready For The Enterprise?

    $
    0
    0

    For enterprise developers, adopting Swift over Objective-C as a primary language is not an easy decision to make. Stakeholders, budgets and sizeable user bases all affect the direction of enterprise app development. Enterprises must move carefully, and with oversight, as there’s quite a lot at stake. Perhaps the question could be rephrased: “Is the enterprise ready for Swift?”

    As a contract developer, I’ve spent decades dealing with various enterprises, architecting, designing and delivering App Store and in-house apps. It’s a tough market to work in, but I still managed to operate at arm’s length without having to deal with enterprise-level details.

    Over a year ago, I took the plunge and joined a major corporation as a subject matter expert and, ultimately, a lead iOS developer. Each day, I experience firsthand the challenges of delivering apps inside the enterprise environment.

    To get a sense of how large companies are managing with the transition to Swift, I polled a number of colleagues — all of them enterprise developers from around the world — to help judge whether Swift is, truly, ready for the enterprise.

    What Defines the Enterprise?

    To start, let me be clear on what I mean by “enterprise”. I’m not talking about your usual small to middle-sized development shops.

    By Apple’s definition, members of the enterprise program have a minimum of 200 employees. The apps they create may be used internally by hundreds or thousands of employees or delivered through the App Store, and may be installed on millions of devices with millions of daily users.

    Adopting new tools and even a new development language requires a lot of forethought, and many checks and balances. A business issue resulting from a bad install or bug could be catastrophic to the company.

    Should You Be an Early Adopter?

    Working with Swift in the face of a large Objective-C codebase requires careful planning. Apple has done a great job with interoperability between languages. Bridging Objective-C and Swift in the same code base should be straightforward, but there are often gotchas with mismatched types, collections and classes.

    The majority of developers I contacted started working with Swift 1.0 as soon as it was out, as they were eager to jump into the new language. The remainder of the developers I polled started developing with Swift 2.0, which was still early in the Swift life cycle. They say that although it was easy to adopt Swift, there was a learning curve to face for those coming from Objective-C. One developer notes although the start was rocky, mastering Swift came quickly:

    “[I was a] very early adopter. I found it incredibly difficult to write Swift for the first few weeks coming from writing Objective-C full time for 4+ years. It didn’t take long until I felt efficient in it though.”, said one developer.

    When it comes to development teams, the adoption rate is a little different. Around 30 per cent of development teams started in earlier than Swift 1.5. The remainder started in later, with Swift 2.0.

    Why Do Enterprise Developers Like Swift?

    The majority of the developers I talked to speak highly of Swift. They admit that there were challenges along the way, but their overall experience with Swift is so good that they try to use the language as much as they can. Language features such as type safety, modern idioms like generic and closures, as well as functional programming are highly valued. Here’s what some developers said they like most about Swift:

    “It’s safe, clean, easy to write and readable.”

    “Swift has greatly improved the clarity, consistency and reliability of our codebase.”

    “Learning what a modern language should feel like and the features that they bring. Learning Swift has allowed me to take a step back from day-to-day app development and refocus on some of the basics of Computer Science and Software Development.”

    “Swift Playgrounds are so inviting, I find myself using them to implement popular CS algorithms to better understand fundamental ideas and principles.”

    “It’s all been good. The type safety, expressiveness, concision, functional programming features, generics, consistency and seamless compatibility with Cocoa/Cocoa Touch have been wonderful.”

    Inside the enterprise I work with, we conducted training sessions on Swift. We have a lot of legacy code, so we decided to start with Swift in our unit tests. Since the testing framework was separated from our apps, it provided a safe place for the team to hone their Swift skills.

    What Challenges Exist for Swift in the Enterprise?

    Adopting Swift would hopefully feel like running gracefully through verdant fields of wheat, but surely it’s not all fun and games?

    When I joined my current employer, not many employees suspected that I was to become a champion of Swift, and challenged me on it. I was often cross-examined by teammates asking me what was so great about Swift.

    Usually I would fall back on things like type safety and Swift idioms that aid in compiler optimization; using the final keyword as a way to tell the compiler that no more method changes or subclasses were due; using extensions to add functionality and adopt protocols while separating concerns and keeping the code clean; Optional Binding, Nil Coalescing and guard as ways of dealing with nil returns and avoiding crashes. You know, the usual “Swift-y” arguments.

    Personally, I could deal with the SourceKit crashes and non-functioning code completion. Those weren’t Swift problems — they were Xcode features, right? For a while, it’s seemed like that was the case. And I could usually tolerate the long compile times and the breaking changes brought on by the Grand Renaming in Swift 3.0 — but not everyone agreed:

    “My number one complaint is compile time can be reaaaaaaaally slow. And methods to speed up compile time can hamper debugging and cause a greater loss in productivity than living with a slower compile time.”

    At a recent meetup in Toronto, we had a discussion about Jenkins, a continuous integration tool. The question of compile times was raised, and the presenter noted compiling with Objective-C took around a couple of minutes. In contrast, a Swift app might take 20 to 30 minutes.

    Another developer commented that their app was a blend of Swift and Objective-C, and they had come to expect 10-minute build times. Long compile times for Swift apps are still one of the most common complaints among enterprise developers. Check out this surprising post from LinkedIn’s study on compile times for more dirty details.

    What About Swift Migrations?

    Migrating to Swift has been a challenge for many developers. Early on, the language was inconsistent, and compile-time errors were difficult to interpret and often marked nowhere near the call site where the actual error occurred. So far, Xcode’s refactor has not been available in Swift files and its misbehavior is starting to become an issue in Objective-C.

    With Swift 3.0, the authors of the language decided to make sweeping language changes now, which would (hopefully!) result in fewer changes in the future. As an example, look at What’s New in Swift 3.0.

    This “jump” has become known as the Great Renaming. Method signatures are now more concise and readable, and various redundancies have been taken out as well. A few common, key Objective-C foundation classes have been renamed in Swift to remove legacy naming issues, and enumeration cases are now lowercased.

    These and other updates in Swift 3.0 are definitely breaking changes. The work to migrate existing Swift code to 3.0 was quite challenging. Xcode 8 does include a very good migration tool, but it doesn’t cover every nuance of the language. To some, the changes in Swift are still considered harmful. Check out this article by Craig Hockenberry for another take on contentious Swift changes.

    Enterprise developers echoed these concerns about Swift migration efforts:

    “The biggest challenge was migrating our codebase from Swift 2.2 to Swift 3.”

    “Migrations. Migrating from one version to the next has been painful. But I still feel that using Swift is a net gain. If you take a step back and consider the safety features of Swift and the number of bugs that can be reduced by using it, the time spent on migrating is likely less than the impact that your users will feel and the time spent debugging production issues and deploying patches.”

    “Co-mingling Obj-C and Swift has made our lives full of pain with various bugs and compilation slow downs.”

    “Every. Freaking. Update.”

    “The worst part has been making sure all of our teams and dependencies upgrade Swift versions at the same time.”

    Managing Dependencies Across the Enterprise

    Coordinating versions of Xcode with versions of third-party tools, such as CocoaPod versions, is much like performing a fine ballet. You need to plan carefully when you have a team of 20 to 30 developers working on a number of related features and products. Throw in a build server and staggered releases, and any incompatibility issues can wreak havoc on the team. When the build server gets stuck on a build failure, nobody’s happy.

    The cumulative economic and psychological cost of downtime or delays adds up quickly in a team. Some developers shared their frustrations with lost productivity:

    “The worst experience I had was when I wasted a few hours trying to figure out a particular compilation problem. As it turned out, I simply didn’t understand what the compiler was trying to tell me because it did so in a very obtuse sort of way.”

    “We’ve had experiences of multiple clients using different versions of Swift, which from a framework provider perspective is a maintenance nightmare. We’ve gone down the route of acting as Swift evangelists to persuade clients using older versions of Swift to upgrade. Sometimes, this isn’t feasible due to budget or time constraints, at which point we look at how we can back port libraries to older Swift versions.”

    “The natural argument to this is if we used Objective-, all these versioning issues would go away. Whilst that is the case, we don’t want to be left behind from a technology standpoint, and feel that the issues we’re facing are worth the pain to make sure we as developers and our third-party clients developers are using the latest and greatest Apple has to offer.”

    Where Has Swift Succeeded in the Enterprise?

    Despite the challenges and setbacks of Swift, it somehow seems easier to deal with these issues on a large team, than when you’re working as a small indie developer. The ability to share knowledge in a group is great; enterprises by their nature have to move cautiously and weigh each decision with care. In spite of some of the hurdles of Swift, there are some notable success.

    Apple announced its desire to work with enterprises back at WWDC 2015. They partnered with IBM MobileFirst to bring mobile technologies to mega corporations. In 2015, IBM also brought Swift to the enterprise with their Cloud Tools for Swift, and created an online Swift Sandbox, where users can write and compile Swift right in a browser. Most recently, IBM introduced BlueMix Runtime for Swift for writing server-side microservices in Swift 3.

    In the spring of 2016, I attended an enterprise presentation at Apple where they covered enterprise management tools and services as well as iOS Security. Jamf, a provider of data protection services, made a presentation of their tools, and Apple shared some of their notable deployments on their web site iPad in Business. As an example of the success between Swift and mobile devices in the enterprise, check out this article on British Airways transformation with the use of iPads.

    Swift Success Profile: Harry’s

    Gemma Barlow, the team lead at Harry’s, shared her experiences with Swift:

    “Now that we are all familiar with the basics, we’ve seen some really nice abstractions start to be worked into our daily grind; keeps things challenging!”

    “We’ve just completed the upgrade from Swift 2 to 3, and it was gnarly. The migrator didn’t work in some places, and littered the code with useless bits we are still cleaning up. We are lucky enough to be featured regular in the Shopping category on the App Store — and have worked with Apple prior to launch. Doubt that would have happened if it was all Obj-C.”

    Swift Success Profile: American Airlines

    American Airlines was one of the enterprises who adopted Swift 1.0. They were also one of the first Watch apps on the App Store.

    Matt Klosterman from American Airlines shared the following:

    “We adopted Swift 1.0 on a “for all green field view controllers” basis. With Swift 2.0 we adopted Swift on a “for all new or modified code” basis. We did this because the language features in Swift 2.0 made code from team members of varying skill level on the team more consistent and reliable. We achieved this by writing extensions on any legacy Objective-C classes to implement new functions. All new classes were written in pure Swift.”

    Matt continues:

    “The Great Renaming of Swift 3.0 went very smoothly for us. We started tracking the open source toolchain snapshots in March of 2016 and converting as changes dropped in a separate branch. Our Swift 3 conversion was complete on the first day of WWDC. We followed this same process as Xcode 8 betas progressed.

    “Our 7-year-old app with lots of legacy code is now more than 50% Swift.”

    What Does the Future Hold for Swift in the Enterprise?

    With each version of Xcode, working with Swift gets better, and you could argue that worst is behind us. For instance, Xcode 8 removed the pain of having to delete cached derived data from your build phases. Application Binary Interface compatibilty (or ABI for short), was pegged for Swift 4.0, which would mean Swift code would then be backwards-compatible. Recently, Apple announced that it will be pushed to a later date, but it seems the looming cloud of more breaking changes in Swift may have passed.

    “[We’re looking forward to] ABI compatibility; we consume a commercial 3rd party Swift framework in binary form. This requires our Xcode, Swift version, and vendor framework to always be in lockstep.”

    “Really love writing [Swift] because it feels smarter than Objective-C is in many ways. The yearly updating to the latest Swift version doesn’t hurt us much at all and we usually plan the migration right around when the GM of the new iOS comes out.”

    IBM: “Swift is ready for the Enterprise”

    Swift for iOS is great, but what about server-side components? IBM recognized the need for cross-platform Swift implementation quite some time ago and made it a reality. Last fall, IBM added its own open source Kitura web framework to the mix, so that enterprise developers can use one language between Linux and iOS.

    The relative stability of Swift 3.0 and Xcode 8, along with support from Apple and IBM, means that enterprises now have the confidence to build new apps and augment existing code bases. According to IBM’s Mike Gilfix, over 70 per cent of enterprises plan to build mobile apps soon. PerfectlySoft Inc has also introduced their Swift server framework, Perfect. Check out our screencasts on Server Side Swift with Perfect: Getting Started. Vapor and Zewo are also popular Swift web frameworks to consider.

    Apple has also demonstrated a continuing commitment to Swift: all Apple presentations since WWDC 2015 have been created with Swift. All of Apple’s developer tutorials are in Swift, and there’s even talk of updating the scores of code samples on the Apple Developer site. At raywenderlich.com, we have been writing our courseware in Swift since August of 2014 — and we continue to update with each new release of Swift.

    Where To Go From Here?

    Of the 20 participants who contributed stories of their experiences for this article, only a few were opposed to using Swift. For them, it was primarily issues with changes between Swift versions and buggy tools that formed their opinions about Swift.

    However, the majority of contributors had adopted Swift early, so bringing Swift into their development teams was much easier, and they had many more success stories to share.

    Some of the top tips for success with Swift are:

    • Use third-party libraries only when necessary to avoid dependency issues.
    • Stay mindful of language versions.
    • Make use of Apple’s and IBM’s enterprise for smooth Swift integrations.
    • Stick it out: when major updates such as ABI become part of Swift, the going will get a lot easier.
    • Start small: consider implementing Swift in small ways, such as for your unit tests.

    I’d like to thank the many developers who contributed to this article with their honest Swift experiences. Many contributors asked to remain anonymous due to confidentiality reasons.

    Some participants I can name, and thank publicly: Aaron Douglas, Rich Turton, Gemma Barlow, Anthony Uccello, Matt Klosterman, Mike Katz, WeyHan Ng, Andy Pereira, and Darryl Bayliss. The developers who gave their insights to this article work in many different capacities and industries; from software agencies, to financial industries, on teams that range from tens to hundreds of developers.

    Share your thoughts on Swift adoption in large, enterprise-based teams below. What kind of experiences have you had with Swift in your organization?

    The post Is Swift Ready For The Enterprise? appeared first on Ray Wenderlich.

    Dependency Management Using Git Submodules

    $
    0
    0

    As an iOS developer, dependency management is something you’ll eventually encounter in your coding adventures.

    Whether you want to integrate someone else’s open source project, add a library from a third party service, or even reuse code across your own projects, dependency management helps you manage these complex code relationships — and guard against some messy problems.

    In this iOS dependency management tutorial, you’ll learn how to use Git Submodules to manage dependencies for your iOS application. This will include both a private dependency for something like shared code between your own code bases, as well as a separate example where you pull in an outside third party dependency as a Git Submodule.

    Getting Started

    Download the starter project for this tutorial. Build and run, and you should see the following:

    Screen Shot 2017-02-10 at 9.20.38 PM

    You can try to select a photo, but the app won’t do much in response. Throughout the rest of this tutorial, you’ll add behavior to the app while integrating other dependencies with Git Submodules.

    First — a little bit of background on dependency management.

    What Is Dependency Management?

    Dependency management is a concept that spans all software development disciplines, not just iOS development. It’s the practice of using configuration mechanisms to add extra code, and therefore extra features, to your software.

    Probably the most basic form of dependency management is to simply copy and paste code into your own app. There are several problems with this approach though:

    1. The original reference is lost. When you copy and paste code, there’s no reference back to the original spot where the code was found, and it’s easily forgotten about.
    2. Updates aren’t easily integrated. When changes are made to the original code you copied, it becomes very hard to track what’s changed so you can apply those changes back to your cut and pasted code. Some third party libraries can have thousands of lines of code, spread across hundreds of files, and it’s impossible to keep things synchronized manually.
    3. Version information isn’t maintained. Proper software development practices call for versioning releases of your code. You’ll find this consistent in third party libraries you use in your projects. When you copy and paste code, there’s no easy way to know you’re using version 1.2.2 of library XYZ, and how will you remember to update your code when version 1.2.3 is released?

    I’m sure it wasn’t hard to convince you copy and pasting code is a terrible idea. :]

    Dependency Management Tools

    There are several great tools to manage dependencies in iOS development, but it can be confusing to know which one to use.

    CocoaPods might be the most popular. It certainly has a large number of libraries available for use.

    Carthage is the younger cousin to CocoaPods. While newer, it’s written in Swift and some find it easier to use than CocoaPods.

    Then there’s the Swift Package Manager, which is even newer to the scene and is stewarded by Apple through the open source community.

    These are just some of the big players in the iOS dependency management game — and there’s even more options beyond those.

    But what if I told you you didn’t need to use an additional tool to manage your dependencies? Would you Git excited? :]

    If you’re already using Git for version management for your iOS project, you can use Git itself to manage your dependencies.

    In the next section, you’ll see how to manage dependencies using Git Submodules.

    Let’s Git started!

    Working With A Private Dependency

    As an iOS developer, you’ll often work on more than one project. You’ll also find yourself repeatedly using the same pieces of code to solve similar problems. You can easily use Git Submodules to create a dependency from one project (the main project) to another personal project (the private dependency).

    Note: This tutorial will focus on using Git from the command line. For a reference on using Git from Xcode, check out How To Use Git Source Control with Xcode.

    Connecting a Private Dependency

    Open Terminal and navigate to the folder of your sample project. Execute ls to see the contents of the folder. You’ll know you’re in the right place when it looks like this:

    AndyRW|⇒ cd PhotoTagger
    PhotoTagger|master ⇒ ls
    PhotoTagger           PhotoTagger.xcodeproj
    PhotoTagger|master ⇒

    The first thing you need to do is initialize the project as a Git repository. Execute git init:

    PhotoTagger|⇒ git init
    Initialized empty Git repository in /Users/andyo/Documents/AndyRW/PhotoTagger/.git/
    PhotoTagger|master⚡ ⇒

    This sets up the current folder and its contents as a Git repository, though nothing is actually version managed yet.

    Next, execute git add . followed by git commit -m "Initial project":

    PhotoTagger|master⚡ ⇒ git add .
    PhotoTagger|master⚡ ⇒ git commit -m "Initial project"
    [master (root-commit) 1388581] Initial project
     13 files changed, 1050 insertions(+)
     create mode 100755 .gitignore
     create mode 100755 PhotoTagger.xcodeproj/project.pbxproj
     create mode 100755 PhotoTagger.xcodeproj/project.xcworkspace/contents.xcworkspacedata
     create mode 100755 PhotoTagger/AppDelegate.swift
     create mode 100755 PhotoTagger/Assets.xcassets/AppIcon.appiconset/Contents.json
     create mode 100755 PhotoTagger/Base.lproj/LaunchScreen.storyboard
     create mode 100755 PhotoTagger/Base.lproj/Main.storyboard
     create mode 100755 PhotoTagger/Info.plist
     create mode 100755 PhotoTagger/PhotoColor.swift
     create mode 100644 PhotoTagger/TagsColorTableData.swift
     create mode 100755 PhotoTagger/TagsColorsTableViewController.swift
     create mode 100755 PhotoTagger/TagsColorsViewController.swift
     create mode 100755 PhotoTagger/ViewController.swift
    PhotoTagger|master ⇒

    This adds the contents of the project to version management and takes a snapshot of the contents as a commit.

    Note: Does your Terminal prompt look different than this? Examples in this tutorial are shown from Oh My Zsh shell with a custom theme. If you normally use Git, try one of those themes out — you’ll love them!

    Execute git status to confirm the state of the local repository; i.e. to confirm there are no outstanding changes that haven’t been committed:

    PhotoTagger|master ⇒ git status
    On branch master
    nothing to commit, working tree clean
    PhotoTagger|master ⇒

    This means your local Git repository sees no local changes. That’s a good thing, since you haven’t changed anything in the code base.

    Now you’ve confirmed the state of the local Git repository for the project, it’s time to create your private dependency.

    For this tutorial, the private dependency you create will be a reusable project that helps specify URL paths to the Imagga API. Not only will it be useful for this project, but any other future projects you create that use the Imagga API will be able to reuse this private dependency.

    In Xcode, select File\New\Project…. Select Cocoa Touch Framework\Next.

    Screen Shot 2017-02-11 at 2.51.47 PM

    Enter ImaggaRouter as the Product Name.

    Screen Shot 2017-02-11 at 2.51.54 PM

    Click Next, and navigate to the parent of the PhotoTagger project folder. Then click Create to create the new project.

    You should now be looking at an empty Xcode project representing your new project. Folder-wise, this project should be in the same parent folder as the PhotoTagger folder.

    Now you have your private dependency project created, you’re ready to designate it as your first Git Submodule.

    First, the private dependency project needs to be initialized as a Git repository itself. In Terminal, navigate into the ImaggaRouter folder and execute git init:

    AndyRW|⇒ cd ImaggaRouter
    ImaggaRouter|⇒ git init
    Initialized empty Git repository in /Users/andyo/Documents/AndyRW/ImaggaRouter/.git/

    This initializes the ImaggaRouter project as a Git repository.

    Next you need to add and commit the empty project. Execute git add . followed by git commit -m "Initial ImaggaRouter":

    ImaggaRouter|master⚡ ⇒ git add .
    git %                                                                                                                                 ImaggaRouter|master⚡ ⇒ git commit -m "Initial ImaggaRouter"
    [master (root-commit) 554d7a1] Initial ImaggaRouter
     36 files changed, 517 insertions(+)

    This tells Git to be aware of the files from the empty project. Committing them marks a “snapshot” of the state of the files.

    This concludes setting up ImaggaRouter as a Git repository with an initial set of files. Now you need to add it as a submodule of PhotoTagger.

    First, create a folder hierarchy to store your dependencies. Navigate to the root folder of PhotoTagger and execute mkdir Frameworks; mkdir Frameworks/Internal:

    AndyRW|⇒ cd PhotoTagger
    PhotoTagger|⇒ mkdir Frameworks; mkdir Frameworks/Internal
    PhotoTagger|⇒

    This step isn’t technically necessary for working with Git Submodules, but this folder hierarchy is a good way to keep track of the locations of dependencies in your project.

    Now to finally identify ImaggaRouter as a dependency!

    From the root folder of PhotoTagger, execute git submodule add ../ImaggaRouter Frameworks/Internal/ImaggaRouter/:

    PhotoTagger|master ⇒ git submodule add ../ImaggaRouter Frameworks/Internal/ImaggaRouter/
    Cloning into '/Users/andyo/Documents/AndyRW/PhotoTagger/Frameworks/Internal/ImaggaRouter'...
    done.
    PhotoTagger|master⚡ ⇒

    This command tells the Git repository for PhotoTagger about the dependency on another Git repository (the one for ImaggaRouter). You’ll see this step creates a new file as well: .gitmodules.

    [submodule "Frameworks/Internal/ImaggaRouter"]
            path = Frameworks/Internal/ImaggaRouter
            url = ../ImaggaRouter

    This file contains the actual definition for the submodule.

    You’ll also notice this file is marked as a new file from Git’s perspective.

    Execute git status to see the current state of the local repository:

    PhotoTagger|master⚡ ⇒ git status
    On branch master
    Changes to be committed:
      (use "git reset HEAD <file>..." to unstage)
     
    	new file:   .gitmodules
    	new file:   Frameworks/Internal/ImaggaRouter
     
    PhotoTagger|master⚡ ⇒

    It’s nice git status is reporting changes to both the .gitmodules file and the new directory for ImaggaRouter.

    On the other hand, it’s not so nice git status leaves out any information about the submodule itself. Since submodules are treated like nested repositories, git status will not report on submodules by default.

    Luckily, this can be changed. Execute git config --global status.submoduleSummary true to change this default:

    PhotoTagger|master⚡ ⇒ git config --global status.submoduleSummary true
    PhotoTagger|master⚡ ⇒

    Check the output of git status again:

    PhotoTagger|master⚡ ⇒ git status
    On branch master
    Changes to be committed:
      (use "git reset HEAD <file>..." to unstage)
     
    	new file:   .gitmodules
    	new file:   Frameworks/Internal
     
    Submodule changes to be committed:
     
    * Frameworks/Internal 0000000...554d7a1 (1):
      > Initial ImaggaRouter
     
    PhotoTagger|master⚡ ⇒

    Awesome! git status now reports on the state of the submodule as well as the main project, and it indicates to you specifically what will be committed.

    At this point, Git is aware of the new submodule for the project, but hasn’t actually marked a snapshot of the state. To do that, you’ll repeat the same steps from earlier.

    Execute git add ., followed by git commit -m "Add ImaggaRouter dependency":

    PhotoTagger|master⚡ ⇒ git add .
    PhotoTagger|master⚡ ⇒ git commit -m "Add ImaggaRouter dependency"
    [master 6a0d257] Add ImaggaRouter dependency
     2 files changed, 4 insertions(+)
     create mode 100644 .gitmodules
     create mode 160000 Frameworks/Internal
    PhotoTagger|master ⇒

    Now the local Git repository for the PhotoTagger project has taken a snapshot of the current project and its configuration with a dependency on ImaggaRouter.

    Now you need to add the ImaggaRouter project to the Xcode project for PhotoTagger.

    In Finder, navigate within the PhotoTagger folder to Frameworks/Internal/ImaggaRouter and drag ImaggaRouter.xcodeproj into the root of the PhotoTagger Xcode project.

    Private dependency management

    Adding the ImaggaRouter project to Xcode makes the code within it (although there’s none yet) available for use within the PhotoTagger project.

    You also need to link the framework with the target. Do this in the General settings for the PhotoTagger target:

    Private dependency management

    Note: If you don’t immediately see ImaggaRouter.framework in the list of frameworks, try building the project, or closing the project and reopening it.

    This will result in a change to PhotoTagger.xcodeproj/project.pbxproj which will need to be committed.

    First, you can verify there is a local change that needs to be committed by executing git status.

    PhotoTagger|master⚡ ⇒ git status
    On branch master
    Your branch is ahead of 'origin/master' by 1 commit.
      (use "git push" to publish your local commits)
    Changes not staged for commit:
      (use "git add <file>..." to update what will be committed)
      (use "git checkout -- <file>..." to discard changes in working directory)
     
    	modified:   PhotoTagger.xcodeproj/project.pbxproj
     
    no changes added to commit (use "git add" and/or "git commit -a")

    To commit the change, execute git add . followed by git commit -m "Add ImaggaRouter project to Xcode":

    PhotoTagger|master⚡ ⇒ git add .
    PhotoTagger|master⚡ ⇒ git commit -m "Add ImaggaRouter project to Xcode"
    [master 911dee9] Add ImaggaRouter project to Xcode
     1 file changed, 36 insertions(+)
    PhotoTagger|master ⇒

    Congratulations – you’ve successfully connected two private projects via Git Submodules! :]

    Pulling Changes From A Private Dependency

    When sharing code between projects, you’ll often find you need to make changes to the shared code, and also make those changes available to other projects. Git Submodules make this easy.

    You’ll add some code to ImaggaRouter, commit those changes, then use those changes from PhotoTagger.

    Add a new Swift file to the ImaggaRouter project and name it ImaggaRouter.swift. Replace its contents with:

    import Foundation
     
    public enum ImaggaRouter {
      static let baseURLPath = "http://api.imagga.com/v1"
      static let authenticationToken = "Basic xxx"
     
      case content
      case tags(String)
      case colors(String)
     
      var path: String {
        switch self {
        case .content:
          return "/content"
        case .tags:
          return "/tagging"
        case .colors:
          return "/colors"
        }
      }
    }

    This code begins to flesh out a routing enum for interacting with the Imagga API.

    Now add and commit these changes to the ImaggaRouter repository. From the root of the ImaggaRouter project, execute git commit -am "Add initial ImaggaRouter path":

    ImaggaRouter|master⚡ ⇒ git commit -am "Add initial ImaggaRouter path"
    [master 1523f10] Add initial ImaggaRouter path
     3 files changed, 33 insertions(+)
     rewrite ImaggaRouter.xcodeproj/project.xcworkspace/xcuserdata/andyo.xcuserdatad/UserInterfaceState.xcuserstate (80%)
     create mode 100644 ImaggaRouter/ImaggaRouter.swift
    ImaggaRouter|master ⇒

    This adds the most recent changes (adding an initial implementation of ImaggaRouter.swift) to the local Git repository.

    Note: This time you used the Git -am switch on git commit instead of using git add X; git commit -m "Message". The -am will add all untracked files and any files with changes to the commit. So in this case you had multiple files with changes instead of doing multiple git add X you managed to perform the functionality in one line.

    Now the private dependency has been updated with changes, it’s time to pull those into PhotoTagger.

    From the root of the PhotoTagger project, navigate into the submodule folder for ImaggaRouter, and execute git pull:

    ImaggaRouter|master ⇒ pwd
    /Users/andyo/Documents/AndyRW/PhotoTagger/Frameworks/Internal/ImaggaRouter
    ImaggaRouter|master ⇒ git pull
    Updating 1523f10..4d9e71a
    Fast-forward
     .gitignore                                                                                             |  66 ++++++++++++++++++++++++++++++++++++++++++++++++++++++++++++++++++
     ImaggaRouter.xcodeproj/project.xcworkspace/xcuserdata/andyo.xcuserdatad/UserInterfaceState.xcuserstate | Bin 9652 -> 9771 bytes
     2 files changed, 66 insertions(+)
    ImaggaRouter|master ⇒

    This retrieves the latest changes from the submodule. You can verify this by opening ImaggaRouter.swift and taking a peek through for the changes you just made.

    The submodule is maintained as a a separate Git repository within the main project’s folder hierarchy. This is useful to know because all the same Git commands can be used to inspect that repository as well.

    For example, from the submodule folder Frameworks/Internal/ImaggaRouter, execute git log to look at the commits for the submodule. Since you just updated it, the latest commit should be as you would expect:

    commit 1523f10dda29649d5ee281e7f1a6dedff5a8779f
    Author: Andy Obusek <andyo@xyz.com>
    Date:   Mon Feb 13 20:08:29 2017 -0500
     
        Add initial ImaggaRouter path
     
    ... cut ...

    And just to observe the differences, that this really is a separate repository, navigate back to the root folder of PhotoTagger and execute git log:

    ImaggaRouter|master ⇒ cd ../../..
    PhotoTagger|master⚡ ⇒ pwd
    /Users/andyo/Documents/AndyRW/PhotoTagger
    PhotoTagger|master⚡ ⇒ git log
    commit 7303c65cc0f18174cb4846f6abe5cbfb57e17607
    Author: Andy Obusek <andyo@aweber.com>
    Date:   Mon Feb 13 20:24:13 2017 -0500
     
        Add ImaggaRouter project to Xcode

    Notice how the latest commit message is different? That’s one indication you’re in a different Git repository.

    While you’re in the root folder of PhotoTagger, execute git status:

    PhotoTagger|master⚡ ⇒ git status
    On branch master
    Changes not staged for commit:
      (use "git add <file>..." to update what will be committed)
      (use "git checkout -- <file>..." to discard changes in working directory)
     
    	modified:   Frameworks/Internal/ImaggaRouter (new commits)
     
    Submodules changed but not updated:
     
    * Frameworks/Internal/ImaggaRouter 1523f10...4d9e71a (1):
      > Add initial ImaggaRouter path
     
    no changes added to commit (use "git add" and/or "git commit -a")
    PhotoTagger|master⚡ ⇒

    This status message tells you three important pieces of information:

    1. There are local changes that haven’t been committed.
    2. There have been updates to the ImaggaRouter submodule.
    3. There are specific commits that are new in the ImaggaRouter submodule.

    To finally integrate the latest changes to ImaggaRouter, execute git add . followed by git commit -m "Update ImaggaRouter":

    PhotoTagger|master⚡ ⇒ git add .
    PhotoTagger|master⚡ ⇒ git commit -m "Update ImaggaRouter
    dquote> "
    [master ad3b7f8] Update ImaggaRouter
     1 file changed, 1 insertion(+), 1 deletion(-)
    PhotoTagger|master ⇒

    You’ve now made changes to the private dependency and pulled those changes back into the main project. You’re getting pretty good at this! :]

    Working With A 3rd Party Dependency

    Now you’ll add Alamofire as a dependency to your project as a Git Submodule. Alamofire is a popular networking library for iOS.

    Adding Alamofire

    Adding an external dependency is very similar to a private dependency. The only difference from what you’ve done so far is you’ll add Alamofire via its public github.com repository.

    From the root folder of PhotoTagger, create a new folder under Frameworks named “External” by executing the following:

    mkdir Frameworks/External

    Then execute git submodule add https://github.com/Alamofire/Alamofire.git Frameworks/External/Alamofire:

    PhotoTagger|master ⇒ mkdir Frameworks/External
    PhotoTagger|master ⇒ git submodule add https://github.com/Alamofire/Alamofire.git Frameworks/External/Alamofire
    Cloning into '/Users/andyo/Documents/AndyRW/PhotoTagger/Frameworks/External/Alamofire'...
    remote: Counting objects: 5924, done.
    remote: Total 5924 (delta 0), reused 0 (delta 0), pack-reused 5924
    Receiving objects: 100% (5924/5924), 2.51 MiB | 4.86 MiB/s, done.
    Resolving deltas: 100% (3937/3937), done.
    PhotoTagger|master⚡ ⇒

    This adds Alamofire as a Git Submodule into a new sub-folder named Frameworks/External/Alamofire.

    Execute git status to reveal the local repository’s knowledge of Alamofire needs to be committed.

    To do this, execute git add . followed by git commit -m 'Add Alamofire':

    PhotoTagger|master⚡ ⇒ git status
    On branch master
    Changes to be committed:
      (use "git reset HEAD <file>..." to unstage)
     
    	modified:   .gitmodules
    	new file:   Frameworks/External/Alamofire
     
    Submodule changes to be committed:
     
    * Frameworks/External/Alamofire 0000000...fa3c6d0 (660):
      > [PR #1927] Fixed bug in README example code around default headers.
     
    PhotoTagger|master⚡ ⇒ git add .
    PhotoTagger|master⚡ ⇒ git commit -m "Add Alamofire"
    [master 1b3e30b] Add Alamofire
     2 files changed, 4 insertions(+)
     create mode 160000 Frameworks/External/Alamofire
    PhotoTagger|master ⇒

    Now you can add Alamofire.xcodeproj to your project.

    Just as before with ImaggaRouter.xcodeproj, drag Alamofire.xcodeproj into your project.

    To use Alamofire, you need to add the framework as a Linked Framework to the main PhotoTagger target’s General settings.

    Adding an external dependency was as simple as that!

    Sometimes you come across the need to remove a dependency. Maybe it’s an old library you’re ready to stop using. Or maybe you just wanted to try out that latest and greatest new hot framework. Either way, it’s good to know how to remove dependencies that have been added as Git Submodules.

    Removing A Dependency

    To remove a Git Submodule dependency, first add ReactiveSwift as a dependency. Execute git submodule add https://github.com/ReactiveCocoa/ReactiveSwift.git Frameworks/External/ReactiveSwift:

    PhotoTagger|master ⇒ git submodule add https://github.com/ReactiveCocoa/ReactiveSwift.git Frameworks/External/ReactiveSwift
    Cloning into '/Users/andyo/Documents/AndyRW/PhotoTagger/Frameworks/External/ReactiveSwift'...
    remote: Counting objects: 42067, done.
    remote: Compressing objects: 100% (37/37), done.
    remote: Total 42067 (delta 14), reused 0 (delta 0), pack-reused 42028
    Receiving objects: 100% (42067/42067), 15.24 MiB | 5.37 MiB/s, done.
    Resolving deltas: 100% (25836/25836), done.
    PhotoTagger|master⚡ ⇒

    Now you’ve added ReactiveSwift as a dependency. You can verify this by listing the contents of the folder where it resides by executing ls Frameworks/External/ReactiveSwift :

    PhotoTagger|master⚡ ⇒ ls Frameworks/External/ReactiveSwift
    CONTRIBUTING.md
    Cartfile
    Cartfile.private
    Cartfile.resolved
    Carthage
    CodeOfConduct.md
    Documentation
    LICENSE.md
    Logo
    Package.swift
    README.md
    ReactiveSwift-UIExamples.playground
    ReactiveSwift.playground
    ReactiveSwift.podspec
    ReactiveSwift.xcodeproj
    ReactiveSwift.xcworkspace
    Sources
    Tests
    script
    PhotoTagger|master⚡ ⇒

    To properly remove the dependency after it’s been committed, you’ll need to commit the dependency. Once again, execute git add . followed by git commit -m "Add ReactiveSwift dependency":

    PhotoTagger|master⚡ ⇒ git add .
    PhotoTagger|master⚡ ⇒ git commit -m "Add ReactiveSwift"
    [master ebb1a7c] Add ReactiveSwift
     2 files changed, 4 insertions(+)
     create mode 160000 Frameworks/External/ReactiveSwift

    Now that ReactiveSwift was added as a dependency, you’re going to remove it. To remove it, type: git rm Frameworks/External/ReactiveSwift:

    PhotoTagger|master ⇒ git rm Frameworks/External/ReactiveSwift
    rm 'Frameworks/External/ReactiveSwift'
    PhotoTagger|master⚡ ⇒

    This marks ReactiveSwift to be entirely removed from your local repository and filesystem. At this point, the changes need to be committed. Execute git commit -m "Remove ReactiveSwift":

    PhotoTagger|master⚡ ⇒ git commit -m "Remove ReactiveSwift"
    [master 557bab4] Remove ReactiveSwift
     2 files changed, 4 deletions(-)
     delete mode 160000 Frameworks/External/ReactiveSwift
    PhotoTagger|master ⇒

    And boom, it’s gone!

    Wiring It All Up

    You’ll need a bit of additional code before you can tag images in your app. Rather than copy and paste a bunch of code without much explanation, the final section of this tutorial provides a wired-up solution for you. You’ll just need a secret token from the Imagga API — read on to learn how to get one.

    The Imagga API

    You might recognize this API from our Alamofire Tutorial: Getting Started.

    Imagga is an image recognition Platform-as-a-Service that provides image tagging APIs for developers and businesses to build scalable, image-intensive cloud apps. You can play around with a demo of their auto-tagging service here.

    You’ll need to create a free developer account with Imagga for this tutorial. Imagga requires an authorization header in each HTTP request, so only people with an account can use their services.

    Go to https://imagga.com/auth/signup/hacker and fill out the form. After you create your account, check out the dashboard:

    alamofire tutorial

    Listed down in the Authorization section is your secret token. Copy it into the clipboard.

    Note: Make sure you copy the whole secret token. Scroll over to the right and verify you copied everything.

    In the final project, open ImaggaRouter.swift and use your secret token as the value for authenticationToken.

    Where to Go From Here?

    Normally a final, completed version of the tutorial project is made available to you for download. Since this tutorial is made up of two projects connected via a Git Submodule, it seemed more fitting to provide the final project via a Git remote on github.com.

    In addition, there’s one common task left to be explained that goes right along with this: cloning a repository that has a submodule dependency.

    Bonus: Cloning A Repository With Submodules

    To access the final and completed compilation of ImaggaRouter and PhotoTagger, you’ll clone a remote repository where they are stored. To do this, execute git clone --recursive https://github.com/raywenderlich/PhotoTagger.git:

    temp|⇒ git clone --recursive https://github.com/raywenderlich/PhotoTagger.git
    Cloning into 'PhotoTagger'...
    remote: Counting objects: 40, done.
    remote: Compressing objects: 100% (24/24), done.
    remote: Total 40 (delta 11), reused 40 (delta 11), pack-reused 0
    Unpacking objects: 100% (40/40), done.
    Submodule 'Frameworks/External/Alamofire' (https://github.com/Alamofire/Alamofire.git) registered for path 'Frameworks/External/Alamofire'
    Submodule 'Frameworks/Internal/ImaggaRouter' (https://github.com/obuseme/ImaggaRouter.git) registered for path 'Frameworks/Internal/ImaggaRouter'
    Cloning into '/Users/andyo/Downloads/temp/temp/PhotoTagger/Frameworks/External/Alamofire'...
    Cloning into '/Users/andyo/Downloads/temp/temp/PhotoTagger/Frameworks/Internal/ImaggaRouter'...
    Submodule path 'Frameworks/External/Alamofire': checked out 'c9c9d091b308a57ff9a744be4f2537ac9c5b4c0b'
    Submodule path 'Frameworks/Internal/ImaggaRouter': checked out 'ceb7415e46829c8a732fdd084b42d95c2f453fa2'
    Submodule 'Frameworks/External/Alamofire' (https://github.com/Alamofire/Alamofire.git) registered for path 'Frameworks/Internal/ImaggaRouter/Frameworks/External/Alamofire'
    Cloning into '/Users/andyo/Downloads/temp/temp/PhotoTagger/Frameworks/Internal/ImaggaRouter/Frameworks/External/Alamofire'...
    Submodule path 'Frameworks/Internal/ImaggaRouter/Frameworks/External/Alamofire': checked out 'c9c9d091b308a57ff9a744be4f2537ac9c5b4c0b'
    temp|⇒

    The --recursive flag on the normal git clone command ensures all submodules are cloned at the same time. You can see in the output Alamofire and ImaggaRouter are also cloned. By default, this doesn’t happen with git clone.

    To try these out together, you’ll need to connect the ImaggaRouter project as a dependency of the PhotoTagger project, and add your own secret token for the Imagga API.

    For further reading, check out the following:

    I hope you enjoyed this tutorial, and if you have any questions or comments, please join the forum discussion below!

    The post Dependency Management Using Git Submodules appeared first on Ray Wenderlich.

    Introducing RxSwift: Reactive Programming with Swift!

    $
    0
    0

    For the past six months, we’ve been working on a top-secret book project: RxSwift: Reactive Programming with Swift.

    We revealed the book at our third annual tutorial conference, RWDevCon 2017, and the book is now available on the raywenderlich.com store!

    To celebrate the book launch, we’ll release some free chapters on the site this week — and you can also grab a great discount on the book in our store.

    Read on to see what the book is all about!

    What is RxSwift?

    Rx is one of the hottest topics in mobile app development. From international conferences to local meetups, it seems like everyone is talking about observables, side effects, and (gulp) schedulers.

    And no wonder — Rx is a multi-platform standard, so whether it’s a web development conference, local Android meetup, or a Swift workshop, you might end up joining a multi-platform discussion on Rx.

    The RxSwift library (part of the larger family of Rx ports across platforms and languages) lets you use your favorite Swift programming language in a completely new way. The somewhat difficult-to-handle asynchronous code in Swift becomes much easier and a lot saner to write with RxSwift.

    What’s In the RxSwift Book?

    In RxSwift: Reactive Programming with Swift, you’ll learn how RxSwift solves issues related to asynchronous programming. You’ll also master various reactive techniques, from observing simple data sequences, to combining and transforming asynchronous value streams, to designing the architecture and building production quality apps.

    By the end of the book, you’ll have learned all about the ins and outs of RxSwift, you’ll have hands-on experience solving the challenges at the end of the chapters — and you’ll be well on your way to coming up with your own Rx patterns and solutions!

    Here’s a detailed look at what’s inside the book:

    Section I: Getting Started with RxSwift

    The first section of the book covers RxSwift basics. Don’t skip this section, as you will be required to have a good understanding of how and why things work in the following sections.

    1. Hello RxSwift!: Learn about the reactive programming paradigm and what RxSwift can bring to your app.
    2. Observables: Now that you’re ready to use RxSwift and have learned some of the basic concepts, it’s time to play around with observables.
    3. Subjects:In this chapter, you’re going to learn about the different types of subjects in RxSwift, see how to work with each one and why you might choose one over another based on some common use cases.
    4. Observables and Subjects in Practice: In this chapter, you’ll use RxSwift and your new observable super-powers to create an app that lets users to create nice photo collages — the reactive way.

    Learn the Zen of sequences in RxSwift!

    Section II: Operators and Best Practices

    In this section, once you’ve mastered the basics, you will move on to building more complex Rx code by using operators. Operators allow you to chain and compose little pieces of functionality to build up complex logic.

    1. Filtering Operators: This chapter will teach you about RxSwift’s filtering operators that you can use to apply conditional constraints to .next events, so that the subscriber only receives the elements it wants to deal with.
    2. Filtering Operators in Practice: In the previous chapter, you began your introduction to the functional aspect of RxSwift. In this chapter, you’re going to try using the filtering operators in a real-life app.
    3. Transforming Operators: In this chapter, you’re going to learn about one of the most important categories of operators in RxSwift: transforming operators.
    4. Transforming Operators in Practice: In this chapter, you’ll take an existing app and add RxSwift transforming operators as you learn more about map and flatMap, and in which situations you should use them in your code.
    5. Combining Operators: This chapter will show you several different ways to assemble sequences, and how to combine the data within each sequence.
    6. Combining Operators in Practice: You’ll get an opportunity to try some of the most powerful RxSwift operators. You’ll learn to solve problems similar to those you’ll face in your own applications.
    7. Time Based Operators: Managing the time dimension of your sequences is easy and straightforward. To learn about time-based operators, you’ll practice with an animated playground that visually demonstrates how data flows over time.

    Leverage the power of operators in RxSwift!

    Section III: iOS Apps with RxCocoa

    Once you’ve mastered RxSwift’s basics and know how to use operators, you will move on to iOS specific APIs, which will allow you to use and integrate your RxSwift code with the existing iOS classes and UI controls.

    1. Beginning RxCocoa: In this chapter you’ll be introduced to another framework: RxCocoa. RxCocoa works on all platforms and targets the specific UI needs of iOS, watchOS, tvOS and macOS.
    2. Intermediate RxCocoa: Following on from Chapter 12, you’ll learn about some advanced RxCocoa integrations and how to create custom wrappers around existing UIKit components.

    Learn how to create a reactive UI as you build a fully-featured app!

    Section IV: Intermediate RxSwift/RxCocoa

    In this section, you will look into more topics like building an error-handling strategy for your app, handling your networking needs the reactive way, writing Rx tests, and more.

    1. Error Handling in Practice: Even the best RxSwift developers can’t avoid encountering errors. You’ll learn how to deal with errors, how to manage error recovery through retries, or just surrender yourself to the universe and letting the errors go.
    2. Intro to Schedulers: This chapter will cover the beauty behind schedulers, where you’ll learn why the Rx abstraction is so powerful and why working with asynchronous programming is far less less painful than using locks or queues.
    3. Testing with RxTest: For all the reasons why you started reading this book and are excited to begin using RxSwift in your app projects, RxTest (and RxBlocking) may very soon have you excited to write tests against your RxSwift code, too.
    4. Creating Custom Reactive Extensions: In this chapter, you will create an extension to NSURLSession to manage the communication with an endpoint, as well as managing the cache and other things which are commonly part of a regular application.

    There’s nothing mysterious about schedulers in RxSwift – they’re powerful and easy to use!

    Section V: RxSwift Community Cookbook

    Many of the available RxSwift-based libraries are created and maintained by the community – people just like you. In this section, we’ll look into a few of these projects and how you can use them in your own apps.

    1. Table and Collection Views: RxSwift not only comes with the tools to perfectly integrate observable sequences with tables and collections views, but also reduces the amount of boilerplate code by quite a lot.
    2. Action: Action exposes observables for errors, the current execution status, an observable of each work observable, guarantees that no new work starts when the previous has not completed, and generally is such a cool class that you don’t want to miss it!
    3. RxGesture: Gesture processing is a good candidate for reactive extensions. Gestures can be viewed as a stream of events, either discrete or continuous. Working with gestures normally involves using the target-action pattern, where you set some object as the gesture target and create a function to receive updates.
    4. RxRealm: A long time ago, in a parallel universe far away, developers who needed a database for their application had the choice between using the ubiquitous but tortuous Core Data, or creating custom wrappers for SQLite. Then Realm appeared, and using databases in applications became a breeze.
    5. RxAlamofire: One of the basic needs of modern mobile applications is the ability to query remote resources. RxAlamofire adds an idiomatic Rx layer to Alamofire, making it straightforward to integrate into your observable workflow.

    Get a handle on some of the most popular RxSwift libraries, along with example code!

    Section VI: Putting it All Together

    This part of the book deals with app architecture and strategies for building production-quality, full-blown iOS applications. You will learn how to structure your project and explore a couple of different approaches to designing your data streams and the project navigation.

    1. MVVM with RxSwift: RxSwift is such a big topic that this book hasn’t covered application architecture in any detail yet. And this is mostly because RxSwift doesn’t enforce any particular architecture upon your app. However, since RxSwift and MVVM play very nicely together, this chapter is dedicated to the discussion of that specific architecture pattern.
    2. Building a Complete RxSwift App: To conclude the book, you’ll architect and code a small RxSwift application. The goal is not to use Rx “at all costs”, but rather to make design decisions that lead toa clean architecture with stable, predictable and modular behavior. The application is simple by design, to clearly present ideas you can use to architect your own applications.

    Who Is this Book For?

    This book is for iOS developers who already feel comfortable with iOS and Swift, and want to dive deep into development with RxSwift.

    If you’re a complete beginner to iOS, we suggest you first read through the latest edition of the iOS Apprentice. That will give you a solid foundation of building iOS apps with Swift from the ground up but you might still need to learn more about intermediate level iOS development before you can work through all chapters in this book.

    If you know the basics of iOS development but are new to Swift, we suggest you read through Swift Apprentice first, which goes through the features of Swift using playgrounds to teach the language.

    You can find both of these books at our online store: store.raywenderlich.com.

    Free RxSwift Chapters

    To help celebrate the release of RxSwift: Reactive Programming with Swift, we are offering our readers a taste of what the book has in store.

    We’ll be releasing two chapters from the book this week as tutorials on the site, complete with downloadable resources, that you can use to start your journey of learning RxSwift.

    Introducing the RxSwift Book Authors

    Check out the amazing team of authors behind this book:

    Florent Pillet has been developing for mobile platforms since the last century and moved to iOS on day 1. He adopted reactive programming before Swift was announced and has been using RxSwift in production since 2015. A freelance developer, Florent also uses Rx on Android and likes working on tools for developers like the popular NSLogger when he’s not contracting for clients worldwide. Say hello to Florent on Twitter at @fpillet.

    Junior Bontognali has been developing on iOS since the first iPhone and joined the RxSwift team in the early development stage. Based in Switzerland, when he’s not eating cheese or chocolate, he’s doing some cool stuff in the mobile space, without denying to work on other technologies. Other than that he organizes tech events, speaks and blogs. Say hello to Junior on Twitter at @bontoJR.

    Marin Todorov is one of the founding members of the raywenderlich.com team and has worked on seven of the team’s books. Besides crafting code, Marin also enjoys blogging, teaching, and speaking at conferences. He happily open-sources code. You can find out more about Marin at www.underplot.com.

    Scott Gardner has been developing iOS apps since 2010, Swift since the day it was announced, and RxSwift since before version 1. He’s authored several video courses, tutorials, and articles on iOS app development, presented at numerous conferences, meetups, and online events, and this is his second book. Say hello to Scott on Twitter at @scotteg.

    Where to Go From Here?

    There’s one final piece of good news.

    You’ll receive an automatic $10 discount on the PDF version of the book when you buy it through our online store .

    But this offer is only good for launch week, April 3-7, so grab it while you can! After that, the book goes back up to $54.99.

    Check out the store page to take advantage of this offer: store.raywenderlich.com/products/rxswift.

    The RxSwift book team and I hope you enjoy the book, and we can’t wait to hear about your RxSwift adventures!

    The post Introducing RxSwift: Reactive Programming with Swift! appeared first on Ray Wenderlich.

    Updated Course: Saving Data in iOS

    $
    0
    0

    Since WWDC, we have released 17 new or updated courses for raywenderlich.com subscribers.

    Today, we’re happy to release our 18th course: Saving Data in iOS, now fully updated for iOS 10 and Swift 3!

    In this course, you’ll take a tour of the many different ways to save data in iOS, such as User Defaults, Property Lists, NSCoding, and more.

    Each method has its place, so you’ll learn which option to use when, and also how to reuse code as much as possible.

    Let’s take a look at what’s inside!

    Video 1: Introduction. Find out what’s covered in our Saving Data in iOS course!

    Video 2: FileManager. Learn to use FileManager to work with saved data in the user’s document directory.

    Video 3: Foundation Data. Learn how to use Foundation’s Data structure to save and load your bytes of data.

    Video 4: NSCoding. Learn how to save your object graph to disc using the NSCoding protocol.

    Video 5: Serializable Dictionaries. Building on what was introduced with NSCoding, learn to serialize your Swift data structures by translating them into dictionaries.

    Video 6: Property Lists. Learn how to work with your data using the property list format, a very common file type in Apple development.

    Video 7: JSON. Learn how to save and load using JSON, preparing you for translating back and forth between your Swift types and data from the web.

    Video 8: User Defaults. Learn about Foundation’s UserDefaults, a method for saving a user’s preferences and settings.

    Video 9: Conclusion. Review what you’ve learned in this course, and find out where to learn more ways to save data.

    Where To Go From Here?

    Want to check out the course? You can watch the introduction for free!

    The rest of the course is for raywenderlich.com subscribers only. Here’s how you can get access:

    • If you are a raywenderlich.com subscriber: The entire course is complete and available today. You can check out the first part here.
    • If you are not a subscriber yet: What are you waiting for? Subscribe now to get access to our updated Scroll View School course and our entire catalog of over 500 videos.

    We hope you enjoy, and stay tuned for more new Swift 3 courses and updates to come! :]

    The post Updated Course: Saving Data in iOS appeared first on Ray Wenderlich.

    Responsive UI Tutorial for Android

    $
    0
    0

    Responsive UI Tutorial for Android

    Update 4/5/17: Updated for Android Studio 2.2.3 by James Nocentini. Original tutorial also by James.

    Android runs on a wide variety of devices that offer different screen sizes and densities. Because of this, it is important for Android apps to have a responsive UI that can adapt to these different screens. Since the early days of the Android platform, system APIs have provided very powerful abstractions to design responsive UIs, also known as adaptive layouts.

    This is an update to our adaptive UI in Android tutorial which will show you how to build apps that work across different devices by dealing with the fragmentation in the Android device market. You’ll learn about:

    • Configuration qualifiers
    • Alternative layouts and drawables
    • And layout previews in Android Studio — an immensely useful tool

    What would a tutorial be without something to tinker with? It’d be pretty boring. So, you’ll build the user interface for a simple weather app completely from scratch! When you’re done, the screen will display an image, text labels and a map in three different configurations. Apps look so cool and well built when they have a responsive UI.

    Responsive UI Tutorial for Android

    Getting Started

    Download the starter project named Adaptive Weather here, and open it in Android Studio. Then build and run.

    The app displays a simple RecyclerView listing several cities.

    cities

    To learn all about RecyclerViews, we recommend reading our Android RecyclerView tutorial.

    Open the build.gradle file of the app module to declare the following dependency:

    dependencies {
        ...
        compile 'com.google.android:flexbox:0.2.5'
    }

    Google FlexBox provides an implementation of the FlexBox specification on the Android platform. As you will see later on, it is a very useful tool for designing responsive layouts. And combining it with Android’s resource qualifier system makes it even more powerful!

    Note: The Android platform is constantly updated and the version numbers may have increased since we published this tutorial. You can find details of the different versions, including the most recent on the support library pages on the Android developer site.

    During this tutorial, you’ll often switch between the Android and Project modes in the Project navigator. Generally speaking:

    • Android mode is the default when working within Android Studio because it provides a clean and simple file structure.
    • Project mode is also necessary for building alternative layouts.
    • Android Studio Project Navigator

      Weather Icons

      Android devices have different screen densities, and for that reason it’s a good practice to import static images in multiple sizes. This is one way Android’s system APIs provide a way to create responsive UIs. As described in the Supporting Multiple Screens guide, the categories of screen densities are:

      • ldpi (low) ~120dpi
      • mdpi (medium) ~160dpi
      • hdpi (high) ~240dpi
      • xhdpi (extra-high) ~320dpi
      • xxhdpi (extra-extra-high) ~480dpi
      • xxxhdpi (extra-extra-extra-high) ~640dpi

      Whilst some UI editors make it easy to export images in different sizes, we will be exploring a different approach in this tutorial. Android Studio recently added support for Vector Drawables. This means that all your assets can be imported once and will be scaled at runtime depending on the device configuration (screen size and orientation).

      Download the Weather Icons and extract. In Android Studio right-click on res/drawable and click on the New\Vector Asset menu item:

      Android Studio Create Vector Asset

      Select Local file (SVG, PSD) under Asset Type. From the filesystem location chooser under Path locate the weather-icons folder and choose the first icon, cloud.svg. Make sure to check the Override under Size setting otherwise your icons will look a bit distorted later on (¯\_(ツ)_/¯). Click Next and Finish:

      Android Studio Configure Vector Asset

      Now you should see your icon in Android Studio as res/drawable/ic_cloud.xml. Repeat the same operations for the other icons: fog, rain, snow, sun, thunder.

      Finally, enable the use of Vector Drawables in the app module’s build.gradle as follows:

      android {
          ...
       
          defaultConfig {
              ...
              vectorDrawables.useSupportLibrary = true
          }
      }

      With scalable assets now in place in the project, you’re ready to start customizing the layouts.

      Building layouts

      With the dependencies declared, you get to shift your focus to building some layouts!

      This simple application only contains one screen, which is represented by MainActivity. From the Project navigator, open res/layout/activity_main.xml. Click on the Preview button on the right side to see it in action.

      An activity comprises a Java class — in this case MainActivity.java — and a layout file. In fact, one activity can have several layouts, as you’ll see shortly. For now, it’s important to remember that the existing layout file, activity_main.xml, is the default layout.

      Forecast Grid View

      First, define the default layout for your main activity. To start this, open res/values/colors.xml and replace its content with the following:

      <?xml version="1.0" encoding="utf-8"?>
      <resources>
        <color name="color_primary">#9B26AF</color>
        <color name="color_primary_dark">#89229b</color>
        <color name="text_color_primary">#ffffff</color>
        <color name="forecast_grid_background">#89bef2</color>
      </resources>

      Here you’re overriding the default Material theme colors and providing a background color for the forecast grid. Next, right-click on the values folder and select the New\Value resource file menu:

      Android Studio New Resource File

      Enter fractions.xml for the file name and paste the following:

      <?xml version="1.0" encoding="utf-8"?>
      <resources>
        <item name="weather_icon" type="fraction">33%</item>
      </resources>

      Here you’re specifying that the width taken by each icon should be 1/3 of the total width.

      Next, create a new layout called forecast_grid.xml and add the following list of images:

      <?xml version="1.0" encoding="utf-8"?>
      <com.google.android.flexbox.FlexboxLayout
          xmlns:android="http://schemas.android.com/apk/res/android"
          xmlns:app="http://schemas.android.com/apk/res-auto"
          android:id="@+id/forecast"
          android:layout_width="match_parent"
          android:layout_height="match_parent"
          android:background="@color/forecast_grid_background"
          app:alignItems="center"
          app:flexWrap="wrap"
          app:justifyContent="space_around">
       
        <android.support.v7.widget.AppCompatImageView
            android:id="@+id/day1"
            android:layout_width="wrap_content"
            android:layout_height="60dp"
            app:layout_flexBasisPercent="@fraction/weather_icon"
            app:srcCompat="@drawable/ic_thunder"/>
        <android.support.v7.widget.AppCompatImageView
            android:id="@+id/day2"
            android:layout_width="wrap_content"
            android:layout_height="60dp"
            app:layout_flexBasisPercent="@fraction/weather_icon"
            app:srcCompat="@drawable/ic_fog"/>
        <android.support.v7.widget.AppCompatImageView
            android:id="@+id/day3"
            android:layout_width="wrap_content"
            android:layout_height="60dp"
            app:layout_flexBasisPercent="@fraction/weather_icon"
            app:srcCompat="@drawable/ic_rain"/>
        <android.support.v7.widget.AppCompatImageView
            android:id="@+id/day4"
            android:layout_width="wrap_content"
            android:layout_height="60dp"
            app:layout_flexBasisPercent="@fraction/weather_icon"
            app:srcCompat="@drawable/ic_snow"/>
        <android.support.v7.widget.AppCompatImageView
            android:id="@+id/day5"
            android:layout_width="wrap_content"
            android:layout_height="60dp"
            app:layout_flexBasisPercent="@fraction/weather_icon"
            app:srcCompat="@drawable/ic_cloud"/>
        <android.support.v7.widget.AppCompatImageView
            android:id="@+id/day6"
            android:layout_width="wrap_content"
            android:layout_height="60dp"
            app:layout_flexBasisPercent="@fraction/weather_icon"
            app:srcCompat="@drawable/ic_sun"/>
       
      </com.google.android.flexbox.FlexboxLayout>

      There are a couple things to note with the above block:

    1. You’re using the com.google.android.flexbox.FlexboxLayout resource to layout the icons on the screen.
    2. You’re using the android.support.v7.widget.AppCompatImageView resource to draw the weather icons on the screen. You would normally use the ImageView resource with plain images (.png, .jpg) but for Vector Drawables you must use this component instead.

    In the Preview pane, you see should the weather icons aligned perfectly:

    Android Studio Forecast Grid Color

    This is already starting to feel responsive. Instead of positioning the icons with margins or using a relative layout you have used the FlexBox properties to spread them symmetrically. If you remove a middle icon for example, the remaining ones will automatically shift to the left to fill in the empty space. This is the true power of using FlexBox in layouts. The forecast grid is now ready to be used in your default layout for the main activity.

    Main Activity

    Open res/layout/activity_main.xml and replace its contents with the following:

    <?xml version="1.0" encoding="utf-8"?>
    <LinearLayout xmlns:android="http://schemas.android.com/apk/res/android"
                  android:layout_width="match_parent"
                  android:layout_height="match_parent"
                  android:orientation="vertical">
     
      <include layout="@layout/forecast_grid"
               android:layout_width="match_parent"
               android:layout_height="0dp"
               android:layout_weight="1"/>
     
      <android.support.v7.widget.RecyclerView
          android:id="@+id/list"
          android:layout_width="match_parent"
          android:layout_height="0dp"
          android:layout_weight="1"/>
     
    </LinearLayout>

    Here’s what is happening in this layout:

    • Orientation for the LinearLayout is set to vertical
    • Dimensions: using the layout_weight XML attribute you’re setting each child view to take half of the screen height
    • Layout reuse: using the include XML tag you’re placing the forecast grid on the top half by referencing the forecast_grid.xml layout. This is one of the core functionalities to creating different layouts without duplicating the code.

    Notice that the preview in the editor gets instantly updated. At this point you still haven’t deployed the application to a device or emulator which is astonishing.

    Android Studio Preview Layout

    Build and run. You should now see the weather icons above the list of locations.

    Android Simulator Recycler View Selection 1

    Updating the Weather Forecast

    Take a look at the static JSON data in assets/data.json. The forecast for a given location is represented as an array of strings. You could create another RecyclerView with a GridLayout to dynamically create the forecast, but that’s asking for trouble :]. Instead you will write a method that maps each possible forecast value to a corresponding drawable icon.

    In MainActivity.java, add a new method:

    private Drawable mapWeatherToDrawable(String forecast) {
      int drawableId = 0;
      switch (forecast) {
        case "sun":
          drawableId = R.drawable.ic_sun;
          break;
        case "rain":
          drawableId = R.drawable.ic_rain;
          break;
        case "fog":
          drawableId = R.drawable.ic_fog;
          break;
        case "thunder":
          drawableId = R.drawable.ic_thunder;
          break;
        case "cloud":
          drawableId = R.drawable.ic_cloud;
          break;
        case "snow":
          drawableId = R.drawable.ic_snow;
          break;
      }
      return getResources().getDrawable(drawableId);
    }

    Now you are ready to write the code that responds to the click event of a RecyclerView row. Add the following method to MainActivity:

    private void loadForecast(List<String> forecast) {
      FlexboxLayout forecastView = (FlexboxLayout) findViewById(R.id.forecast);
      for (int i = 0; i < forecastView.getChildCount(); i++) {
        AppCompatImageView dayView = (AppCompatImageView) forecastView.getChildAt(i);
        dayView.setImageDrawable(mapWeatherToDrawable(forecast.get(i)));
      }
    }

    Then find // TODO in MainActivity and replace it with the following:

    loadForecast(location.getForecast());

    Build and run. Click on a location name and notice the weather forecast gets updated:

    Android Simulator Recycler View Selection 2

    Good job, what a beautiful looking weather application! The weather in San Francisco isn’t looking so beautiful though :].

    Creating Responsive UI: Landscape Layout

    So far, you built this application with the portrait mode in mind but let’s take a look at what happens when the phone is rotated to landscape. Open activity_main.xml and in the layout editor click on the orientation icon:

    Android Studio Preview Orientation

    At this stage, you could run the app on multiple Android devices or simulators. But this method of testing alternative layouts is time consuming and repetitive at best, and error prone at worst. There must be another way.

    Thankfully, Android Studio has extensive previewing capabilities. Open the default activity_main.xml file, and hover your mouse over the bottom right corner of the screen to resize the layout. Notice that upon clicking the handle, Android Studio automatically displayed guides for different device sizes.

    Android Studio Preview Dragging

    Ugh — landscape mode is none too kind to your design. Let’s try to have both views side by side instead. To tell the system which resource to pick for a given dimension, you place the layout resource in a folder named in a particular way. The system will pick the correct activity layout for the current device’s screen dimensions. This way, you will have responsive UIs for your app.

    Layout qualifiers

    Back in Android Studio, right-click on res/layout and click on the New\Layout resource file menu:

    Android Studio Create New Layout 1

    Name the file activity_main and add the landscape resource qualifier:

    Android Studio Create New Layout 2

    The layout editor now shows a blank screen for the landscape mode because it picked the newly-created layout file layout-land/activity_main.xml. This only contains an empty LinearLayout, though not for much longer :]. Add the following to reuse the weather forecast layout and Recycler View in a horizontal orientation this time.

    <?xml version="1.0" encoding="utf-8"?>
    <LinearLayout xmlns:android="http://schemas.android.com/apk/res/android"
                  android:layout_width="match_parent"
                  android:layout_height="match_parent"
                  android:orientation="horizontal">
     
      <include layout="@layout/forecast_grid" 
                    android:layout_width="0dp"
                    android:layout_height="match_parent"
                    android:layout_weight="1" />
     
      <android.support.v7.widget.RecyclerView
          android:id="@+id/list"
          android:layout_width="0dp"
          android:layout_height="match_parent"
          android:layout_weight="1"/>
     
    </LinearLayout>

    And the layout editor now shows all your elements in landscape orientation.

    Android Studio Preview Landscape

    Well done! You have created the first layout qualifier in this application. There are layout qualifiers for plenty of other configurations (screen width, height, aspect ratio etc.). In the next section we will modify the landscape layout even further with just a one-line change.

    Resource qualifiers

    Another enhancement you could make to the layout is to organize the weather icons as 2 columns and 3 rows as opposed to the current 3 columns and 2 rows layout. We could duplicate the forecast_grid.xml layout, but then it would be duplicated code and harder to maintain. The width occupied by each weather icon in relation to the FlexBox view width is determined by the layout_flexBasisPercent attribute:

    <android.support.v7.widget.AppCompatImageView
        android:id="@+id/day1"
        android:layout_width="wrap_content"
        android:layout_height="60dp"
        app:layout_flexBasisPercent="@fraction/weather_icon"
        app:srcCompat="@drawable/ic_thunder"/>

    The value is a fraction type and is currently equal to 33% in the resource qualifier file res/values/fractions.xml. Following the same approach to creating a landscape layout, you can create resource files for the landscape configuration. Right-click on res/values and select the New\Values resource file menu item. Name the file fractions and add the landscape orientation qualifier:

    Android Studio New Fractions File

    Inside the resources XML tag, add the following:

    <item name="weather_icon" type="fraction">49%</item>

    Return the main activity layout in landscape mode and notice the weather icons are laid out on 2 columns and 3 rows:

    Android Preview Landscape Layout updated

    Well done! You can pause here and appreciate the fact that once again, you didn’t have to deploy the application to achieve this result. Of course now you should build & run though and make sure it works :]

    The configuration qualifiers can be applied to any attribute type in your XML layout (font size, colors, margins etc.).

    Extra Large Layout

    Return to the portrait orientation in the layout editor and drag the screen size all the way to the X-Large size range.

    Android Preview Drag X-large

    For devices with that much screen real estate, you could show all the weather icons on 1 row. Go ahead and right-click on res/values and select the New\Values resource file menu item. Name the file fractions and add the X-Large size qualifier:

    Android Studio Create New Fractions File

    Add the following inside the resources XML tag:

    <item name="weather_icon" type="fraction">16%</item>

    Return to the layout editor and notice that all the weather icons are aligned on 1 row.

    Android Preview X-large Layout

    Configuration Calculations

    Don’t worry, the content in this section isn’t as scary as the title makes it sound. When the user interacts with the application, the layout state changes over time (rows are selected, input fields populated with text etc.). When the layout changes (for example when the orientation changes), the existing layout is thrown away a new layout is inflated. But the system has no way of knowing how to restore the state because the two layouts could be completely different as far as it knows.

    To see a live example of this in action, build and run the application. Select a location then change the orientation and notice the location isn’t selected anymore!

    Android Simulator Example Run 1

    If you are not already surprised that the forecast in London is sunny all week then you may also notice that the selected row was deselected after switching to landscape.

    To fix this, you will hook into the activity lifecycle methods to save the selected location to a bundle and retrieve after the screen rotation.

    Add the following field at the top of MainActivity.java:

    private static final String SELECTED_LOCATION_INDEX = "selectedLocationIndex";

    Then add the following method to MainActivity:

    @Override
    protected void onSaveInstanceState(Bundle outState) {
      super.onSaveInstanceState(outState);
      outState.putInt(SELECTED_LOCATION_INDEX, mLocationAdapter.getSelectedLocationIndex());
    }

    Add the following to the end of onCreate():

    if (savedInstanceState != null) {
      int index = savedInstanceState.getInt(SELECTED_LOCATION_INDEX);
      mLocationAdapter.setSelectedLocationIndex(index);
      loadForecast(mLocations.get(index).getForecast());
    }

    Build and run again and this time the location remains selected across configuration changes. Hooray!

    Where to Go From Here

    Well done! You’ve built your first Android app with adaptive layouts and you learned how activities can make use of multiple layouts. You learned how drawables work with different displays, and how to make your app come to life on practically any Android device.

    Of course, there’s a lot more to Android than layouts, and no shortage of ways to build on the adaptive UI principles you discovered in this responsive UI for Android tutorial. To learn more, check out Google’s guidelines on the best UI practices. If you want, you can challenge yourself by trying the following:

    • Use another available qualifier to have yet another type of layout. For example, what if you’d like to have a different background color based on the locale qualifier?
    • Or, try using size qualifier on other resources, such as strings. You could add a TextView which shows a short message, or a longer message with the same name if the screen is in landscape?

    Get the full source code for this project as a downloadable zip or as a repo on GitHub.

    Feel free to share your feedback, findings or ask any questions in the comments below or in the forums. Talk to you soon!

    The post Responsive UI Tutorial for Android appeared first on Ray Wenderlich.

    Viewing all 4373 articles
    Browse latest View live


    <script src="https://jsc.adskeeper.com/r/s/rssing.com.1596347.js" async> </script>