Quantcast
Channel: Kodeco | High quality programming tutorials: iOS, Android, Swift, Kotlin, Unity, and more
Viewing all 4374 articles
Browse latest View live

Introducing the iOS 11 Launch Party!

$
0
0

iOS 11 drops next week! It’s time to get this party started — and you’re on the VIP list.

This year marks our seventh annual iOS release celebration. It’s hard to believe we’ve been doing this so many years in a row now — and even harder to believe how far iOS has come from its humble beginnings.

Just think: back when many of us first started, there was no ARC, no Storyboards, no ARKit, and most importantly: no Swift!

Now we have the iPhone X with infrared face recognition, cellular-enabled Apple Watches, and animated emoji. I don’t think any of us imagined the future of iOS would look quite like this!

This year, we have an amazing lineup of iOS 11 tutorials, books, and courses — and over $9,000 worth of of giveaways to be awarded to some lucky readers.

Here’s a quick overview of what’s in store:

New and Updated Books

This year, we have ten books that are new or updated for iOS 11. And to celebrate, we’re putting all of them on sale!

And as usual, all of our updates are free for existing PDF customers, to thank you for supporting our site.

Here’s the list of books we’re releasing this year, and when you can expect them:

  1. iOS 11 by Tutorials (NEW!) — September 12
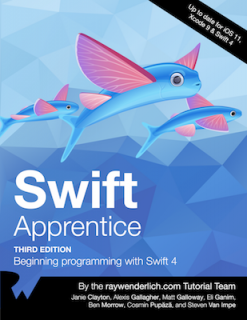
  2. Swift Apprentice, Third Edition — September 18
  3. iOS Apprentice, Sixth Edition — September 20
  4. 2D Apple Games by Tutorials, Second Edition — September 25
  5. 3D Apple Games by Tutorials, Second Edition — September 27
  6. tvOS Apprentice, Third Edition — October 2
  7. iOS Animations by Tutorials, Fourth Edition — October 9
  8. Core Data by Tutorials, Fourth Edition — October 16
  9. watchOS by Tutorials, Third Edition — October 23
  10. Advanced Apple Debugging, Second Edition — October 30

Here’s a detailed look at what’s coming in the next few weeks.

1) iOS 11 by Tutorials

First, we have a brand new book!

iOS 11 and Xcode 9 introduced a pile of amazing new technologies and features that all iOS developers should be aware of — and iOS 11 by Tutorials is the quickest way to get up-to-speed.

Here’s the highlights of what’s inside:

  • ARKit is the most exciting feature in iOS 11 in our opinion, opening up the the world of augmented reality to iPhone developers. ARKit does the heavy lifting of plane detection and camera placement for you, so you can focus on building amazing experiences like portals to virtual worlds, 3D games and art, and compelling ecommerce apps. What new worlds will you create with ARKit?
  • Vision and Core ML frameworks bring the power of machine learning models into your apps. Whether you’re building a sentiment analysis app, creating advanced face and scene detection algorithms, or just trying to figure out whether something is a hot dog or not, Core ML makes it easy to plug pre-trained machine learning models into your app, and Vision provides a host of advanced detection technologies for text, images, faces, and more.
  • Xcode 9 sports a completely rewritten editor, helpers for code refactoring, improved responsiveness, support for Markdown, and (finally!) wireless debugging.
  • And much more, including the new drag-and-drop, PDFKit, MusicKit, Swift 4 updates and more!

Gone are the days when every third-party developer knew everything there is to know about iOS. The sheer size of iOS can make new releases seem daunting.

That’s why the Tutorial Team has been working really hard to extract the important parts of the new APIs, and to present this information in an easy-to-understand tutorial format. This means you can focus on what you want to be doing — building amazing apps!

iOS 11 by Tutorials is available today — get it now during the iOS 11 Launch Party sale for just $44.99! But don’t wait, the sale ends soon.

iOS 11 by Tutorials Authors

Here are the hard-working authors who have contributed to iOS 11 by Tutorials:

Jawwad Ahmad is a freelance iOS Developer that dove into Swift head first and has not looked back. He enjoys mentoring and teaching and was the original founder of the NYC iOS Study Group Meetup and later on the Atlanta iOS Study Group Meetup. He’s worked for companies as large as The New York Times, and as small as GateGuru, a 6 person startup.

Jerry Beers is a co-founder of Five Pack Creative, a mobile development company specializing in iOS development. He’s worked on client projects, like American Airlines and Match.com, but lately he’s been pouring his focus into Hours, a time tracking app. He is passionate about creating well-crafted code and teaching others. In partnership with Ray Wenderlich, he recently launched Alt-U, a live remote and in-person iOS training program. Jerry enjoys spending time on the beach with his wife and kids, SCUBA diving, and watching movies.

Michał Ciuruś is an iOS developer at Jodel. He likes to blog about his Swift adventures. His love of computer games has led to him to look what’s under the hood. He started with C++ at a young age and his first game was a memory leak simulator. He’s also addicted to discovering new technologies and learning iOS software architecture.

Richard Critz is on career number three as a professional photographer (after first being a software engineer doing mainframe O/S development for 20+ years and then a stint as a corporate pilot) doing contract iOS development on the side. Some would say he just can’t make up his mind. Actually, he just likes diversity! When he’s not working on either of those, he’s probably playing League of Legends (with or without the rest of his family). On Twitter, while being mainly read-only, he can be found at @rcritz. The rest of his professional life can be found at www.rwcfoto.com.

Michael Katz envisions a world where mobile apps always work, respect users’ privacy, and integrate well with their users’ life. When not coding, he can be found with his family playing board games, brewing, gardening, and watching the Yankees.

Andy Pereira is a senior iOS developer with Delta Air Lines. When he’s not coding, he’s spending time traveling the world with his wife, and playing guitar.

Mic Pringle is an iOS developer by trade, but he’s recently found himself dabbling in Ruby, PHP, and JavaScript. An F1 nut at heart, Mic enjoys spending time with his wife Lucy and their daughter Evie, watching his beloved Fulham F.C. and, weather permitting, tearing up the English countryside on his motorbike.

Jeff Rames is an enterprise iOS developer in San Antonio, TX. When not working, he’s spending time with his wife and daughters, watching rocket launches, or cooking wood fired pizza. Say hi on Twitter at @jefframes.

2) Swift Apprentice, Third Edition

The third edition of our popular book the Swift Apprentice covers programming in Swift 4 in a straight-forward, easy-to-understand manner, through a sequence of tutorials and hands-on challenges.

This book is perfect for complete beginners to Swift, or for developers who want to sharpen their Swift chops and make sure they’re using the best new features of the language.

You’ll start with the basics like constants, values and types, move up to more complicated items such as data structures, classes and enumerators, and finish off with some advanced topics like protocol extensions, custom operators and protocol-oriented programming.

For the new third edition, we’ve made some major changes:

  • New chapter: Strings. We’ve addd an entirely new chapter showcasing the new approach for Strings in Swift 4.
  • New chapter: Codable. We’ve also added a new chapter on Codable and serialization.
  • Extended chapter: Operators and Subscripts. We’ve greatly extended the chapter on custom operators and subscripts to covers keypaths in detail.
  • More Swift 4 updates! We’ve also made many other changes to upgrade the book for Swift 4 throughout the book!

Swift Apprentice, Third Edition has been fully updated for Swift 4 and will be released on September 18, 2017, as a free update to existing PDF customers.

If you don’t have the book yet, pre-order it here! During the iOS 11 Launch Party sale, you can get it at a discount for just $49.99.

3) iOS Apprentice, Sixth Edition

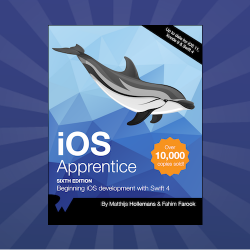
The iOS Apprentice is our best-selling book for complete beginners to iOS development, with over 10,000 copies sold. It has a series of epic-length tutorials that each show you how to build four complete apps from scratch.

In this edition, long-time team member Fahim Farook has come on board to update Matthijs Hollemans’ classic for Xcode 9, iOS 11, and Swift 4.

Did you know that iOS Apprentice was first written for iOS 5, and we’ve updated it for every version of iOS since then for free? You can’t beat that value!

“Over the years, I have read iOS books/ebooks by Dave Mark, Big Nerd Ranch, Wei-Ming Lee, Neil Smythe, Matt Neuburg, many RW tutorials and probably several others, but Matthijs Hollemans’ tutorials absolutely tower over the rest. . . .Matthijs’s knowledge is profound and his presentations are flawless, but his detailed explanations are pure dev gold.” –chicago in a recent forum post

iOS Apprentice, Sixth Edition will be released on September 20, 2017, as a free update to existing PDF customers.

If you don’t have the book yet, pre-order it here! During the iOS 11 Launch Party sale, you can get it at a discount for just $49.99.

4) 2D Apple Games by Tutorials, Second Edition

WWDC introduced us to ARKit, the ground-breaking augmented reality SDK available in iOS 11. And we’ve updated our classic gaming book, 2D Apple Games by Tutorials, to show you how to bring AR into your games as well!
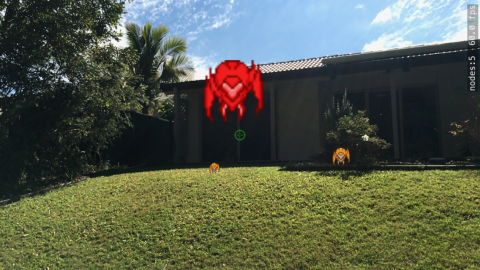
Better get that bugspray ready to blast those ARKit enemies!

The SpriteKit API is well-designed and easy to use, especially for beginners. Best of all, you can use it knowing that it’s fully supported by Apple and heavily optimized to make 2D games on iOS — and now with support for macOS, tvOS and watchOS, it makes it the clear choice for Apple 2D game development.

2D Apple Games by Tutorials, Second Edition has been fully updated for iOS 11, Xcode 9 and Swift 4 and will be released on September 25, 2017, as a free update to existing PDF customers.

If you don’t have the book yet, pre-order it here! During the iOS 11 Launch Party sale, you can get it at a discount for just $49.99.

5) 3D Apple Games by Tutorials, Second Edition

Creating amazing 3D games (or ARKit apps) is easier than ever, thanks to the advent of SceneKit. The simplicity of SceneKit lets beginners create simple and stylish games in a short amount of time. Yet it’s also powerful enough to satisfy the needs of advanced developers, who want to create the next FPS killer.

In the book, you’ll create four games that leverage the power of SceneKit, and you can even enjoy some bonus chapters that show you how to create your own 3D art for your games:
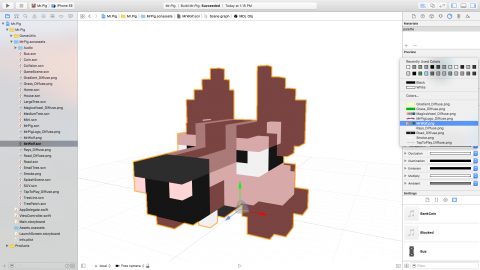
Learn how to build your own 3D art!

We’ve updated the entire book to reflect the new features of SceneKit and brought it fully up to date with iOS 11 and Xcode 9.

3D Apple Games by Tutorials, Second Edition will be released on September 27, 2017, as a free update to existing PDF customers.

If you don’t have the book yet, pre-order it here! During the iOS 11 Launch Party sale, you can get it at a discount for just $49.99.

6) tvOS Apprentice, Third Edition

In the tvOS Apprentice, you’ll learn how to make tvOS apps from the ground up, with a series of tutorials for complete beginners. You’ll learn how to make tvOS apps in two different ways: via the traditional method using UIKit, and via the new Client-Server method using TVML.

You’ll learn how to download video and other content and display it in your app, built great-looking interfaces with UI elements designed for the Apple TV experience, monetize your app with in-app purchases, add animations, and much, much more.
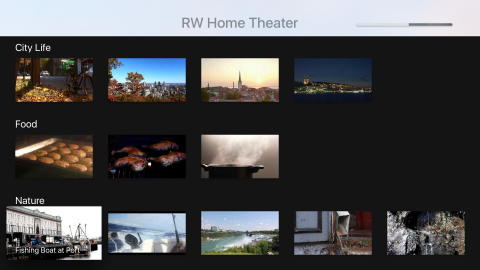
Build apps that make use of all the best features of tvOS!

tvOS Apprentice, Third Edition has been fully updated for tvOS 11, Swift 4 and Xcode 9, and will be released on October 2, 2017, as a free update to existing PDF customers.

If you don’t have the book yet, pre-order it here! During the iOS 11 Launch Party sale, you can get it at a discount for just $49.99.

7) iOS Animations by Tutorials, Fourth Edition

iOS Animations by Tutorials teaches you how to make delightful animations in your apps with Swift 4. You start with basic view and layer animations, move all the way through Auto Layout animations, view controller transitions, and even investigate 3D animations.

When used properly, animations can convey information to your users and draw their attention to important parts of the interface. To create responsive and attractive user interfaces, you’ll need to use all kinds of animations, from very subtle effects, to extremely expressive ones that leap off the screen.

By the end of this book, you’ll have worked through the chapter content and you’ll have hands-on experience solving the challenges at the end of the chapters — and you’ll be well on your way to coming up with stunning animations for your own apps!

Learn how to create compelling, realistic animations to make your apps stand out!

iOS Animations by Tutorials, Fourth Edition has been fully updated for iOS 11, Swift 4 and Xcode 9 and will be released on October 9, 2017, as a free update to existing PDF customers.

If you don’t have the book yet, pre-order it here! During the iOS 11 Launch Party sale, you can get it at a discount for just $49.99.

8) Core Data by Tutorials, Fourth Edition

Marching right along, we’re pleased to bring you the fourth edition of Core Data by Tutorials!

What is Core Data? You’ll hear a variety of answers to this question: It’s a database! It’s SQLite! It’s not a database! And so forth. But here’s the technical answer: Core Data is an object graph management and persistence framework in the OS X and iOS SDKs.

That means Core Data can store and retrieve data, but it isn’t a relational database like MySQL or SQLite. Although it can use SQLite as the data store behind the scenes, you don’t think about Core Data in terms of tables and rows and primary keys.

Core Data by Tutorials teaches you everything you need to know about Core Data, starting with the basics like setting up your own Core Data Stack and moving all the way to advanced topics like migration, performance, multithreading, and more.

Core Data by Tutorials, Fourth Edition has been fully updated for iOS 11, Xcode 9 and Swift 4 and will be released on October 16, 2017, as a free update to existing PDF customers.

If you don’t have the book yet, pre-order it here! During the iOS 11 Launch Party sale, you can get it at a discount for just $49.99.

9) watchOS by Tutorials, Third Edition

watchOS continues to evolve rapidly, and the latest version — watchOS 4 — is no exception. We’ve updated the entire book to show you how to take advantage of all the great stuff in watchOS 4.

We’ve included three new chapters in the third edition:

  • Core Bluetooth: In this chapter, you’ll learn how to transfer data between the Apple Watch using Bluetooth, how to send a control instruction to a BLE device, and effortlessly launch Maps on an external device right from the Watch!
  • Handoff Video Playback: In the first section of this chapter, you’ll learn about playing multimedia files and build a custom interface. In the second section, you’ll use Handoff to create continuity between the Apple Watch and a paired iPhone for your multimedia app.
  • Audio Recording: New in watchOS 4, Apple has greatly improved the multimedia API and there are great opportunities to create innovative apps and enhance the user experience. In this chapter, you’ll add audio recording to a memo app so that users can record and review their thoughts and experiences right from their wrists.

Record audio directly on your Apple Watch!

watchOS by Tutorials, Third Edition has been fully updated for watchOS 4, Xcode 9 and Swift 4 and will be released on October 23, 2017, as a free update to existing PDF customers.

If you don’t have the book yet, pre-order it here! During the iOS 11 Launch Party sale, you can get it at a discount for just $49.99.

10) Advanced Apple Debugging, Second Edition

There are always going to be bugs in your software — or any software, for that matter. No amount of test coverage imposed by your product manager is going to fix that. In fact, viewing debugging as simply a process of fixing something that’s broken is actually a poisonous way of thinking that will mentally hinder your analytical abilities.

Instead, you should view debugging as a process to better understand a program. It’s a subtle difference, but if you truly believe it, any previous drudgery of debugging simply disappears.
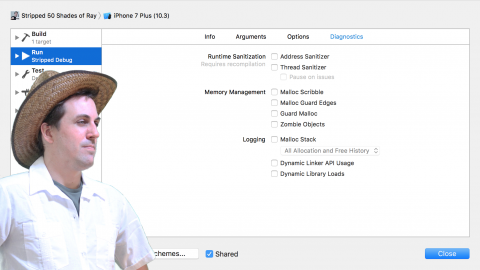
Master the secrets of LLDB debugging like a boss!

In this book, you’ll come to realize debugging is an enjoyable process to help you better understand software. Not only will you learn to find bugs faster, but you’ll also learn how other developers have solved problems similar to yours. You’ll also learn how to create custom, powerful debugging scripts that will help you quickly find answers to any item that piques your interest, whether it’s in your code — or someone else’s.

Advanced Apple Debugging, Second Edition has been fully updated for Xcode 9 and will be released on October 30, 2017, as a free update to existing PDF customers.

If you don’t have the book yet, pre-order it here! During the iOS 11 Launch Party sale, you can get it at a discount for just $49.99.

Sample Book Chapters

As part of the iOS 11 Launch Party, we’ll be sharing some free sample chapters with you from the iOS 11 books. It’s our way of saying “thanks” to you, the readers of this site — and will give you a taste of the all the great stuff contained inside the books this year!

New and Updated Courses

In addition to all of the new books, we have tons of new and updated courses coming for raywenderlich.com subscribers!

Over the next few weeks, we will be releasing the following new and updated courses for iOS 11:

  1. Your First Swift 4 and iOS 11 App
  2. Programming in Swift
  3. Your Second Swift 4 and iOS 11 App
  4. Saving Data in iOS
  5. Beginning Auto Layout
  6. Beginning Collection Views
  7. Scroll View School
  8. Beginning iOS Animations
  9. Beginning Core Data
  10. Networking with URLSession
  11. App Asset Design (NEW!)

Plus, we have a bunch of iOS 11 screencasts for advanced developers on the way, and a few other surprises up our sleeves. If you’re a raywenderlich.com subscriber, clear your calendars and get ready to learn! :]

The iOS 11 Launch Party Giveaway

Now, the part you’ve all been waiting for: how to get your hands on this year’s prizes!

We have one grand prize this year, four second prizes, and a pile of bonus prizes up for grabs:

Grand Prize

The Grand Prize for the iOS 11 Launch Party consists of the following package:

  • A complete set of all our books in PDF form — an $840 value!
  • A complete set of all our books in print form — an $840 value!
  • A one-year subscription to all of our video courses — a $179 value!

That’s over $1,800 in value for the Grand Prize!

Check out the serious stack of books you could win! Geeky deliveryman not included.

Second Prize

We also have some secondary prizes available, for some more lucky readers:

  • Two readers will win a complete set of all our books in PDF form ($840 value).
  • Two readers will win a complete set of all our books in print form of books ($840 value).
  • Two readers will win a one-year subscription to our video courses ($179 value).

Bonus Prizes

On top of that, we have a host of other bonus prizes to give away:

  • 11 readers will win a PDF copy of iOS 11 by Tutorials
  • 3 readers will win a PDF copy of Swift Apprentice, Third Edition
  • 3 readers will win a PDF copy of iOS Apprentice, Sixth Edition
  • 3 readers will win a PDF copy of 2D Apple Games by Tutorials, Second Edition
  • 3 readers will win a PDF copy of 3D Apple Games by Tutorials, Second Edition
  • 3 readers will win a PDF copy of tvOS Apprentice, Third Edition
  • 3 readers will win a PDF copy of iOS Animations by Tutorials, Fourth Edition
  • 3 readers will win a PDF copy of Core Data by Tutorials
  • 3 readers will win a PDF copy of watchOS by Tutorials, Third Edition
  • 3 readers will win a PDF copy of Advanced Apple Debugging, Second Edition
  • 3 readers will win a print copy of iOS 11 by Tutorials
  • 3 readers will win a print copy of Swift Apprentice, Third Edition
  • 3 readers will win a print copy of iOS Apprentice, Sixth Edition
  • 3 readers will win a print copy of 2D Apple Games by Tutorials, Second Edition
  • 3 readers will win a print copy of 3D Apple Games by Tutorials, Second Edition
  • 3 readers will win a print copy of tvOS Apprentice, Third Edition
  • 3 readers will win a print copy of iOS Animations by Tutorials, Fourth Edition
  • 3 readers will win a print copy of Core Data by Tutorials
  • 3 readers will win a print copy of watchOS by Tutorials, Third Edition
  • 3 readers will win a print copy of Advanced Apple Debugging, Second Edition
  • 10 readers will win an official raywenderlich.com T-shirt and stickers

That gives you an impressive number of chances to win — there’s over $9,000 in value of awesome prizes waiting for our lucky readers!

To be eligible for for this epic iOS 11 giveaway, all you have to do is retweet this post — or any of the upcoming iOS 11 Launch Party posts.

We’ve even made it super-easy to create your first entry! Simply click the button below to send your first tweet for the iOS 11 Launch Party:


We’ll hold the random drawing in 8 weeks, when the iOS 11 Launch Party finally wraps up. Enter early — and enter often!

Where to Go From Here?

Whew! That’s a lot to take in all at once. Here’s a recap of all this great news:

  • Want to get up to speed as fast as possible on iOS 11, Swift 4, tvOS 11 and watchOS 4? Head over to our official store, where you can get all the books and courses we’ve covered in this update.
  • Want to learn with some great free tutorials? Over the next eight weeks, we’ll release some free sample chapters and videos for you to enjoy!
  • Want to meet the raywenderlich.com team in person? Sign up for RWDevCon 2018: The Tutorial Conference for hands-on tutorials and workshops presented by the tutorial authors you know and love!
  • Want to win some amazing raywenderlich.com prizes? Tweet this post now — or any of our official iOS 11 Launch Party posts with the #ios11launchparty hashtag over the next 8 weeks for a chance to win!

The Tutorial Team and I hope you enjoy the iOS 11 Launch Party! We’re incredibly excited by everything announced at the 2017 Apple Special Event — what are you most excited about this year? Share it with us in the comments!

The post Introducing the iOS 11 Launch Party! appeared first on Ray Wenderlich.


Instruments Tutorial with Swift: Getting Started

$
0
0
Update note: This tutorial has been updated to iOS 11, Xcode 9, and Swift 4 by Nicholas Sakaimbo. The original tutorial was written by Matt Galloway.
Learn how to troubleshoot and optimize your code with Xcode Instruments!

Learn how to troubleshoot and optimize your code with Xcode Instruments!

Whether you’ve worked on many iOS apps or are still getting started with your first: you are no doubt coming up with new features and otherwise wondering what you can do to make your apps even better.

Besides improving your app by adding features though, there is one thing that all good app developers should do… instrument their code!

This Instruments tutorial will show you how to use the most important features of the tool called Instruments that ships with Xcode. It allows you to check your code for performance issues, memory issues, reference cycles, and other problems.

In this tutorial you’re going to learn:

  • How to determine hot-spots in your code using the Time Profiler instrument in order to make your code more efficient, and
  • How to detect and fix memory management issues such as strong reference cycles in your code using the Allocations instrument and the Visual Memory Debugger.

Note: This tutorial assumes you’re familiar with Swift and iOS programming. If you are a complete beginner to iOS programming, you may wish to check out some of the other tutorials on this site. This tutorial makes use of a storyboard, so make sure you’re familiar with the concept; a good place to start is with the tutorial on this site.

All set? Get ready to dive into the fascinating world of Instruments! :]

Getting Started

For this Instruments tutorial you won’t go through the process of creating an application from scratch; instead, a sample project has been provided for you. Your task is to go through the application and improve it using Instruments as your guide — very similar to how you would go about optimizing your own apps!

Download the starter project then unzip it and open it up in Xcode.

This sample app uses the Flickr API to search for images. To use the API you’ll need an API key. For demo projects, you can generate a sample key on Flickr’s website. Just perform any search at: http://www.flickr.com/services/api/explore/?method=flickr.photos.search and copy the API key out of the URL at the bottom – it follows the “&api_key=” all the way to the next “&”.

For example, if the URL is:
http://api.flickr.com/services/rest/?method=flickr.photos.search&api_key=6593783 efea8e7f6dfc6b70bc03d2afb&format=rest&api_sig=f24f4e98063a9b8ecc8b522b238d5e2f
Then the API key is: 6593783efea8e7f6dfc6b70bc03d2afb.

Paste it into the top of the FlickrAPI.swift file, replacing the existing API key.

Note that this sample API key is changed every day or so, so you’ll occasionally have to regenerate a new key. The app will alert you whenever the key is no longer valid.

Build and run the app, perform a search, click the result, and you’ll see something like the following:

The starter project for this tutorial

Browse through the application and check out the basic functions. You might be tempted to think that once the UI looks great the app is ready for store submission. However, you’re about to see the value that using Instruments can add to your app.

The remainder of this tutorial will show you how to find and fix the issues that still exist in the app. You’ll see how Instruments can make debugging problems a whole lot easier! :]

Time for Profiling

The first instrument you’ll look at is the Time Profiler. At measured intervals, Instruments will halt the execution of the program and take a stack trace on each running thread. Think of it as clicking the pause button in Xcode’s debugger.

Here’s a sneak preview of the Time Profiler:

Time Profiler - Call Tree

This screen displays the Call Tree. The Call Tree shows the amount of time spent executing in various methods within an app. Each row is a different method that the program’s execution path has followed. The time spent in each method can be determined from the number of times the profiler is stopped in each method.

For instance, if 100 samples are done at 1 millisecond intervals, and a particular method is found to be at the top of the stack in 10 samples, then you can deduce that approximately 10% of the total execution time — 10 milliseconds — was spent in that method. It’s a fairly crude approximation, but it works!

Note: In general, you should always profile your app on an actual device, instead of the simulator. The iOS simulator has all of the horsepower of your Mac behind it, whereas a device will have all of the limitations of mobile hardware. Your app may seem to run just fine in the simulator, but you might discover a performance issue once it’s running on a real device.
Additionally, there have been some issues with Xcode 9 betas and using the simulator from Instruments.

So without any further ado, time to get instrumenting!

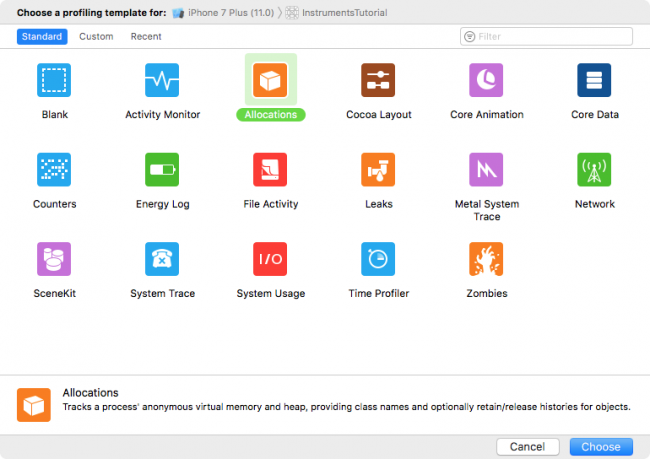
From Xcode’s menu bar, select Product\Profile, or press ⌘I. This will build the app and launch Instruments. You will be greeted with a selection window that looks like this:

These are all different templates that come with Instruments.

Select the Time Profiler instrument and click Choose. This will open up a new Instruments document. Click the red record button in the top left to start recording and launch the app. You may be asked for your password to authorize Instruments to analyze other processes — fear not, it’s safe to provide here! :]

In the Instruments window, you can see the time counting up, and a little arrow moving from left to right above the graph in the center of the screen. This indicates that the app is running.

Now, start using the app. Search for some images, and drill down into one or more of the search results. You have probably noticed that going into a search result is tediously slow, and scrolling through a list of search results is also incredibly annoying – it’s a terribly clunky app!

Well, you’re in luck, for you’re about to embark on fixing it! However, you’re first going to get a quick run down on what you’re looking at in Instruments.

First, make sure the view selector on the right hand side of the toolbar has both options selected, like so:

Instruments - View Selector

That will ensure that all panels are open. Now study the screenshot below and the explanation of each section beneath it:

Time Profiler Main Window

  1. These are the recording controls. The red ‘record’ button will stop & start the app currently being profiled when it is clicked (it toggles between a record and stop icon). The pause button does exactly what you’d expect and pauses the current execution of the app.
  2. This is the run timer. The timer counts how long the app being profiled has been running, and how many times it has been run. Click the stop button and then restart the app, you’ll see the display now show Run 2 of 2.
  3. This is called a track. In the case of the Time Profiler template you selected, there’s just one instrument so there’s just one track. You’ll learn more about the specifics of the graph shown here later in the tutorial.
  4. This is the detail panel. It shows the main information about the particular instrument you’re using. In this case, it’s showing the methods which are “hottest” — that is, the ones that have used up the most CPU time.

    Click on the bar at the top of this area on the word Profile and select Samples. Here you can view every single sample. Click on a few samples, and you’ll see the captured stack trace appear in the Extended Detail inspector to the right. Switch back to Profile when you’re done.

  5. This is the inspectors panel. There are two inspectors: Extended Detail and Run Info. You’ll be learning more about these options shortly.

Drilling Deep

Perform an image search, and drill into the results. I personally like searching for “dog”, but choose whatever you wish – you might be one of those cat people! :]

Now, scroll up and down the list a few times so that you’ve got a good amount of data in the Time Profiler. You should notice the numbers in the middle of the screen changing and the graph filling in; this tells you that CPU cycles are being used.

No table view is ready to ship until it scrolls like butter!

To help pinpoint the problem, you’ll set some options. Click the Stop button and, below the detail panel, click the Call Tree button. In the popover that appears, select Separate by Thread, Invert Call Tree and Hide System Libraries. It will look like this:

Time Profiler Call Tree Settings

Here’s what each option is doing to the data displayed in the table to the left:

  • Separate by State: This option groups results by your application’s life cycle state and is a useful way to inspect how much work your app is doing and when.
  • Separate by Thread: Each thread should be considered separately. This enables you to understand which threads are responsible for the greatest amount of CPU use.
  • Invert Call Tree: With this option, the stack trace is considered from most recent to least recent.
  • Hide System Libraries: When this option is selected, only symbols from your own app are displayed. It’s often useful to select this option, since usually you only care about where the CPU is spending time in your own code – you can’t do much about how much CPU the system libraries are using!
  • Flatten Recursion: This option treats recursive functions (ones which call themselves) as one entry in each stack trace, rather than multiple.
  • Top Functions: Enabling this makes Instruments consider the total time spent in a function as the sum of the time directly within that function, as well as the time spent in functions called by that function. So if function A calls B, then A’s time is reported as the time spent in A PLUS the time spent in B. This can be really useful, as it lets you pick the largest time figure each time you descend into the call stack, zeroing in on your most time-consuming methods.

Scan the results to identify which rows have the highest percentage in the Weight column. Notice that the row with the Main Thread is using up a significant proportion of CPU cycles. Unfold this row by clicking the small arrow to the left of the text, and drill down until you see of one of your own methods (marked with the “person” symbol). Although some values may be slightly different, the order of the entries should be similar to the table below:

Call Tree Results

Well, that certainly doesn’t look too good. The vast majority of time is spent in the method that applies the ‘tonal’ filter to the thumbnail photos. That shouldn’t come as too much of a shock to you, as the table loading and scrolling were the clunkiest parts of the UI, and that’s when the table cells are constantly being updated.

To find out more about what’s going on within that method, double-click its row in the table. Doing so will bring up the following view:

Well that’s interesting, isn’t it! applyTonalFilter() is a method added to UIImage in an extension, and, a lot of time is spent invoking the method that creates the CGImage output after applying the image filter.

There’s not really much that can be done to speed this up: creating the image is quite an intensive process, and takes as long as it takes. Let’s try stepping back and seeing where applyTonalFilter() is called from. Click Root in the breadcrumb trail at the top of the code view to get back to the previous screen:

Call Tree Breadcrumb

Now click the small arrow to the left of the applyTonalFilter row at the top of the table. This will show the caller of applyTonalFilter. You may need to unfold the next row too; when profiling Swift, there will sometimes be duplicate rows in the Call Tree, prefixed with @objc. You’re interested in the first row that’s prefixed with the “person” symbol, which indicates it belongs to your app’s target:

Tonal Filter Call Tree

In this case, this row refers to the results collection view’s (_:cellForItemAt:). Double-click the row to see the associated code from the project.

Now you can see what the problem is. Take a look at line 74; the method to apply the tonal filter takes a long time to execute, and it’s called directly from collectionView(_:cellForItemAt:), which will block the main thread (and therefore the entire UI) each time it asks for a filtered image.

Offloading the Work

To solve this, you’ll take two steps: first, offload the image filtering onto a background thread with DispatchQueue.global().async; then cache each image after it’s been generated. There is a small, simple image caching class (with the catchy name ImageCache) included in the starter project, that simply stores images in memory and retrieves them with a given key.

You could now switch to Xcode and manually find the source file you’re looking at in Instruments, but there’s a handy Open in Xcode button right in front of your eyes. Locate it in the panel just above the code and click it:

Open In Xcode Button

There you go! Xcode opens up at exactly the right place. Boom!

Now, within collectionView(_:cellForItemAt:), replace the call to loadThumbnail(for:completion:) with the following:

ImageCache.shared.loadThumbnail(for: flickrPhoto) { result in

  switch result {

    case .success(let image):

      if cell.flickrPhoto == flickrPhoto {
        if flickrPhoto.isFavourite {
          cell.imageView.image = image
        } else {
          if let cachedImage = ImageCache.shared.image(forKey: "\(flickrPhoto.id)-filtered") {
            cell.imageView.image = cachedImage
           }
           else {
             DispatchQueue.global().async {
               if let filteredImage = image.applyTonalFilter() {
                 ImageCache.shared.set(filteredImage, forKey: "\(flickrPhoto.id)-filtered")

                   DispatchQueue.main.async {
                     cell.imageView.image = filteredImage
         	          }
                }
             }
          }
        }
     }

  case .failure(let error):
    print("Error: \(error)")
  }
}

The first section of this code is the same as it was before, and is concerned with loading the Flickr photo’s thumbnail image from the web. If the photo is favorited, the cell displays the thumbnail as-is. However, if the photo isn’t favorited, the tonal filter is applied.

This is where you changed things: first, you check to see if a filtered image for this photo exists in the image cache. If yes, great; you display that image in the image view. If not, you dispatch the call to apply the tonal filter onto a background queue. This will allow the UI to remain responsive whilst the images are filtered. When the filter has been applied, you save the image in the cache, and update the image view on the main queue.

That’s the filtered images taken care of, but there’s still the original Flickr thumbnails to be taken care of. Open up Cache.swift and find loadThumbnail(for:completion:). Replace it with the following:

func loadThumbnail(for photo: FlickrPhoto, completion: @escaping FlickrAPI.FetchImageCompletion) {
  if let image = ImageCache.shared.image(forKey: photo.id) {
    completion(Result.success(image))
  }
  else {
    FlickrAPI.loadImage(for: photo, withSize: "m") { result in
      if case .success(let image) = result {
        ImageCache.shared.set(image, forKey: photo.id)
      }
     completion(result)
    }
  }
}

This is quite similar to the way you handled filtered images. If an image already exists in the cache then you call the completion closure straight away with the cached image. Otherwise, you load the image from Flickr and store it in the cache.

Re-run the app in Instruments by navigating to Product\Profile (or ⌘I – remember, those shortcuts will really save you some time).

Notice that this time Xcode doesn’t ask you for which instrument to use. This is because you still have a window open for this app, and Instruments assumes you want to run again with the same options.

Perform a few more searches, and notice that this time the UI is not quite so clunky! The image filter is now applied asynchronously and the images are cached in the background, so once they only have to be filtered once. You’ll see a number of dispatch_worker_threads in the Call Tree – these are handling the heavy lifting of applying image filters.

Looks great! Is it time to ship it? Not yet! :]

Allocations, Allocations, Allocations

So what bug are you going to track down next? :]

There’s something hidden in the project that you probably don’t know is there. You’ve likely heard about memory leaks. But what you may not know is that there are actually two kinds of leaks:

  1. True memory leaks are where an object is no longer referenced by anything but still allocated – that means the memory can never be re-used.
    Even with Swift and ARC helping manage memory, the most common kind of memory leak is a retain cycle or strong reference cycle. This is when two objects hold strong references to one another, so that each object keeps the other one from being deallocated. This means that their memory is never released.
  2. Unbounded memory growth is where memory continues to be allocated and is never given a chance to be deallocated. If this continues forever, then at some point the system’s memory will be filled and you’ll have a big memory problem on your hands. On iOS this means that the app will be killed by the system.

The next instrument covered in this tutorial is the Allocations instrument. This gives you detailed information about all the objects that are being created and the memory that backs them; it also shows you retain counts of each object.

To start afresh with a new instruments profile, quit the Instruments app, don’t worry about saving this particular run. Now press ⌘I, select the Allocations instrument from the list and click Choose.

You should now be presented with the Allocations instrument. It should look familiar to you because it looks a lot like the time profiler.

Click the Record button on the top left to run the app. This time you’ll notice two tracks. For the purposes of this tutorial, you will only be concerned with the one called All Heap and Anonymous VM.

With the Allocations instrument running on the app, make five different searches in the app but do not drill down into the results yet. Make sure the searches have some results. Now let the app settle a bit by waiting a few seconds.

You should have noticed that the graph in the All Heap and Anonymous VM track has been rising. This is telling you that memory is being allocated. It’s this feature that will guide you to finding unbounded memory growth.

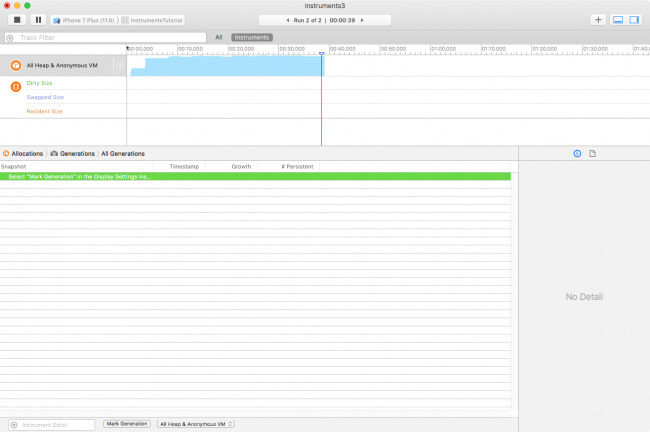
What you’re going to perform is a “generation analysis”. To do this, click the button called Mark Generation. You’ll find the button at the bottom of the detail panel:

Mark Generation Button

Click it and you will see a red flag appear in the track, like so:

Red Flag

The purpose of generation analysis is to perform an action multiple times, and see if memory is growing in an unbounded fashion. Drill into a search, wait a few seconds for the images to load, and then go back to the main page. Then mark the generation again. Do this repeatedly for different searches.

After a drilling into a few searches, Instruments will look like this:

Generations

At this point, you should be getting suspicious. Notice how the blue graph is going up with each search that you drill into. Well, that certainly isn’t good. But wait, what about memory warnings? You know about those, right? Memory warnings are iOS’s way of telling an app that things are getting tight in the memory department, and you need to clear out some memory.

It’s possible that this growth is not just due to your app; it could be something in the depths of UIKit that’s holding onto memory. Give the system frameworks and your app a chance to clear their memory first before pointing a finger at either one.

Simulate a memory warning by selecting Instrument\Simulate Memory Warning in Instruments’ menu bar, or Hardware\Simulate Memory Warning from the simulator’s menu bar. You’ll notice that memory usage dips a little, or perhaps not at all. Certainly not back to where it should be. So there’s still unbounded memory growth happening somewhere.

Instruments: Talkin’ Bout My Generation

The reason for marking a generation after each iteration of drilling into a search is that you can see what memory has been allocated between each generation. Take a look in the detail panel and you’ll see a bunch of generations.

Within each generation, you’ll see all the objects that were allocated and still resident at the time that generation was marked. Subsequent generations will contain just the objects since the previous generation was marked.

Look at the Growth column and you’ll see that there is definitely growth occurring somewhere. Open up one of the generations and you’ll see this:

Generation Analysis

Wow, that’s a lot of objects! Where do you start?

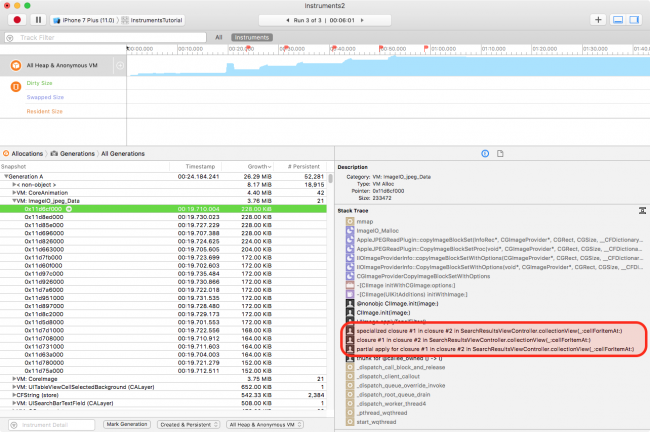
Easy. Click the Growth header to sort by size, make sure the heaviest objects are at the top. Right near the top of each generation, you’ll notice a row labeled ImageIO_jpeg_Data, which certainly sounds like something dealt with in your app. Click on the arrow on the left of ImageIO_jpeg_Data to display the memory addresses associated with this item. Select the first memory address to display the associated stack trace in the Extended Detail inspector on the panel to the right:

This stack trace shows you the point when this specific object was created. The parts of the stack trace in gray are in system libraries; the parts in black are in your app’s code. Hmm, something looks familiar: Some of the black entries show your old friend collectionView(_:cellForItemAt:). Double click any of those entries, Instruments will bring up the code in its context.

Take a look through the method, you’ll see it calling set(_:forKey:) on line 81. Remember, this method caches an image in case it is used again later on in the app. Ah! Well that certainly sounds like it could be a problem! :]

Again, click the Open in Xcode button to jump back into Xcode. Open Cache.swift and take a look at the implementation of set(_:forKey:).:

func set(_ image: UIImage, forKey key: String) {
  images[key] = image
}

This adds an image to a dictionary which is keyed on the photo ID of the Flickr photo. But if you look through the code, you’ll notice that the image is never cleared from that dictionary!

That’s where your unbounded memory growth is coming from: everything is working as it should, but the app never removes things from the cache — it only ever adds them!

To fix the problem, all you need to do is have ImageCache listen to the memory warning notification that UIApplication fires. When ImageCache receives this, it must be a good citizen and clear its cache.

To make ImageCache listen to the notification, open up Cache.swift and add the following initializer and de-initializer to the class:

init() {
   NotificationCenter.default.addObserver(forName: Notification.Name.UIApplicationDidReceiveMemoryWarning, object: nil, queue: .main) { [weak self] notification in
    self?.images.removeAll(keepingCapacity: false)
  }
}

deinit {
  NotificationCenter.default.removeObserver(self)
}

This registers an observer for UIApplicationDidReceiveMemoryWarningNotification to execute the closure above which clears images.

All that the code needs to do is remove all objects in the cache. This will ensure that nothing is holding onto the images any more and they will be deallocated.

To test this fix, fire up Instruments again (from Xcode with ⌘I) and repeat the steps you followed previously. Don’t forget to simulate a memory warning at the end.

Note: Make sure you launch from Xcode, triggering a build, rather than just hitting the red button in Instruments, in order to make sure you’re using the latest code. You may also want to Build and Run first before Profiling, as sometimes Xcode doesn’t seem to update the build of the app in the simulator to the latest version if you just Profile.

This time the generation analysis should look like this:

You’ll notice the memory usage dropped after the memory warning. There’s still some memory growth overall, but nowhere near as much as before.

The reason there’s still some growth is really due to the system libraries, and there’s not much you can do about those. It appears that the system libraries are not freeing all of their memory, which may be by design or may be a bug. All you can do in your app is free up as much memory as possible, and you’ve already done that! :]

Well done! One more issue patched up! It must be time to ship by now! Oh, wait – there’s still the issue of the first type of leak that you haven’t yet addressed.

Strong Reference Cycles

As mentioned earlier, a strong reference cycle occurs when two objects hold strong references to each other, therefore memory can’t ever be deallocated. You can detect these cycles using the Allocations instrument in a different way.

Close Instruments and head back to Xcode. Choose Product\Profile once again, and select the Allocations template.

This time around, you won’t be using generation analysis. Instead, you’ll look at the number of objects of different types that are hanging around in memory. Click the Record button to start this run. You should already see a huge number of objects filling up the detail panel – too much to look through! To help narrow down only the objects of interest, type “Instruments” as a filter in the field in the bottom-left corner.

The two columns worth noting in Instruments are # Persistent and # Transient. The Persistent column keeps a count of the number of objects of each type that currently exist in memory. The Transient column shows the number of objects that have existed but have since been deallocated. Persistent objects are using up memory, transient objects have had their memory released.

You should see that there is a persistent instance of ViewController – that makes sense, because that’s the screen you’re currently looking at. There’s also an instance of the app’s AppDelegate.

Back to the app! Perform a search and drill into the results. Notice that a bunch of extra objects are now showing up in Instruments: the SearchResultsViewController and the ImageCache amongst others. The ViewController instance is still persistent, because it’s needed by its navigation controller. That’s fine.

Now tap the back button in the app. The SearchResultsViewController has now been popped off the navigation stack, so it should be deallocated. But it’s still showing a # Persistent count of 1 in the Allocations summary! Why is it still there?

Try performing another two searches and tap the back button after each one. There are now 3 SearchResultsViewControllers?! The fact that these view controllers are hanging around in memory means that something is keeping a strong reference to them. Looks like you have a strong reference cycle!

Your main clue in this situation is that not only is the SearchResultsViewController persisting, but so are all the SearchResultsCollectionViewCells. It’s likely that the reference cycle is between these two classes.

Thankfully, the Visual Memory Debugger, introduced in Xcode 8, is a neat tool that can help you further diagnose memory leaks and retain cycles. The Visual Memory Debugger is not part of Xcode’s Instrument’s suite but is nevertheless such a useful tool that it’s worth including in this tutorial. Cross-referencing insights from both the Allocations instrument and the Visual Memory Debugger is a powerful technique that can make your debugging workflow a lot more effective.

Getting Visual

Quit the Allocations instrument and exit the Instruments suite.

Before starting the Visual Memory Debugger, enable Malloc Stack logging in the Xcode scheme editor like this: Click on the Instruments Tutorial scheme at the top of the window (next to the stop button) and select Edit Scheme. In the pop-up that appears, click the Run section and switch to the Diagnostics tab. Check the box that says Malloc Stack and select the Live Allocations Only option and click close.

Start the app directly from Xcode. Like before, perform at least 3 searches to accumulate some data.

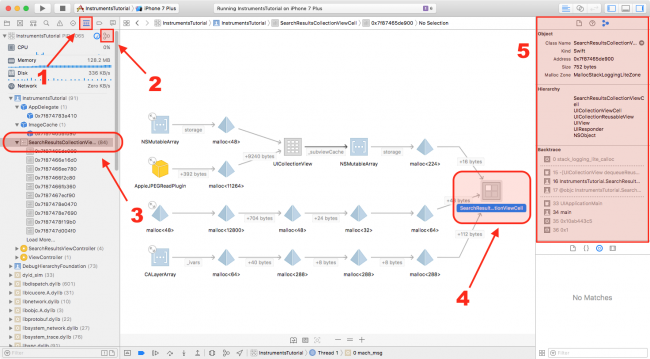
Now activate the Visual Memory Debugger like this:

  1. Switch to the Debug navigator.
  2. Click this icon and choose View Memory Graph Hierarchy from the pop up.
  3. Click on the entry for the SearchResultsCollectionViewCell.
  4. You can click any object on the graph to view details on the inspectors pane.
  5. You can view details in this area. Switch to the Memory inspector here.

The Visual Memory Debugger pauses your app and displays a visual representation of objects in memory and the references between them.

As highlighted in the screenshot above, the Visual Memory Debugger displays the following information:

  • Heap contents (Debug navigator pane): This shows you the list of all types and instances allocated in memory at the moment your app was paused. Clicking on a type unfolds the row to show you the separate instances of the type in memory.
  • Memory graph (main window): The main window shows a visual representation of objects in memory. The arrows between objects represent the references between them (strong and weak relationships).
  • Memory Inspector (Utilities pane): This includes details such as the class name and hierarchy, and whether a reference is strong or weak.

Notice how some rows in the Debug navigator have a bracketed number next to them. The number in brackets indicates how many instances of that specific type are in memory. In the screenshot above, you can see that after a handful of searches, the Visual Memory Debugger confirms the results you saw in the Allocations instrument, i.e. anywhere from 20 to (if you scrolled to the end of the search results) 60 SearchResultsCollectionViewCell instances for every SearchResultsViewController instance are being retained in memory.

Use the arrow on the left side of the row to unfold the type and show each SearchResultsViewController instance in memory. Clicking an individual instance will display that instance and any references to it in the main window.

Notice the arrows pointing to the SearchResultsViewController instance. It looks like there are a few Swift closure contexts instances with references to the same view controller instance. Looks a little suspect, doesn’t it? Let’s take a closer look. Select one of the arrows to display more information in the Utilities pane about the reference between one of these closure instances and the SearchResultsViewController.

In the Memory Inspector, you can see that the reference between the Swift closure context and the SearchResultsViewController is strong. If you select the reference between the SearchResultsCollectionViewCell and the Swift closure context, you will see that this is marked strong as well. You can also see that the closure’s name is “heartToggleHandler.” A-ha! This is declared in the SearchResultsCollectionViewCell class!

Select the instance of SearchResultsCollectionViewCell in the main window to show more information on the inspector pane.

In the backtrace, you can see that the cell instance was initialized in collectionView(_:cellForItemAt:). When you hover over this row in the backtrace, a small arrow will appear. Clicking the arrow will take you to this method in Xcode’s code editor. Neato!

In collectionView(_:cellForItemAt:), locate where each cell’s heartToggleHandler variable is set. You’ll see the following lines of code:

cell.heartToggleHandler = { isStarred in
  self.collectionView.reloadItems(at: [indexPath])
}

This closure handles when the heart button in a collection view cell is tapped. This is where the strong reference cycle lies, but it’s kind of hard to spot unless you’ve come across one before. But thanks to the Visual Memory Debugger, you were able to follow where the trail all the way to this piece of code!

The closure cell refers to the SearchResultsViewController using self, which creates a strong reference. The closure captures self. Swift actually forces you to explicitly use the word self in closures (whereas you can usually drop it when referring to methods and properties of the current object). This helps you be more aware of the fact you’re capturing it. The SearchResultsViewController also has a strong reference to the cells, via their collection view.

To break a strong reference cycle, you define a capture list as part of the closure’s definition. A capture list can be used to declare instances that are captured by closures as being either weak or unowned:

  • Weak should be used when the captured reference might become nil in the future. If the object they refer to is deallocated, the reference becomes nil. As such, they are optional types.
  • Unowned references should be used when the closure and the object it refers to will always have the same lifetime as one another and will be deallocated at the same time. An unowned reference can never become nil.

To fix this strong reference cycle, add a capture list to the heartToggleHandler like this:

cell.heartToggleHandler = { [weak self] isStarred in
  self?.collectionView.reloadItems(at: [indexPath])
}

Declaring self as weak means that the SearchResultsViewController can be deallocated even though the collection view cells hold a reference to it, as they are now just weak references. And deallocating the SearchResultsViewController will deallocate its collection view, and in turn, the cells.

From within Xcode, use ⌘+I again to build and run the app in Instruments.

Look at the app again in Instruments using the Allocations instrument as you did before (remember to filter the results down to show only the classes that are part of the starter project). Perform a search, navigate into the results, and back again. You should see that the SearchResultsViewController and its cells are now deallocated when you navigate back. They show transient instances, but no persistent ones.

Cycle broken! SHIP IT! :]

Where to Go From Here?

Here’s a download of the final optimized version of the project, all thanks to Instruments.

Now that you have the knowledge from this Instruments tutorial under your belt, go and instrument your own code and see what interesting things appear! Also, try to make Instruments a part of your usual development workflow.

You should be running your code through Instruments relatively often, and performing a full sweep of your app before release to ensure that you’ve caught as many memory management and performance issues as possible.

Now go and make some awesome – and efficient – apps! :]

The post Instruments Tutorial with Swift: Getting Started appeared first on Ray Wenderlich.

Video Tutorial: Xcode Tips And Tricks Part 8: Code Snippets

Video Tutorial: Xcode Tips And Tricks Part 9: Behaviors

RWDevCon 2017 Inspiration Talk: Finding Freedom Through Freelancing by Lyndsey Scott

$
0
0
Note from Ray: At our recent RWDevCon tutorial conference, in addition to hands-on tutorials, we also had a number of “inspiration talks” – non-technical talks with the goal of giving you a new idea or some battle-won advice, and leaving you excited and energized.

We recorded these talks so that you can enjoy them even if you didn’t get to attend the conference. Here’s one of the inspiration talks from RWDevCon 2017: “Finding Freedom Through Freelancing” by Lyndsey Scott. I hope you enjoy it!

Transcript

Today I’m going to talk to you all about how I found my own personal freedom through freelancing.

It’s taken ten years, but I’ve finally managed to fully pursue all the things I love. Right now I act, I model, I do iOS development. I’ll take this time to tell you all that I’ve been able to freelance my way into balancing all three.

The Background Story

A little bit about myself: I graduated from Amherst college in 2006 with a dual major in Theater and Computer Science.

Why did I choose theater and computer science? Well, even before I started college I knew that I wanted to be a theater major. I loved acting more than anything. As a second major, I explored economics, I explored physics. Then when that physics class I wanted to take was full, I decided to give computer science a try. I had no idea what it was, but I figured I’d give it a go.

I should have known what it was, though, because when I was about 12 years old I read through this huge book of documentation that came along with my TI-89 graphing calculator, and I figured out how to build games without realizing that there was a whole academic field devoted to this hobby of mine, of coding.

When I took my first computer science course in college, I had even more fun coding than I did when I was a kid. Here I was able to learn the theory behind everything, and I was able to receive grades that validated my interest.

Programming came naturally to me. I went on to learn about algorithms, artificial intelligence, robotics, lower level programming languages, compilers and more. Eventually I graduated with that dual degree in theater and computer science.

This is 12 year old me, the programmer.

Even my newfound love for programming, though, couldn’t distract me from my acting career. I moved back in with my parents in New Jersey and hopped into the freelance life right away as an actress, going back and forth from New Jersey to New York.

I made progress by booking some roles on my own, and I managed to earn my coveted Screen Actors Guild Union card by fall. When a modeling agency found my pictures online and told me that they’d have me work with both their fashion and acting divisions, I jumped at the opportunity to have my career progress.

Lights, Costumes, Fashion!

As it turns out, I actually enjoyed modeling a lot. I soon discovered that modeling was a bit like acting, putting on different costumes and transforming into different characters.

Unfortunately, there were sides of the industry that I wasn’t as fond of. First off, by signing with an agency I lost a lot of control over my career: I was no longer legally able to find jobs on my own. Yes, I had access to better opportunities now, and the opportunities paid more money, but I often felt impatient. I felt that my progress in my career was slow. And though I wasn’t naturally outgoing, I had to learn to be.

My agency had me change my entire wardrobe, change my hair, had me lying about my age and told me exactly what to say during various meetings. In all aspects of my professional life, I was now in costume playing a character and reciting a script.

I caught on well, though, and after about a year I started making enough money to move out of my parents home and into an apartment of my own in New York. Shortly after that I had my big break: I was the first African American to score an exclusive contract with Calvin Klein.

After that, other contracts followed: DKNY, Vogue, W Magazine, Prada, Gucci, Fendi, and the Victoria’s Secret show and catalog.

I was often on planes several times a week. I lived in London, in Paris, and traveled all around Europe working with my various agencies all over the world.

Success and Anxiety

Eventually I came back to New York, where even during the peak of my success I spent most of my time at home waiting for the phone to ring. I kept my schedules clear so that my agencies could call me at any moment and have me go into an office for a last minute appointment or job.

I’d settled into making a very good living for myself, being able to afford a two story penthouse apartment in New York while only working approximately three days a month at a minimum of $6,000 a day. I’d attained relative success in this industry, but I was bored and riddled with anxiety, always waiting for the next phone call and knowing that my career could fade away at any moment.

That was around the time I got my first iPhone, around 2010, 2011.

iPhones and Inspiration

Inspired by what I saw as the beauty of the interface and the elegance of the iPhone experience, I began to use my free time and my programming background to learn how to create iOS apps for myself.

After a modeling industry shakeup, my agents all left my New York agency so I had to switch to another. The bookings dried up immediately.

They suggested I go back to Europe to get some new images for my portfolio, so I did. I took their advice in an attempt to hold on to a career that I felt had little security. I lived for nearly a year in Paris and then Berlin. I managed to book several nice editorial shoots, but magazines pay little to no money.

I had enough time, and fortunately enough savings, to let myself relax into the different cultures I was around, and I would spend every available moment I had coding.

I did the raywenderlich.com tutorials. I followed tutorial series on YouTube. I’d read Apple’s documentation, and I especially learned by doing. I built out a few apps on my own.

After nearly a year of making no money, I came back to New York to find out that my agency had actually dropped me while I was away. They didn’t tell me about this at all until I got back.

The Need for More Control

Although I managed to find a new agency and the bookings did start coming back in, I realized that I needed to build a stronger foundation for myself by devoting more time working towards a career that I could control.

I started coding nonstop. I subleased my apartment. I moved back in with my parents and committed myself to publishing an app on my own.

My First App

For my first app, I decided to go with what I knew. I came up with an idea for a customizable modeling portfolio app. That fall I spent several months fueled by growing financial desperation, very little sleep, and the belief in the product I was determined to release.

By the start of that winter, the app was approved and on the app store.

I carefully designed marketing materials. I sent packages to every agency in New York. I posted advertisements on various fashion websites. I contacted the fashion press.

Despite all my efforts, there was little to no response. I’d been a very successful model a few years earlier; I’d enter a room and fashion folks would greet me, flatter me, treat me with respect. As my popularity waned and opportunities dried up, however, I was no longer as treated as important or even worthy of respect.

I was told by my agencies that my modeling career’s demise was my own fault, that I was too boring, that I was too short, that ethnic models weren’t in. My calls were often ignored, and my emails often received no response.

I had started coding again to gain some power for myself after spending years serving in an industry that often felt dismissive, so perhaps I shouldn’t have been surprised that building an app to cater to those same industry folks was met with no response.

The World Takes Notice

By this point, I was very used to being rejected and ignored, so I was genuinely shocked when, by the end of that year, the wider media actually took notice of my accomplishments. Headline after headline came out: Victoria’s Secret Model Is a Programmer. I was in Forbes. I did an interview for NPR, the BBC, Good Morning America, CNN, Bloomberg TV and many, many more news outlets.

When I’m not performing I’m a pretty private person, so I decided to focus a portion of the media attention away from myself and towards the lack of diversity in tech, that same lack of diversity which made my story newsworthy in the first place, since I don’t look like the typical programmer in the media’s eyes.

I spent that year swamped with interview requests and speech requests and press opportunities. I turned down lucrative modeling jobs, seeing this PR as a more promising route to financial stability.

During all of that success, I made virtually no money. Press doesn’t pay, and I didn’t yet know how to make money from the publicity.

The Struggle for Respect

I was a very solid iOS developer at this point—I’d been coding in Objective C for several years and had released five or so apps on the app store—but very few people in the tech industry took me seriously.

For example, during one conversation I had with a successful tech founder who had no iOS development background at all, he attempted to give me a lesson on iOS background modes. He tried to explain iOS background execution and he told me that there were three new background modes. I said, “Well actually there are 9 background modes,” and I listed them one by one.

He was in shock. “Oh, you’re a real programmer.” He knew I’d been a computer science major. He knew I’d released several iOS apps, but that wasn’t enough. He still didn’t believe I was a real programmer.

You may think to yourself that sort of reaction is reasonable. It makes sense to assume that I haven’t had enough time to commit to my programming as a full-time engineer might have, but even now I’ll walk into a room of male programmers who know nothing about me. I’ll try to join their conversation and they’ll often say, “Oh you wouldn’t be interested in this. We’re just talking about programming.”

With or without my modeling background, I’m still often met with skepticism, probably because the typical programmer looks nothing like me.

Stack Overflow recently did a survey that found:

  • 88.6% of its users are male or identify as male, while only 7.6% identify as female.
  • 74.4% identify as white or European, while only 2.5% identify as black or of African decent.
  • Of all programmers, only about 23% are mobile developers.
  • Of that 23%, 57.6% of those polled were iOS developers.

So as a black female iOS developer, I’m a rarity.

Learning By Teaching: Becoming an Expert

I started becoming active on Stack Overflow shortly after Swift was released in 2014. I learned the new language, not by asking but by answering questions on Stack Overflow. I’d been fluent in Objective C for years, and by helping others navigate their issues with the new language I managed to become fluent in Swift as well.

Still intent on proving myself worthy of programming work, I spent a full month tethered to my computer, to the Stack Overflow iOS feed, answering question after question after question.

Much like the broader tech industry can be, Stack Overflow isn’t always the most welcoming place for women, and I was in fact faced with some sexist comments, but as my Stack Overflow reputation grew in points I became more determined; I pressed on until I became that month’s #1 iOS question answerer.

I took that screenshot and sent it over to raywenderlich.com with a description of my experience, and after taking a test was invited to join the iOS tutorial team. I desperately needed money at that time, so I saw it as both an opportunity to make some income and as a résumé builder which would hopefully lead to other opportunities.

Since then I’ve written tutorials on optical character recognition, Google Cardboard, routing and core location, I did a Fastlane update recently, and I’m about to start working on a Core Text tutorial in Swift soon (Update: you can find the Core Text tutorial here!).

Around the time I joined Ray’s team, I came up with an idea for a TV show, a tech TV show that seemed to perfectly combine my tech and entertainment experience in a way that could be monetized. Through my networking over the past year, I managed to enlist a team of producers beyond my wildest dreams: Alexis Ohanian, who’s a co-founder of Reddit, and the Emmy Award-winning producers of Shark Tank.

In order to keep an eye on the project as it was produced out of Sony studios, I took a gamble, found a place to stay on Craigslist, and moved out to LA. There, I was finally back on track with pursuing all my dreams. I started going back to acting classes. I found new acting representation, and by the time we met with networks and they passed on the show, I was still happy to be in a place where professionally I felt I had always belonged.

Becoming A Freelancer

As a member of Ray’s tutorial team, I’d signed up to receive contracting opportunities submitted to the site, and I took on one in particular.

It was a remote contract that paid relatively little money, but the designs the client had created were beautiful. I did everything in my power to make my client happy, and I made sure the app looked and functioned well enough to serve as a great portfolio piece for me.

Freelancing Tips

As a freelancer, the most valuable endeavors don’t always have immediate financial rewards. Reputation can be your most valuable asset.

Since that initial contract, I’ve found 40-hour-per-week remote freelance jobs pretty consistently over the past two years or so. Each client has recommended me to the next client, and my rate has increased gradually. I now typically work for a minimum of $125 per hour, depending on the length and complexity of the contract. I’m often the sole developer on a project, which I particularly enjoy because those apps can serve as an especially great showcase of my work.

At the start, I always choose money over equity, because although being able to receive your typical rate AND equity is ideal, most app companies fail. It’s hard to succeed in the app business. If a company can’t afford to pay you, chances are they can’t afford to market their product effectively either.

After building an initial app for a fee, I may go back and accept equity in exchange for future updates if I feel confident that the product will make money. If the app does in fact succeed, then that equity could provide an important passive income stream for me that can sustain me through the dryer periods.

When it comes to my remote contracts, I stay honest. I offer discounts. I post to GitHub often so that there’s a record of my work to account for all the hours billed. My clients like that I make suggestions and that I take initiative and that I attack each project from a design, from a user experience, and from an engineering perspective.

The best part is that even with 40 hours per week of freelance programming, my schedule is flexible. I can work night, weekends, anytime and still take acting classes, go to auditions, and pursue any acting or modeling gig that comes around.

Freelancing = the freedom of time

I now have the freedom to pursue all of my interests, along with the freedom to reject modeling, acting, or programming work that doesn’t align with my goals. If I make money doing one job, I can use the money to help advance another one of my careers. Each career has helped fuel the others.

For those of you looking to pursue freelance iOS development here are 5 things I hope you’ve taken from my story.

  1. If opportunities aren’t coming along, build up your resume in other ways.
  2. Stay flexible but set firm boundaries. You can keep an open mind while still working towards your goals.
  3. Don’t get too comfortable in any one contract. Keep networking.
  4. Keep learning. Read up on design, user experience, app store optimization, etc. If you’re a front-end developer, learn back-end development. It only makes you more financially valuable.
  5. Make your clients happy, and remember that even though it’s not technically your app, it can serve as a great portfolio piece, and having a stellar product to show off is crucial to your resume.

I’m sure all of you have multiple passions; if not, I suggest you go out and get some. :] Technology is useless if there’s nothing to apply it to, and being able to offer your expertise in areas other than iOS development can be extremely valuable to your client.

I hope you gained a bit of insight today into how freelancing can help you gain control over your schedule and allow you the freedom and time to pursue all of your dreams. Thanks.

Note from Ray: If you enjoyed this talk, you should join us at the next RWDevCon! We’ve sold out in previous years, so don’t miss your chance.

The post RWDevCon 2017 Inspiration Talk: Finding Freedom Through Freelancing by Lyndsey Scott appeared first on Ray Wenderlich.

Video Tutorial: Xcode Tips And Tricks Part 10: Conclusion

UICollectionView Custom Layout Tutorial: Pinterest

$
0
0
Update note: This tutorial has been updated to Xcode 9, Swift 4, and iOS 11 by Paride Broggi. The original tutorial was written by Ernesto García.
create custom layouts

Create awesome user interfaces with collection views and custom layouts!

UICollectionView, introduced in iOS 6, has become one of the most popular UI elements among iOS developers. What makes it so attractive is the separation between the data and presentation layers, which depends upon a separate object to handle the layout. The layout is then responsible for determining the placement and visual attributes of the views.

You’ve likely used the default flow layout — a layout class provided by UIKit — which consists of a basic grid layout with some customizations. But you can also implement your own custom layouts to arrange the views any way you like; this is what makes the collection view so flexible and powerful.

In this UICollectionView custom layout tutorial, you’ll create a layout inspired by the popular Pinterest app.

In the process, you’ll learn a lot about custom layouts, how to calculate and cache layout attributes, how to handle dynamically sized cells and much more.

Note: This tutorial requires a basic knowledge of UICollectionView. If you’re not familiar with it, you can learn more about it in our written or video tutorial series:

Ready to pimp-up your collection view? Read on!

Getting Started

Download the starter project for this tutorial and open it in Xcode.

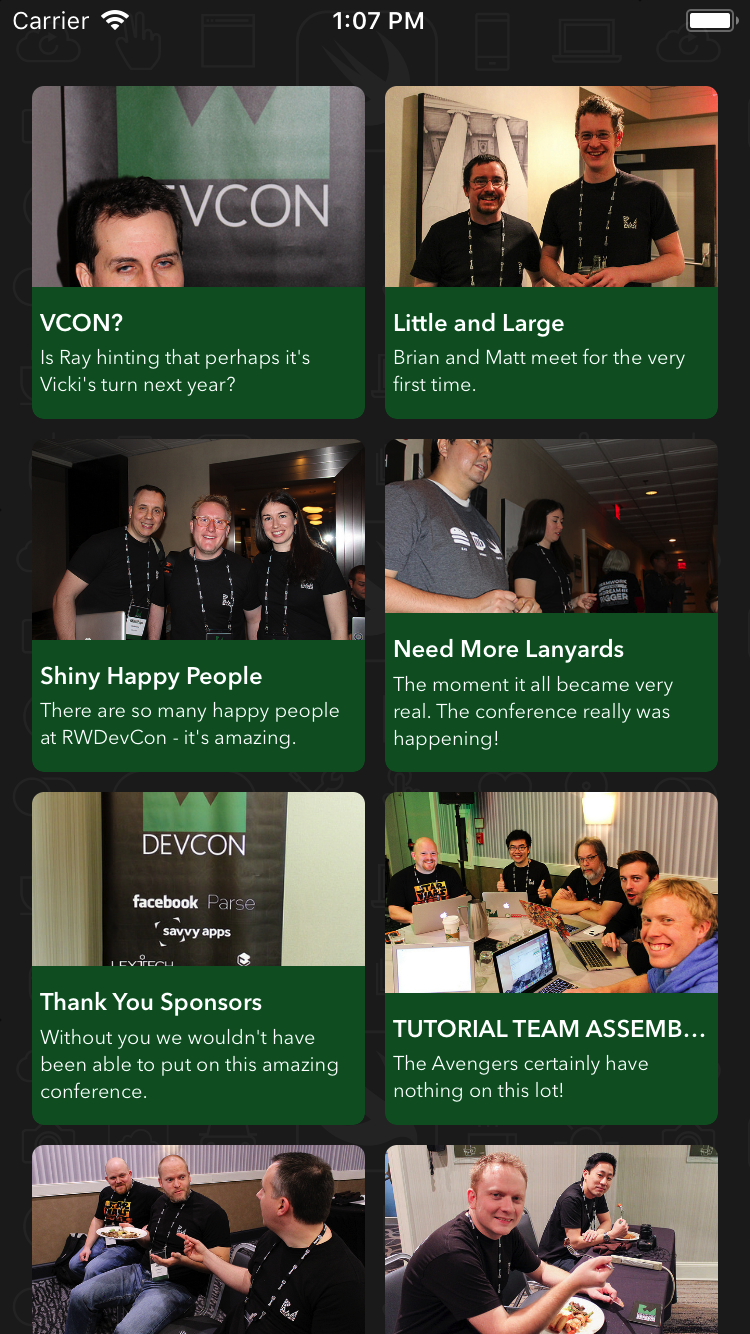
Build and run the project, and you’ll see the following:

Starter Project image

The app presents a gallery of photos from RWDevCon. You can browse the photos and see how much fun the attendees had while at the conference.

The gallery is built using a collection view with a standard flow layout. At first sight, it looks all right. But the layout design could certainly be improved. The photos don’t completely fill the content area and long annotations end up truncated.

The overall user experience appears quite boring and static because all cells have the same size. One way to improve the design would be to create a custom layout where each cell is free to have the size that perfectly fits its needs.

Creating Custom Collection View Layouts

Your first step in creating a stunning collection view is to create a custom layout class for your gallery.

Collection view layouts are subclasses of the abstract UICollectionViewLayout class. They define the visual attributes of every item in your collection view. The individual attributes are instances of UICollectionViewLayoutAttributes and contain the properties of each item in your collection view, such as the item’s frame or transform.

Create a new file inside the Layouts group. Select Cocoa Touch Class from the iOS\Source list. Name it PinterestLayout and make it a subclass of UICollectionViewLayout. Make sure the selected language is Swift and finally create the file.

Next you’ll need to configure the collection view to use your new layout.

Open Main.storyboard and select the Collection View in the Photo Stream View Controller Scene as shown below:

storyboard_select_collection_view

Next, open the Attributes Inspector. Select Custom in the Layout drop-down list and select PinterestLayout in the Class drop-down list:

storyboard_change_layout

Okay — time to see how it looks. Build and run your app:

build_and_run_empty_collection

collectionview empty meme

Don’t panic! This is a good sign, believe it or not. This means the collection view is using your custom layout class. The cells aren’t shown because the PinterestLayout class doesn’t yet implement any of the methods involved in the layout process.

Core Layout Process

Take a moment to think about the collection view layout process, which is a collaboration between the collection view and the layout object. When the collection view needs some layout information, it asks your layout object to provide it by calling certain methods in a specific order:

Layout lifecycle

Your layout subclass must implement the following methods:

  • collectionViewContentSize: This method returns the width and height of the collection view’s contents. You must override it. Then return the height and width of the entire collection view’s content — not just the visible content. The collection view uses this information internally to configure its scroll view’s content size.
  • prepare(): This method is called whenever a layout operation is about to take place. It’s your opportunity to prepare and perform any calculations required to determine the collection view’s size and the positions of the items.
  • layoutAttributesForElements(in:): In this method you need to return the layout attributes for all the items inside the given rectangle. You return the attributes to the collection view as an array of UICollectionViewLayoutAttributes.
  • layoutAttributesForItem(at:): This method provides on demand layout information to the collection view. You need to override it and return the layout attributes for the item at the requested indexPath.

Okay, so you know what you need to implement — but how do you go about calculating these attributes?

Calculating Layout Attributes

For this layout, you need to dynamically calculate the height of every item since you don’t know what the height of the photo will be in advance. You’ll declare a protocol that will provide this information when PinterestLayout needs it.

Now, back to the code. Open PinterestLayout.swift and add the following delegate protocol declaration before the PinterestLayout class:

protocol PinterestLayoutDelegate: class {
  func collectionView(_ collectionView:UICollectionView, heightForPhotoAtIndexPath indexPath:IndexPath) -> CGFloat
}

This code declares the PinterestLayoutDelegate protocol, which has a method to request the height of the photo. You’ll implement this protocol in PhotoStreamViewController shortly.

There’s just one more thing to do before implementing the layout methods; you need to declare some properties that will help with the layout process.

Add the following to PinterestLayout:

// 1
weak var delegate: PinterestLayoutDelegate!

// 2
fileprivate var numberOfColumns = 2
fileprivate var cellPadding: CGFloat = 6

// 3
fileprivate var cache = [UICollectionViewLayoutAttributes]()

// 4
fileprivate var contentHeight: CGFloat = 0

fileprivate var contentWidth: CGFloat {
  guard let collectionView = collectionView else {
    return 0
  }
  let insets = collectionView.contentInset
  return collectionView.bounds.width - (insets.left + insets.right)
}

// 5
override var collectionViewContentSize: CGSize {
  return CGSize(width: contentWidth, height: contentHeight)
}

This code defines some properties you’ll need later on to provide the layout information. Here it is, explained step-by-step:

  1. This keeps a reference to the delegate.
  2. These are two properties for configuring the layout: the number of columns and the cell padding.
  3. This is an array to cache the calculated attributes. When you call prepare(), you’ll calculate the attributes for all items and add them to the cache. When the collection view later requests the layout attributes, you can be efficient and query the cache instead of recalculating them every time.
  4. This declares two properties to store the content size. contentHeight is incremented as photos are added, and contentWidth is calculated based on the collection view width and its content inset.
  5. This overrides the collectionViewContentSize method to return the size of the collection view’s contents. You use both contentWidth and contentHeight from previous steps to calculate the size.

You’re ready to calculate the attributes for the collection view items, which for now will consist of the frame. To understand how this will be done, take a look at the following diagram:

customlayout-calculations

You’ll calculate the frame of every item based on its column (tracked by xOffset) and the position of the previous item in the same column (tracked by yOffset).

To calculate the horizontal position, you’ll use the starting X coordinate of the column the item belongs to, and then add the cell padding. The vertical position is the starting position of the prior item in that column, plus the height of that prior item. The overall item height is the sum of the image height and the content padding.

You’ll do this in prepare(), where your primary objective is to calculate an instance of UICollectionViewLayoutAttributes for every item in the layout.

Add the following method to PinterestLayout:

override func prepare() {
  // 1
  guard cache.isEmpty == true, let collectionView = collectionView else {
    return
  }
  // 2
  let columnWidth = contentWidth / CGFloat(numberOfColumns)
  var xOffset = [CGFloat]()
  for column in 0 ..< numberOfColumns {
    xOffset.append(CGFloat(column) * columnWidth)
  }
  var column = 0
  var yOffset = [CGFloat](repeating: 0, count: numberOfColumns)

  // 3
  for item in 0 ..< collectionView.numberOfItems(inSection: 0) {

    let indexPath = IndexPath(item: item, section: 0)

    // 4
    let photoHeight = delegate.collectionView(collectionView, heightForPhotoAtIndexPath: indexPath)
    let height = cellPadding * 2 + photoHeight
    let frame = CGRect(x: xOffset[column], y: yOffset[column], width: columnWidth, height: height)
    let insetFrame = frame.insetBy(dx: cellPadding, dy: cellPadding)

    // 5
    let attributes = UICollectionViewLayoutAttributes(forCellWith: indexPath)
    attributes.frame = insetFrame
    cache.append(attributes)

    // 6
    contentHeight = max(contentHeight, frame.maxY)
    yOffset[column] = yOffset[column] + height

    column = column < (numberOfColumns - 1) ? (column + 1) : 0
  }
}

Taking each numbered comment in turn:

  1. You only calculate the layout attributes if cache is empty and the collection view exists.
  2. This declares and fills the xOffset array with the x-coordinate for every column based on the column widths. The yOffset array tracks the y-position for every column. You initialize each value in yOffset to 0, since this is the offset of the first item in each column.
  3. This loops through all the items in the first section, as this particular layout has only one section.
  4. This is where you perform the frame calculation. width is the previously calculated cellWidth, with the padding between cells removed. You ask the delegate for the height of the photo and calculate the frame height based on this height and the predefined cellPadding for the top and bottom. You then combine this with the x and y offsets of the current column to create the insetFrame used by the attribute.
  5. This creates an instance of UICollectionViewLayoutAttribute, sets its frame using insetFrame and appends the attributes to cache.
  6. This expands contentHeight to account for the frame of the newly calculated item. It then advances the yOffset for the current column based on the frame. Finally, it advances the column so that the next item will be placed in the next column.

Note: As prepare() is called whenever the collection view's layout is invalidated, there are many situations in a typical implementation where you might need to recalculate attributes here. For example, the bounds of the UICollectionView might change - such as when the orientation changes - or items may be added or removed from the collection. These cases are out of scope for this tutorial, but it's important to be aware of them in a non-trivial implementation.

Now you need to override layoutAttributesForElements(in:), which the collection view calls after prepare() to determine which items are visible in the given rect.

Add the following code to the very end of PinterestLayout:

override func layoutAttributesForElements(in rect: CGRect) -> [UICollectionViewLayoutAttributes]? {

  var visibleLayoutAttributes = [UICollectionViewLayoutAttributes]()

  // Loop through the cache and look for items in the rect
  for attributes in cache {
    if attributes.frame.intersects(rect) {
      visibleLayoutAttributes.append(attributes)
    }
  }
  return visibleLayoutAttributes
}

Here you iterate through the attributes in cache and check if their frames intersect with rect, which is provided by the collection view. You add any attributes with frames that intersect with that rect to layoutAttributes, which is eventually returned to the collection view.

The last method you must implement is layoutAttributesForItem(at:)

override func layoutAttributesForItem(at indexPath: IndexPath) -> UICollectionViewLayoutAttributes? {
  return cache[indexPath.item]
}

Here you simply retrieve and return from cache the layout attributes which correspond to the requested indexPath.

Before you can see your layout in action, you need to implement the layout delegate. PinterestLayout relies upon this to provide photo and annotation heights when calculating the height of an attribute's frame.

Open PhotoStreamViewController.swift and add the following extension to the end of the file to adopt the PinterestLayoutDelegate protocol:

extension PhotoStreamViewController: PinterestLayoutDelegate {
  func collectionView(_ collectionView: UICollectionView,
                      heightForPhotoAtIndexPath indexPath:IndexPath) -> CGFloat {

    return photos[indexPath.item].image.size.height
  }
}

Here you provide the layout with the exact height of the photos.

Next, add the following code inside viewDidLoad(), just below the call to super:

if let layout = collectionView?.collectionViewLayout as? PinterestLayout {
  layout.delegate = self
}

This sets the PhotoStreamViewController as the delegate for your layout.

Time to see how things are shaping up! Build and run your app. You'll see the cells are properly positioned and sized based on the heights of the photos:

build_and_run_final

You've now built a completely custom collection view layout - great work!

Where to Go From Here?

You can download the final project with all of the code from the tutorial.

With less work than you probably thought, you've created your very own Pinterest-like custom layout!

If you're looking to learn more about custom layouts, consider the following resources:

If you have any questions or comments on this tutorial, feel free to join the discussion below in the forums!

The post UICollectionView Custom Layout Tutorial: Pinterest appeared first on Ray Wenderlich.

Swift Apprentice Updated for Swift 4

$
0
0

Happy Monday, everyone — it’s time for another Swift 4 book release as part of our iOS 11 Launch Party!

Today’s book release is the Swift Apprentice, Third Edition.

For the new third edition, we’ve made some major changes:

  • New chapter: Strings. We’ve addd an entirely new chapter showcasing the new approach for Strings in Swift 4.
  • New chapter: Codable. We’ve also added a new chapter on Codable and serialization.
  • Extended chapter: Operators and Subscripts. We’ve greatly extended the chapter on custom operators and subscripts to covers keypaths in detail.
  • More Swift 4 updates! We’ve also made many other changes to upgrade the book for Swift 4 throughout the book!

This will be a free update for existing Swift Apprentice PDF customers — our way of saying “thanks” to all of our readers for their support!

Don’t own the Swift Apprentice yet? Read on to see how you can get a copy — and take advantage of our iOS 11 Launch Party discount!

What is the Swift Apprentice?

If you’re a complete beginner to programming, this is the book for you! There are short exercises and challenges throughout the book to give you some programming practice and test your knowledge along the way.

In a little over three years, Swift has gone from being a secret project at Apple, Inc. to a full-blown, open source community driven language. It continues to refine its core goal of being a general purpose language that supports safety, speed and expressiveness.

Despite its advanced, industrial-strength nature, Swift is a great choice for the beginning programmer, since Xcode offers a sandbox-type environment where you can directly execute Swift statements to try out various components of the language — without having to create a whole app first.

Developers around the world use Swift to build thousands of amazing apps for the iPhone, iPad, Mac, Apple TV and the Apple Watch. That means what you learn in this book will be extremely useful as you expand your development skills and in your work as an app developer.

This book is divided into four sections:

Section I: Swift Basics

The chapters in this section will introduce you to the very basics of programming in Swift. From the fundamentals of how computers work all the way up to language structures, you’ll cover enough of the language to be able to work with data and organize your code’s behavior.

The section begins with some groundwork to get you started.

  • Chapter 1, Expressions, Variables & Constants: This is it, your whirlwind introduction to the world of programming! You’ll begin with an overview of computers and programming, and then say hello to Swift playgrounds, which are where you’ll spend your coding time for the rest of this book. You’ll learn some basics such as code comments, arithmetic operations, constants and variables. These are some of the fundamental building blocks of any language, and Swift is no different.
  • Chapter 2, Types & Operations: You’ll learn about handling different types, including strings which allow you to represent text. You’ll learn about converting between types and you’ll also be introduced to type inference which makes your life as a programmer a lot simpler. You’ll learn about tuples which allow you to make your own types made up of multiple values of any type.

Once you have the basic data types in your head, it’ll be time to do things with that data:

  • Chapter 3, Basic Control Flow: You’ll learn how to make decisions and repeat tasks in your programs by using syntax to control the flow. You’ll also learn about Booleans, which represent true and false values, and how you can use these to compare data.
  • Chapter 4, Advanced Float Control: Continuing the theme of code not running in a straight line, you’ll learn about another loop known as the `for` loop. You’ll also learn about `switch` statements which are particularly powerful in Swift.
  • Chapter 5, Functions: Functions are the basic building blocks you use to structure your code in Swift. You’ll learn how to define functions to group your code into reusable units.

The final chapter of the section loops a very important data type:

  • Chapter 6, Optionals: This chapter covers optionals, a special type in Swift that represents either a real value or the absence of a value. By the end of this chapter, you’ll know why you need optionals and how to use them safely.

Section II: Collection Types

Stored data is a core component of any app, whether it’s a list of friends in your social networking app or a set of unlockable characters in your hit game. In this section, you’ll learn how to store collections of data in Swift.

So far, you’ve mostly seen data in the form of single elements. Although tuples can have multiple pieces of data, you have to specify the size up front; a tuple with three strings is a completely different type from a tuple with two strings, and converting between them isn’t trivial. In this section, you’ll learn about collection types in Swift. Collections are flexible “containers” that let you store any number of values together.

There are several collection types in Swift, but three important ones are arrays, dictionaries and sets. You’ll learn about these here:

  • Chapter 7, Arrays, Dictionaries, and Sets: There are several collection types in Swift, but three important ones are arrays, dictionaries and sets. You’ll learn about these here.
  • Chapter 8, Collection Iterations With Closures: Next you’ll learn how to apply custom operations and loop over collection types.
  • Chapter 9, Strings: Finally, you will revisit strings, which are actually bi-directional collections of unicode characters.

The collection types have similar interfaces but very different use cases. As you read through these chapters, keep the differences in mind, and you’ll begin to develop a feel for which type you should use when.

As part of exploring the differences between the collection types, you’ll also consider performance: how quickly the collections can perform certain operations, such as adding to the collection or searching through it.

Section III: Building Your Own Types

Swift comes with basic building blocks, but its real power is in the custom things you can build to model parts of your app. Swift has no idea about playable characters and monsters and power-ups, for example — these are things you need to build yourself! You’ll learn how to do that in this section.

Now that you know the basics of Swift, it’s time to put everything you’ve learned together to create your own types.

You can create your own type by combining variables and functions into a new type definition. For example, integers and doubles might not be enough for your purposes, so you might need to create a type to store complex numbers. Or maybe storing first, middle and last names in three independent variables is getting difficult to manage, so you decide to create a `FullName` type.

When you create a new type, you give it a name; thus, these custom types are known as named types. Structures are a powerful tool for modeling real world concepts. You can encapsulate related concepts, properties and methods into a single, cohesive model.

  • Chapter 10, Structures
  • Chapter 11, Properties
  • Chapter 12, Methods

Swift, in fact, includes four kinds of named types: structures, classes, enumerations and protocols. Now that you understand structures work with methods and properties you can see how the other named types use these same concepts, how they differ, and where you want to use each.

  • Chapter 13, Classes
  • Chapter 14, Advanced Classes
  • Chapter 15, Enumerations
  • Chapter 16, Protocols

Finally, you expand your knowledge of the type system by learning about generics: types and methods that take as input other types instead of just methods. Swift’s key to safety, speed and expressiveness lies in the ability to utilize generic types.

  • Chapter 17, Generics

Custom types make it possible to build large and complex things with the basic building blocks you’ve learned so far.

Section IV: Advanced Topics

The final section of the book covers more advanced topics in Swift. You’ll learn about specific things, such as how to handle problems that come up as your code runs, as well as about more general things such as memory management, which will help you understand some of Swift’s behind-the-scenes mechanisms.

In this section, you’ll delve into some important but more advanced topics to round out your Swift apprenticeship:

  • Chapter 18, Access Control and Code Organization: Swift gives you powerful tools for hiding complexity and organizing your code into easier to digest units. This chapter details how to do that.
  • Chapter 19, Custom Operators, Subscripts, Keypaths: You’ll learn how you can define your own operators and subscripts to make your types feel even more like built-in language constructs. You will also learn about type-safe keypaths introduced in Swift 4.
  • Chapter 20, Pattern Matching: With pattern matching you can accomplish more — with less typing. You’ll master all of its many forms in this chapter.
  • Chapter 21, Error Handling: In the real world, some errors cannot be avoided. Handling them gracefully is what sets apart mediocre code from great code.
  • Chapter 22, Encoding and Decoding Types: You will learn about the type serialization system introduced in Swift 4 with particular emphasis on the JSON format.
  • Chapter 23, Async Closures and Memory Management: This chapter digs into the details of Swift memory management examining the relation between objects. It shows you how you avoid common leaks.
  • Chapter 24, Value Types and Reference Types: Value semantics have a clear advantage over reference semantics in terms of the local reasoning but can lead to inefficiency for large objects. This chapter shows you how to get the best of both worlds.
  • Chapter 25, Protocol-Oriented Programming: From the standard library to user authored generics, Swift is a protocol-based language. In this chapter you’ll see how to get all of the benefits associated with object-oriented programming while being able to avoid most of the difficulties.

About the Authors

Of course, our book would be nothing without our team of experienced and dedicated authors:

Janie Clayton is an independent iOS developer. She spent a year apprenticed to a super genius programming robots and learning the forgotten ways of long term software maintenance and development. Janie is the coauthor on several books on iOS and Swift development. Janie lives outside of Madison, Wisconsin with her attempted grumble of pugs and multitude of programming books. Janie writes her various musings on her blog at RedQueenCoder.com.

Alexis Gallagher is a software engineer who is always looking for the conceptual deep dive and always hoping to find pearls down at the bottom. When he’s not coding, he’s out and about in sunny San Francisco.

Matt Galloway is a software engineer with a passion for excellence. He stumbled into iOS programming when it first was a thing, and has never looked back. When not coding, he likes to brew his own beer.

Eli Ganim is an engineering manager at Facebook. He is passionate about teaching, writing, and sharing his knowledge with others.

Ben Morrow delights in discovering the unspoken nature of the world. He’ll tell you the surprising bits while on a walk. He produces beauty by drawing out the raw wisdom that exists within each of us.

Cosmin Pupăză is a software developer and tutorial writer from Romania. He has worked with more than a dozen programming languages over the years, but none of them has made such a great impact on himself as the advent of Swift. When not coding, he either plays the guitar or studies WWII history. Cosmin blogs about Swift at cosminpupaza.wordpress.com.

Steven Van Impe is a computer science lecturer at the University College of Ghent, Belgium. When he’s not teaching, Steven can be found on his bike, rattling over cobblestones and sweating up hills, or relaxing around the table, enjoying board games with friends. You can find Steven on Twitter as @svanimpe.

Free Swift Apprentice Chapter

To help celebrate the launch, we’re going to open up the book and share a free chapter with you this week! This will give you a chance to check out some of the new pieces in the book. Stay tuned!

Now Available in ePub!

And as another exciting announcement, by popular request, the Swift Apprentice is now available in ePub format. Take it on the go with you on your iPad, iPhone or other digital reader and enjoy all the mobile reading benefits that ePub has to offer!

For the first time, Swift Apprentice is available in ePub format too!

Where to Go From Here?

Swift Apprentice, Third Edition is now 100% complete, fully updated for Swift 4 and is available today!

  • If you’ve already bought the Swift Apprentice PDF, you can log in to your account and download the new book in PDF and ePub format immediately on our store page.
  • If you don’t have the Swift Apprentice yet, you can grab your own very own copy in our online store.

And to help sweeten the deal, the digital edition of the book is on sale for $49.99! But don’t wait — this sale price is only available for a limited time.

Speaking of sweet deals, be sure to check out the great prizes we’re giving away this year with the iOS 11 Launch Party, including over $9,000 in giveaways!

To enter, simply retweet this post using the #ios11launchparty hashtag by using the button below:


We hope you enjoy this update to one of our most-loved books. Stay tuned for more book releases and updates coming soon!

The post Swift Apprentice Updated for Swift 4 appeared first on Ray Wenderlich.


New Course: Your First Swift 4 & iOS 11 App

$
0
0

As part of our iOS 11 Launch Party, we are releasing a ton of new and updated courses for raywenderlich.com subscribers.

Today we are happy to release our first new course: Your First Swift 4 & iOS 11 App! This is our course for complete beginners to iOS development – or to programming in general.

This epic 47-video course is a complete overhaul of our previous Beginning iOS course. This time, we’ve made the videos shorter, more polished, and more fun.

If you’re a beginner to iOS development (or if you know someone who is), this is the place to start. Let’s take a look at what’s inside.

Section 1: Basic Controls

In this section, you will learn how to add basic controls like labels, buttons, and sliders into a Swift 4 and iOS 11 app.

This section contains 10 videos:

  1. Introduction: Learn about the first app you’ll build – a simple but fun game called Bull’s Eye – and get a preview of all the things you’ll learn throughout this section.
  2. Making a Programming to-do list: Make a programming to-do list of all the things you’ll need to do to build the game. This helps build a good programming practice of gathering requirements first!
  3. Buttons and Actions: Learn how to add a button to the app and connect it to some Swift 4 code that prints a message to the console.
  4. Alerts: Learn how to make the app display a popup alert when you tap a button.
  5. Solving Problems: Learn how to solve problems beginners frequently run into.
  6. Challenge: Connecting Actions: Practice connecting an action performs on a button – such as a tap – to some Swift code that you write.
  7. How Does an App Work: Learn how apps actually work under the hood.
  8. Portrait vs. Landscape: Learn how to convert your app from portrait to landscape mode.
  9. Challenge: Basic Controls: Practice adding basic controls like sliders, buttons, and labels into your app by creating the basic layout for the Bulls-eye game.
  10. Conclusion: Let’s review where you are with your programming to-do list, and discuss what’s next.

Section 2: Outlets

You will learn how to access the controls you added to your app in the previous section – like labels, buttons, and sliders – from your own Swift code.

This section contains 8 videos:

  1. Introduction: Let’s review what you’ll be learning in this section, and why it’s important.
  2. Objects, Data, and Methods: Learn the basics of object-oriented programming, so you can better understand the Swift 4 code you are writing.
  3. Strings and Variables: Learn how to detect when the user moves the slider, and how to store the result in a variable. Along the way, you’ll learn the basics of using Swift 4 strings.
  4. Challenge: Your First Bug: In this challenge, you’ll come across your first bug – and you’ll try and fix it.
  5. Connecting Outlets: Learn about one of the fundamental techniques in iOS development: connecting views like buttons or labels from your storyboard to outlets in your code.
  6. Writing Methods: Learn how to add multiple rounds into Bulls-Eye, and how to write your own methods along the way.
  7. Challenge: Connecting Outlets: Get some more practice connecting views from your storyboard to outlets that you can access from Swift code.
  8. Conclusion: Let’s review where you are with your programming to-do list, and discuss what’s next.

Section 3: Coding Basics

You will learn the basics of programming in Swift, as you finish adding the rest of the gameplay for Bull’s Eye.

This section contains 11 videos:

  1. Introduction: Let’s review what you’ll be learning in this section, and why it’s important.
  2. Challenge: How to Calculate the Difference: See if you can figure out an algorithm to calculate the positive difference between the target value and the slider value.
  3. Calculating the Difference: Implement the algorithm you just designed to calculate the difference using Swift.
  4. Variables vs. Constants: Finalize the difference algorithm and score calculation, and learn about an important Swift concept: the difference between variables and constants.
  5. Challenge: Calculating the Difference: Try improving the algorithm to calculate the difference so it is written in less lines of code.
  6. Type Inference: Add the ability to track the user’s total score, and learn about something cool called Swift type inference along the way.
  7. Challenge: Showing the Score: Practice some coding basics by modifying Bull’s Eye to display the player’s total score.
  8. Challenge: Tracking Rounds: It’s time for an even bigger challenge: modifying Bull’s Eye to keep track and report the current round of the game.
  9. Adding Polish: Polish the app by telling the player how well they did each round.
  10. Challenge: Adding Polish: Get some final practice with coding basics by giving the user bonus points if they are very close to the target.
  11. Conclusion: Let’s review where you are with your programming to-do list, and discuss what’s next.

Section 4: Coding Practice

You will get more practice coding in Swift, by adding the final few features to Bull’s Eye.

This section contains 7 videos:

  1. Introduction: Let’s review what you’ll be learning in this section, and why it’s important.
  2. Challenge: Local vs. Instance Variables: Try this challenge to make sure you understand the difference between local and instance variables, which is a common point of confusion for beginners to programming.
  3. Closures: Learn how to use an important construct in Swift called closures, which you often use to provide a block of code that is executed some time in the future.
  4. Challenge: Starting Over: Get some more coding practice by implementing the “Start Over” button in Bull’s Eye.
  5. Adding Extra Screens: Learn how to add multiple screens to your iOS apps, by adding an About screen into Bull’s Eye.
  6. Challenge: Adding Extra Screens: Practice adding multiple screens into your iOS apps, by adding an About the Author screen into Bull’s Eye.
  7. Conclusion: Let’s review where you are with your programming to-do list, and discuss what’s next.

Section 5: Styling the App

You will learn how to style your apps to make them look great, and run your app on your own iPhone.

This section contains 11 videos:

  1. Introduction: Let’s review what you’ll be learning in this section, and why it’s important.
  2. Styling with Images and Labels: Learn how to add a background image to your app, and style labels.
  3. Challenge: Styling with Labels: In this challenge, you’ll style the rest of the labels in Bull’s Eye.
  4. Styling with Buttons and Sliders: Learn how to style buttons to use custom images, and style sliders to use custom thumb images.
  5. Challenge: Styling the About Screen: In this challenge, you’ll get practice with styling your apps by improving the look of the About screen.
  6. Web Views: Learn how to add web views into your apps to display web pages.
  7. Introduction to Auto Layout: Learn how to use Auto Layout, a core UIKit technology that makes it easy to support many different screen sizes.
  8. Challenge: Introduction to Auto Layout: In this challenge, you’ll get practice with auto layout by setting up Auto Layout on the About screen.
  9. App Icon and Display Name: Learn how to set up your app icon, and change the display name of your app.
  10. Running the App on Your Device: Learn how to run your app on your own physical device.
  11. Conclusion: Let’s review where you are with your programming to-do list, and discuss what’s next.

Where To Go From Here?

Want to check out the course? You can watch the first four parts for free!

The rest of the course is for raywenderlich.com subscribers only. Here’s how you can get access:

  • If you are a raywenderlich.com subscriber: The entire 47-part course is complete and available today. You can check out the entire course here.
  • If you are not a subscriber yet: What are you waiting for? Subscribe now to get access to our new Xcode Tips and Tricks course and our entire catalog of over 500 videos.

This is just the beginning of the iOS 11 Launch Party, so stay tuned for many more new and updated courses to come. I hope you enjoy our new course! :]

The post New Course: Your First Swift 4 & iOS 11 App appeared first on Ray Wenderlich.

Storyboards and Codable – Podcast S07 E01

$
0
0

In this episode Dru and Janie welcome guest Arthur Mayes who gives his insights into working with Storyboards and then Dru looks into the new Swift 4 Codable protocol.

[Subscribe in iTunes] [RSS Feed]

Interested in sponsoring a podcast episode? We sell ads via Syndicate Ads, check it out!

Episode Links

Contact Us

Where To Go From Here?

We hope you enjoyed this episode of our podcast. Be sure to subscribe in iTunes to get notified when the next episode comes out.

We’d love to hear what you think about the podcast, and any suggestions on what you’d like to hear in future episodes. Feel free to drop a comment here, or email us anytime at podcast@raywenderlich.com.

The post Storyboards and Codable – Podcast S07 E01 appeared first on Ray Wenderlich.

Will All iOS 11 raywenderlich.com Books be Available in EPUB?

$
0
0

It’s a question you’ve been asking us for years:

“When will you offer ePub versions of your new books?”

Well, we’re happy to announce that all of our Swift 4+ books will be available in ePub format!

All books updated for iOS 11 and Swift 4 will be available in PDF and ePub format!

Why is ePub So Great?

We’ve had PDF versions of our books for years, but readers have been asking for compact, reflowable books that are readable on any size device, whether you’re on an iPhone SE, an iPad Pro, or even at home on your Mac.

The popular ePub format solves those problems handily. So for each and every book that we’re updating for iOS 11 and Swift 4 this book season, we’re going to include the ePub edition for free for everyone who has purchased the digital PDF edition of the book, as a way to say “thanks” to all of our great readers for their years of support!

Take advantage of all the great features of the ePub format, from reading settings, to bookmarks, searchable text and more!

When Will a Particular Book be Updated?

Here’s the release schedule for our books during the iOS 11 Launch Party:

  1. iOS 11 by Tutorials (NEW!) — September 12
  2. Swift Apprentice, Third Edition — September 18
  3. iOS Apprentice, Sixth Edition — September 20
  4. 2D Apple Games by Tutorials, Second Edition — September 25
  5. 3D Apple Games by Tutorials, Second Edition — September 27
  6. tvOS Apprentice, Third Edition — October 2
  7. iOS Animations by Tutorials, Fourth Edition — October 9
  8. Core Data by Tutorials, Fourth Edition — October 16
  9. watchOS by Tutorials, Third Edition — October 23
  10. Advanced Apple Debugging, Second Edition — October 30

Keep watching the site for announcements as we release each updated book!

Where to Go From Here?

We’ll be releasing our updated books for iOS 11 and Swift 4 over the next few weeks as part of our iOS 11 Launch Party.

Once a book has launched, here’s how you can get your hands on the ePub version of the book:

  • If you’ve already bought the digital edition of a book, once we announce the book has been updated for iOS 11/Swift 4, simply log in to your account and download the new book in PDF and ePub format when it’s available on our store page.
  • If you haven’t bought the digital edition of a book yet, you can grab one of our supported books from our online store. As soon as we release the iOS 11/Swift 4 edition of the book, we’ll automatically add it to your account and you can download the ePub version at that point.

We have a limited-time sale on right now for all books that are part of our iOS 11 Launch Party. Check it out on our online store:

As part of our iOS 11 Launch Party we’re offering over $9,000 in giveaways!

To enter, simply retweet this post using the #ios11launchparty hashtag by using the button below:


Once again, thank you for all your support and we hope you enjoy all the new updates in the books this year!

The post Will All iOS 11 raywenderlich.com Books be Available in EPUB? appeared first on Ray Wenderlich.

SQLite With Swift Tutorial: Getting Started

$
0
0
Update note: This tutorial has been updated to Xcode 9, iOS 11, and Swift 4 by Nikolas Burk. The original tutorial was written by Chris Wagner.
sqlite with swift tutorial

Curious about using the SQLite C APIs from Swift? Then read on…

This SQLite with Swift tutorial shows you how to work with the popular database platform from within Swift. In the world of software development, it doesn’t take long before you need to persist app data. In many cases, this comes in the form of data structures. But how do you store it effectively — and efficiently?

Fortunately, some great minds have developed solutions for storing structured data in databases and writing language features to access that data. SQLite is available by default on iOS. In fact, if you’ve used Core Data before, you’ve actually already used SQLite since Core Data is only a layer on top of SQLite that provides a more convenient API.

Throughout this SQLite with Swift tutorial, you’ll learn how to perform the following database operations:

  • Create and connect to a database
  • Create a table
  • Insert a row
  • Update a row
  • Delete a row
  • Query the database
  • Handle SQLite errors

After learning how to perform these fundamental operations, you’ll see how to wrap them up in a more Swift-like manner. This will let you write abstraction APIs for your apps so that you can (mostly) avoid the pain of working with the SQLite C APIs! :]

Finally, I’ll briefly cover the popular open source Swift wrapper SQLite.swift to give you a basic understanding of how underlying frameworks work within a wrapper.

Note: Databases, and even just SQLite on its own, are massive topics to cover, so they’re mostly out of scope for this tutorial. It’s assumed that you have a basic understanding of relational database ideology and that you’re primarily here to learn how to use SQLite in conjunction Swift.

Getting Started

Download the starter project for this SQLite with Swift tutorial and open SQLiteTutorial.xcworkspace. From the Project Navigator open the Tutorial playground.

Note: The project is packed up in an Xcode workspace since it uses the SQLite3 dependency as an embedded binary. This binary contains all the functionality for the SQLite code you’re going to write in this tutorial.

Notice that your Playground is configured to run manually instead of autmatically:

sqlite tutorial

This means it will only execute when you explicitly invoke the execution by hitting the “Play” button.

You might also see a destroyPart1Database() call at the top of the page; you can safely ignore this, since the database file is destroyed each time the playground runs. This ensures all statements execute successfully as you move through this SQLite with Swift tutorial.

Your playground will need somewhere to write SQLite database files on your file system. Run the following command in Terminal to create the data directory for your playground:

mkdir -p ~/Documents/Shared\ Playground\ Data/SQLiteTutorial

Why Should I Choose SQLite?

True, SQLite isn’t the only way to persist data on iOS. Besides Core Data, there are lots of other alternatives for data persistence, including Realm, Couchbase Lite, Firebase, and NSCoding.

Each of these has their own pros and cons — including SQLite itself. There’s no silver bullet for data persistence, and as the developer, it’s up to you to determine which option outweighs the others based on your app’s requirements.

SQLite does have some advantages:

  • Shipped with iOS so it adds no overhead to your app’s bundle
  • Tried and tested; version 1.0 was released in August 2000
  • Open source
  • Familiar query language for database developers and admins
  • Cross-platform

The cons of SQLite can be terribly subjective and opinionated, so we’ll leave the research on that up to you! :]

The C API

This part of the SQLite with Swift tutorial will walk you through the most common and basic SQLite APIs. You’ll soon realize that wrapping the C API in Swift methods would be ideal, but sit tight and work through the C code first; you’ll do some wrapping in the second part of this tutorial.

Opening a Connection

Before doing anything, you’ll first need to create a database connection.

Add the following method under the Getting Started section of the playground:

func openDatabase() -> OpaquePointer? {
  var db: OpaquePointer? = nil
  if sqlite3_open(part1DbPath, &db) == SQLITE_OK {
    print("Successfully opened connection to database at \(part1DbPath)")
    return db
  } else {
    print("Unable to open database. Verify that you created the directory described " +
      "in the Getting Started section.")
    PlaygroundPage.current.finishExecution()
  }

}

The above method calls sqlite3_open(), which opens or creates a new database file. If it’s successful, it returns an OpaquePointer; this is a Swift type for C pointers that can’t be represented directly in Swift. When you call this method, you’ll have to capture the returned pointer in order to interact with the database.

Many of the SQLite functions return an Int32 result code. Most of these codes are defined as constants in the SQLite library. For example, SQLITE_OK represents the result code 0. A list of the different result codes can be found on the main SQLite site.

To open the database, add the following line to your playground:

let db = openDatabase()

Press the Play button to run the playground and watch the console output. If the console isn’t open, press the button to the left of the play button:

sqlite tutorial

If openDatabase() succeeds, you’ll see some output like the following:

Successfully opened connection to database at /Users/username/Documents/Shared Playground Data/SQLiteTutorial/Part1.sqlite

Where username is your Home directory.

Creating a Table

Now that you have a connection to a database file, you can create a table. You’ll work with a very simple table to store contacts.

The table will consist of two columns; Id, which is an INT and a PRIMARY KEY; and Name, which is a CHAR(255).

sqlite tutorial

Add the following string, which contains the SQL statement necessary to create the table:

let createTableString = """
CREATE TABLE Contact(
Id INT PRIMARY KEY NOT NULL,
Name CHAR(255));
"""

Note that you’re using Swift 4’s handy multine syntax to write this statement!

Next, add this method that executes the CREATE TABLE SQL statement:

func createTable() {
  // 1
  var createTableStatement: OpaquePointer? = nil
  // 2
  if sqlite3_prepare_v2(db, createTableString, -1, &createTableStatement, nil) == SQLITE_OK {
    // 3
    if sqlite3_step(createTableStatement) == SQLITE_DONE {
      print("Contact table created.")
    } else {
      print("Contact table could not be created.")
    }
  } else {
    print("CREATE TABLE statement could not be prepared.")
  }
  // 4
  sqlite3_finalize(createTableStatement)
}

Going over this step-by-step:

  1. First, you create a pointer to reference in the next step.
  2. sqlite3_prepare_v2() compiles the SQL statement into byte code and returns a status code — an important step before executing arbitrary statements against your database. If you’re interested, you can find out more here. You check the returned status code to ensure the statement compiled successfully. If so, the process moves to step 3; otherwise, you print a message noting the statement could not be compiled.
  3. sqlite3_step() runs the compiled statement. In this case, you only “step” once as this statement has a single result. Later in this SQLite with Swift tutorial you’ll see when it’s necessary to step multiple times for a single statement.
  4. You must always call sqlite3_finalize() on your compiled statement to delete it and avoid resource leaks. Once a statement has been finalized, you should never use it again.

Now, add the following method call to the playground:

createTable()

Run your playground; you should see the following appear in your console output:

Contact table created.

Now that you have a table, it’s time to add some data to it. You’re going to add a single row with an Id of 1 and Name of “Ray”.

Inserting Some Data

Add the following SQL statement to the bottom of your playground:

let insertStatementString = "INSERT INTO Contact (Id, Name) VALUES (?, ?);"

This might look a little strange if you haven’t had much SQL experience. Why are the values represented by question marks?

Remember above when you used sqlite3_prepare_v2() to compile your statement? The ? syntax tells the compiler that you’ll provide real values when you actually execute the statement.

This has performance considerations, and lets you compile statements ahead of time, which can be a performance gain since compilation is a costly operation. The compiled statements can then be re-used over and over with different values.

Next, create the following method in your playground:

func insert() {
  var insertStatement: OpaquePointer? = nil

  // 1
  if sqlite3_prepare_v2(db, insertStatementString, -1, &insertStatement, nil) == SQLITE_OK {
    let id: Int32 = 1
    let name: NSString = "Ray"

    // 2
    sqlite3_bind_int(insertStatement, 1, id)
    // 3
    sqlite3_bind_text(insertStatement, 2, name.utf8String, -1, nil)

    // 4
    if sqlite3_step(insertStatement) == SQLITE_DONE {
      print("Successfully inserted row.")
    } else {
      print("Could not insert row.")
    }
  } else {
    print("INSERT statement could not be prepared.")
  }
  // 5
  sqlite3_finalize(insertStatement)
}

Here’s how the above method works:

  1. First, compile the statement and verify that all is well;
  2. Here, you define a value for the ? placeholder. The function’s name — sqlite3_bind_int() — implies you’re binding an Int value to the statement. The first parameter of the function is the statement to bind to, while the second is a non-zero based index for the position of the ? you’re binding to. The third and final parameter is the value itself. This binding call returns a status code, but for now you assume that it succeeds;
  3. Perform the same binding process, but this time for a text value. There are two additional parameters on this call; for the purposes of this tutorial you can simply pass -1 and nil for them. If you’d like, you can read more about binding parameters here;
  4. Use the sqlite3_step() function to execute the statement and verify that it finished;
  5. As always, finalize the statement. If you were going to insert multiple contacts, you’d likely retain the statement and re-use it with different values.

Next, call your new method by adding the following to the playground:

insert()

Run your playground and verify that you see the following in your console output:

Successfully inserted row.

Challenge: Multiple Inserts

Challenge time! Your task is to update insert() to insert an array of contacts.

As a hint, you’ll need to reset your compiled statement back to its initial state by calling sqlite3_reset() before you execute it again.

Solution Inside: Solution — Insert multiple rows SelectShow>

Querying Contacts

Now that you’ve inserted a row or two, it sure would be nice to verify that they’re really there! :]

Add the following to the playground:

let queryStatementString = "SELECT * FROM Contact;"

This query simply retrieves all records from the contact table. Using a * means all columns will be returned.

Add the following method to perform the query:

func query() {
  var queryStatement: OpaquePointer? = nil
  // 1
  if sqlite3_prepare_v2(db, queryStatementString, -1, &queryStatement, nil) == SQLITE_OK {
    // 2
    if sqlite3_step(queryStatement) == SQLITE_ROW {
      // 3
      let id = sqlite3_column_int(queryStatement, 0)

      // 4
      let queryResultCol1 = sqlite3_column_text(queryStatement, 1)
      let name = String(cString: queryResultCol1!)

      // 5
      print("Query Result:")
      print("\(id) | \(name)")

    } else {
      print("Query returned no results")
    }
  } else {
    print("SELECT statement could not be prepared")
  }

  // 6
  sqlite3_finalize(queryStatement)
}

Taking each numbered comment in turn:

  1. Prepare the statement;
  2. Execute the statement. Note that you’re now checking for the status code SQLITE_ROW, which means that you retrieved a row when you stepped through the result;
  3. It’s time to read values from the returned row. Given what you know about the table’s structure and your query, you can access the row’s values column by column. The first column is an Int, so you use sqlite3_column_int() and pass in the statement and a zero-based column index. You assign the returned value to the locally-scoped id constant;
  4. Next, you fetch the text value from the Name column. This is a bit messy due to the C API. First, you capture the value as queryResultCol1 so you can convert it to a proper Swift string on the next line;
  5. Print out the results;
  6. Finalize the statement.

Now, call your new method by adding the following to the bottom of the playground:

query()

Run your playground; you’ll see the following output in your console:

Query Result:
1 | Ray

W00t! It looks like your data made it into the database after all!

Challenge: Printing Every Row

Your task is to update query() to print out every contact in the table.

Solution Inside: Solution — Print all contacts SelectShow>

Updating Contacts

The next natural progression is to update an existing row. You should start to see a pattern emerging.

First, create the UPDATE statement:

let updateStatementString = "UPDATE Contact SET Name = 'Chris' WHERE Id = 1;"

Here you’re using real values instead of ? placeholders. Usually you’d use the placeholders and perform proper statement binding, but for brevity you can skip it here.

Next, add the following method to the playground:

func update() {
  var updateStatement: OpaquePointer? = nil
  if sqlite3_prepare_v2(db, updateStatementString, -1, &updateStatement, nil) == SQLITE_OK {
    if sqlite3_step(updateStatement) == SQLITE_DONE {
      print("Successfully updated row.")
    } else {
      print("Could not update row.")
    }
  } else {
    print("UPDATE statement could not be prepared")
  }
  sqlite3_finalize(updateStatement)
}

This is a similar flow to what you’ve seen before: prepare, step, finalize! Add the following to your playground:

update()
query()

This executes your new method, then calls your previously defined query() method so that you can see the results:

Successfully updated row.
Query Result:
1 | Chris

Congratulations on updating your first row! How easy was that? :]

Deleting Contacts

The final step on the path to becoming an SQLite ninja is to delete the row you created. Again, you’ll use the familiar pattern of prepare, step, and finalize.

Add the following to the playground:

let deleteStatementStirng = "DELETE FROM Contact WHERE Id = 1;"

Now add the following method to execute the statement:

func delete() {
  var deleteStatement: OpaquePointer? = nil
  if sqlite3_prepare_v2(db, deleteStatementStirng, -1, &deleteStatement, nil) == SQLITE_OK {
    if sqlite3_step(deleteStatement) == SQLITE_DONE {
      print("Successfully deleted row.")
    } else {
      print("Could not delete row.")
    }
  } else {
    print("DELETE statement could not be prepared")
  }

  sqlite3_finalize(deleteStatement)
}

Are you feeling it now? Prepare, step, and finalize! :]

Execute this new method, followed a call to query(), like so:

delete()
query()

Now run your playground and you should see the following output in your console:

Successfully deleted row.
Query returned no results
Note: If you completed the Multiple Inserts challenge above, it’s likely the output will look a little different to that above due to rows still being present in the table.

Handling Errors

Hopefully, you’ve managed to avoid SQLite errors up to this point. But the time will come when you make a call that doesn’t make sense, or simply cannot be compiled.

Handling the error message when these things happen can save you a lot of development time; it also gives you the opportunity to present meaningful error messages to your users.

Add the following statement – which is intentionally malformed – to your playground:

let malformedQueryString = "SELECT Stuff from Things WHERE Whatever;"

Now add a method to execute this malformed statement:

func prepareMalformedQuery() {
  var malformedStatement: OpaquePointer? = nil
  // 1
  if sqlite3_prepare_v2(db, malformedQueryString, -1, &malformedStatement, nil) == SQLITE_OK {
    print("This should not have happened.")
  } else {
    // 2
    let errorMessage = String.init(cString: sqlite3_errmsg(db))
    print("Query could not be prepared! \(errorMessage)")
  }

  // 3
  sqlite3_finalize(malformedStatement)
}

Here’s how you’re going to force an error:

  1. Prepare the statement, which will fail and should NOT return SQLITE_OK;
  2. Get the error message from the database using sqlite3_errmsg(). This function returns a textual description of the most recent error. You then print the error to the console;
  3. As always, finalize.

Call the method to see the error message:

prepareMalformedQuery()

Run your playground; you should see the following output in your console:

Query could not be prepared! no such table: Things

Well, that’s actually helpful — you obviously cannot run a SELECT statement on a table that doesn’t exist!

Closing the Database Connection

When you’re done with a database connection, you’re responsible for closing it. But beware — there are a number of things you must have performed before you can successfully close your database, as described in the SQLite documentation.

Call the close function as shown below:

sqlite3_close(db)

Run your playground; you should see a status code of 0 in the right side results view of the playground; this represents SQLITE_OK, which means your close call succeeded.

You’ve successfully created a database, added a table, added rows to the table, queried and updated those rows, and even deleted a row — all using the SQLite C APIs from Swift. Great job!

In the next section, you’ll take what you’ve learned and see how to wrap some of these calls in Swift.

SQLite With Swift

As a Swift developer, you’re probably feeling a little uneasy about what happened in the first part of this tutorial. That C API is a bit painful, but the good news is you can take the power of Swift and wrap those C routines to make things easier for yourself.

For this part of the SQLite with Swift tutorial, click the Making it Swift link at the bottom of the playground to open the playground for this section:

sqlite tutorial

Wrapping Errors

Getting at errors from the C API is a bit awkward as a Swift developer. Checking a result code and then calling another method just doesn’t make sense in this brave new world. It would make more sense if methods that can fail throw an error.

Add the following to your playground:

enum SQLiteError: Error {
  case OpenDatabase(message: String)
  case Prepare(message: String)
  case Step(message: String)
  case Bind(message: String)
}

This is a custom Error enum that covers four of the main operations you are using that can fail. Note how each case has an associated value that will hold the error message.

Wrapping the Database Connection

Another not-so-Swifty aspect is the use of those blasted OpaquePointer types.

Wrap up the database connection pointer in its own class, as shown below:

class SQLiteDatabase {
  fileprivate let dbPointer: OpaquePointer?

  fileprivate init(dbPointer: OpaquePointer?) {
    self.dbPointer = dbPointer
  }

  deinit {
    sqlite3_close(dbPointer)
  }
}

This looks much better. When you need a database connection, you can create a reference to a more meaningful type of SQLiteDatabase rather than OpaquePointer.

You’ll notice the initializer is fileprivate; that’s because you don’t want your Swift developers passing in that OpaquePointer. Instead, you let them instantiate this class with a path to the database file.

Add the following static method to SQLiteDatabase as follows:

static func open(path: String) throws -> SQLiteDatabase {
  var db: OpaquePointer? = nil
  // 1
  if sqlite3_open(path, &db) == SQLITE_OK {
    // 2
    return SQLiteDatabase(dbPointer: db)
  } else {
    // 3
    defer {
      if db != nil {
        sqlite3_close(db)
      }
    }

    if let errorPointer = sqlite3_errmsg(db) {
      let message = String.init(cString: errorPointer)
      throw SQLiteError.OpenDatabase(message: message)
    } else {
      throw SQLiteError.OpenDatabase(message: "No error message provided from sqlite.")
    }
  }
}

Here’s what happening:

  1. Attempt to open the database at the provided path;
  2. If successful, return a new instance of SQLiteDatabase;
  3. Otherwise, defer closing the database if the status code is anything but SQLITE_OK and throw an error.

Now you can create and open a database connection using much cleaner syntax.

Add the following to your playground:

let db: SQLiteDatabase
do {
  db = try SQLiteDatabase.open(path: part2DbPath)
  print("Successfully opened connection to database.")
} catch SQLiteError.OpenDatabase(let message) {
  print("Unable to open database. Verify that you created the directory described in the Getting Started section.")
  PlaygroundPage.current.finishExecution()
}

Ah, much more Swift like. Here, the attempt to open the database is wrapped in a do-try-catch block, and the error message from SQLite is passed to the catch block thanks to that custom enum you added earlier.

Run your playground and watch the console output; you’ll see something like the following:

Successfully opened connection to database.

Now you can use and inspect the db instance as a proper and meaningful type.

Before moving on to writing methods that execute statements, it would be nice if SQLiteDatabase let you easily access SQLite error messages.

Add the following computed property to SQLiteDatabase:

fileprivate var errorMessage: String {
  if let errorPointer = sqlite3_errmsg(dbPointer) {
    let errorMessage = String(cString: errorPointer)
    return errorMessage
  } else {
    return "No error message provided from sqlite."
  }
}

Here you’ve added a computed property that simply returns the most recent error SQLite knows about. If there is no error, it just returns a generic message stating as much.

Wrapping the Prepare Call

Since you do this so often, it makes sense to wrap it like the other methods. As you move forward and add functionality to the SQLiteDatabase class, you’ll make use of class extensions.

Add the following extension, which will be used by your future methods, to invoke sqlite3_prepare_v2() on SQL statements:

extension SQLiteDatabase {
  func prepareStatement(sql: String) throws -> OpaquePointer? {
    var statement: OpaquePointer? = nil
    guard sqlite3_prepare_v2(dbPointer, sql, -1, &statement, nil) == SQLITE_OK else {
      throw SQLiteError.Prepare(message: errorMessage)
    }

    return statement
  }
}

Here you declare that prepareStatement(_:) can throw an error, and then use guard to throw that error should sqlite3_prepare_v2() fail. Just like before, you pass the error message from SQLite to the relevant case of your custom enum.

Creating a Contact Struct

In these examples, you’ll use the same Contact table as before, so it makes sense to define a proper struct to represent a contact. Add the following to the playground:

struct Contact {
  let id: Int32
  let name: NSString
}

Wrapping the Table Creation

You’ll knock out the same database tasks as before, but this time you’ll use a “Swifter” approach.

To create a table, you need a CREATE TABLE SQL statement. It makes sense for Contact to define its own CREATE TABLE statement.

Create the following protocol for just that purpose:

protocol SQLTable {
  static var createStatement: String { get }
}

Now, extend Contact to provide conformance to this new protocol:

extension Contact: SQLTable {
  static var createStatement: String {
    return """
    CREATE TABLE Contact(
      Id INT PRIMARY KEY NOT NULL,
      Name CHAR(255)
    );
    """
  }
}

Now you’re able to write the following method that accepts types that conform to SQLTable to create a table:

extension SQLiteDatabase {
  func createTable(table: SQLTable.Type) throws {
    // 1
    let createTableStatement = try prepareStatement(sql: table.createStatement)
    // 2
    defer {
      sqlite3_finalize(createTableStatement)
    }
    // 3
    guard sqlite3_step(createTableStatement) == SQLITE_DONE else {
      throw SQLiteError.Step(message: errorMessage)
    }
    print("\(table) table created.")
  }
}

Here’s a breakdown of what’s happening:

  1. prepareStatement() throws, so you must use try. You’re not doing this in a do-try-catch block because this method itself throws, so any error from prepareStatement() will simply be thrown to the caller of createTable();
  2. With the power of defer, you can ensure that your statements are always finalized, regardless of how this method exits its scope;
  3. guard lets you write a more expressive check for the SQLite status codes.

Give your new method a try by adding the following to your playground:

do {
  try db.createTable(table: Contact.self)
} catch {
  print(db.errorMessage)
}

Here you simply attempt to create the Contact, and catch the error if there is one.

Run your playground; you should see the following appear in your console:

Contact table created.

Fantastic! Isn’t that a much cleaner API to work with?

Wrapping Insertions

Moving right along, it’s time to insert a row into the Contact table. Add the following method:

extension SQLiteDatabase {
  func insertContact(contact: Contact) throws {
    let insertSql = "INSERT INTO Contact (Id, Name) VALUES (?, ?);"
    let insertStatement = try prepareStatement(sql: insertSql)
    defer {
      sqlite3_finalize(insertStatement)
    }

    let name: NSString = contact.name
    guard sqlite3_bind_int(insertStatement, 1, contact.id) == SQLITE_OK  &&
      sqlite3_bind_text(insertStatement, 2, name.utf8String, -1, nil) == SQLITE_OK else {
        throw SQLiteError.Bind(message: errorMessage)
    }

    guard sqlite3_step(insertStatement) == SQLITE_DONE else {
      throw SQLiteError.Step(message: errorMessage)
    }

    print("Successfully inserted row.")
  }
}

Now that you’ve got your SQLegs – see what I did there? :] – this code shouldn’t be too surprising. Given a Contact instance, you prepare a statement, bind the values, execute and finalize. Again, using a potent mix of defer, guard and throw allows you to take advantage of modern Swift language features.

Write the code to call this new method as shown below:

do {
  try db.insertContact(contact: Contact(id: 1, name: "Ray"))
} catch {
  print(db.errorMessage)
}

Run your playground; you should see the following in your console:

Successfully inserted row.

Wrapping Reads

Wrapping up (sorry, I couldn’t resist!) the section on creating the Swift wrapper is querying the database.

Add the following method to query the database for a contact:

extension SQLiteDatabase {
  func contact(id: Int32) -> Contact? {
    let querySql = "SELECT * FROM Contact WHERE Id = ?;"
    guard let queryStatement = try? prepareStatement(sql: querySql) else {
      return nil
    }

    defer {
      sqlite3_finalize(queryStatement)
    }

    guard sqlite3_bind_int(queryStatement, 1, id) == SQLITE_OK else {
      return nil
    }

    guard sqlite3_step(queryStatement) == SQLITE_ROW else {
      return nil
    }

    let id = sqlite3_column_int(queryStatement, 0)

    let queryResultCol1 = sqlite3_column_text(queryStatement, 1)
    let name = String(cString: queryResultCol1!) as NSString

    return Contact(id: id, name: name)
  }
}

This method simply takes the id of a contact and either returns that contact, or nil if there isn’t a contact with that id. Again, these statements should feel somewhat familiar by now.

Write the code to query the first contact:

let first = db.contact(id: 1)
print("\(first?.id) \(first?.name)")

Run your playground; you should see the following output in the console:

Optional(1) Optional(Ray)

By now, you’ve probably identified some calls you could create in a generic fashion and apply them to entirely different tables. The point of the above exercise is to show how you can use Swift to wrap low-level C APIs. This is no simple task for SQLite; there are a ton of intricacies to SQLite that were not covered here.

You might be thinking “Hasn’t someone already created a wrapper for this?” – let me answer that for you right now!

Introducing SQLite.swift

Stephen Celis has graciously written a fully-featured Swift wrapper for SQLite named SQLite.swift. I highly recommend that you check it out if you decide that SQLite fits the bill for data storage in your app.

SQLite.swift provides an expressive way to represent tables and lets you get started with SQLite — without worrying about many of the underlying details and idiosyncrasies of SQLite. You may even consider wrapping SQLite.swift itself to create a high-level API for your app’s domain model.

Check out the well-written README.md for SQLite.swift and decide for yourself if it has a place in your personal code toolbox.

Where to Go From Here?

What about those other common tasks that were skipped over in the Swift section? You can download the completed project for this SQLite with Swift tutorial to see implemented updates, deletes, and multiple row handling. There simply wasn’t enough space to outline them all here.

One thing I haven’t covered is debugging. In many cases, you’ll need some kind of database browser to see what’s going on under the hood. There are a number of different apps out there that range from free and open source, to paid closed source with commercial support. Here are a couple to take a look at, but a quick Google search will reveal many more:

You can also access your SQLite databases directly from your Terminal by typing sqlite3 file.db. From there you can use the .help command to see a list of commands, or you can simply start executing SQL statements directly at the prompt. More information on the command-line SQLite client can be found on the main SQLite site.

I hope you enjoyed this whirlwind introduction to working with SQLite from Swift! If you have any questions or comments, please join the discussion below!

The post SQLite With Swift Tutorial: Getting Started appeared first on Ray Wenderlich.

iOS Apprentice Updated for Swift 4 & iOS 11

$
0
0

Happy Wednesday – it’s book release day during the iOS 11 Launch Party!

This week’s book release is the iOS Apprentice, Sixth Edition. This is our book for complete beginners to iOS 11 development, where you learn how to build four complete apps from scratch.

In this edition, team member Fahim Farook has taken Matthijs Holleman’s classic and completely updated the entire book iOS 11, Swift 4 and Xcode 9.

This is a free update for existing PDF customers, as our way of thanking you for supporting our site.

Don’t have a copy yet? Read on to see how you can get one during our limited-time sale!

What’s Inside the iOS Apprentice

Did you know that iOS Apprentice was first written for iOS 5, and it’s been updated for every version of iOS since then for free? You can’t beat that value!

Here’s what one of our readers has to say:

“Over the years, I have read iOS books/ebooks by Dave Mark, Big Nerd Ranch, Wei-Ming Lee, Neil Smythe, Matt Neuburg, many RW tutorials and probably several others, but Matthijs Hollemans’ tutorials absolutely tower over the rest. . . .Matthijs’s knowledge is profound and his presentations are flawless, but his detailed explanations are pure dev gold.” –chicago in a recent forum post

The iOS Apprentice is one of our best-selling books of all time. Over 10,000 people have begun their iOS development adventures with this book since it was released.

Here’s what’s contained inside:

Section I: Getting Started

In the first tutorial in the series, you’ll start off by building a complete game from scratch called “Bull’s Eye”.

The first app: Bull’s Eye!

Here’s what you’ll learn:

  • How to use Xcode, Interface Builder, and Swift 4 in an easygoing manner.
  • How to use standard UIKit components
  • How to customize them to make them look good!

By the time you’re done, you’ll have created your own iOS app from scratch, even if you’re a complete beginner!

Section II: Checklists

In the second section, you’ll create your own to-do list app. In the process, you’ll learn about the fundamental design patterns that all iOS apps use and about table views, navigation controllers and delegates. Now you’re making apps for real!

The second app you’ll build: Checklists!

Here’s what you’ll learn:

  • How to use Storyboards to design user interfaces
  • How the Model-View-Controller design pattern works in iOS
  • How to use table views, including the new prototype cells and static cells capability
  • How to create your own data model objects
  • What refactoring is, why you should do it, and how to do it
  • How to use Navigation Controllers
  • Using text fields and the keyboard
  • Sending data between view controllers using delegates
  • Saving your app’s data into files in the app’s Documents folder
  • Using NSUserDefaults to store application settings
  • How to use arrays and dictionaries
  • How to set reminders using local notifications

Most importantly, you’ll learn more than just how to program with the standard iOS components — you get to see what it takes to build a quality app. You’ll learn about all the little details that set great apps apart from mediocre ones. After all, you need to make a great app if you want it to be a success on the App Store!

Section III: MyLocations

In the third tutorial in the series, you’ll develop a location-aware app that lets you keep a list of spots that you find interesting. In the process, you’ll learn about Core Location, Core Data, Map Kit, and much more!

The third app in the book: MyLocations!

Here’s what you’ll learn:

  • More about the Swift 4 language
  • How to use the Tab Bar Controller
  • Using the Core Location framework to obtain GPS coordinates and do reverse geocoding
  • How to make your own UIView subclasses and do custom drawing
  • How to use Core Data to persist your objects
  • How to make your own table view cell objects
  • How to embed the Map View into your app
  • How to use NSNotificationCenter
  • How to use the camera and photo library
  • How to use “lazy loading” to improve the responsiveness and memory usage of your apps
  • How to play basic sound effects
  • How to make your app look more impressive with UIView-based animations and Core Animation

Of course, all of this is just an excuse to play with some of the more alluring technologies from the iOS SDK: Core Location, Map Kit, the camera and photo library, and Core Data.
These are frameworks you’ll use all the time as a professional iOS developer!

Section IV: StoreSearch

Mobile apps often need to talk to web services and that’s what we’ll do in this final tutorial of the series. We’ll make a stylish app that lets you search for products on the iTunes store using HTTP requests and JSON.

The fourth and final app you’ll build: StoreSearch!

Here’s what you’ll learn:

  • How to use a web service from your apps and how to download images
  • View controller containment: how to embed one view controller inside another
  • Showing a completely different UI after rotating to landscape
  • Cool effects with keyframe animations
  • How to use scroll views and the paging control
  • Internationalization and supporting multiple languages
  • Changing the look of navigation bars and other UI elements
  • Making iPad apps with split-view controller and popovers
  • Using Ad Hoc distribution for beta testing
  • And finally, submitting your apps to the App Store!

By the time you have finished this fourth part in the series, you will have the core skills that it takes to make your own apps, and will be ready to make your own apps and submit them to the App Store!

Best of all, the book comes complete with all source code for the apps in the book. That way, you can always compare your work to the final product of the authors at ay point in your journey through the book!

About the Authors

Of course, our book would be nothing without our team of experienced and dedicated authors:

Matthijs Hollemans is a mystic who lives at the top of a mountain where he spends all of his days and nights coding up awesome apps. Actually he lives below sea level in the Netherlands and is pretty down-to-earth but he does spend too much time in Xcode. Check out his website at www.matthijshollemans.com.

Fahim Farook is a developer with over 25 years of experience in developing in over a dozen different languages. Fahim’s current focus is on mobile development with over 80 iOS apps and a few Android apps under his belt. He has lived in Sri Lanka, USA, Saudi Arabia, New Zealand, Singapore, Malaysia, France, and the UAE and enjoys science fiction and fantasy novels, TV shows, and movies. You can follow Fahim on Twitter at @FahimFarook.

Now Available in ePub!

And as another exciting announcement, by popular request, the iOS Apprentice is now available in ePub format. Take it on the go with you on your iPad, iPhone or other digital reader and enjoy all the mobile reading benefits that ePub has to offer!

Where To Go From Here?

iOS Apprentice, Sixth Edition is now 100% complete, fully updated for Swift 4, iOS 11 and Xcode 9 — and is available today!

  • If you’ve already bought the iOS Apprentice PDF, you can log in to your account and download the new book in PDF and ePub format immediately on our store page.
  • If you don’t have the iOS Apprentice yet, you can grab your own very own copy in our online store.

And to help sweeten the deal, the digital edition of the book is on sale for $49.99! But don’t wait — this sale price is only available for a limited time.

Speaking of sweet deals, be sure to check out the great prizes we’re giving away this year with the iOS 11 Launch Party, including over $9,000 in giveaways!

To enter, simply retweet this post using the #ios11launchparty hashtag by using the button below:


We hope you enjoy this update to one of our most-loved books. Stay tuned for more book releases and updates coming soon!

The post iOS Apprentice Updated for Swift 4 & iOS 11 appeared first on Ray Wenderlich.

Reactive Programming with RxAndroid in Kotlin: An Introduction

$
0
0

Update note: This tutorial has been updated to Kotlin, Android 26 (Oreo), and Android Studio 3.0 Beta 5 by Irina Galata. The original tutorial was written by Artem Kholodnyi.

AndroidReactive-featureThey say you should develop a proactive mindset in life, not a reactive one. That does not apply to Android programming, however! :]

Reactive programming is not just another API. It’s a whole new paradigm and a very useful one. RxJava is a reactive implementation used on Android. Android is a perfect place to start your exploration of the reactive world. It’s made even easier with RxAndroid, a library that wraps asynchronous UI events to be more RxJava like.

Don’t be scared — I’ll bet the basic concept of reactive programming is known to you even if you are not aware of it yet. :]

Note: This tutorial requires good knowledge of Android and Kotlin. To get up to speed, check out our Android Development Tutorials first and return to this tutorial when you’re ready.

In this RxAndroid tutorial you will learn how to do the following:

  • understand what Reactive Programming is
  • define an observable
  • turn asynchronous events like button clicks and text field context changes into observables
  • transform observable items
  • filter observable items
  • specify the thread on which code should be executed
  • combine several observables into one

I hope you like cheese — because you’re going to build a cheese-finding app as you learn the concepts above! :]

Getting Started

Download the starter project for this tutorial and open it in Android Studio 3.0 Beta 5 or above.

You’ll be working exclusively in CheeseActivity.kt. The CheeseActivity class extends BaseSearchActivity; take some time to explore BaseSearchActivity and check out the following features ready for your use:

  • showProgress(): A function to show a progress bar…
  • hideProgress(): … and a function to hide it.
  • showResult(result: List): A function to display a list of cheeses.
  • cheeseSearchEngine: A field which is an instance of CheeseSearchEngine. It has a search function which you call when you want to search for cheeses. It accepts a text search query and returns a list of matching cheeses.

Build and run the project on your Android device or emulator. You should see a gloriously empty search screen:

starter-300x500

What is Reactive Programming?

Before creating your first observable, indulge yourself with a bit of a theory first. :]

In imperative programming, an expression is evaluated once and a value is assigned to a variable:

var x = 2
var y = 3
var z = x * y // z is 6

x = 10
// z is still 6

On the other hand, reactive programming is all about responding to value changes.

You have probably done some reactive programming — even if you didn’t realize it at the time.

  • Defining cell values in spreadsheets is similar to defining variables in imperative programming.
  • Defining cell expressions in spreadsheets is similar to defining and operating on observables in reactive programming.

Take the following spreadsheet that implements the example from above:

The spreadsheet assigns cell B1 with a value of 2, cell B2 with a value of 3 and a third cell, B3, with an expression that multiplies the value of B1 by the value of B2. When the value of either of the the components referenced in the expression changes, the change is observed and the expression is re-evaluated automagically in B3:

Difference between RxJava and RxKotlin

As you probably know, it’s possible to use Java libraries in Kotlin projects thanks to Kotlin’s language compatibility with Java. If that’s the case, then why was RxKotlin created in the first place? RxKotlin is a Kotlin wrapper around RxJava, which also provides plenty of quite useful extension functions. Effectively, RxKotlin makes working with RxJava more Kotlin-y.

In this article, we’ll focus on using RxJava, since it’s critical to understand the core concepts of this approach, however everything you will learn applies to RxKotlin as well.

Note: Take a look at the build.gradle file and the project dependencies especially. Except for the UI libraries, it contains RxKotlin and RxAndroid packages. We don’t need to specify RxJava here explicitly since RxKotlin already contains it.

RxJava Observable Contract

RxJava make use of the Observer pattern.

Note: To refresh your memory about the Observer pattern you can visit Common Design Patterns for Android with Kotlin.

In the Observer pattern, you have objects that implement two key RxJava interfaces: Observable and Observer. When an Observable changes state, all Observer objects subscribed to it are notified.

Among the methods in the Observable interface is subscribe(), which an Observer will call to begin the subscription.

From that point, the Observer interface has three methods which the Observable calls as needed:

  • onNext(T value) provides a new item of type T to the Observer
  • onComplete() notifies the Observer that the Observable has finished sending items
  • onError(Throwable e) notifies the Observer that the Observable has experienced an error

As a rule, a well-behaved Observable emits zero or more items that could be followed by either completion or error.

That sounds complicated, but some marble diagrams may clear things up.

network-request

The circle represents an item that has been emitted from the observable and the black block represents a completion or error. Take, for example, a network request observable. The request usually emits a single item (response) and immediately completes.

A mouse movement observable would emit mouse coordinates but will never complete:

mouse-coords

Here you can see multiple items that have been emitted but no block showing the mouse has completed or raised an error.

No more items can be emitted after an observable has completed. Here’s an example of a misbehaving observable that violates the Observable contract:

misbehaving-stream

That’s a bad, bad observable because it violates the Observable contract by emitting an item after it signaled completion.

How to Create an Observable

There are many libraries to help you create observables from almost any type of event. However, sometimes you just need to roll your own. Besides, it’s a great way to learn!

You’ll create an Observable using Observable.create(). Here is its signature:

Observable<T> create(ObservableOnSubscribe<T> source)

That’s nice and concise, but what does it mean? What is the “source?” To understand that signature, you need to know what an ObservableOnSubscribe is. It’s an interface, with this contract:

public interface ObservableOnSubscribe<T> {
  void subscribe(ObservableEmitter<T> e) throws Exception;
}

Like an episode of a J.J. Abrams show like “Lost” or “Westworld,” that answers some questions while inevitably asking more. So the “source” you need to create your Observable will need to expose subscribe(), which in turn requires whatever’s calling it to provide an “emitter” as a parameter. What, then, is an emitter?

RxJava’s Emitter interface is similar to the Observer one:

public interface Emitter<T> {
  void onNext(T value);
  void onError(Throwable error);
  void onComplete();
}

An ObservableEmitter, specifically, also provides a means to cancel the subscription.

To visualize this whole situation, think of a water faucet regulating the flow of water. The water pipes are like an Observable, willing to deliver a flow of water if you have a means of tapping into it. You construct a faucet that can turn on and off, which is like an ObservableEmitter, and connect it to the water pipes in Observable.create(). The outcome is a nice fancy faucet. :]

An example will make the situation less abstract and more clear. It’s time to create your first observable! :]

Observe Button Clicks

Add the following code inside the CheeseActivity class:

// 1
private fun createButtonClickObservable(): Observable<String> {
  // 2
  return Observable.create { emitter ->
    // 3
    searchButton.setOnClickListener {
      // 4
      emitter.onNext(queryEditText.text.toString())
    }

    // 5
    emitter.setCancellable {
      // 6
      searchButton.setOnClickListener(null)
    }
  }
}

Your imports should look as follows after entering the above code:

import io.reactivex.Observable
import kotlinx.android.synthetic.main.activity_cheeses.*

You’ve imported the correct Observable class and you’re using the Kotlin Android Extensions to get references to view objects.

Here’s what’s going on in the code above:

  1. You declare a function that returns an observable that will emit strings.
  2. You create an observable with Observable.create(), and supply it with a new ObservableOnSubscribe.
  3. Set up an OnClickListener on searchButton.
  4. When the click event happens, call onNext on the emitter and pass it the current text value of queryEditText.
  5. Keeping references can cause memory leaks in Java or Kotlin. It’s a useful habit to remove listeners as soon as they are no longer needed. But what do you call when you are creating your own Observable? For that very reason, ObservableEmitter has setCancellable(). Override cancel(), and your implementation will be called when the Observable is disposed, such as when the Observable is completed or all Observers have unsubscribed from it.
  6. For OnClickListener, the code that removes the listener is setOnClickListener(null).

Now that you’ve defined your Observable, you need to set up the subscription to it. Before you do, you need to learn about one more interface, Consumer. It’s a simple way to accept values coming in from an emitter.

public interface Consumer<T> {
  void accept(T t) throws Exception;
}

This interface is handy when you want to set up a simple subscription to an Observable.

The Observable interface requires several versions of subscribe(), all with different parameters. For example, you could pass a full Observer if you like, but then you’d need to implement all the necessary methods.

If all you need out of your subscription is for the observer to respond to values sent to onNext(), you can use the version of subscribe() that takes in a single Consumer (the parameter is even named onNext, to make the connection clear).

You’ll do exactly that when you subscribe in your activity’s onStart(). Add the following code to CheeseActivity.kt:

override fun onStart() {
  super.onStart()
  // 1
  val searchTextObservable = createButtonClickObservable()

  searchTextObservable
      // 2
      .subscribe { query ->
        // 3
        showResult(cheeseSearchEngine.search(query))
      }
}

Here’s an explanation of each step:

  1. First, create an observable by calling the method you just wrote.
  2. Subscribe to the observable with subscribe(), and supply a simple Consumer.
  3. Finally, perform the search and show the results.

Build and run the app. Enter some letters and press the Search button. After a simulated delay (see CheeseSearchEngine), you should see a list of cheeses that match your request:

enter-and-press-300x500

Sounds yummy! :]

RxJava Threading Model

You’ve had your first taste of reactive programming. There is one problem though: the UI freezes up for a few seconds when the search button is pressed.

You might also notice the following line in Android Monitor:

> 08-24 14:36:34.554 3500-3500/com.raywenderlich.cheesefinder I/Choreographer: Skipped 119 frames!  The application may be doing too much work on its main thread.

This happens because search is executed on the main thread. If search were to perform a network request, Android will crash the app with a NetworkOnMainThreadException exception. It’s time to fix that.

One popular myth about RxJava is that it is multi-threaded by default, similar to AsyncTask. However, if not otherwise specified, RxJava does all the work in the same thread it was called from.

You can change this behavior with the subscribeOn and observeOn operators.

subscribeOn is supposed to be called only once in the chain of operators. If it’s not, the first call wins. subscribeOn specifies the thread on which the observable will be subscribed (i.e. created). If you use observables that emit events from an Android View, you need to make sure subscription is done on the Android UI thread.

On the other hand, it’s okay to call observeOn as many times as you want in the chain. observeOn specifies the thread on which the next operators in the chain will be executed. For example:

myObservable // observable will be subscribed on i/o thread
      .subscribeOn(Schedulers.io())
      .observeOn(AndroidSchedulers.mainThread())
      .map { /* this will be called on main thread... */ }
      .doOnNext{ /* ...and everything below until next observeOn */ }
      .observeOn(Schedulers.io())
      .subscribe { /* this will be called on i/o thread */ }

The most useful schedulers are:

  • Schedulers.io(): Suitable for I/O-bound work such as network requests or disk operations.
  • Schedulers.computation(): Works best with computational tasks like event-loops and processing callbacks.
  • AndroidSchedulers.mainThread() executes the next operators on the UI thread.

The Map Operator

The map operator applies a function to each item emitted by an observable and returns another observable that emits results of those function calls. You’ll need this to fix the threading issue as well.

If you have an observable called numbers that emits the following:

map-0

And if you apply map as follows:

numbers.map { number -> number * number }

The result would be the following:

map-1

That’s a handy way to iterate over multiple items with little code. Let’s put it to use!

Modify onStart() in CheeseActivity class to look like the following:

override fun onStart() {
  super.onStart()

  val searchTextObservable = createButtonClickObservable()

  searchTextObservable
      // 1
      .subscribeOn(AndroidSchedulers.mainThread())
      // 2
      .observeOn(Schedulers.io())
      // 3
      .map { cheeseSearchEngine.search(it) }
      // 4
      .observeOn(AndroidSchedulers.mainThread())
      .subscribe {
        showResult(it)
      }
}

Going over the code above:

  1. First, specify that code down the chain should start on the main thread instead of on the I/O thread. In Android, all code that works with Views should execute on the main thread.
  2. Specify that the next operator should be called on the I/O thread.
  3. For each search query, you return a list of results.
  4. Finally, make sure that the results are passed to the list on the main thread

Build and run your project. Now the UI should be responsive even when a search is in progress.

Show Progress Bar with doOnNext

It’s time to display the progress bar!

For that you’ll need a doOnNext operator. doOnNext takes a Consumer and allows you do something each time an item is emitted by observable.

In the same CheeseActivity class modify onStart() to the following:

override fun onStart() {
  super.onStart()

  val searchTextObservable = createButtonClickObservable()

  searchTextObservable
      // 1
      .observeOn(AndroidSchedulers.mainThread())
      // 2
      .doOnNext { showProgress() }
      .observeOn(Schedulers.io())
      .map { cheeseSearchEngine.search(it) }
      .observeOn(AndroidSchedulers.mainThread())
      .subscribe {
        // 3
        hideProgress()
        showResult(it)
      }
}

Taking each numbered comment in turn:

  1. Ensure that the next operator in chain will be run on the main thread.
  2. Add the doOnNext operator so that showProgress() will be called every time a new item is emitted.
  3. Don’t forget to call hideProgress() when you are just about to display a result.

Build and run your project. You should see the progress bar appearing when you initiate the search:

progressbar

Observe Text Changes

What if you want to perform search automatically when the user types some text, just like Google?

First, you need to subscribe to TextView text changes. Add the following function to the CheeseActivity class:

// 1
private fun createTextChangeObservable(): Observable<String> {
  // 2
  val textChangeObservable = Observable.create<String> { emitter ->
    // 3
    val textWatcher = object : TextWatcher {

      override fun afterTextChanged(s: Editable?) = Unit

      override fun beforeTextChanged(s: CharSequence?, start: Int, count: Int, after: Int) = Unit

      // 4
      override fun onTextChanged(s: CharSequence?, start: Int, count: Int, after: Int) {
        s?.toString()?.let { emitter.onNext(it) }
      }

    }

    // 5
    queryEditText.addTextChangedListener(textWatcher)

    // 6
    emitter.setCancellable {
      queryEditText.removeTextChangedListener(textWatcher)
    }
  }

  // 7
  return textChangeObservable
}

Here’s the play-by-play of each step above:

  1. Declare a function that will return an observable for text changes.
  2. Create textChangeObservable with create(), which takes an ObservableOnSubscribe.
  3. When an observer makes a subscription, the first thing to do is to create a TextWatcher.
  4. You aren’t interested in beforeTextChanged() and afterTextChanged(). When the user types and onTextChanged() triggers, you pass the new text value to an observer.
  5. Add the watcher to your TextView by calling addTextChangedListener().
  6. Don’t forget to remove your watcher. To do this, call emitter.setCancellable() and overwrite cancel() to call removeTextChangedListener()
  7. Finally, return the created observable.

To see this observable in action, replace the declaration of searchTextObservable in onStart() of CheeseActivity as follows:

val searchTextObservable = createTextChangeObservable()

Build and run your app. You should see the search kick off when you start typing text in the TextView:

text-view-changes-simple

Filter Queries by Length

It doesn’t make sense to search for queries as short as a single letter. To fix this, let’s introduce the powerful filter operator.

filter passes only those items which satisfy a particular condition. filter takes in a Predicate, which is an interface that defines the test that input of a given type needs to pass, with a boolean result. In this case, the Predicate takes a String and returns true if the string’s length is two or more characters.

Replace return textChangeObservable in createTextChangeObservable() with the following code:

return textChangeObservable.filter { it.length >= 2 }

Everything will work exactly the same, except that text queries with length less than 2 won’t get sent down the chain.

Run the app; you should see the search kick off only when you type the second character:

filter-0

filter-1

Debounce operator

You don’t want to send a new request to the server every time the query is changed by one symbol.

debounce is one of those operators that shows the real power of reactive paradigm. Much like the filter operator, debounce, filters items emitted by the observable. But the decision on whether the item should be filtered out is made not based on what the item is, but based on when the item was emitted.

debounce waits for a specified amount of time after each item emission for another item. If no item happens to be emitted during this wait, the last item is finally emitted:

719f0e58_1472502674

In createTextChangeObservable(), add the debounce operator just below the filter so that the return statement will look like the following code:

return textChangeObservable
      .filter { it.length >= 2 }
      .debounce(1000, TimeUnit.MILLISECONDS) // add this line

Run the app. You’ll notice that the search begins only when you stop making quick changes:

debounce-500px

debounce waits for 1000 milliseconds before emitting the latest query text.

Merge Operator

You started by creating an observable that reacted to button clicks and then implemented an observable that reacts to text field changes. But how do you react to both?

There are a lot of operators to combine observables. The most simple and useful one is merge.

merge takes items from two or more observables and puts them into a single observable:

ae08759b_1472502259

Change the beginning of onStart() to the following:

val buttonClickStream = createButtonClickObservable()
val textChangeStream = createTextChangeObservable()

val searchTextObservable = Observable.merge<String>(buttonClickStream, textChangeStream)

Run your app. Play with the text field and the search button; the search will kick off either when you finish typing two or more symbols or when you simply press the Search button.

RxJava and Activity/Fragment lifecycle

Remember those setCancellable methods you set up? They won’t fire until the observable is unsubscribed.

The Observable.subscribe() call returns a Disposable. Disposable is an interface that has two methods:

public interface Disposable {
  void dispose();  // ends a subscription
  boolean isDisposed(); // returns true if resource is disposed (unsubscribed)
}

Add the following property to CheeseActivity:

private lateinit var disposable: Disposable

In onStart(), set the returned value of subscribe() to disposable with the following code (only the first line changes):

disposable = searchTextObservable // change this line
      .observeOn(AndroidSchedulers.mainThread())
      .doOnNext { showProgress() }
      .observeOn(Schedulers.io())
      .map { cheeseSearchEngine.search(it) }
      .observeOn(AndroidSchedulers.mainThread())
      .subscribe {
        hideProgress()
        showResult(it)
      }

Since you subscribed to the observable in onStart(), onStop() would be a perfect place to unsubscribe.

Add the following code to CheeseActivity.kt:

@Override
override fun onStop() {
  super.onStop()
  if (!disposable.isDisposed) {
    disposable.dispose()
  }
}

And that’s it! Build and run the app. You won’t “observe” any changes yourself, but now the app is successfully avoiding RxJava memory leaks. :]

Where to Go From Here?

You can download the final project from this tutorial here.

You’ve learned a lot in this tutorial. But that’s only a glimpse of the RxJava world. For example, there is RxBinding, a library that includes most of the Android View APIs. Using this library, you can create a click observable by just calling RxView.clicks(viewVariable).

To learn more about RxJava refer to the ReactiveX documentation.

What’s new in RxJava 2

The second version of RxJava is quite different from the first one, since RxJava 2 was completely rewritten. You should get acquainted with some entirely new classes like Flowable and Maybe.

With Flowable, you can now avoid getting such well-known problems as MissingBackpressureException or OutOfMemoryError. You can use it to handle a flow of 10k+ elements.

Maybe is a combination of Single and Completable. Like Single, it can receive at most one item or fail, and like Completable it can finish successfully without any received items or fail.

Find some time to skim all the changelog of RxJava2 :]

If you have any comments or questions, don’t hesitate to join the discussion below!

The post Reactive Programming with RxAndroid in Kotlin: An Introduction appeared first on Ray Wenderlich.

Unreal Engine 4 Animation Tutorial

$
0
0

Unreal Engine 4 Animation Tutorial

You will rarely see a modern game without animation. This is because animation is key in conveying motion. Without animation, a character would just look like they’re sliding instead of running.

Luckily, Unreal makes it easy to get your characters animated in no time!

In this tutorial, you will learn how to:

  • Import a mesh with a skeleton
  • Import animations
  • Create an Animation Blueprint to transition to different animations
  • Blend between animations

Please note, you will be using Blueprints in this tutorial. If you need a refresher, check out our Blueprints tutorial.

Note: This tutorial is part of a 6-part tutorial series on Unreal Engine:

Getting Started

Download the starter project and unzip it. In the root directory, you will see a folder named Animation Assets. This folder contains the character and animations that you will be importing.

Unreal Engine 4 Animation Tutorial

Open the project by navigating to the project folder and opening SkywardMuffin.uproject.

Note: If you get a message saying that the project was created with an earlier version of the Unreal editor, that’s OK (the engine is updated frequently). You can either choose the option to open a copy, or the option to convert in place.

Press Play to start the game. The goal of the game is to touch as many clouds as possible without falling. Click the left-mouse button to jump up to the first cloud.

Unreal Engine 4 Animation Tutorial

Instead of a plain red circle, let’s control this cute little muffin instead:

Unreal Engine 4 Animation Tutorial

This muffin contains a skeleton which allows you to animate it.

Unreal Engine 4 Animation Tutorial

What is a Skeleton?

In 3D applications, a skeleton is a set of interconnected points called joints. In the image below, each sphere is a joint.

Unreal Engine 4 Animation Tutorial

Note: Unreal uses the terms joint and bone interchangeably.

By manipulating these joints, you can create different poses for your character.

Unreal Engine 4 Animation Tutorial

When you go from one pose to another, you are creating an animation.

Unreal Engine 4 Animation Tutorial

If you create more poses between the previous poses, you can get something like this:

Unreal Engine 4 Animation Tutorial

In Unreal, any mesh with a skeleton is a Skeletal Mesh. Let’s begin by importing the Skeletal Mesh for the muffin.

Importing a Skeletal Mesh

Go to the Content Browser and navigate to Characters\Muffin. Click Import and then go to SkywardMuffinStarter\Animation Assets. Select SK_Muffin.fbx and then click Open.

Unreal Engine 4 Animation Tutorial

In the import window, go to the Mesh section and uncheck the Create Physics Asset option. The Physics Asset helps create a ragdoll effect. Since this tutorial does not cover that, you do not need one.

Unreal Engine 4 Animation Tutorial

The project already includes the muffin material and texture so you don’t need to import them. Uncheck the Import Materials and Import Textures options.

Unreal Engine 4 Animation Tutorial

Leave everything else at their default settings and then click Import. This will create the following assets:

  • SK_Muffin: The Skeletal Mesh asset. This is basically just a mesh with a link to a Skeleton asset.
  • SK_Muffin_Skeleton: The Skeleton asset. This holds a list of joints and other information such as their hierarchy.
    Unreal Engine 4 Animation Tutorial

Now that you have the muffin imported, it’s time to use it.

Using a Skeletal Mesh

Before you use your new Skeletal Mesh, you should give it a material so it’s not just a grey blob. Double-click on SK_Muffin to open it.

Go to the Asset Details panel and locate the Material Slots section. Assign the M_Muffin material and then close SK_Muffin.

Unreal Engine 4 Animation Tutorial

Now, let’s use SK_Muffin as the player character. Go back to the Content Browser and double-click on BP_Muffin to open it.

Go to the Components panel and select the Mesh (Inherited) component. Navigate to the Details panel and locate the Mesh section. Set the Skeletal Mesh property to SK_Muffin.

Unreal Engine 4 Animation Tutorial

Click Compile and then go back to the main editor. Press Play to play the game as a muffin!

Unreal Engine 4 Animation Tutorial

The game is already looking a lot better! Your next step is to import some animations that will add life to the muffin.

Importing Animations

Go to the Content Browser and click Import. Make sure you are in SkywardMuffinStarter\Animation Assets. Select the following files:

  • SK_Muffin_Death.fbx
  • SK_Muffin_Fall.fbx
  • SK_Muffin_Idle.fbx
  • SK_Muffin_Jump.fbx
  • SK_Muffin_Walk.fbx

Once you have done that, click Open.

Unreal Engine 4 Animation Tutorial

In the import window, go to the Mesh section and uncheck the Import Mesh option. This will make sure the Skeletal Mesh is not imported again.

Unreal Engine 4 Animation Tutorial

Next, make sure the Skeleton property is set to SK_Muffin_Skeleton. This specifies which skeleton the animation will use.

Unreal Engine 4 Animation Tutorial

Finally, click Import All. This will import all the animations with the settings you just specified.

Unreal Engine 4 Animation Tutorial

Now that you have all your animations, you need a way to play them. You can use an Animation Blueprint to do this.

Creating an Animation Blueprint

An Animation Blueprint is like a regular Blueprint. However, it also features a graph dedicated to animation tasks.

To create one, go to the Content Browser and click the Add New button. Select Animation\Animation Blueprint.

In the pop-up window, locate the Target Skeleton property and select SK_Muffin_Skeleton. Next, click the OK button to create the Animation Blueprint.

Unreal Engine 4 Animation Tutorial

Rename the asset to ABP_Muffin. Afterwards, double-click on it to open it in the Animation Blueprint editor.

The Animation Blueprint Editor

The Animation Blueprint editor is like the Blueprint editor but with four extra panels:

Unreal Engine 4 Animation Tutorial

  1. Anim Graph: This graph is dedicated to animation. This is where you will play your animations.
  2. Preview Scene Settings: This panel allows you to tweak the preview scene in the Viewport
  3. Anim Preview Editor: Variables you create will also show up here. Use this panel to preview the effect your variables have on the final animation.
  4. Asset Browser: This panel contains a list of animations the current skeleton can use

To define when each animation should play, you can use a State Machine.

What is a State Machine?

A State Machine is a set of states and rules. For the purposes of this tutorial, you can think of a state as an animation.

State Machines can only be in one state at a time. To transition to a different state, certain conditions—defined by rules—must be met.

Below is an example of a simple State Machine. It shows the states of a jump and the rules for transitioning to each state.

Unreal Engine 4 Animation Tutorial

States can also have a two-way relationship. In the example below, the Jump and Fall states can transition to each other.

Unreal Engine 4 Animation Tutorial

Without this two-way relationship, a character wouldn’t be able to perform a double jump. This is because the character would only be able to enter the Jump state from the Idle state.

That’s enough about State Machines. Let’s go ahead and create a new State Machine.

Creating a State Machine

Make sure you are in the Anim Graph and then right-click an empty area. From the menu, select Add New State Machine.

Unreal Engine 4 Animation Tutorial

This will add a State Machine node to your graph. Rename the State Machine to Locomotion. Afterwards, connect the Locomotion State Machine to the Final Animation Pose node.

Unreal Engine 4 Animation Tutorial

Now, the Locomotion State Machine will determine the muffin’s final animation.

Next, double-click on the Locomotion State Machine to open it. Inside, you will see an Entry node.

Unreal Engine 4 Animation Tutorial

The state connected to this node is the default state. For this tutorial, the default state will be the idle animation. Create this state by right-clicking an empty area on the graph. From the menu, select Add State and rename it to Idle.

Unreal Engine 4 Animation Tutorial

Now, you need to connect the Entry node to the Idle state. Drag-click the Entry pin to the gray area of the Idle state. Release left-click to connect them.

Unreal Engine 4 Animation Tutorial

When you create a state using the context menu, it won’t have an animation linked to it. Let’s fix that.

Linking an Animation to a State

Double-click on the Idle state to open it.

To link an animation, go to the Asset Browser and then drag-click the SK_Muffin_Idle animation. Release left-click on an empty area in the graph to add it.

Unreal Engine 4 Animation Tutorial

Next, connect the Play SK_Muffin_Idle node to the Final Animation Pose node.

Unreal Engine 4 Animation Tutorial

To use the Animation Blueprint, you need to update BP_Muffin.

Using an Animation Blueprint

Click Compile and then switch to BP_Muffin.

Go to the Components panel and then select the Mesh (Inherited) component. Go to the Details panel and then locate the Animation section.

Set the Animation Mode to Use Animation Blueprint. Next, set Anim Class to ABP_Muffin.

Unreal Engine 4 Animation Tutorial

Now, the Skeletal Mesh will use ABP_Muffin as its Animation Blueprint.

Click Compile and then close BP_Muffin. Go to the main editor and press Play to test the Animation Blueprint. Since Idle is the default state, the muffin will automatically use the idle animation.

Unreal Engine 4 Animation Tutorial

In the next section, you will create states for jumping and falling.

Creating the Jumping and Falling States

Go back to ABP_Muffin and then switch back to the graph for the Locomotion State Machine. You can do this by clicking the Locomotion bread crumb located at the top of the graph.

Unreal Engine 4 Animation Tutorial

Instead of creating a state and then linking an animation, you can create one with an animation already linked. Let’s do that for the jumping state.

Go to the Asset Browser and then drag-click the SK_Muffin_Jump animation. Release left-click on an empty area in the graph. This will create a state with the animation already linked.

Unreal Engine 4 Animation Tutorial

Rename the state to Jump.

Repeat the process using the SK_Muffin_Fall animation and rename the state to Fall.

You will now have three states: Idle, Jump and Fall.

Unreal Engine 4 Animation Tutorial

Next, you will link the states to each other. You can do this by drag-clicking the gray area of the state you want to transition from. Release left-click on the gray area of the target state to create a transition.

Create the following transitions:

  • Idle to Jump
  • Jump to Fall
  • Fall to Jump
  • Fall to Idle

Unreal Engine 4 Animation Tutorial

Now that you have transitions, you need to define when a transition can occur. You do this by using Transition Rules.

Transition Rules

This icon represents a Transition Rule:

Unreal Engine 4 Animation Tutorial

Every Transition Rule contains a Result node with a single boolean input.

Unreal Engine 4 Animation Tutorial

If this input is true, a transition can occur.

Next, you will create variables that inform you if the player is jumping or falling. You will then use these variables in the Transition Rules.

Checking if the Player is Jumping or Falling

Create two boolean variables named IsJumping and IsFalling.

First, you will set the value of IsJumping. Switch to the Event Graph and locate the Event Blueprint Update Animation node. This node functions like the Event Tick node.

Unreal Engine 4 Animation Tutorial

To check if the player is jumping, create the following setup:

Unreal Engine 4 Animation Tutorial

This will check if the player’s velocity on the Z-axis is greater than 0. If it is, the player is jumping and IsJumping will be set to true.

Note: Make sure to cast to the class that will use the Animation Blueprint. This is crucial in being able to preview your variables using the Anim Preview Editor.

To check if the player is falling, you just need to perform the opposite check. Add the highlighted nodes:

Unreal Engine 4 Animation Tutorial

Now, IsFalling will be set to true if the player’s Z-Velocity is less than 0.

It’s time to use these variables to define the Transition Rules.

Defining the Transition Rules

First, you will define the Idle to Jump Transition Rule. Switch back to the Locomotion State Machine. Double-click on the Idle to Jump Transition Rule to open it.

Unreal Engine 4 Animation Tutorial

Create an IsJumping node and connect it to the Result node.

Unreal Engine 4 Animation Tutorial

Now, the Idle state can transition to the Jump state when IsJumping is true.

Repeat the process for the Jump to Fall and Fall to Jump Transition Rules. Use the following variables:

  • Jump to Fall: IsFalling
  • Fall to Jump: IsJumping

Unreal Engine 4 Animation Tutorial

Now, the Jump and Fall states can transition to each other.

There is still one Transition Rule left to define. Go ahead and open the Fall to Idle Transition Rule.

Unreal Engine 4 Animation Tutorial

To transition to the Idle state, the player cannot be jumping or falling. To perform this check, you can use the NOR node. This node will only return true if both of its inputs are false.

Create a NOR node and connect an IsJumping and IsFalling node to it. Afterwards, connect the NOR node to the Result node.

Unreal Engine 4 Animation Tutorial

Now, the Fall state can transition to the Idle state when IsJumping and IsFalling are false.

Click Compile and then go back to the main editor. Press Play to test the transitions.

Unreal Engine 4 Animation Tutorial

Note: You can also test transitions by editing variables in the Anim Preview Editor.

Right now, the muffin just slides when moving along the ground. This is because you haven’t used the walk animation yet!

Instead of creating a new state for walking, you can blend it with the idle animation using a Blend Space.

What is a Blend Space?

A Blend Space is a type of animation asset. It interpolates between different animations based on input values. In this tutorial, you will use the player’s speed as the input.

Unreal Engine 4 Animation Tutorial

Blend Spaces can also help simplify your State Machines. Here’s what the Locomotion State Machine would look like if you didn’t use a Blend Space for the walk:

Unreal Engine 4 Animation Tutorial

Using a Blend Space, all you have to do is replace the idle animation.

Unreal Engine 4 Animation Tutorial

Now that you know of the magic of Blend Spaces, let’s create one.

Creating a Blend Space

Go to the Content Browser and click Add New. Select Animation\Blend Space 1D.

Note: The difference between a Blend Space and Blend Space 1D is that the former can have two inputs. The latter can only have one.

From the pop-up window, select SK_Muffin_Skeleton.

Unreal Engine 4 Animation Tutorial

Rename the asset to BS_IdleWalk and then double-click on it to open it in the Animation editor.

When you open a Blend Space, you will see a panel at the bottom. This is the Blend Space editor and this is where you will add your animations.

Unreal Engine 4 Animation Tutorial

Let’s add some animations to the Blend Space.

Adding Animations to a Blend Space

First, you will change the name of the axis value (the input). Go to the Asset Details panel and locate the Axis Settings section. Change the Horizontal Axis\Name property to Speed.

Now, you will add the animations. Go to the Asset Browser and drag-click the SK_Muffin_Idle animation. Move it to the left side of the Blend Space grid so that it snaps to the 0.0 value. Release left-click to add the animation.

Unreal Engine 4 Animation Tutorial

Note: To display the animation names, press the label icon at the top-left of the Blend Space grid.

Afterwards, add the SK_Muffin_Walk animation at the 100.0 value.

Unreal Engine 4 Animation Tutorial

Now, the Blend Space will blend the idle and walk animations depending on the input value. If the input is 0, only the idle animation will play. If the input is 100, only the walk animation will play. Anything inbetween will be a blend.

Note: These values are arbitrary. For example, you could change the maximum value to 500. This would result in the walk animation only playing at higher speeds.

You can change the values under the Axis Settings section in the Asset Details panel.

It’s time to use the Blend Space.

Using Blend Spaces

Close BS_IdleWalk and then open ABP_Muffin. Switch to the Locomotion State Machine and then open the Idle state.

First, delete the Play SK_Muffin_Idle node.

Next, add the BS_IdleWalk Blend Space using the drag and drop method. Afterwards, connect the BS_IdleWalk node to the Final Animation Pose node.

Unreal Engine 4 Animation Tutorial

Now, BS_IdleWalk will automatically play because it is the default state. However, it will only show the idle animation. This is because its Speed input stays at 0.

To fix this, you need to supply it with the player’s speed.

Getting the Player’s Speed

Create a new float variable named Speed. Afterwards, switch to the Event Graph.

Add a new pin to the Sequence node and then add the highlighted nodes to it:

Unreal Engine 4 Animation Tutorial

This setup will constantly set the Speed variable to the player’s speed.

Switch back to the Idle state’s graph. Connect the Speed variable to the Speed input of the BS_IdleWalk node.

Unreal Engine 4 Animation Tutorial

Now, BS_IdleWalk will be able to blend between the idle and walk animations.

Click Compile and then go back to the main editor. Press Play to test out the Blend Space.

Unreal Engine 4 Animation Tutorial

There’s one more animation you still need to use: the death animation!

Using the Death Animation

In this game, you can only die while in the Idle state (on the ground). However, let’s imagine you could die from any state. Your first thought might be to create a Death state and connect every state to it. While this is an option, it can quickly lead to a messy graph.

Unreal Engine 4 Animation Tutorial

A solution to this is to use a Blend Poses by bool node. This node can switch between two animations depending on the value of the input boolean.

Before you create one, you need a variable that holds the player’s death status.

Checking if the Player is Dead

Go back to ABP_Muffin and create a boolean variable named IsDead. Afterwards, switch to the Event Graph.

Add a new pin to the Sequence node and then add the highlighted nodes to it:

Unreal Engine 4 Animation Tutorial

This will set the IsDead variable depending on the player’s death status.

Next, you will use the Blend Poses by bool node.

Using the Blend Poses by Bool Node

Switch to the Anim Graph and add the SK_Muffin_Death animation. With it selected, go to Details panel and uncheck the Loop Animation property.

Unreal Engine 4 Animation Tutorial

This will make sure the death animation only plays once.

Next, create a Blend Poses by bool node.

Unreal Engine 4 Animation Tutorial

With the Blend Poses by bool node selected, go to the Details panel. Under the Option section, check the Reset Child on Activation property.

Unreal Engine 4 Animation Tutorial

Since the death animation only plays once, this option will make sure the animation resets before playback.

Finally, add the IsDead variable and connect everything like so:

Unreal Engine 4 Animation Tutorial

Now, if IsDead is true, the death animation will play. If IsDead is false, the current animation of the Locomotion State Machine will play.

Click Compile and then close ABP_Muffin. Press Play and test out the new death animation!

Unreal Engine 4 Animation Tutorial

Where to Go From Here?

You can download the completed project here.

The game looks a lot more polished now, doesn’t it? Although you can do a lot with what you’ve learned so far, there’s still more! Check out the Skeletal Mesh Animation System page in the Unreal Engine documentation. Here, you can read about the other types of animation assets and how you can use them.

If there’s a topic you’d like me to cover, let me know in the comments below!

The post Unreal Engine 4 Animation Tutorial appeared first on Ray Wenderlich.


Encoding, Decoding and Serialization in Swift 4

$
0
0

This is an abridged chapter from our best-selling book Swift Apprentice, which has been completely updated for Swift 4 and includes several new chapters. This tutorial is presented as part of our iOS 11 Launch Party — enjoy!

There are several scenarios where you’ll need to save data to a file or to send it over the network. In this tutorial, you’ll learn how to achieve these tasks by converting your instances to another representation, like a string or a stream of bytes. This process is known as encoding, also known as serialization.

The reverse process of turning the data into an instance is called decoding, or deserialization.

Imagine you have an instance you want to write to a file. The instance itself cannot be written as-is to the file, so you need to encode it into another representation, like as a stream of bytes:

Once the data is encoded and saved to a file, you can turn it back into an instance whenever you want by using a decoder:

Encodable and Decodable Protocols

The Encodable protocol is used by types that can be encoded to another representation. It declares a single method:

func encode(to: Encoder) throws

…which the compiler generates for you if all the stored properties of that type conform to Encodable as well. You’ll learn more about this later on in the tutorial.

The Decodable protocol is used by types that can be decoded. It declares just a single initializer:

init(from decoder: Decoder) throws

You will know when and how to implement these methods by the end of this tutorial.

What is Codable?

Codable is a protocol that a type can conform to, to declare that it can be encoded and decoded. It’s basically an alias for the Encodable and Decodable protocols.

typealias Codable = Encodable & Decodable

Automatic Encoding and Decoding

There are many types in Swift which are codable out of the box: Int, String, Date, Array and many other types from the Standard Library and the Foundation framework. If you want your type to be codable, the simplest way to do it is by conforming to Codable and making sure all its stored properties are also codable.

For example, let’s say you own a toy factory and you have this struct to store employee data:

struct Employee {
    var name: String
    var id: Int
}

All you need to do to be able to encode and decode this type is to conform to the Codable protocol, like so:

struct Employee: Codable {
    var name: String
    var id: Int
}

Wow, that was easy! You were able to do it because both name (String) and id (Int) are codable.

This works well when you’re only using types that are already Codable. But what if your type includes other custom types as properties? For example, looking at your Employee struct, assume that it also has a favoriteToy property:

struct Employee: Codable {
    var name: String
    var id: Int
    var favoriteToy: Toy
}

struct Toy: Codable {
    var name: String
}

By making sure Toy also conforms to Codable, you maintain the overall conformance to Codable for Employee as well.

All collections types, like Array and Dictionary are also codable if they contain codable types.

Encoding and Decoding Custom Types

There are several representations you can encode to or decode from, such as XML or a Property List. In this section, you’ll learn how to encode to and decode from JSON, by using Swift’s JSONEncoder and JSONDecoder classes.

JSON stands for JavaScript Object Notation, and is one of the most popular ways to serialize data. It’s easily readable by humans and easy for computers to parse and generate.

For example, if you were to encode an instance of type Employee to JSON, it might look something like this:

{ "name": "John Appleseed", "id": 7 }

You can easily understand how the Employee instance looked like before it was serialized into JSON.

JSONEncoder and JSONDecoder

Once you have a codable type, you can use JSONEncoder to convert your type to Data which can be either written to a file or sent over the network. Assume you have this employee instance:

let toy1 = Toy(name: "Teddy Bear");
let employee1 = Employee(name: "John Appleseed", id: 7, favoriteToy: toy1)

John’s birthday is coming up and you want to give him his favorite toy as a gift. You need to send over this data to the Gifts department. Before you can do that, you need to encode it like this:

let jsonEncoder = JSONEncoder()
let jsonData = try jsonEncoder.encode(employee1)

You’ll notice that you need to use try because encode(_:) might fail and throw an error.

If you try to print jsonData like this:

print(jsonData)

You’ll see that Xcode omits the data and only provides the number of bytes in jsonData. This is fine, because jsonData contains an unreadable representation of employee1. If you would like to create a readable version of this JSON as a string, you can use String’s initializer:

let jsonString = String(data: jsonData, encoding: .utf8)
print(jsonString)
// {"name":"John Appleseed","id":7,"favoriteToy":{"name":"Teddy Bear"}}

Now you can send jsonData or jsonString over to the gifts department using their special gift API.

If you want to decode the JSON data back into an instance, you need to use JSONDecoder:

let jsonDecoder = JSONDecoder()
let employee2 = try jsonDecoder.decode(Employee.self, from: jsonData)

Note that you need to tell the decoder what type to decode the JSON to, because the compiler can’t figure this out on its own.

Renaming Properties With CodingKeys

It turns out that the gifts department API requires that the employee ID appear as employeeId instead of id. Luckily, Swift provides a solution to this kind of problem.

CodingKey Protocol, CodingKeys Enum

The CodingKeys enum, which conforms to CodingKey protocol, lets you rename specific properties in case the serialized format doesn’t match the requirements of the API.

Add the nested enumeration CodingKeys like this:

struct Employee: Codable {
  var name: String
  var id: Int
  var favoriteToy: Toy

  enum CodingKeys: String, CodingKey {
    case id = "employeeId"
    case name
    case favoriteToy
  }
}

There are several things to note here:

  1. CodingKeys is a nested enumeration in your type.
  2. It has to conform to CodingKey.
  3. You also need String as the raw type, since the keys are always strings.
  4. You have to include all properties in the enumeration, even if you don’t plan to rename them.
  5. By default, this enumeration is created by the compiler, but when you need to rename a key you need to implement it yourself.

Now if you print the JSON, you’ll see that the stored property id key has changed to employeeId:

{ "employeeId": 7, "name": "John Appleseed", "favoriteToy": {"name":"Teddy Bear"}}

Manual Encoding and Decoding

You try to send the data over to the gifts department, and again the data gets rejected. This time they claim that the information of the gift you want to send to the employee should not be inside a nested type, but rather as a property called gift. So the JSON should actually look like this:

{ "employeeId": 7, "name": "John Appleseed", "gift": "Teddy Bear" }

In this case you can’t use CodingKeys, since you need to alter the structure of the JSON and not just rename properties. You need to write your own encoding and decoding logic.

The encode Function

As mentioned earlier in the tutorial, Codable is actually just a typealias for the Encodable and Decodable protocols. You need to implement encode(to: Encoder) and describe how to encode each property.

It might sound complicated, but it’s pretty simple. First, update CodingKeys to use the key gift instead of favoriteToy:

enum CodingKeys: String, CodingKey {
  case id = "employeeId"
  case name
  case gift
}

Then, you need to remove Employee’s conformance to Codable and then add this extension:

extension Employee: Encodable {
  func encode(to encoder: Encoder) throws {
    var container = encoder.container(keyedBy: CodingKeys.self)
    try container.encode(name, forKey: .name)
    try container.encode(id, forKey: .id)
    try container.encode(favoriteToy.name, forKey: .gift)
  }
}

First you get back the container of the encoder. This is a view into the storage of the encoder that you can access with keys. Note how you choose which properties to encode for which keys. Importantly, you flatten favoriteToy.name down to the .gift key.

If you stop now, you should get an error that says:

'Employee' does not conform to expected type 'Decodable'

This is because you removed the conformance to Codable and only added conformance to Encodable. For now you can comment out the code that decodes jsonString to employee2.

If you print jsonString once more, this is what you’ll get:

{"name":"John Appleseed","gift":"Teddy Bear","employeeId":7}

Success!

The decode Function

Once the data arrives at the gifts department, they need to be able to convert this JSON back to an instance in their system. For this they’ll need a decoder.

Add the following code to your playground to make Employee conform to Decodable (and thus also Codable):

extension Employee: Decodable {
  init(from decoder: Decoder) throws {
    let values = try decoder.container(keyedBy: CodingKeys.self)
    name = try values.decode(String.self, forKey: .name)
    id = try values.decode(Int.self, forKey: .id)
    let gift = try values.decode(String.self, forKey: .gift)
    favoriteToy = Toy(name: gift)
  }
}

Here you’re pretty much doing the opposite of what you did in the encode method using the decoder’s keyed storage container.

Key Points

  • You need to encode (or serialize) an instance before you can save it to a file or send it over the web.
  • Your type should conform to the Codable protocol to make it codable. If all properties are codable, then the type is automatically codable as well.
  • JSON is the most common encoding in modern applications and web services, and you can use JSONEncoder and JSONDecoder to encode and decode your types to and from JSON.

Where to Go From Here?

You can download the final package from this tutorial here.

If you enjoyed what you learned in this tutorial, why not check out the complete Swift Apprentice book, available on our store?

Here’s a taste of what’s in the book:

  • Section I: Swift Basics: The first section of the book starts at the very beginning of the computing environment: first, how computers work, and then, how Swift’s playgrounds feature works. With those logistics out of the way, you’ll take a tour of the fundamentals of the Swift language and learn the basics of managing data, structuring your code, performing simple operations and calculations, working with types.
  • Section II: Collection Types: Stored data is a core component of any app, whether it’s a list of friends in your social networking app or a set of unlockable characters in your hit game. In this section, you’ll learn how to store collections of data in Swift.
  • Section III: Building Your Own Types: Swift comes with basic building blocks, but its real power is in the custom things you can build to model parts of your app. Swift has no idea about playable characters and monsters and power-ups, for example — these are things you need to build yourself! You’ll learn how to do that in this section.
  • Section IV: Advanced Topics: The final section of the book covers more advanced topics in Swift. You’ll learn about specific things, such as how to handle problems that come up as your code runs, as well as about more general things such as memory management, which will help you understand some of Swift’s behind-the-scenes mechanisms.

By the end of this book, you’ll have some great hands-on experience with all of the best features of the Swift 4 programming language.

And to help sweeten the deal, the digital edition of the book is on sale for $49.99! But don’t wait — this sale price is only available for a limited time.

Speaking of sweet deals, be sure to check out the great prizes we’re giving away this year with the iOS 11 Launch Party, including over $9,000 in giveaways!

To enter, simply retweet this post using the #ios11launchparty hashtag by using the button below:


We hope you enjoy this update to one of our most-loved books. Stay tuned for more book releases and updates coming soon!

The post Encoding, Decoding and Serialization in Swift 4 appeared first on Ray Wenderlich.

Swift Algorithm Club: Minimum Spanning Tree with Prim’s Algorithm

$
0
0

The Swift Algorithm Club is an open source project on implementing data structures and algorithms in Swift.

Every month, Kelvin Lau, Ross O’Brien and I feature a cool data structure or algorithm from the club in a tutorial on this site. If you want to learn more about algorithms and data structures, follow along with us!

In this tutorial you will learn to implement a Swift minimum spanning tree, specifically using prim’s algorithm.

Prim’s algorithm was first implemented for the Swift Algorithm Club by Xiang Xin (thank you!), and has been presented here for tutorial format.

Note: If you have been follow along our SAC article series, last time you saw how to create a heap and priority queue. You will now use a priority queue to implement Prim’s algorithm.

Introduction

Prim’s algorithm was first discovered by a mathematician named Vojtěch Jarník, and later again by Robert Prim. This algorithm is also known as a greedy algorithm.

A greedy algorithm is used to find optimal solutions. It constructs a solution step by step, where at every stage it picks the most optimal path.

Prim’s algorithm constructs a minimum spanning tree. A minimum spanning tree is formed by a subset of connected undirected weighted edges, that connect all vertices together without forming a cycle. Also it has the minimum possible total edge weight. For example you might want to find the cheapest way to layout your water pipes effectively, to cut cost.

In Prim’s algorithm you create a minimum spanning tree by picking edges one at a time. It’s a greedy algorithm because every time you pick an edge, you always pick the smallest weighted edge that connects a pair of vertices.

For other applications of greedy algorithm check out this link by UT Dallas.

Getting Started

Before you start implementing prim’s algorithm, there are 6 steps to consider when performing it:

Let’s go through a simple example. Imagine the network graph below. It could represent any type of network! Let’s open up our imagination here!

Imagine a network of airports represented by the vertices. The weighted edges represents the cost and route for an airplane to fly from one airport to the next. RW Airways may want to adopt prim’s algorithm to get a minimum spanning tree giving them the most cost effective routes to fly between airports!

By the end of this tutorial you will save lots of dollar bills!

Working through an example

  1. First, start by picking any vertex. Let’s say vertex 2.
  2. Choose the shortest edge from this vertex. This vertex has edges with weights { 6, 5, 3 }.
  3. You pick edge 3 since it’s the smallest, which routes to vertex 5.

  1. You have now visited vertices { 2, 5 }.
  2. Choose the shortest edge from these vertices. The next nearest edges are { 6, 5, 6, 6 }. You pick edge 5 since it’s the smallest, which routes to vertex 3.
  3. Notice that edge 6 between vertex 5 and vertex 3 can be removed since these vertices have already been visited.

  1. You now have visited vertices { 2, 3, 5 } .
  2. Choose the shortest edge from these vertices. The next nearest edges are { 6, 1, 5, 4, 6 } . You pick edge 1 since it’s the smallest, which routes to vertex 1.
  3. Notice that edge 6 between vertex 2 and vertex 1 can be removed since these vertices have already been visited.

  1. You now have visited vertices { 2, 3, 5, 1 }.
  2. Choose the shortest edge from these vertices. The next nearest edges are { 5, 5, 4, 6 } . You pick edge 4 since it’s the smallest, which routes to vertex 6.
  3. Notice that edge 6 between vertex 5 and vertex 6 can be removed since these vertices have already been visited.

  1. Finally you now have visited vertices {2, 5, 3, 1, 6 }.
  2. Choose the shortest edge from these vertices. The next nearest edges are { 5, 5, 2 } You pick edge 2 since it’s the smallest, which routes to vertex 4 .
  3. Notice that the rest of the edges { 5, 5 } connected to vertex 4 from vertex 1 and vertex 3 can be removed since these vertices have been visited.

RW Airways can now redirect their airplanes to fly these routes to cut cost! This means more profit! Are you starting to see the pattern here? Let’s move on to the implementation!

Implementation

Download the starter playground. Open the Project Navigator to see the list of files, and familiarize yourself with the Sources folder:

  1. You will be using an adjacency list to create your graph network.
  2. You will be using a Priority Queue (implemented using a Heap). This data structure will store edges adjacent to vertices you visit. The root of this heap will always have the smallest weighted edge.

Again, if you want more information on how these classes work, check out our Swift heap and priority queue tutorial.

Setup

Navigate to the root Playground and add the following code:

class Prim<T: Hashable> { // 1
  typealias Graph = AdjacencyList<T> // 2
  var priorityQueue = PriorityQueue<(vertex: Vertex<T>, weight: Double, parent: Vertex<T>?)>(
    sort: { $0.weight < $1.weight }) // 3
}
  1. You have declared a class named Prim, you want this algorithm to be generic, so it can find the minimum spanning tree of any type, given that it's Hashable.
  2. This class will use the AdjacencyList to hold your graphs.
  3. You define a minimum priorityQueue, where it holds the current vertex, the weight of the edge between the vertices, and the parent vertex.

Next add the following after priorityQueue:

func produceMinimumSpanningTree(graph: Graph) -> (cost: Double, mst: Graph) { // 1
  var cost = 0.0 // 2
  let mst = Graph() // 3
  var visited = Set<Vertex<T>>() // 4

  return (cost: cost, mst: mst) // 5
}
  1. Define a function produceMinimumSpanningTree(_:), that takes a Graph network, and returns the minimum total cost of all edges, and the minimum spanning tree.
  2. Define the cost variable, used to aggregate all weights.
  3. Create a graph to construct your minimum spanning tree.
  4. Create a Set to store all vertices visited.
  5. Once prim's algorithm is complete, return the results.

Initiate the algorithm

Add the following after the visited variable:

guard let start = graph.getAllVertices().first else { // 1
  return (cost: cost, mst: mst)
}
priorityQueue.enqueue((vertex: start, weight: 0.0, parent: nil)) //2
  1. Start by picking any vertex. In this case, we grab all vertices from the adjacency list, and pick the first one.
  2. Add the start vertex into the priorityQueue. In this case since you haven't visit any other vertex, the edge weight is zero, and the parent is nil.

Step by Step and grab the smallest!

Next add the following code right after:

while let head = priorityQueue.dequeue() { // 1
  let vertex = head.vertex
  if visited.contains(vertex) { // 2
    continue
  }
  visited.insert(vertex) // 3
  cost += head.weight // 4

  if let prev = head.parent { // 5
    mst.add(.undirected, from: prev, to: vertex, weight: head.weight)
  }

  if let neighbours = graph.edges(from: vertex) { // 6
    for neighbour in neighbours { // 7
      if !visited.contains(neighbour.destination) { // 8
        priorityQueue.enqueue((vertex: neighbour.destination, weight: neighbour.weight ?? 0.0, parent: vertex))
      }
    }
  }
}

This is the main part of prim's algorithm where you select the smallest edge every time you visit a vertex. Let's go over how the code works:

  1. Check to see if there is a set of vertices and weight in the priority queue. If the queue is empty, prim's algorithm is complete.

    Note: Every time a (current vertex, weight, parent vertex) set is dequeued from the priority queue, you are guaranteed that the weight between two vertices is always the minimum.

  2. Check to see if the current vertex you are visiting has been visited before.
    If it has been visited, restart the loop, and dequeue the next set of vertices and edge between them.
  3. If it has been yet to visited, add it to the set of visited vertices
  4. Add the weight between the set of vertices to the total cost.
  5. Check to see if the current vertex you are visiting has a parent vertex. If there is, add it to the minimum spanning tree you are constructing.
  6. Now go through all the neighbouring edges from the current vertex, and add it to the queue, as long as the destination vertex has yet to be visited.

That's all there is to it!

Testing it out

Add the following code after Prim class declaration:

var graph = AdjacencyList<Int>()
let one = graph.createVertex(data: 1)
let two = graph.createVertex(data: 2)
let three = graph.createVertex(data: 3)
let four = graph.createVertex(data: 4)
let five = graph.createVertex(data: 5)
let six = graph.createVertex(data: 6)

graph.add(.undirected, from: one, to: two, weight: 6)
graph.add(.undirected, from: one, to: three, weight: 1)
graph.add(.undirected, from: one, to: four, weight: 5)
graph.add(.undirected, from: two, to: three, weight: 5)
graph.add(.undirected, from: two, to: five, weight: 3)
graph.add(.undirected, from: three, to: four, weight: 5)
graph.add(.undirected, from: three, to: five, weight: 6)
graph.add(.undirected, from: three, to: six, weight: 4)
graph.add(.undirected, from: four, to: six, weight: 2)
graph.add(.undirected, from: five, to: six, weight: 6)


let prim = Prim<Int>()
let (cost, mst) = prim.produceMinimumSpanningTree(graph: graph)
print("cost: \(cost)")
print("mst:")
print(mst.description)

You should see a string representation of the example below:

Where to go from here?

I hope you enjoyed this tutorial on prim's algorithm! Here is a playground with the above code. You can also find the original implementation and further discussion on the repo for prim's algorithm.

This was just one of the many algorithms in the Swift Algorithm Club repository. If you're interested in more, check out the repo. It's in your best interest to know about algorithms and data structures - they're solutions to many real-world problems, and are frequently asked as interview questions. Plus it's fun!

Stay tuned for many more tutorials from the Swift Algorithm club in the future. In the meantime, if you have any questions on implementing trees in Swift, please join the forum discussion below.

Note: The Swift Algorithm Club is always looking for more contributors. If you've got an interesting data structure, algorithm, or even an interview question to share, don't hesitate to contribute! To learn more about the contribution process, check out our Join the Swift Algorithm Club article.

The post Swift Algorithm Club: Minimum Spanning Tree with Prim’s Algorithm appeared first on Ray Wenderlich.

Readers’ App Reviews – September 2017

$
0
0

With Apple’s September Event reinvigorating developers all over the world, our readers have been hard at work on some new apps of their own.

I’m honored you are taking a quick break to see what the community has been building. Every month, readers like you release great apps built with a little help from our tutorials, books, and videos. I want to highlight a few today to give just a peek at what our fantastic readers are creating.

This month we have:

  • An exercise app
  • A personal profile app
  • An artistic endless runner
  • And of course, much more!

Keep reading to see the latest apps released by raywenderlich.com readers just like you.

Wheeler Dealer


Wheeler Dealer is a fun take on the stock market style of game. If you like buying, selling, and money management then Wheeler Dealer is perfect for you.

Buy and sell cars in five different cities, with each city having unique prices for each car. You buy cars in cities that offer lower prices and sell them in cities that charge more to make a profit. Sounds simple right? But you only have a certain number of days to hit a target profit margin.

There are also other factors that can change the game, such as random events that cause some cars prices to plummet, starting with debt that gets larger every day, and getting your cars stolen! All in all, Wheeler Dealer is a great game that you could easily put many hours into.

Social Steps


If you have a hard time motivating yourself to walk or you just love seeing your step counter climb higher, then Social Steps can add a little more to your daily walking habits by encouraging you through friendly competition!

Social Steps pairs with the Health app in order to track your steps throughout the day. It allows you to set goals for yourself so that you’ll always be motivated to surpass your goal. If that isn’t enough, it also allows you to add your friends and compete to see who can reach the highest amount of steps per day. You can also earn awards such as the Top Walker among your friends so they know you’re the most active.

Get a group of your friends to try Social Steps for a week and you’ll be walking like crazy trying to become the Top Walker!

SAY Hi!


Do you have a hard time starting conversations with new people? SAY Hi is here to help no matter where you are, and it’s as easy as scanning a QR code.

SAY Hi allows you to create multiple profiles for yourself. In these profiles you list your likes and dislikes, as well as any other information that you don’t mind sharing. Then, whenever you meet someone all you need to do is select which profile you want them to see and turn your phone to face theirs. A QR code pops up on each phone and scans in your profile so that they can see whatever you assigned to the profile.

SAY Hi is a great conversation starter. It lets you immediately know what you and a person has in common and can easily spark new relationships. Give it a download and let the Dev know what you think!

Matches Game


Card matching games have been around as long as cards have and they come in many iterations. If you’re a fan of matching games, then Matches Game will be a great app for you.

Matches Game is a simple matching game with a timer. Whenever you start a round, you go through as many levels as you can until you lose. The levels get progressively harder each time.

Matches Game was designed for children, and they will definitely love it. The shapes on the cards are brightly colored, various, and easy to remember. You can also receive power-ups that can do a variety of things, such as revealing all of the cards for a brief moment, showing where a cards match is when you pick it, and many more!

Matches Game is a fantastic app to spend a few minutes on and can also be used to help children recognize shapes and colors while still having fun!

Puck Striker


Puck Striker is air hockey on your phone! I personally love air hockey, so this app was especially fun for me. If you love air hockey also, then you’ll want to download Puck Striker.

This app lets you play against the computer or another person with different settings that let you customize the game a bit. Some of the settings you can enable are expanding goal sizes, changing winning scores, and new color modes.

One of my favorite features of the game, however, is the announcer who shouts whenever a player scores, begins each round with the classic, “GO,” and congratulates the winning player when the round ends.

The announcer, coupled with an awesome superhero-esque art style, and great lighting effects makes Puck Striker a great game for you and a friend. Actually, I think I’m going to go and play it some more!

Deep Into Space


The open void of space has always been an interesting subject because of all of the many things that fill that void, of which we know very little about. Deep Into Space aims to increase your knowledge on the subject of space!

Deep Into Space has a few features that space lovers can delve into. Firstly, the app sends you facts about space every day. It could be information on a planet, an exploding star, or our weather from the perspective of a satellite.

Secondly, it offers many images from different rover missions to mars as well as pictures of Earth. They’re beautiful and very interesting to look at! Lastly, Deep Into Space gives you information on nearby asteroids including their name, speed, diameter, and how close they came to Earth.

If you love space, you’ll love Deep Into Space. Download it and surprise your friends with all of your newfound space knowledge!

Don’t Eat Us!


Endless runners make for great apps and this endless runner is the perfect example of a great app!

Don’t Eat Us is a fun game with an interesting art style. You’re tasked with keeping children alive as they run through a terrifying forest where everything from zombies to savage beasts is trying to get them. All you do is tap on the creatures as quickly as you can before they reach the children, otherwise they become the creature’s dinner!

The game’s visuals are very pretty and the animations are done well. The music is beautiful, thematic, and changes whenever there’s a special event happening.

Don’t Eat Us is an awesome game. You should download it and give it a try! I promise that you won’t be disappointed.

Where To Go From Here?

Each month, I really enjoy seeing what our community of readers comes up with. The apps you build are the reason we keep writing tutorials. Make sure you tell me about your next one, submit here.

If you saw an app you liked, hop to the App Store and leave a review! A good review always makes a dev’s day. And make sure you tell them you’re from raywenderlich.com; this is a community of makers.

If you’ve never made an app, this is the month! Check out our free tutorials to become an iOS star. What are you waiting for – I want to see your app next month.

The post Readers’ App Reviews – September 2017 appeared first on Ray Wenderlich.

2D Apple Games by Tutorials Updated for Swift 4 and iOS 11

$
0
0

Happy Monday – it’s another iOS 11 Launch Party book release!

The book has been completely updated for Swift 4, iOS 11 and Xcode 9, and is available today. We’ve even added an extra bonus chapter to the book covering ARKit!

This will be a free update for existing 2D Apple Games by Tutorials PDF customers — our way to say “thanks” to our readers for their support.

Don’t own 2D Apple Games by Tutorials yet? Read on to see how you can get a copy!

What is 2D Apple Games by Tutorials?

The trailer below gives you a good, fast overview of what the book’s about:

There are two ways to use this book, depending on whether you are a complete beginner to Apple game development or an advanced developer with knowledge of other 2D game frameworks.

If you’re a complete beginner to Apple game development, the best way to read this book is from cover to cover. We have arranged the chapters to introduce the material in the most logical manner to build up your skills one layer at a time.

If you’re an advanced developer with knowledge of other 2D game frameworks, you’ll have an easier time adapting to SpriteKit, as the core concepts and syntax will look very familiar.

Our suggestion is to skim through the early chapters and focus more on the later, more advanced chapters, or where you have a particular interest.

Don’t worry — you can jump right into any chapter in the book, because we’ll always have a starter project waiting for you!

2D Apple Games by Tutorials is 25 chapters and 695 pages – yeah, it’s pretty huge. :]

The book is split into six sections, moving from beginning to advanced topics. In each section, you will create a complete mini-game, from scratch! The book also includes two bonus chapters at the end that we think you’ll enjoy.

Here’s a quick look at what’s inside 2D Apple Games by Tutorials.

Section I: Getting Started

This section covers the basics of making 2D games with Sprite Kit. These are the most important techniques, the ones you’ll use in almost every game you make. By the time you reach the end of this section, you’ll be ready to make your own simple game.

Zombie Conga

Throughout this section you will create an action game called Zombie Conga, where you take the role of a happy-go-lucky zombie who just wants to party!

You will build this game across seven chapters, in stages:

  • Chapter 1, Sprites: Get started by adding your first sprites to the game: the background and the zombie.
  • Chapter 2, Manual Movement: You’ll make the zombie follow your touches around the screen and get a crash-course in basic 2D vector math.
  • Chapter 3, Actions: You’ll add cats and crazy cat ladies to the game, as well as basic collision detection and gameplay.
  • Chapter 4, Scenes: You’ll add a main menu to the game, as well as win and lose scenes.
  • Chapter 5, Camera: You’ll make the game scroll from left to right, and finally, add the conga line itself.
  • Chapter 6, Labels: You’ll add a label to show the zombie’s lives and the number of cats in his conga line.
  • Chapter 7, Scene Editor: You’ll begin by creating the first level of the game. By the end, you’ll have a better understanding of Xcode’s level designer, better known as the scene editor.

Section II: Physics and Nodes

In this section, you will learn how to use the built-in 2D physics engine included with Sprite Kit to create movement as realistic as that in Angry Birds or Cut the Rope. You will also learn how to use special types of nodes that allow you to play videos or create shapes in your game.

Cat Nap

In the process, you will create a physics puzzle game called Cat Nap, where you take the role of a cat who has had a long day and just wants to go to bed.

You will build this game across five chapters, in stages:

  • Chapter 8, Beginning Physics: In this chapter, you’re going to make a little detour in order to learn the basics of creating physics simulations for your games. As a bonus, you’ll learn how to prototype games inside an Xcode playground.
  • Chapter 9, Intermediate Physics: You’ll learn about physics-based collision detection and create custom classes for your Sprite Kit nodes.
  • Chapter 10, Advanced Physics: You’ll add two more levels to the game as you learn about interactive bodies, joints between bodies, composed bodies and more.
  • Chapter 11, Crop, Video and Shape Nodes: You’ll add special new blocks to Cat Nap while learning about additional types of nodes that allow you to do amazing things—like play videos, crop images and create dynamic shapes.

Section III: Tile Maps

In this section, you’ll revisit the game “Pest Control”, first introduced in iOS Games by Tutorials. This new and improved version uses the new tile maps features in SpriteKit and covers saving and loading game data.

sim-tree-stump

  • Chapter 12, Beginning Tile Maps: You’ll learn the basics about tile maps in SpriteKit by creating a tile set and a background tile map.
  • Chapter 13, Intermediate Tile Maps: You’ll take things a step further by learning how to access tile maps in code and how to create a tile map with randomly placed tiles.
  • Chapter 14, Saving and Loading Games: You’ll finish up by adding a winning end state and a heads-up display. You’ll also learn how to automatically save the game when you leave it and then reload it from where you left off.

Section IV: Juice

In this section, you’ll also learn how to take a good game and make it great by adding a ton of special effects and excitement – a.k.a. “juice.”

Drop Charge

In the process, you will create a game called Drop Charge, where you’re a space hero with a mission to blow up an alien space ship – and escape with your life before it explodes. To do this, you must jump from platform to platform, collecting special boosts along the way. Just be careful not to fall into the red hot lava!

You will build this game across four chapters, in stages:

  • Chapter 15, Making Drop Charge: You’ll put together the basic gameplay using the scene editor and code, flexing the Sprite Kit muscles you’ve developed working through previous chapters.
  • Chapter 15, State Machines: You’ll learn what state machines are and how to use them.
  • Chapter 16, Particle Systems: You’ll learn how to use particle systems to create amazing special effects.
  • Chapter 17, Juice Up Your Game: You’ll trick out your game with music, sound, animation, more particles and other special effects, experiencing for yourself the benefits of mastering the details.

Section V: Other Platforms

In this section, you’ll learn how to leverage your iOS knowledge to build games for the other Apple Platforms: macOS, tvOS and watchOS.

007_tvOS_run

In the process, you’ll create a game named Zombie Piranhas. In this game, your goal is to catch as many fish as possible without hooking a zombie — because we all know what happens when zombies are around.

  • Chapter 18, macOS Games: You’ll take a complete iOS game and add a target for macOS. Along the way, you’ll learn some of the differences between the platforms, such as windows and mouse and keyboard events.
  • Chapter 19, tvOS Games: Building from Chapter 18, you’ll add another target for tvOS. You’ll learn concepts such as Focus and parallax icons, Top Shelf and working with the Apple TV Remote.
  • Chapter 20, watchOS Games: Lastly, you’ll add a target for watchOS, and you’ll learn about gestures, the Digital Crown and Haptic Feedback. You’ll also discover some of the design considerations when working with a small device.

Section VI: Advanced Topics

In this section, you’ll learn how to Game Center leaderboards and achievements into your game and use the ReplayKit API to share your gaming victories with the world.

In the process, you will integrate these APIs into a top-down racing game called Circuit Racer, where you take the role of an elite racecar driver out to set a world record. It would be no problem if it weren’t for the debris on the track!

Circuit Racer

  • Chapter 21, Game Center Achievements: Enable Game Center for your game and award the user achievements for accomplishing certain feats.
  • Chapter 22, Game Center Leaderboards: Set up various leaderboards for your game and track and report the player’s scores.
  • Chapter 23, ReplayKit: You’ll learn how to allow players to record and share videos of their games with ReplayKit.

Section VI: Bonus Chapters

We have also included two bonus chapters!

  • Chapter 24, Augmented Reality & ARKit: Learn about the new ARKit framework by reworking the Pest Control game and turning it into an Augmented Reality game!

  • Chapter 25, Making Art for Programmers: If you liked the art in these mini-games and want to learn how to either hire an artist or make some art of your own, look no further than this chapter! This chapter guides you through drawing a cute cat in the style of this book with Illustrator.

ai-v06-complex03

About the Authors

Of course, our book would be nothing without our team of experienced and dedicated authors:

Caroline-BegbieCaroline Begbie is living the dream as an indie iOS developer, educator and explorer. She loves the graphics and animation side of iOS and watches Disney movies “for research.”

Mike-BergMike Berg is a full time game artist who is fortunate enough to work with many different indie game developers from all over the world. When he’s not manipulating pixel colors, he loves to eat good food, spend time with his family, play games and be happy.

Michael-BriscoeMichael Briscoe is an independent software developer with over 30 years of programming experience. Learning BASIC on a Commodore 64 way back in 1984, he’s been hooked on coding ever since. He enjoys creating simulations and games for all Apple platforms. You can visit his website at skyrocketsoftware.wordpress.com.

Ali-HafizjiKauserali Hafizji (a.k.a. Ali) is a freelance software developer. He is fortunate to have worked on several large projects. He loves creating software that people use everyday whether it’s on the web, watch, phone or tv. A good read, cool dip in the pool and a hot cheesy meal would be the perfect end to his weekend. You can find out more about Ali on his website at alihafizji.com.

Marin-TodorovMarin Todorov is a part of Realm and raywenderlich.com. He’s also the author of books and apps. You can find out more at www.underplot.com.

Ray-WenderlichRay Wenderlich is part of a great team — the raywenderlich.com team, a group of over 100 developers and editors from across the world. He and the rest of the team are passionate both about making apps and teaching others the techniques to make them. When Ray’s not programming, he’s probably playing video games, role playing games, or board games.

Free 2D Games Chapter This Week

To help celebrate the launch, we’re going to open up the book and share a free chapter with you this week! This will give you a chance to check out some of the new pieces in the book. Stay tuned!

Now Available in ePub!

And as another exciting announcement, by popular request, 2D Apple Games by Tutorials is now available in ePub format. Take it on the go with you on your iPad, iPhone or other digital reader and enjoy all the mobile reading benefits that ePub has to offer!

Where To Go From Here?

2D Apple Games by Tutorials is now 100% complete, fully updated for Swift 4, iOS 11 and Xcode 9 — and available today.

  • If you’ve already bought the 2D Apple Games by Tutorials PDF, you can download the new book immediately on the book store page page.
  • If you don’t have 2D Apple Games by Tutorials yet, you can grab your own copy in our store.

And to help sweeten the deal, the digital edition of the book is on sale for $49.99! But don’t wait — this sale price is only available for a limited time.

Speaking of sweet deals, be sure to check out the great prizes we’re giving away this year with the iOS 11 Launch Party, including over $9,000 in giveaways!

To enter, simply retweet this post using the #ios11launchparty hashtag by using the button below:


We hope you enjoy this free update, and stay tuned for more book releases and updates coming soon!

The post 2D Apple Games by Tutorials Updated for Swift 4 and iOS 11 appeared first on Ray Wenderlich.

Augmented Reality and ARKit Tutorial

$
0
0

This is an abridged chapter from our book 2D Apple Games by Tutorials, which has been completely updated for Swift 4 and iOS 11. This tutorial is presented as part of our iOS 11 Launch Party — enjoy!

Augmented Reality. The phrase alone conjures up images of bionic limbs and holodecks. Wouldn’t it be cool if you could turn your iOS device into a mini-holodeck? Well, thanks to Apple’s exciting new framework named ARKit, now you can!

Augmented reality (AR), as its name indicates, adds computer-generated objects to reality. In short, you view the world through a camera and interact with virtual 2D or 3D objects inside that view.

With 2D AR, you can add overlays or signposts, which respond to geographic location or visual features in real-time. Or with 3D AR, you can visualize how a piece of furniture might look inside your living-room without ever leaving your home.

AR has been around for a while. For example, Snapchat’s 3D filters recognize facial features and wrap 3D objects around your head. But in order for that to work, you needed some hard-core math. You also needed hardware that can track in real-world space. With ARKit, Apple has provided both.

To demonstrate the differences between 2D and 3D ARKit, here is an example of Apple’s ARKit/SceneKit 3D template — a spaceship landing in my garden:

Now take a look at the 2D ARKit/SpriteKit template. With this template, you’re able to tap the screen and anchor a Space Invader 0.2 meters directly in front of your device’s camera.

In this tutorial, you’re going to step up the Pest Control game from 2D Apple Games by Tutorials and convert it into an immersive augmented reality first-person shooter named ARniegeddon, bringing bugs and firebugs into your very own home with the power of ARKit.

Getting Started

ARniegeddon is a first-person shooter. You’ll add bugs to the view and shoot them from a distance. Firebugs, just as they were in Pest Control, are a bit tougher to destroy. You’ll have to locate bug spray and pick it up by scooping your phone through the bug spray canister. You’ll then be able to aim at a firebug and take it down.

You’ll start from a SpriteKit template, and you’ll see exactly what goes into making an AR game using ARKit.

This is what the game will look like when you’ve completed this tutorial:

Download the starter project for this tutorial, and run the game on your device. The starter project is simply the Hello World code created from a new SpriteKit template. I’ve added the image and sound assets to it. There’s also a Types.swift file that has an enum for the sounds you’ll be using.

Note: To run the game on your device, you must select a development team under General\Signing of the ARniegeddon target.

Requirements

There are a few requirements for using ARKit. So before you get too far into this tutorial, make sure you have all of these:

  • An A9 or later processor. Only the iPhone 6s and up, the 2017 iPads and the iPad Pros can run ARKit.
  • Space. You’ll need plenty of space. One of the great things about AR is that you can develop games like Pokémon Go and encourage people to leave their homes — and play games in the park. To play ARniegeddon, you’ll need a clear space so you can capture bugs without falling over your furniture.
  • Contrast. If you’re in a dark room, you wouldn’t expect to see much, would you? With augmented reality, contrast is the key. So, if your room has white reflective tiles, white furniture and white walls, or is too dark, things won’t work too well; the camera needs contrast in order to distinguish surfaces and distances of objects.

How AR Works

Using a process called Visual Inertial Odometry (VIO), ARKit uses your device’s motion sensors, combined with visual information from the camera, to track the real world. Some clever math takes this tracking information and maps features in the real 3D world to your 2D screen.

When your game first starts, the device sets its initial position and orientation. The camera determines features of possible objects in its frame. When you move the device, there’s a new position and orientation. Because you’ve moved, the camera sees the objects slightly differently. The device now has enough information to triangulate on a feature and can work out the distance of an object. As you move, the device constantly refines the information and can gradually work out where there are horizontal surfaces.

Note: At the time of this writing, vertical surfaces are not calculated.

In addition to all this tracking, the sensors can examine the amount of available light and apply the same lighting to the AR objects within the scene.

Rendering the View

The first thing you’ll change is the view itself. When using SpriteKit with ARKit, your main view will be an ARSKView. This is a subclass of SKView that renders live video captured by the camera in the view.

In Main.storyboard, in the view hierarchy, select View, which is listed under Game View Controller. In the Identity Inspector, change the class to ARSKView.

In GameViewController.swift, replace all the imports at the top of the file with this:

import ARKit

Next, add a property for the view to GameViewController:

var sceneView: ARSKView!

Then, change this:

if let view = self.view as! SKView? {

…to this:

if let view = self.view as? ARSKView {
  sceneView = view

Here you get the loaded view as an ARSKView — matching your change in Main.storyboard — and you set sceneView to this view. Now the main view is set to display the camera video feed.

World Tracking with Sessions

You set up tracking by starting a session on an ARSKView. The configuration class ARWorldTrackingConfiguration tracks orientation and position of the device. In the configuration, you can specify whether or not to detect horizontal surfaces and also turn off lighting estimations.

Add these two methods to GameViewController:

override func viewWillAppear(_ animated: Bool) {
  super.viewWillAppear(animated)
  let configuration = ARWorldTrackingConfiguration()
  sceneView.session.run(configuration)
}

override func viewWillDisappear(_ animated: Bool) {
  super.viewWillDisappear(animated)
  sceneView.session.pause()
}

Here you start the session when the view appears and pause the session when the view disappears.

If you run the game at this time, you’ll get a crash. That’s because the app is trying to access the camera without permission.

Open Info.plist, control-click Information Property List, and choose Add Row.

Add the key NSCameraUsageDescription.

Double-click in the value field, and add the following description, which explains to the user how the game will use the camera:

For an immersive augmented reality experience, ARniegeddon requires access to the camera
Note: If you want to restrict your game to devices that support ARKit, find the UIRequiredDeviceCapabilities section in Info.plist (that’s the Required device capabilities section), and add arkit as a string entry in the array.

Build and run the game. You’ll get a notification requesting access to the camera, with the text indicating why access is required. When you do, tap OK.

The template’s GameScene code still runs, but with the camera view in the background. It’s rendering to the ARSKView that you set up earlier.

Note: When developing for augmented reality, you’re often moving around and generally don’t want the device to be tethered to the computer. Wireless development, new in Xcode 9, assists greatly with this. You can set this up under Window\Devices and Simulators.

Respond to Session Events

ARSKView’s session has delegate methods for certain events. For example, you’ll want to know if the session failed. Perhaps the user denied access to the camera, or she could be running the game on a device that doesn’t support AR. You need to address these issues.

In GameViewController.swift, add an extension for the delegate methods with placeholder error messages:

extension GameViewController: ARSKViewDelegate {
  func session(_ session: ARSession,
               didFailWithError error: Error) {
  print("Session Failed - probably due to lack of camera access")
}

func sessionWasInterrupted(_ session: ARSession) {
  print("Session interrupted")
}

func sessionInterruptionEnded(_ session: ARSession) {
  print("Session resumed")
  sceneView.session.run(session.configuration!,
                        options: [.resetTracking,
                                  .removeExistingAnchors])
 }
}
  • session(_:didFailWithError:): will execute when the view can’t create a session. This generally means that to be able to use the game, the user will have to allow access to the camera through the Settings app. This is a good spot to display an appropriate dialog.
  • sessionWasInterrupted(_:): means that the app is now in the background. The user may have pressed the home button or received a phone call.
  • sessionInterruptionEnded(_:): means that play is back on again. The camera won’t be in exactly the same orientation or position so you reset tracking and anchors. In the challenge at the end of the tutorial, you’ll restart the game.

Next, replace viewDidLoad() with this code:

override func viewDidLoad() {
  super.viewDidLoad()
  if let view = self.view as? ARSKView {
    sceneView = view
    sceneView!.delegate = self
    let scene = GameScene(size: view.bounds.size)
    scene.scaleMode = .resizeFill
    scene.anchorPoint = CGPoint(x: 0.5, y: 0.5)
    view.presentScene(scene)
    view.showsFPS = true
    view.showsNodeCount = true
  }
}

Here you set the view’s delegate and initialize GameScene directly, instead of through the scene file.

The Current Frame, Camera and Anchors

You’ve now set up your ARSKView with a session so the camera information will render into the view.

For every frame, the session will capture the image and tracking information into an ARFrame object, named currentFrame. This ARFrame object has a camera which holds positional information about the frame, along with a list of anchors.

These anchors are stationary tracked positions within the scene. Whenever you add an anchor, the scene view will execute a delegate method view(_:nodeFor:) and attach an SKNode to the anchor. When you add the game’s bug nodes to the scene, you’ll attach the bug nodes to these anchors.

Adding Bugs to the Scene

Now you’re ready to add bugs to the game scene.

First, you’ll remove all the template code. Delete GameScene.sks and Actions.sks since you won’t need them anymore.

In GameScene.swift, remove all the code in GameScene, leaving you with an empty class.

class GameScene: SKScene {
}

Replace the imports at the top with:

import ARKit

To get acquainted with ARKit, and possibly help with your entomophobia, you’re going to place a bug just in front of you.

Create a convenience property to return the scene’s view as an ARSKView:

var sceneView: ARSKView {
  return view as! ARSKView
}

Before you add the bug to your AR world, you need to make sure the AR session is ready. An AR session takes time to set up and configure itself.

First, create a property so you can check whether you added your AR nodes to the game world:

var isWorldSetUp = false

You’ll load the bug once — only if isWorldSetUp is false.

Add the following method:

private func setUpWorld() {
  guard let currentFrame = sceneView.session.currentFrame
    else { return }

  isWorldSetUp = true
}

Here you check whether the session has an initialized currentFrame. If the session doesn’t have a currentFrame, then you’ll have to try again later.

update(_:) is called every frame, so you can attempt to call the method inside there.

Override update(_:):

override func update(_ currentTime: TimeInterval) {
  if !isWorldSetUp {
    setUpWorld()
  }
}

Doing it this way, you only run the set up code once, and only when the session is ready.

Next you’ll create an anchor 0.3 meters in front of the camera, and you’ll attach a bug to this anchor in the view’s delegate.

But first there’s some math-y stuff to explain. Don’t worry — I’ll be gentle!

A Brief Introduction to 3D Math

Even though your game is a 2D SpriteKit game, you’re looking through the camera into a 3D world. Instead of setting position and rotation properties of an object, you set values in a 3D transformation matrix.

You may be a Neo-phyte to 3D (no more Matrix jokes, I promise!), so I’ll briefly explain.

A matrix is made up of rows and columns. You’ll be using four-dimensional matrices, which have four rows and four columns.

Both ARCamera and ARAnchor have a transform property, which is a four-dimensional matrix holding rotation, scaling and translation information. The current frame calculates ARCamera’s transform property, but you’ll adjust the translation element of the ARAnchor matrix directly.

The magic of matrices — and why they are used everywhere in 3D — is that you can create a transform matrix with rotation, scaling and translation information and multiply it by another matrix with different information. The result is then a new position in 3D space relative to an origin position.

Add this after the guard statement in setUpWorld():

var translation = matrix_identity_float4x4

Here you create a four-dimensional identity matrix. When you multiply any matrix by an identity matrix, the result is the same matrix. For example, when you multiply any number by 1, the result is the same number. 1 is actually a one-dimensional identity matrix. The origin’s transform matrix is an identity matrix. So you always set a matrix to identity before adding positional information to it.

This is what the identity matrix looks like:

The last column consists of (x, y, z, 1) and is where you set translation values.

Add this to setUpWorld(), right after the previous line:

translation.columns.3.z = -0.3

This is what the translation matrix looks like now:

Rotation and scaling use the first three columns and are more complex. They’re beyond the scope of this tutorial, and in ARniegeddon you won’t need them.

Continue adding to your code in setUpWorld():

let transform = currentFrame.camera.transform * translation

Here you multiply the transform matrix of the current frame’s camera by your translation matrix. This results in a new transform matrix. When you create an anchor using this new matrix, ARKit will place the anchor at the correct position in 3D space relative to the camera.

Note: To learn more about matrices and linear algebra, take a look at 3Blue1Brown’s video series Essence of linear algebra at http://bit.ly/2bKj1AF

Now, add the anchor to the scene using the new transformation matrix. Continue adding this code to setUpWorld():

let anchor = ARAnchor(transform: transform)
sceneView.session.add(anchor: anchor)

Here you add an anchor to the session. The anchor is now a permanent feature in your 3D world (until you remove it). Each frame tracks this anchor and recalculates the transformation matrices of the anchors and the camera using the device’s new position and orientation.

When you add an anchor, the session calls sceneView’s delegate method view(_:nodeFor:) to find out what sort of SKNode you want to attach to this anchor.

Next, you’re going to attach a bug.

In GameViewController.swift, add this delegate method to GameViewController’s ARSKViewDelegate extension:

func view(_ view: ARSKView,
          nodeFor anchor: ARAnchor) -> SKNode? {
  let bug = SKSpriteNode(imageNamed: "bug")
  bug.name = "bug"
  return bug
}

Hold up your phone and build and run. And I mean… RUN! Your space has been invaded!

Move your phone around, and the bug will stay where it’s anchored. The tracking becomes more effective the more information you give the phone, so move your phone around a bit to give it some position and orientation updates.

Notice that whichever way you turn the camera, the bug faces you. This is called a billboard, which is a technique used in many 3D games as a cheap way of adding elements such as trees and grass to a scene. Simply add a 2D object to a 3D scene and make sure that it’s always facing the viewer.

If you want to be able to walk around the bug and see what it looks like from behind, you’ll have to model the bug in a 3D app such as Blender, and use ARKit with either SceneKit or Metal.

Note: You can find out more about ARKit and SceneKit in our book iOS 11 by Tutorials, available here: http://bit.ly/2wcpx07.

Light Estimation

If you’re in a darkened room, then your bug will be lit up like a firefly. Bring your hand to gradually cover the camera and see the bug shine. Luckily, ARKit has light estimation so that your bug can lurk creepily in dark corners.

In GameScene.swift, add this to the end of update(_:):

// 1
guard let currentFrame = sceneView.session.currentFrame,
  let lightEstimate = currentFrame.lightEstimate else {
    return
}

// 2
let neutralIntensity: CGFloat = 1000
let ambientIntensity = min(lightEstimate.ambientIntensity,
                           neutralIntensity)
let blendFactor = 1 - ambientIntensity / neutralIntensity

// 3
for node in children {
  if let bug = node as? SKSpriteNode {
    bug.color = .black
    bug.colorBlendFactor = blendFactor
  }
}

Here’s the breakdown of this code:

  1. You retrieve the light estimate from the session’s current frame.
  2. The measure of light is lumens, and 1000 lumens is a fairly bright light. Using the light estimate’s intensity of ambient light in the scene, you calculate a blend factor between 0 and 1, where 0 will be the brightest.
  3. Using this blend factor, you calculate how much black should tint the bugs.

As you pan about the room, the device will calculate available light. When there’s not much light, the bug will be shaded. Test this by holding your hand in front of the camera at different distances.

Shooting Bugs

Unless you’re an acrobat, these bugs are a little difficult to stomp on. You’re going to set up your game as a first-person shooter, very similar to the original Doom.

In GameScene.swift, add a new property to GameScene:

var sight: SKSpriteNode!

Override didMove(to:):

override func didMove(to view: SKView) {
  sight = SKSpriteNode(imageNamed: "sight")
  addChild(sight)
}

This adds a sight to the center of the screen so you can aim at the bugs.

You’ll fire by touching the screen. Still in GameScene, override touchesBegan(_:with:) as follows:

override func touchesBegan(_ touches: Set<UITouch>,
                           with event: UIEvent?) {
  let location = sight.position
  let hitNodes = nodes(at: location)
}

Here you retrieve an array of all the nodes that intersect the same xy location as the sight. Although ARAnchors are in 3D, SKNodes are still in 2D. ARKit very cleverly calculates a 2D position and scale for the SKNode from the 3D information.

You’ll now find out if any of these nodes are a bug, and if they are, retrieve the first one. Add this to the end of touchesBegan(_:with:)

var hitBug: SKNode?
for node in hitNodes {
  if node.name == "bug" {
    hitBug = node
    break
  }
}

Here you cycle through the hitNodes array and find out if any of the nodes in the array are bugs. hitBug now contains the first bug hit, if any.

You’ll need a couple of sounds to make the experience more realistic. The sounds are defined in Sounds in Types.swift; they are all ready for you to use.

Continue by adding this code to the end of the same method:

run(Sounds.fire)
if let hitBug = hitBug,
  let anchor = sceneView.anchor(for: hitBug) {
  let action = SKAction.run {
    self.sceneView.session.remove(anchor: anchor)
  }
  let group = SKAction.group([Sounds.hit, action])
  let sequence = [SKAction.wait(forDuration: 0.3), group]
  hitBug.run(SKAction.sequence(sequence))
}

You play a sound to indicate you’ve fired your weapon. If you do hit a bug, then play the hit sound after a short delay to indicate the bug is some distance away. Then remove the anchor for the node, which will also remove the bug node itself.

Build and run, and kill your first bug!

Level Design

Of course, a game with one bug in it isn’t much of a game. In Pest Control, you edited tile maps in the scene editor to specify the positions of your bugs. You’ll be doing something similar here, but you’ll directly add SKSpriteNodes to a scene in the scene editor.

Although ARniegeddon is fully immersive, you’ll design the level as top down. You’ll lay out the bugs in the scene as if you are a god-like being in the sky, looking down at your earthly body. When you come to play the game, you’ll be at the center of the world, and the bugs will be all around you.

Create a new SpriteKit Scene named Level1.sks. Change the scene size to Width: 400, Height: 400. The size of the scene is largely irrelevant, as you will calculate the real world position of nodes in the scene using a gameSize property which defines the size of the physical space around you. You’ll be at the center of this “scene”.

Place three Color Sprites in the scene and set their properties as follows:

  1. Name: bug, Texture: bug, Position: (-140, 50)
  2. Name: bug, Texture: bug, Position: (0, 150)
  3. Name: firebug, Texture: firebug, Position: (160, 120)

Imagine you’re at the center of the scene. You’ll have one bug on your left, one straight in front of you and the firebug on your right.

2D Design to 3D World

You’ve laid out the bugs in a 2D scene, but you need to position them in a 3D perspective. From a top view, looking down on the 2D scene, the 2D x-axis maps to the 3D x-axis. However, the 2D y-axis maps to the 3D z-axis — this determines how far away the bugs are from you. There is no mapping for the 3D y-axis — you’ll simply randomize this value.

In GameScene.swift, set up a game size constant to determine the real world area that you’ll play the game in. This will be a 2-meter by 2-meter space with you in the middle. In this example, you’ll be setting the game size to be a small area so you can test the game indoors. If you play outside, you’ll be able to set the game size larger:

let gameSize = CGSize(width: 2, height: 2)

Replace setUpWorld() with the following code:

private func setUpWorld() {
  guard let currentFrame = sceneView.session.currentFrame,
    // 1
    let scene = SKScene(fileNamed: "Level1")
    else { return }

  for node in scene.children {
    if let node = node as? SKSpriteNode {
      var translation = matrix_identity_float4x4
      // 2
      let positionX = node.position.x / scene.size.width
      let positionY = node.position.y / scene.size.height
      translation.columns.3.x =
              Float(positionX * gameSize.width)
      translation.columns.3.z =
              -Float(positionY * gameSize.height)
      let transform =
             currentFrame.camera.transform * translation
      let anchor = ARAnchor(transform: transform)
      sceneView.session.add(anchor: anchor)
    }
  }
  isWorldSetUp = true
}

Taking each numbered comment in turn:

  1. Here you load the scene, complete with bugs from Level1.sks.
  2. You calculate the position of the node relative to the size of the scene. ARKit translations are measured in meters. Turning 2D into 3D, you use the y-coordinate of the 2D scene as the z-coordinate in 3D space. Using these values, you create the anchor and the view’s delegate will add the SKSpriteNode bug for each anchor as before.

The 3D y value — that’s the up and down axis — will be zero. That means the node will be added at the same vertical position as the camera. Later you’ll randomize this value.

Build and run and see the bugs laid out around you.

The firebug on your right still has the orange bug texture instead of the red firebug texture. You’re creating it in ARSKViewDelegate’s view(_:nodeFor:), which currently doesn’t distinguish between different types of bug. You’ll adjust this later.

First, you’ll randomize the y-position of the bugs.

Still in setUpWorld(), before:

let transform = currentFrame.camera.transform * translation

add this:

translation.columns.3.y = Float(drand48() - 0.5)

drand48() creates a random value between 0 and 1. Here you step it down to create a random value between -0.5 and 0.5. Assigning it to the translation matrix means the bug will appear in a random position between half a meter above the position of the device and half a meter below the position of the device. For this game to work properly, it assumes the user is holding the device at least half a meter off the ground.

To get a random number, you’ll initialize drand48(); otherwise the random number will be the same every time you run it. This can be good while you’re testing, but not so good in a real game.

Add this to the end of didMove(to:) to seed the random number generator:

srand48(Int(Date.timeIntervalSinceReferenceDate))

Build and run, and your bugs should show themselves in the same location, but at a different height.

Note: This was a lucky shot — you probably won’t see the scary alien ray.

Firebugs

Currently the game only has one type of bug in it. Now you’re going to create different nodes for bugs, firebugs and bug spray.

In Types.swift, add this enum:

enum NodeType: String {
  case bug = "bug"
  case firebug = "firebug"
  case bugspray = "bugspray"
}

New nodes will be attached to an anchor, so the anchor needs to have a type property to track the type of node you want to create.

Create a new file with the iOS/Source/Cocoa Touch Class template. Name the class Anchor with a subclass of ARAnchor. At the top of the file, replace the import statement with:

import ARKit

Add this new property to hold the type of node associated with the anchor:

var type: NodeType?

In GameScene.swift, in setUpWorld(), in the for loop, replace this:

let anchor = ARAnchor(transform: transform)
sceneView.session.add(anchor: anchor)

with this:

let anchor = Anchor(transform: transform)
if let name = node.name,
  let type = NodeType(rawValue: name) {
  anchor.type = type
  sceneView.session.add(anchor: anchor)
}

Here you get the type of the bug from the SKSpriteNode name you specified in Level1.sks. You create the new anchor, specifying the type.

In GameViewController.swift, in the ARSKViewDelegate extension, replace view(_:nodeFor:) with this:

func view(_ view: ARSKView,
          nodeFor anchor: ARAnchor) -> SKNode? {
  var node: SKNode?
  if let anchor = anchor as? Anchor {
    if let type = anchor.type {
      node = SKSpriteNode(imageNamed: type.rawValue)
      node?.name = type.rawValue
    }
  }
  return node
}

You check to see whether the anchor being added is of the subclass Anchor. If it is, then you create the appropriate SKSpriteNode using the anchor’s type.

Build and run, and this time the firebug on your right should have the correct red texture. Oh… also, you can’t kill it.

Anchor Collision

Remember how in Pest Control you needed bug spray to kill a firebug? Your current game will also place bug spray randomly around the scene, but the player will pick up bug spray by moving the phone over the bug spray canister. The player will then be able to kill one firebug with that bug spray.

The steps you’ll take are as follows:

  1. Add bug spray at a random position when you add a firebug.
  2. Check the distance of your device and the bug spray nodes each frame.
  3. If a collision occurs, “pick up” bug spray by removing the anchor and bug spray node and providing a visual cue.

In GameScene.swift, add a new method to GameScene:

private func addBugSpray(to currentFrame: ARFrame) {
  var translation = matrix_identity_float4x4
  translation.columns.3.x = Float(drand48()*2 - 1)
  translation.columns.3.z = -Float(drand48()*2 - 1)
  translation.columns.3.y = Float(drand48() - 0.5)
  let transform = currentFrame.camera.transform * translation
  let anchor = Anchor(transform: transform)
  anchor.type = .bugspray
  sceneView.session.add(anchor: anchor)
}

In this method, you add a new anchor of type bugspray with a random position. You randomize the x (side) and z (forward/back) values between -1 and 1 and the y (up/down) value between -0.5 and 0.5.

In setUpWorld(), call this method when you add a firebug. After this:

sceneView.session.add(anchor: anchor)

add this:

if anchor.type == .firebug {
  addBugSpray(to: currentFrame)
}

Build and run to ensure that you are getting the same amount of bug spray as firebugs in your game.

Hint: If you can’t see the bug spray, walk away from the game area and point the device back. You should be able see all of the nodes in the game area. You can even see through walls! And if you still can’t see it, try commenting out the lighting code in update(_:).

Now for the collision. This is a simplified collision, as a real physics engine would have more efficient algorithms.

update(_:) runs every frame, so you’ll be able to check the current distance of the bug spray from the device by using the camera’s transformation matrix and the bug spray’s anchor’s transformation matrix.

You’ll also need a method to remove the bug spray and its anchor when the collision is successful.

Add this method to GameScene to remove the bug spray and make a “success” sound:

private func remove(bugspray anchor: ARAnchor) {
  run(Sounds.bugspray)
  sceneView.session.remove(anchor: anchor)
}

Here you set up an SKAction to make a sound and then remove the anchor. This also removes the SKNode attached to the anchor.

At the end of update(_:), add:

// 1
for anchor in currentFrame.anchors {
  // 2
  guard let node = sceneView.node(for: anchor),
    node.name == NodeType.bugspray.rawValue
    else { continue }
  // 3
  let distance = simd_distance(anchor.transform.columns.3,
    currentFrame.camera.transform.columns.3)
  // 4
  if distance < 0.1 {
    remove(bugspray: anchor)
    break
  }
}

Going through this code point-by-point:

  1. You process all of the anchors attached to the current frame,
  2. You check whether the node for the anchor is of type bugspray. At the time of writing, there is an Xcode bug whereby subclasses of ARAnchor lose their properties, so you can’t check the anchor type directly.
  3. ARKit includes the framework simd, which provides a distance function. You use this to calculate the distance between the anchor and the camera.
  1. If the distance is less than 10 centimeters, you remove the anchor from the session. This will remove the bug spray node as well.

You should give the player a visual cue when she manages to collide the device with the bug spray and pick it up. You’ll set up a property which changes the sight image when it is changed.

Add this property to GameScene:

var hasBugspray = false {
  didSet {
    let sightImageName = hasBugspray ? "bugspraySight" : "sight"
    sight.texture = SKTexture(imageNamed: sightImageName)
  }
}

When you set hasBugSpray to true, you change the sight to a different texture, indicating that you’re carrying the ultimate firebug exterminator.

At the end of remove(bugspray:), add this:

hasBugspray = true

Build and run and see if you can pick up a bug spray canister. Notice that while you’re holding a bug spray canister, the sight texture changes to a green one.

Firebug Destruction

In touchesBegan(_:with:), locate the for loop where you set up hitBug with the hit SKSpriteNode.

Replace this:

if node.name == "bug" {

with this:

if node.name == NodeType.bug.rawValue ||
  (node.name == NodeType.firebug.rawValue && hasBugspray) {

As well as checking to see if the node is a “bug”, you can now check to see if it’s a firebug. If it is a firebug and you have bug spray, then you’ve scored a hit.

At the end of touchesBegan(_:with:), add this:

hasBugspray = false

You only get one shot with the bug spray. If you miss, beware! You can no longer kill the firebug.

Where to Go From Here?

You can download the final project for this tutorial here.

Congratulations! At this point you have an almost playable game, and you’ve experimented with 2D ARKit. I hope I’ve whet your appetite for the potential of augmented reality, so you’ll move into the more exciting third dimension. Our book 3D iOS Games by Tutorials, available here will teach you how to work with SceneKit so you’ll be comfortable using 3D objects in 3D space.

Using ARKit and SceneKit, you’ll be able to move 3D models around the scene instead of attaching them to a stationary anchor. You’ll be able to walk around them and examine the model from behind. You’ll also be able to gather information about flat surfaces, place your models on a surface and measure distances accurately.

If you enjoyed what you learned in this tutorial, why not check out the complete 2D Apple Games by Tutorials book, available on our store?

Here’s a taste of what’s in the book:

  • Section I: Getting Started: This section covers the basics of making 2D games with SpriteKit. These are the most important techniques, the ones you’ll use in almost every game you make. By the time you reach the end of this section, you’ll be ready to make your own simple game. Throughout this section, you’ll create an action game named Zombie Conga, where you take the role of a happy-go-lucky zombie who just wants to party!
  • Section II: Physics and Nodes: In this section, you’ll learn how to use the built-in 2D physics engine included with SpriteKit. You’ll also learn how to use special types of nodes that allow you to play videos and create shapes in your game. In the process, you’ll create a physics puzzle game named Cat Nap, where you take the role of a cat who has had a long day and just wants to go to bed.
  • Section III: Tile Maps: In this section, you’ll learn about tile maps in SpriteKit and how to save and load game data. In the process, you’ll create a game named Pest Control, where you take control of a vigorous, impossibly ripped he-man named Arnie. Your job is to lead Arnie to bug-fighting victory by squishing all those pesky bugs.
  • Section IV: Juice: In this section, you’ll learn how to take a good game and make it great by adding a ton of special effects and excitement — also known as “juice.” In the process, you’ll create a game named Drop Charge, where you’re a space hero with a mission to blow up an alien space ship — and escape with your life before it explodes. To do this, you must jump from platform to platform, collecting special boosts along the way. Just be careful not to fall into the red hot lava!
  • Section V: Other Platforms: In this section, you’ll learn how to leverage your iOS knowledge to build games for the other Apple Platforms: macOS, tvOS and watchOS. In the process, you’ll create a game named Zombie Piranhas. In this game, your goal is to catch as many fish as possible without hooking a zombie — because we all know what happens when zombies are around.
  • Section VI: Advanced Topics: In this section, you’ll learn some APIs other than SpriteKit that are good to know when making games for the Apple platforms. In particular, you’ll learn how to add Game Center leaderboards and achievements into your game. You’ll also learn how to use the ReplayKit API. In the process, you’ll integrate these APIs into a top-down racing game named Circuit Racer, where you take the role of an elite race car driver out to set a world record — which wouldn’t be a problem if all this debris wasn’t on the track!
  • Section VII: Bonus Chapters: On top of the above, we included two bonus chapters. You can learn about the new ARKit framework by reworking the Pest Control game and turning it into an Augmented Reality game. If you liked the art in these mini-games and want to learn how to either hire an artist or make some art of your own, there’s a chapter to guide you through drawing a cute cat in the style of this book with Illustrator.

By the end of this book, you’ll have some great hands-on experience with how to build exciting, good-looking games using Swift and SpriteKit!

And to help sweeten the deal, the digital edition of the book is on sale for $49.99! But don’t wait — this sale price is only available for a limited time.

Speaking of sweet deals, be sure to check out the great prizes we’re giving away this year with the iOS 11 Launch Party, including over $9,000 in giveaways!

To enter, simply retweet this post using the #ios11launchparty hashtag by using the button below:


We hope you enjoy this update to one of our most-loved books. Stay tuned for more book releases and updates coming soon!

The post Augmented Reality and ARKit Tutorial appeared first on Ray Wenderlich.

Viewing all 4374 articles
Browse latest View live

<script src="https://jsc.adskeeper.com/r/s/rssing.com.1596347.js" async> </script>